What's new
Pinball info

Register a free account today to become a member! Once signed in, you'll be able to participate on this site by adding your own topics and posts, as well as connect with other members through your own private inbox!

Pinball Related Arduino Projects

The ws2811 series of drivers and leds with arduino control is a great system. I’ve used them for years in various products of mine that have arduino at the heart And my custom pinball controller supports them to.

You also may know that magic girl had an arduino under the hood which interfaced to these leds for the playfield lamps and I wrote a full lamp os for it. That was back in 2012
 
I'm also going to mess around further with the arduino program so that it changes light show if an input pin goes low (or high). Once I've done that I should then be able to hook that pin into one of the games logic circuits (somehow).

If you want advice on how best to interface arduino i/o Pins to a switch matrix on a pinball or a lamp matrix then give me a shout but as a starting point the good old opto isolator is your friend :)
 
The ws2811 series of drivers and leds with arduino control is a great system. I’ve used them for years in various products of mine that have arduino at the heart And my custom pinball controller supports them to.

You also may know that magic girl had an arduino under the hood which interfaced to these leds for the playfield lamps and I wrote a full lamp os for it. That was back in 2012

If you want advice on how best to interface arduino i/o Pins to a switch matrix on a pinball or a lamp matrix then give me a shout but as a starting point the good old opto isolator is your friend :)

Hi Jim - interesting to know all this. and thanks for the opto-isolator pointer. I did a quick test linking direct to the board and it worked, but I didn't feel comfortable with it as a permanent solution, i had a spare opto isolated relay lying about, so stuck that in and got it working ok, but now need to get a non relay opto isolator - looks like there is a 4-way board for 99p on ebay!
 
Hi Jim - interesting to know all this. and thanks for the opto-isolator pointer. I did a quick test linking direct to the board and it worked, but I didn't feel comfortable with it as a permanent solution, i had a spare opto isolated relay lying about, so stuck that in and got it working ok, but now need to get a non relay opto isolator - looks like there is a 4-way board for 99p on ebay!

Yep opto isolators can help with all sorts of driving requirements where you want to trigger from something thats not logic safe voltage. WMS used them to allow detection of flipper button presses on WPC games before fliptronic was a thing, so you could do this on strange science pretty easily. Colour changing from flipper presses etc

Look forward to seeing how you get on :)
 
@myPinballs - Jim do you know about these guys? : http://missionpinball.org/ - I'm sure you do - what do you think?

Yes I know them well. If you check the segment score section you’ll see ‘myPinballs hardware’ supported! :) I’ve worjed with them to integrate my segment controller stuff.

It’s the best framework to use for custom game writing these days

Ask @Sven Normansson to, he uses it to

Welcome round here anytime for any custom software writing guidance or advice to :)
 
I updated the software on the Strange Science project so that it changes the light show based on picking up the signal from the neon topper activation circuit.

Video here (ps also posted same video link on the Strange Science shop log thread).

 
Next project is to use an LED string and arduino to light up a spare playfield as a piece of wall art. I have got some old playfields (just arrived) and I dug one out this evening to take a look. The first thing that struck me was that I will need to first get the LED string to reach to all the inserts and the holes through the playfield where a lampholder is/was. There is only about 10cm of wire between each LED light on the strings that I have bought, so I need to cut and extend the wires to bridge large gaps over the playfield. I will try to work a route around that minimises the amount of cuts I need to make! It doesn't matter what order I thread the LED's around as I'm going to have to map and group them anyway. All I WILL need to do is number them as I go along, so I know which LED number is in which Insert or lamp hole.

I then started thinking about how I am going to program these lights and what sort of effects to do.
The first sort of effects are the usual sort of sequencing runs that you get in pins - either during a game or in attract mode. e.g. if there are inserts for 2X, 3X, 4X, 5X, X bnous, they these will typically light up in sequence, or will flash together. Almost all the lights can be grouped together like this. Although sometimes there are odd 'orphan' lights - e.g. a 'special' or 'extra ball'. I could either group those together, or flash them individually, or tag them into a group of other lights that are nearby. The GI lamps can be grouped together - probably best by proximity to each other.

A second type of effect is made by grouping the lights in a different way, based on their physical position on the playfield. e.g. start at the bottom of the playfield and illuminate gradually up. or down, or side to side, or in a circle or arc, etc.

So, it looks like I need to be able to group lights together and also group them multiple times in different ways depending on the effect I am trying to produce. MY programming skills are basic with arduino, but I know I'm going to have to use arrays to store the groups - looks like a late night for me reading up on some programming tricks and tips.

You may want to look at these board for use on a playfield. They are designed for use under playfield inserts and this hardware

https://squareup.com/market/fast-pinball-llc/item/fast-rgb-led-insert?t=modal-em

Regarding the control of a playfield of lamps, the 'traditional' way of strobing lamps in groups of similar feature sets is down to the original matrix hardware and the chips in use. For example 8 group of 8 or in ballys case 16 groups of 4. Therefore you can recreate the matrix design in software using (as you mentioned) a 2 level array. You will probably notice that similar lamps like bonus times,feature words, lane change etc will be all in the same group. Therefore the control to inc these will be fairly simple once you get the matrix array recreated. A couple of for loops should sort it out nicely.

This type of approach would also work for up down, left right, in out, windmill effects etc

Before you know it you'll have your own lamp os. :)
Thanks, I am sat here at the moment with pencil and paper working out the best way to organise these. I have decided to include the GI lighting as well, so this takes the number of lights on the playffield to over 64 - thus ruling out the traditional 8 X 8 matrix idea. I think I will go the other way which is to just create an array for each 'logical group' that I want to work with. e.g. all the GI lamps could be in array 1, the 2X,3X,4X,5X,6X bonus lights in array 2, the "P", "A", "R", "T", "Y" lights in array 3, and so on. I think this gives me total flexibility and also allows any light to be in more than one array at the same time (may or may not be useful).

Hoping to get a test program going later today - but first I have to suffer the dreaded dentist for some front teeth filling replacements - YUK

Yes the matrix can be any size you want really, its just the principle of a 2 level array thats the way to create it with some for loops to update the lamps in question at the appropriate times. That should create an accurate emulation of the 'traditional' lamp show. Controlled GI is a good idea to. In fact The GI just becomes another set of feature lamps like in pinball 2000 where they had 2 8x8 matrixes A&B (or 16 x 8) so 128 controlled lamps
 
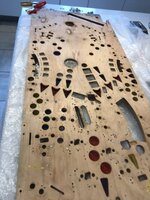
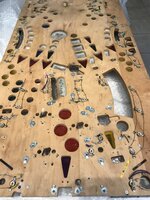
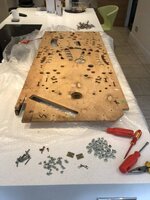
It's been too hot to program the arduino much these last few days, but I've been doing a little bit here and there. i've got the programming to a point where I can easily do various partterns and groups of LEDs, so now I feel it's time to put some LED's into a playfield. I bought a stripped playfiled, but there was still stuff that needed stripping off:

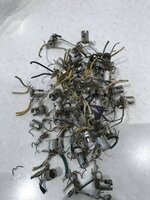
Lots of bits of metal and quite a few lamp holders to get rid of:
IMG_0414.JPG

IMG_0416.JPG
IMG_0417.JPG
IMG_0418.JPG

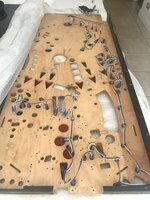
I then took the wood from the front of the playfield and reversed it onto the back to make a rear frame.
IMG_0419.JPG

Gave all the inserts a clean and then started laying out the new LED's
IMG_0465.JPG

I've not permenantly fixed these LED's yet - just a few staples to hold them gently in place, I want to see how it looks when lit beefore I decide on final fixing.
it's not easy to work out a route around all of the holes, so a bit of trail and error to work out a good route. There are well over 100 spots, so I am going to need 3 of these 50 LED strings. I only have two at present, so more ordered from ebay!
IMG_0466.JPG
 
Looks great, took inspiration from you and bought the kit you gave the link to at the start of your thread, so far I've looked in the box of bits........ and that's it, hopefully take a look soon.

Keep up the good work.

Chris
 
My IMVE came with an interactive led board tied to the flashers. It's subtle but works well.

A lot of the sterns have very dull single strip lighting that just light a non interactive translite.

My last LOTR, which you have :-) was a combo of me using an orange pop ring flash behind sauron on the translite, which I was lucky matched the size.

For me the above arduino is getting somewhere but it still veering somewhat into uinicorns at a dutch pride convention :) But I get it, more TNA than 80's EM.
 
First attempt at the software:


Note - I dont have enough LED's to filll the playfield currently - that's why the lower left hand side is not lighting up - it will do as soon as I get mroe LEDs!
Hi Alan,

Can you share the software to take a look at please?

Cheers

kev
 
First attempt at the software:


Note - I dont have enough LED's to filll the playfield currently - that's why the lower left hand side is not lighting up - it will do as soon as I get mroe LEDs!

Lovely piece of software there Alan for a first pass

Look forward to seeing more dev

AJLampOS is looking like it’ll be great :)
 
Hi Alan,

Can you share the software to take a look at please?

Cheers

kev

yes ill share it once i’ve done some more work on it. it’s very rough at the moment and i cheated by hard coding stuff that needs to be softer. i also want to add some more features and i also need to document it better.


Sent from my iPhone using Tapatalk
 
yes ill share it once i’ve done some more work on it. it’s very rough at the moment and i cheated by hard coding stuff that needs to be softer. i also want to add some more features and i also need to document it better.


Sent from my iPhone using Tapatalk
OK cool will be good to see how you structured it.

Cheers

kev
 
This is version 2 - sorted a load of stuff out - like lights too bright and I've now got 3 modes:
Mode 1 - Startup mode - this currently illuminates each light in turn then turns off in reverse, then all lights flash through a series of colours. This sequence only happens once, on startup.
Mode 2 - Groups - this is the normal mode of operation and each group of lights is lit in a sequence
Mode 3- Every few minutes we switch to this mode which does an Up/Down flash of all lights in a single colour, the colour changes every move. Currently only Up or down moves, I will add left / right moves and others later!

 
next arduino project may well be this backglass
5148576571f719ab8369d3d8f5cd236c.jpg

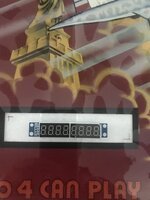
i bought some 7 segment displays but they are far too small
cbdedef24daa92b40d293311dc072918.jpg

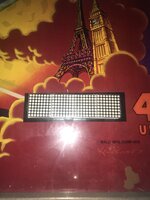
maybe this 4x8x8 led array is the best bet? unless i can get some bigger 7 segments at a good price
1e0c047cf68c0775227f95c1e54cadab.jpg


Sent from my iPhone using Tapatalk
 
Wow!!! the price of wood these days (mind you I did go to B&Q - not a cheap place) - just bought a few bits of wood to support the backglass amd make a frame for it - £30 - And then I get home and realise the MDF board I bought isn't quite wide enpugh - doh!
 
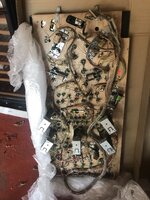
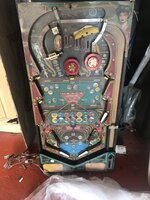
and yet another contender for an arduino project. this playfield is fully populated.

A few options here

1. strip it and do a led lighting show use as wall art
2. wall art but leave intact with leds and working flippers bumpers.
3. turn it into a tabletop playable machine powered by arduino

hmmmmm............

2 could lead to 3 later.
420bc305f4572ee0aa349806152e632c.jpg

967aa132252aa3dd9359bb244dbb8d01.jpg

whichever option i go for it needs a damn good clean!!!!!


Sent from my iPhone using Tapatalk
 
switched from doing the electronics to making wooden frames

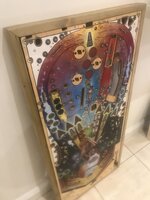
here is the space jam framed
18a440261c11414b9ba8b3e8cd31b222.jpg

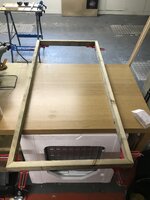
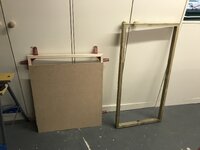
making the frames:
efbe3af51c15ea7d1755f91336479faf.jpg
4289caa3bbcd32faf97a7bfa9886c851.jpg

a26f370a879500fc87c8a2b2fbea311b.jpg

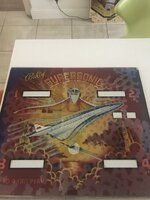
made a frame for the Supersonic backglass
6dea24a3b0f5b0cf6d6ca88339ed3b2f.jpg

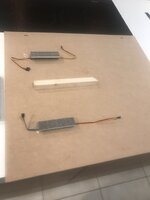
the supersonic backglass project will have all the electronics on this backplate. i’m just working out positions of the displays and how to mount them
cef783d1a78f8fa3b4edeab66dd193b5.jpg


Sent from my iPhone using Tapatalk
 
Back
Top Bottom