What's new
Pinball info

Register a free account today to become a member! Once signed in, you'll be able to participate on this site by adding your own topics and posts, as well as connect with other members through your own private inbox!

Complete No Good Gofers - uh oh, another shop with a large insert swap out!

Hiro996

Registered
Joined
Mar 24, 2013
Messages
470
I picked up a No Good Gofers and the usual OCD kicked in which meant I had to strip it before I even played it (which is what always seems to happen!). This one has an interesting issue which I have not tackled before so present a new challenge. I've finished the restoration but thought I'd post details here in case it's of any use / interest to anyone.

First off, the machine didn't seem overly complex looking at the playfield but along the way I found it to be the most time consuming restore to date, I'll explain all issues as I go.

Here's how it looked upon delivery - actually very clean and a great condition slam ramp area (but does have the usual marks from the ramp) which is promising, looks like I've got a great starting point!DSC02107.jpg

DSC01788.jpg
 
The first issue and a new one for me was an insert replacement, argh! It looks like a flasher has locked on under the sand trap insert at some point in time and has melted the underside causing discolouration and also an uneven surface - I can't live with it despite the fact it has been sanded roughly flat, I need to do something about it!

DSC01792.jpg

The search was on for a replacement insert - this proved more challenging than I imagined, I couldn't find one anywhere, UK, main land Europe, Australia, no where had one, and then I finally tracked one down in the USA, the options were orange or green, they didn't have the original yellow. The insert colour theme on the game is predominantly orange and yellow so I decided on an orange replacement as it would look the most natural after the unobtainable yellow. Whilst waiting for the insert it was a good (but scary!) opportunity to remove the original damaged one.

There are a couple of typical issues with removing inserts:
1. The insert can crack when you try to remove it - I wasn't worried about this of course because I'm not going to re-use it - phew!
2. The insert has to be removed from under the playfield, the issue here is that when pushing the insert out (when I say push I mean tapping with a hammer and a suitable sized socket!) you can lift the clearcoat or even worse, some of the playfield art around the insert as it lifts out! This was what I was most afraid of so I took to my lovely condition playfield with a scalpel and cut around the insert perimeter to ensure there was a clean break in the clearcoat around the insert and where it meets the wooden playfield surface - I spent a long time on this being very careful but also thorough as I didn't want that art work lifting!

Fortunately the time was well spent and as the insert started to lift as a result of tapping it out from the underside, it became apparent the removal was going to be clean with no damage to the surrounding playfield:

DSC01940.jpg

And it's out!

DSC01993.jpg
 
Last edited:
Next up when the new insert arrived there were a number of preparation steps required before being in a position to re-fit it:

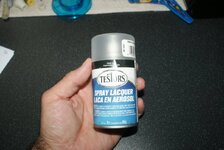
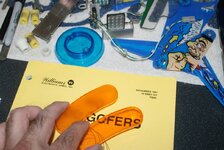
First up, the insert is completely clear as opposed to the frosted finish of the original. In order to achieve the frosted finish I used Testors laquer - this is widely used in the modelling world to create a frosted window effect to buildings - it's awesome stuff! Three coats later and we have a nice frosted effect matching the original. You have to be careful with your masking here as you frost the underside of the insert (not the surface) but you don't want to get any laquer around the edges as this could lift when you re-fit the insert and also cause adhesion issues with the glue when fixing it in place.

This is the lacquer to use:

DSC01999.jpg

The clear insert masked ready for spraying (note careful masking of underside edge):

DSC01996.jpg

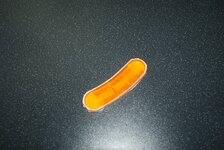
Here you can see the completed 'frosted'' effect on the left and on the right how the insert arrived (I ordered two just in case I made mistake on one!):

DSC02007.jpg
 
Last edited:
Ok, so now we have a frosted insert but we are still way off being complete!

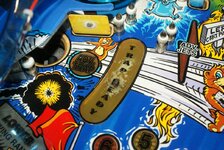
The next step is to create the black border around the edge of the insert, this is not as simple as it sounds because the width of the black border is not uniform around the entire perimeter of the insert - this is due to small variations in the screen printing process where the playfield art work is always very slightly off in terms of position (I hope that makes sense. Hopefully this image shows what I am trying to convey, if you look at the white line around the insert (indicating the perimeter of the insert) you'll notice at the top there is hardly any black border on the insert itself as most of it is on the playfield whereas at the bottom almost the whole black border is on the insert - I need to replicate this all the way around the insert otherwise the border will look too thick in some places and too thin in others:

DSC01867.jpg

As with all things in life, preparation is 80-90% of the effort so it's worth taking your time on this and it did indeed take a while to get the masking right but I got there in the end! Here's my finished perimeter masked with special masking tape designed for tight curves (again borrowed from my modelling supplies!):

DSC02010.jpg

You then have to mask the rest of the insert of course, again being careful not only to mask the face but also the sides as you don't want the black to lift when you fit the insert, here's the finished article with the black border sprayed, a pretty good match in terms of border width - I'm very pleased with the result!

DSC02018.jpg
 
I'm quite fortunate with this insert as it only contains text and no artwork, I couldn't match the font precisely but I searched for something in keeping with the existing playfield artwork until I found a suitable alternative. Another time consuming step here as you want to make sure your letters are:

1. Centred correctly
2. Have a uniform gap between each letter
3. Are rotated correctly as per the original insert

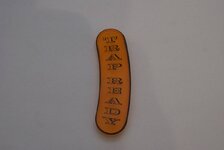
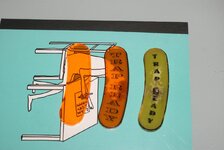
After a lot of effort, more than you'd think looking at the size of the thing(!) I now had an insert with a black border and the 'Trap ready' text correctly aligned:

DSC02114.jpg

I am of course biased but I actually prefer the new design over the original!!!


DSC02115.jpg
 
Hang on, we aren't done yet!

We now have a nice new insert with a decent border and text but if we leave it like this the border and text will wear as balls roll over it so next up is the final insert preparation stage, clear coating the insert!

As with each previous step careful masking is required in order to ensure the edges are not sprayed in order to prevent the clear coat lifting and/or cracking as the insert is mounted in the playfield, here's the result of some time with the masking tape again:


DSC02117.jpg

DSC02118.jpg

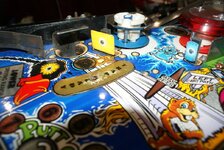
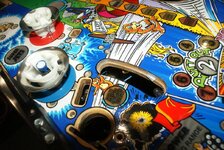
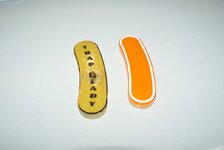
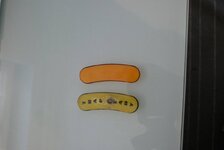
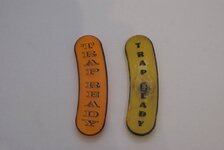
3 coats of clear later with some careful flattening in between and we are done! In the following photo we have gone from the left version of the insert to the middle version of the insert in order to create a replacement for the right version of the insert, very quick to type, not so quick to create but a very satisfying experience!

DSC02124.jpg
 
Nice job kev - although I do think when illuminated from below solid black lettering may of stood out better ? - just saying!!

Cheers

kev
 
Thanks for all the kind comments all, @newdos, that's a very valid point and one which I was concerned about so I held a torch under the characters placed on some mylar and used a torch to create a very technical prototype(!), they looked good so I went with the font, it is more visible than you'd think when lit, I'll try to remember to get an image and post it.
 
Right, time for the next instalment! I now had a completed insert so next up is the second most scary step (first was the insert removal) - fitting of the new insert! I forgot to mention but I tested the insert for fit prior to carying our any work on it to make sure it was the right size (!) and also to see if any adjustments would need to be made - it's well worth the time spent as you are not up against the clock with glue going off!

If you take another look at the image with the insert removed you'll notice a couple of things. Firstly there is a ridge all the way around the hole - the base of the insert sits against this and in theory will be perfectly level with the playfield surface so you'd think you can simply put some glue on the insert an push it in until it won't go in any further, that would be great but unfortunately it's not the case. With this particular insert the bottom third was perfect when pushed all the way in but the top two thirds were below the playfield level, only very slight but definitely slightly lower so I'd need to ensure I didn't push the insert all the way in, I'd have to be careful levelling it.

The second point of interest is that with the insert removed there is some glue residue left in the hole - make sure you remove this completely as otherwise the new glue may not take and the insert could move (sink or raise) over time.

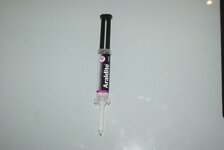
With the glue removed, numerous dry runs complete (including one with the finished insert to make sure no clear or paint was going to lift when the insert was fitted) it was time to actually glue it in place! I looked into a lot of glues for this, @Matt Adams was very helpful with advice - thx Matt! and in the end I went with a two part resin with the smallest application nozzle I could find, I debated over fast setting vs slow but really you want fast as you want to be sure the insert won't move after you go to bed! Here is what I used and I have to say it was perfect for the job:

DSC02125.jpg

Auto mixing of the two parts of the resin, super strong, single use but only 90 seconds to get the stuff applied! I probably shouldn't admit this but I actually timed myself 3 or 4 times by running the sealed nozzle around the insert hole to ensure I could get the glue applied and the insert in place with time to fine tune the fitment!

I decided to apply the glue to the wood and ease the insert in as this had the lowest risk of glue leaking out of the sides of the insert onto the playfield surface and also meant there would be no issue if I accidentally dropped the insert whilst trying to fit it (fortunately I didn't but you never know!).

Ideally I would have applied the glue from the underside of the playfield but the lip I mentioned above prevents you from doing this so I protected the playfield with plastic with rags on top as the glue can be 'stringy' when applying and you have to twist the applicator when you are done to break the thin string of glue (hope that makes sense) - the plastic and cloth ensured I wouldn't get anything on the playfield surface (again this step actually went smoothly but better to be safe than sorry!).

Unfortunately I didn't get any photos of the glue application and insert fitting as I was against the clock and needed to focus! I initially used a perfectly flat piece of hard wood to 'push' the insert in and then immediately took the wood off to allow the fine tuning and to ensure the insert was not below the playfield surface before the glue went of in 90 seconds! Fortunately all was well!

Oh yes, one tip, place tracing paper between the insert surface and the wood when pressing in, at least then if some glue has leaked out you will have stuck tracing paper to your playfield surface (which with some alcohol and quick action you can probably rectify) rather than a block of wood!

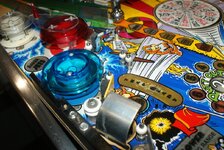
I was so excited and relieved with the result that I forgot to get a picture immediately after so here is one whilst I was re-populating the playfield:

DSC02193 (1).jpg

Looking good (the 'white' on the black border is a reflection, it looks perfect in the flesh - honest!!!).
 
I thought that was it in terms of major fun and games but I was wrong! Despite the slam ramp area looking very good, it did have the ramp mark that they all have, I realise there is not much you can do about it but I decided to see what the options were. The most obvious was an overlay decal and in the end I decided to go for it as there are no inserts under the decal so no risk of lifting the insert art (same risk when removing mylar) if I decided it didn't look too good and needed to remove it.

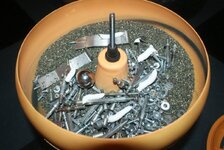
So I made the purchase from a main land Europe supplier and waited for it to arrive, in the mean time the tumber was switched on to do it's polishing duties, all the plastic parts (except ramps!) went in the dish washer and I re-built the pop bumpers
DSC02008.jpg

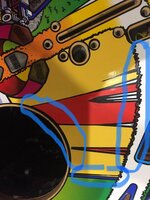
ok, back to the slam ramp area - the decal arrived and in my excitement I didn't carry out a dry run - big mistake as when I fitted the decal I discovered it was too small, argh! Check this out, it is not even close, I had to make the border around the wheel way too thick in order to move the decal up the playfield and it still didn't fit at the top.

Hopefully you can see what I mean in the image below, from the perspective of the image, note the following:

Centre (ish!) of image - border to thick as I have moved the decal up the playfield the black border is made up of the original playfield black border and the black border of the decal
Right side of image - You can clearly see the original playfield black jagged line, then some red and some yellow of the original playfield followed finally by the black jagged line of the overlay decal - looks horrendous!
bottom of image - The decal is not only too short, it's also too narrow (basically the entire scale is wrong), as a result you can see the playfield yellow followed by the decal black border and then finally the decal yellow so you get an extra yellow stripe on your playfield which you don't want!
NGG_OverlayCompetitor.jpg

As you can guess, that was removed and eventually (after many emails to the seller showing the problem including using rulers and sizing guides!) filed in the bin!

At this point I debated, do I leave it or give it one more go? Well, I already started down this path so went with a company I have always had great products, help and who I trust - treasure cove (there was no one in the uk selling a similar thing, just want to mention it as I am always keen to support our fantastic UK pinball part suppliers). Unfortunately this one was a bit more pricey as it had to be shipped from the USA (I still can't work out why postage from the USA is so expensive - it's much cheaper from Australia for example!), anyway after a week or so I had another overlay. I had already spoken to Treasure Cove and sent them measurements of the previous version as I didn't want to pay for this version if it was the same size (I wondered if there was a problem with the printing on my playfield rather than the decal size but there wasn't and this was confirmed by Treasure Cove).

OK, now we are talking, this overlay is fantastic, not only is the right size but rather than the linear red of the 'other' decal this one had the correct fading, basically it was much better in every aspect, thinner, fits perfect, better colour reproduction! In fact if I didn't tell you it was there you may not even notice!

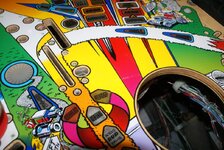
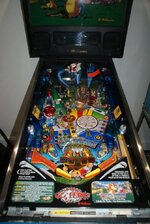
DSC02189.jpg
 
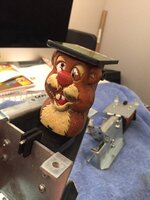
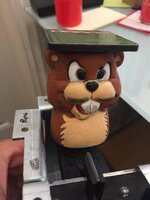
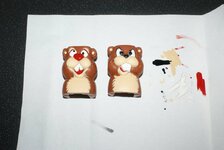
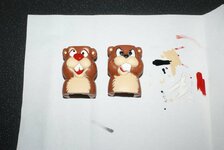
Next up, time for some gofer fun. The first step was straight forward, the gofers were looking a little worse for wear so I restored them back to their healthy selves!

Before:

unnamed (2).jpg


unnamed (3).jpg

After:

DSC02142.jpg
 

Attachments

  • DSC02142.jpg
    DSC02142.jpg
    66.7 KB · Views: 11
Incredible work on that insert! Are the letter decals or painted? How did you get such thin crisp lines in the font?
 
Thanks @deathrow! I initially considered water decals but the outline was visible despite the background being clear so I used dry transfer lettering in the end, I wish I was talented enough to hand paint those letters but unfortunately I'm not!
 
Thanks for all the kind comments all, @newdos, that's a very valid point and one which I was concerned about so I held a torch under the characters placed on some mylar and used a torch to create a very technical prototype(!), they looked good so I went with the font, it is more visible than you'd think when lit, I'll try to remember to get an image and post it.
Nice one matey cant wait to see it finished

Cheers

kev
 
I just had to say this was incredible to read mate.
This is 100k classic car attention to detail here. Certainly a master craftsman. You have spent more time on an insert than some take on full machines.
Well worth the effort and it is looking fantastic.

People must be forming a queue up to buy a pin from you ?
 
This is my old machine I couldn't find an insert for love nor money for it when I had it glad to see this getting done as it was the only thing letting down a cracking condition NGG.
 
I just had to say this was incredible to read mate.
This is 100k classic car attention to detail here. Certainly a master craftsman. You have spent more time on an insert than some take on full machines.
Well worth the effort and it is looking fantastic.

People must be forming a queue up to buy a pin from you ?

Thanks @Horsey, that's very kind of you to say!

Thanks too @Pharo, good to see who has owned the machine in the past - thanks for taking care of it, it was already in great condition, I just had a few bits to address, I'll get round to continuing this shop log next week hopefully.
 
I bit longer than a week but I'm back!

Having dismantled and cleaned the gofer mechanisms I noticed one of the gofer shafts had snapped where it mounts to the gofer as can be seen in this image:

DSC02198.jpg

This prompted more internet searching fun and games, I was unable to source one from the UK but @philpalmer very kindly let me know of a retailer in Germany who had them in stock, Phil also warned me they were of poor quality but were the only option so I crossed my fingers and ordered two, the price was a bit crazy for two bits of metal but there was no choice (I only needed one replacement but I thought I may as well order two in case the other one ever breaks).

In anticipation of the new shaft arriving I set to work dismantling the old one, on order to remove the pins you need to use a roll pin punch, don't be tempted to use a parallel punch as they can 'mushroom' the pin making it more difficult to extract, a bit of careful hammer and punch work and we have the first (of two) roll pins removed (one holds the spring in place, the other connects the gofer metal shaft to the metal shaft which sits in the coil (via a sleeve) :

DSC02204.jpg

DSC02205.jpg
 
Last edited:
Around a week later my new gofer shafts arrived, the excitement was quickly replaced with frustration when I came to realise just how true @philpalmer comments were. There were two issues with the new shafts:

1. The holes for the pins were clearly smaller than the original, there was no way the pin was fitting in the hole without some modification (notice the difference in hole sizes - the new shaft is on the right):

DSC02207.jpg

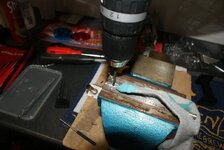
Quite shocking that you need to modify a brand new part made specifically for the machine in question but that's what I had to do! Time for some careful drilling - if the hole is drilled too large the pin will not hold in place and the shaft will be only be fit for the bin!

DSC02208.jpg

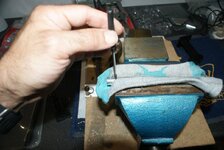
Fortunately all went well and the pin fitted perfectly after the modification (note the good use of one of my old (clean!) socks to prevent any damage to the shaft!:

DSC02209.jpg

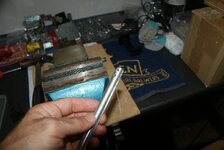
The finished (or so I thought!) article:

DSC02210.jpg
 
Ok, so that was a bit frustrating but no issue, a bit of drilling and we were done right? Er, no! As soon as I tried to pass the coil sleeve over the new shaft I discovered the second issue, the diameter of the new shaft was larger than the original, too large in fact to be able to slide a coil sleeve over! What?! How is this possible?!!!

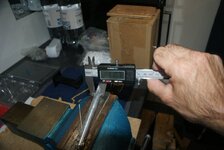
After a couple of swear words and checking the other new shaft (which exhibited the same issue) I had to make sure I wasn't going mad so I measured the diameter of the old vs new shafts:

Old shaft:

DSC02216.jpg

New shaft:

DSC02217.jpg

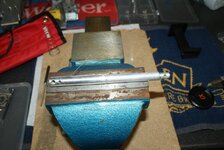
That .39mm difference, although small, was enough to cause a major issue! As a result of some careful grinding and sanding (I didn't want to make it any smaller as it would rattle around inside the coil sleeve and would not be as smooth in operation as it should be) I finally had a new gofer shaft which was fit for purpose!
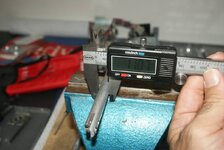
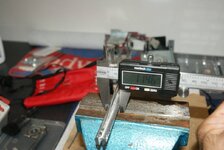
DSC02219.jpg

Spot on size, perfect!!!

DSC02220.jpg
 
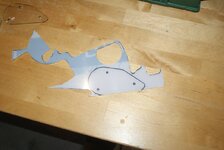
Ok, that was the main challenges out of the way (phew!), just a few more items to address, the first of which was replicating the clear plastics as the originals has yellowed slightly. I use the originals as a template and then borrow @Nedreud scroll saw (thanks @Nedreud) to create the replacements, not an exciting picture but hopefully this will give you the general idea:

DSC02215.jpg

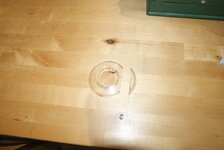
I also wanted to replace the bumper caps but the clear one (there is one blue, one red and one clear) has a cut out due to it's position. I already had a clear bumper cover so decided to modify it to match the original:

DSC02213.jpg

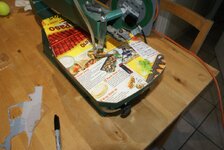
Here's the tool used for the job, notice the professional protector cover (aka cardboard cut out from a fajita box!) to prevent the plastic being scratched by the metal table of the saw:

DSC02214.jpg
 
Ok, one last job before I could start putting the machine back together (just as well there was only one job remaining as I was desperate to play the machine!), the captive ball area had some minor wear but I didn't want it to get any worse as it was already causing the ball to sit very slightly away from the newton ball on occasion which meant only a full on hard newton ball strike would have the desired result, I wanted the machine to play perfectly every time so this needed to be addressed!

I came up with the idea of using a cliffy switch slot protector which works perfectly and looks great!

Area before fitting the cliffy, it's actually not bad at all but I want the machine looking and playing perfect!

DSC02194.jpg

A bit of cliffy magic later, awesome!

DSC02195.jpg
 
At last, I could get the machine back together! I will post images of the completed machine in a couple of weeks, I hope you have enjoyed this shop log so far and also hope it has been of some use to people!
 
Great write up Kev. What a PITA on those parts. You should post them a link to this thread mate
 
Back
Top Bottom