Picked up this stern nine ball at the start of the summer as a project, game was'nt working and hadnt been turned on for a long time but all things considered it was solid with no major damage and no sign of having been wet at any stage.

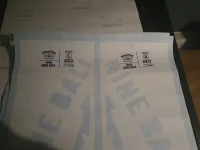
Luckily enough I have access to a workshop where i able to sand/fill/prime the cab for new stencils I also took the opportunity to replace the horrible mdf surround stern used on the back box with fresh wood, this stuff is truly horrific and sucks up primer likes nothing else.


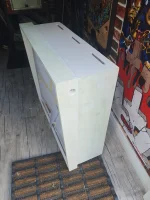
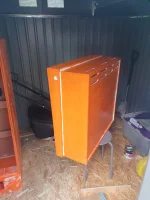
This was just the ususal process of sand/fill sand/fill until i got a finish I was happy with using a thick build primer before I was able to spray the first colour down


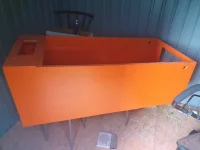
After this i used dolphin glaze for any other imperfections, sprayed it again and then gave it a quick blast of clear to have a point to return too should I balls up the stencils


While waiting inbetween coats I cleaned and polished everything inside the cab, the rails and lockdown bar got a polishing too


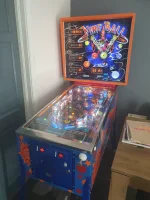
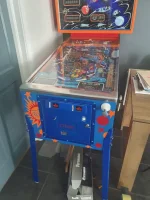
The door and legs were sent to powdercoater and had arrived back in the meantime in candy blue so I was able to start reassembling everything after I had finished clearing the cab
I also replaced the dodgy rectifier board with a new one and resprayed the backboard, the original soundboard was recapped and a new weebly mpu, sdb and lamp driver board. The Weebly MPU contains the latest version of the game rom which fixes many bugs in the original.


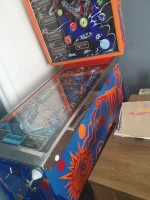
New backglass from Coos and new pf also arrived while reassembling


Completed PF gone in, no major issues here thankfully all drop targets were replaced and mylared before installing as Ive had targets before that have had the print knocked off after a few games so best to cover them, the large dropbank on the left had the drop links torn up not allowing the drops to sit right but luckily I found someome on pinside making repros. I used @AlanJ Ledbars for the inserts too while doing the swap and cant recommend them enough.


After this is was only a matter of sorting the final few issues after power on, some dodgy displays and some replacement coils, I repinned the display connector and put LED displays in to eliminate the HV line and dialled in a few switches and all was good, massive thanks to @AlanJ for giving me a dig out and helping me with some technical issues I had.


Luckily enough I have access to a workshop where i able to sand/fill/prime the cab for new stencils I also took the opportunity to replace the horrible mdf surround stern used on the back box with fresh wood, this stuff is truly horrific and sucks up primer likes nothing else.
This was just the ususal process of sand/fill sand/fill until i got a finish I was happy with using a thick build primer before I was able to spray the first colour down
After this i used dolphin glaze for any other imperfections, sprayed it again and then gave it a quick blast of clear to have a point to return too should I balls up the stencils
While waiting inbetween coats I cleaned and polished everything inside the cab, the rails and lockdown bar got a polishing too
The door and legs were sent to powdercoater and had arrived back in the meantime in candy blue so I was able to start reassembling everything after I had finished clearing the cab
I also replaced the dodgy rectifier board with a new one and resprayed the backboard, the original soundboard was recapped and a new weebly mpu, sdb and lamp driver board. The Weebly MPU contains the latest version of the game rom which fixes many bugs in the original.
New backglass from Coos and new pf also arrived while reassembling
Completed PF gone in, no major issues here thankfully all drop targets were replaced and mylared before installing as Ive had targets before that have had the print knocked off after a few games so best to cover them, the large dropbank on the left had the drop links torn up not allowing the drops to sit right but luckily I found someome on pinside making repros. I used @AlanJ Ledbars for the inserts too while doing the swap and cant recommend them enough.
After this is was only a matter of sorting the final few issues after power on, some dodgy displays and some replacement coils, I repinned the display connector and put LED displays in to eliminate the HV line and dialled in a few switches and all was good, massive thanks to @AlanJ for giving me a dig out and helping me with some technical issues I had.
Attachments
-
 20240603_225540.webp38.5 KB · Views: 18
 -
 20240604_181704.webp90.2 KB · Views: 17
 -
 20240604_201149.webp93.7 KB · Views: 14
 -
 20240610_181417.webp67.2 KB · Views: 16
 -
 IMG_20240706_160855.webp113 KB · Views: 19
 -
 IMG_20240728_142947.webp93 KB · Views: 20
 -
 20240827_155622 (1).webp95.5 KB · Views: 20
 -
 20240827_155532.webp84.5 KB · Views: 16
 -
 20240827_155539.webp108.1 KB · Views: 15

