I grew up with parquet flooring and love the stuff. Hard wearing, repairable and can give amazing patterns when treated with a good stain like you have done. There use to be a lot in the UK but rather than repair, it was likely pulled up or still hiding under a carpet. Our house is a little older and the two of the reception rooms have wooden floors, the hall has a wooden floor too, I found a beautiful bit of parquet style under a built in cupboard in a bedroom but the rest of the room had been lost. Our hope is to restore what we can when we get to those rooms.
Pinball info
You are using an out of date browser. It may not display this or other websites correctly.
You should upgrade or use an alternative browser.
You should upgrade or use an alternative browser.
Mini Shop Jobs - SURFER, CFTBL, Other
- Thread starter Fifty
- Start date
Fifty
Registered
No updates still. Pinball has been put on hold for months now. My floors are still being re-done. Furniture from the main floor is crowded into the basement. Our dining room and kitchenette stools are in the basement so we've been eating meals in front of the TV downstairs. The floors have been sanded and stained. First coat of clear is down. The end is near but man this has been painful. If I was to do this again I would do it myself and do it room by room. As much as I love the parquet, I would rip it up. The contractor has been very good with fixing any complaints I have had, but I have had to point out a lot of deficiencies that I don't think I should have had to point out. I mean, these guys do this for a living. It's their business, and they are not new to this. So why am I noticing mistakes and pointing them out? This seems backwards to me.
Things should be back to normal this week. Furniture can go back and I can start working on the baseboards and door trim work.
*sigh*
Things should be back to normal this week. Furniture can go back and I can start working on the baseboards and door trim work.
*sigh*
I understand this sentiment, there are many jobs that I feel I would do to a higher standard than the professionals that I can hire. However, they are in business because they can get the job done and make money from their skills.
I had a post on here about a toilet where the first 'professional' used sealant to join a metric soil pan connector to an imperial soil stack. A person came to quote to sort it out and wanted to remove the toilet, warning me it would likely damage the toilet and tiles. He might have been right about how to it properly but the toilet wasn't that old and his main issue was access to get the old connector out.
I cut the pan connector in half with an old jigsaw, use a Dremel to clean up the tiles around the stack, got advice from this forum on the right connector and was done in an hour.
Fifty
Registered
@Calimori The internet is a valuable tool for home improvement. Like everything, you have to do your research as the information out there is both good and bad. The internet has helped people from being swindled, but it has create experts on everything overnight.
Finally, I have a pinball update AND I need some advice. Here's what happened...
Finally got the final 3 inserts out of my Surfer.

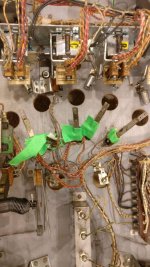
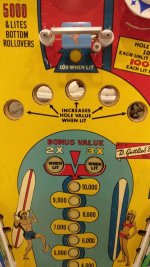
I'm following Vid's guide, so I am using epoxy to set the new inserts. My epoxy was out in the garage, so I brought it inside to warm up to room temperature (it's -5C here today). While the epoxy was warming up I decided to clean up the screws that held the switches in place under the star rollovers. They were pretty ugly looking. I used my Flitz and drill method.
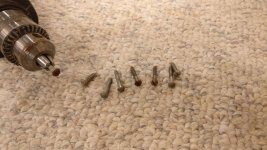
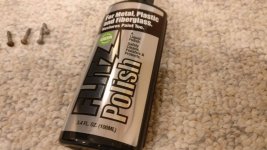
They came out pretty good, but the really rusted ones it didn't have any effect on.
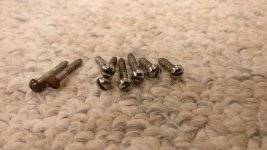
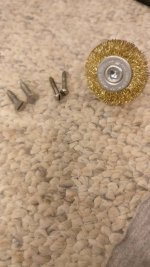
So I gave them the wire brush treatment.
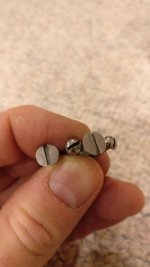
Time to rough up gloss on the new inserts so that the epoxy has something to bite onto.
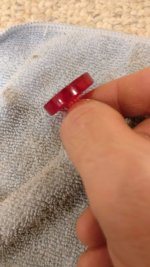
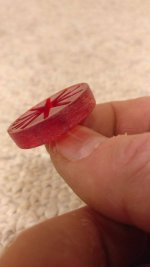
Okay, now to clean off any grease and debris from the sanded inserts. Isopropyl time! BTW, don't use cotton swabs on sanded inserts. Can you tell which one I use the cotton swab on? (Answer: the one on the right). I switched to a cotton t-shirt rag.
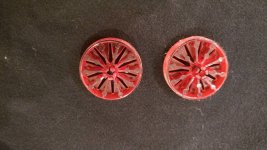
Time to put the insert into the playfield. I'd be lying if I said I wasn't scared to do this. This machine isn't worth a lot of money, but it's a working, fun pin and I don't want to ruin it. I mixed the epoxy and applied it to the playfield hole with a toothpick. I placed the insert into the insert hole, placed a small block of wood over the insert and used a rubber mallet to evenly tap the insert down.
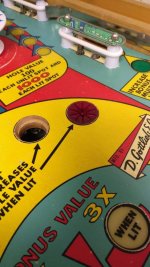
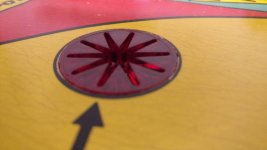
This is where I had to stop. I was pretty happy with how everything went but then I ran into a major problem. The new insert doesn't sit flush with the playfield. When I test fit it earlier, I didn't hammer it in all the way fearing that I wouldn't be able to get it out to apply the epoxy and install it properly. Unfortunately, this is a big problem now. The ball will definitely hit the edge of the insert and hop or break the edge of the new insert.
It's close to being flush, but it's not. This is as far as it will hammer down. Now what do i do?
Finally, I have a pinball update AND I need some advice. Here's what happened...
Finally got the final 3 inserts out of my Surfer.


I'm following Vid's guide, so I am using epoxy to set the new inserts. My epoxy was out in the garage, so I brought it inside to warm up to room temperature (it's -5C here today). While the epoxy was warming up I decided to clean up the screws that held the switches in place under the star rollovers. They were pretty ugly looking. I used my Flitz and drill method.


They came out pretty good, but the really rusted ones it didn't have any effect on.

So I gave them the wire brush treatment.


Time to rough up gloss on the new inserts so that the epoxy has something to bite onto.


Okay, now to clean off any grease and debris from the sanded inserts. Isopropyl time! BTW, don't use cotton swabs on sanded inserts. Can you tell which one I use the cotton swab on? (Answer: the one on the right). I switched to a cotton t-shirt rag.

Time to put the insert into the playfield. I'd be lying if I said I wasn't scared to do this. This machine isn't worth a lot of money, but it's a working, fun pin and I don't want to ruin it. I mixed the epoxy and applied it to the playfield hole with a toothpick. I placed the insert into the insert hole, placed a small block of wood over the insert and used a rubber mallet to evenly tap the insert down.

This is where I had to stop. I was pretty happy with how everything went but then I ran into a major problem. The new insert doesn't sit flush with the playfield. When I test fit it earlier, I didn't hammer it in all the way fearing that I wouldn't be able to get it out to apply the epoxy and install it properly. Unfortunately, this is a big problem now. The ball will definitely hit the edge of the insert and hop or break the edge of the new insert.
It's close to being flush, but it's not. This is as far as it will hammer down. Now what do i do?

Sand it down,
Fifty
Registered
How do I do this without wrecking the paint on the playfield? The insert is glued in now.Sand it down,
Heat it up and take it out.
Fifty
Registered
Frustrated by my former post I started working on something a little less stressful.
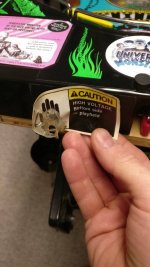
Some of the stickers on my Creech are peeling, cracked or even split in half.
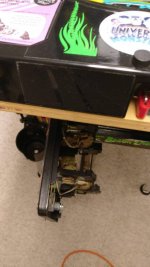
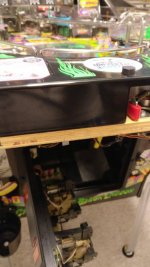
I removed the old sticker with a heat gun. It left a sticky residue behind. I used Goo Gone to remove the residue. Then I cleaned it off with isopropyl. I applied new stickers I purchased from flashinstinct.
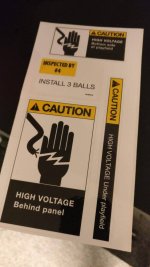
Here's the new label installed.
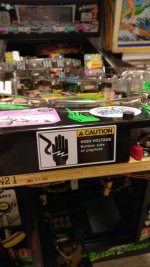
Then I decided to replace the decal on my backbox. Here's what it use to look like.
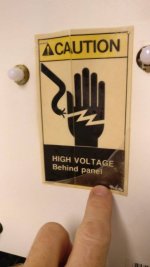
I repeated the above process. Goo Gone to remove the dried on residue, isopropyl to clean off the Goo Gone. Some of the dried on residue the Goo Gone didn't remove I had to remove carefully with a sharp razor blade.
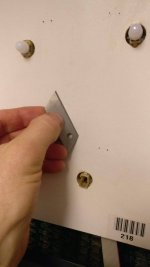
The old sticker is actually bigger than the new one I purchased.
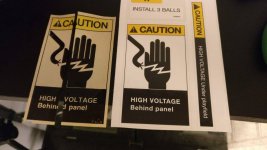
I didn't bother re-stapling the sticker down. The adhesive on the new sticker is crazy strong. I filled the staple holes on the backbox with a little drywall putty. I might colour match the backbox paint and hide the staple holes a bit more, but for now I'll leave them as it is.
Sorry, no after photo. I forgot to take one.
I also started taking apart the flippers on my Surfer. I removed the left side first. I've had a rebuild kit for at least a couple years now but never got around to doing this. I removed the flipper and started taking it apart.
First I had to desolder the wiring to detach it. A while ago I built a wooden work table that fits perfectly in standard pin cabinets. It allows me to drop it in and then put all my tools on top so everything is readily available.
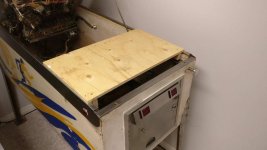
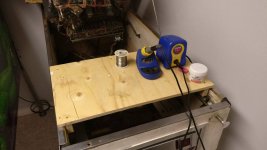
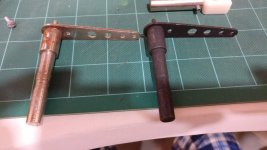
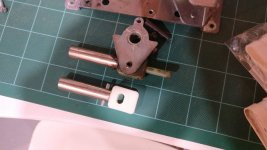
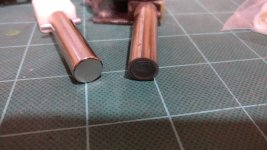
Once I had the flipper removed I noticed the new parts don't match up to the old ones.
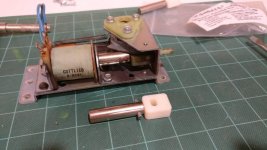
One of the new flipper arms is bent too. The metal is pretty soft. It was easy enough to straighten though.
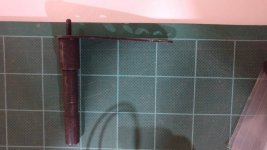
Honestly, the old parts don't look horrible. I thought the pawl would be smashed pretty badly or that the stop would be busted or mushroomed but neither of them were bad. Even the old flipper arm was only a bit rusty. I don't think I'm going to bother replacing anything, at least on this flipper. If the right side is similar then I'm just going to clean everything up and re-assemble using the original parts. No sense throwing out perfectly good parts that are just dirty. Even the flipper plastics aren't bad. I might swap them out because they are a bit yellowed from age. Heck, even the flipper rubbers are in good shape. What do you think?
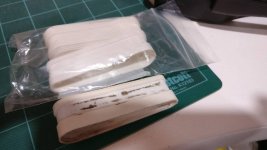

Some of the stickers on my Creech are peeling, cracked or even split in half.


I removed the old sticker with a heat gun. It left a sticky residue behind. I used Goo Gone to remove the residue. Then I cleaned it off with isopropyl. I applied new stickers I purchased from flashinstinct.

Here's the new label installed.

Then I decided to replace the decal on my backbox. Here's what it use to look like.

I repeated the above process. Goo Gone to remove the dried on residue, isopropyl to clean off the Goo Gone. Some of the dried on residue the Goo Gone didn't remove I had to remove carefully with a sharp razor blade.

The old sticker is actually bigger than the new one I purchased.

I didn't bother re-stapling the sticker down. The adhesive on the new sticker is crazy strong. I filled the staple holes on the backbox with a little drywall putty. I might colour match the backbox paint and hide the staple holes a bit more, but for now I'll leave them as it is.
Sorry, no after photo. I forgot to take one.
I also started taking apart the flippers on my Surfer. I removed the left side first. I've had a rebuild kit for at least a couple years now but never got around to doing this. I removed the flipper and started taking it apart.
First I had to desolder the wiring to detach it. A while ago I built a wooden work table that fits perfectly in standard pin cabinets. It allows me to drop it in and then put all my tools on top so everything is readily available.


Once I had the flipper removed I noticed the new parts don't match up to the old ones.

One of the new flipper arms is bent too. The metal is pretty soft. It was easy enough to straighten though.

Honestly, the old parts don't look horrible. I thought the pawl would be smashed pretty badly or that the stop would be busted or mushroomed but neither of them were bad. Even the old flipper arm was only a bit rusty. I don't think I'm going to bother replacing anything, at least on this flipper. If the right side is similar then I'm just going to clean everything up and re-assemble using the original parts. No sense throwing out perfectly good parts that are just dirty. Even the flipper plastics aren't bad. I might swap them out because they are a bit yellowed from age. Heck, even the flipper rubbers are in good shape. What do you think?


Fifty
Registered
So I asked @vid1900 over on Pinside for his advice. He said to use a razor blade and cello tape. At first I thought he was nuts, but the guy is an invaluable resource for all things pinball and I'm just a kid in comparison so I tried it.
I was skeptical and scared ****less to try this. Running a razor blade across a playfield is usually something reserved for my nightmares.
I used 4 pieces of cello tape around the insert and a brand new razor blade. 90 degree angle. I applied enough pressure that the blade bent slightly as I dragged it across the insert. I paid close attention to the edges of the razor. I figured if any part of the blade was going to dig in by accident it would be the edges.
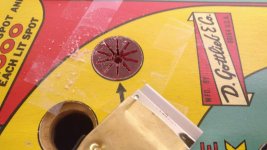
I could immediately tell it was helping. Red shavings poured off the insert. I wiped the blade down constantly. As I went, I learned that going in one direction was not going to create flush sides all around. I started to come at the insert clockwise. 12 o'clock, 1 o'clock, 2 o'clock and so on. This allowed the razor blade to start on a different side of the insert every time. I applied the most pressure to the center of the utility blade, but not too much.
As I saw the razor blade shave off the top layers of cello tape I replaced it. In total, I replaced the tape 4-5 times. The razor blade I replaced 3 times. I also rotated the razor blade so I always had a sharp edge going. Out of the 3 new blades I used, the 2nd one proved to be the sharpest. I actually went back to it from the 3rd blade. It just goes to show you manufacturing quality isn't always equal.
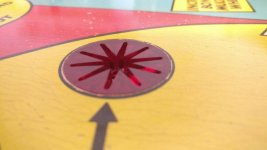
It worked! Here is the after photo. I used Novus 1 to shine it up a bit. I didn't want to use Novus 2 fearing it would gunk up the insert. The camera picks up a slight edge, but it is not noticeable when you run your finger over it and the ball is unaffected by it. Only 4 more to go! I've learned my lesson. I will sand the next 4.
I cannot thank @vid1900 enough. Posted this over on Pinside too. Awesome-sauce!
I was skeptical and scared ****less to try this. Running a razor blade across a playfield is usually something reserved for my nightmares.
I used 4 pieces of cello tape around the insert and a brand new razor blade. 90 degree angle. I applied enough pressure that the blade bent slightly as I dragged it across the insert. I paid close attention to the edges of the razor. I figured if any part of the blade was going to dig in by accident it would be the edges.

I could immediately tell it was helping. Red shavings poured off the insert. I wiped the blade down constantly. As I went, I learned that going in one direction was not going to create flush sides all around. I started to come at the insert clockwise. 12 o'clock, 1 o'clock, 2 o'clock and so on. This allowed the razor blade to start on a different side of the insert every time. I applied the most pressure to the center of the utility blade, but not too much.
As I saw the razor blade shave off the top layers of cello tape I replaced it. In total, I replaced the tape 4-5 times. The razor blade I replaced 3 times. I also rotated the razor blade so I always had a sharp edge going. Out of the 3 new blades I used, the 2nd one proved to be the sharpest. I actually went back to it from the 3rd blade. It just goes to show you manufacturing quality isn't always equal.
It worked! Here is the after photo. I used Novus 1 to shine it up a bit. I didn't want to use Novus 2 fearing it would gunk up the insert. The camera picks up a slight edge, but it is not noticeable when you run your finger over it and the ball is unaffected by it. Only 4 more to go! I've learned my lesson. I will sand the next 4.

I cannot thank @vid1900 enough. Posted this over on Pinside too. Awesome-sauce!
Fifty
Registered
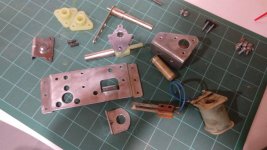
All of the pieces for my right flipper were in good enough shape that I didn't think anything needed replacing. Maybe the plunger, but even the plunger wasn't bad. I've seen bad ones, and this one could not be thrown into the BAD column.
Here are the pieces all cleaned up.
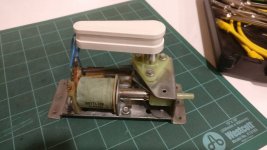
Here is the flipper re-assembled.
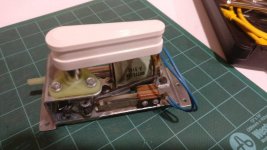
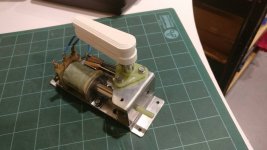
And of course I cleaned up the screw heads using Flitz and my drill again. This is becoming common practise for me. I wish I had know about this method earlier. That's a new white flipper on it. That's the only thing I replaced.
Here are the pieces all cleaned up.

Here is the flipper re-assembled.


And of course I cleaned up the screw heads using Flitz and my drill again. This is becoming common practise for me. I wish I had know about this method earlier. That's a new white flipper on it. That's the only thing I replaced.
Fifty
Registered
Alright, I still have to solder the flipper back in, but I wanted to put these pictures up.
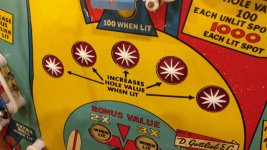
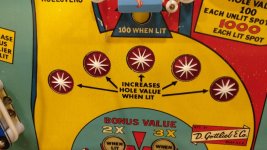
It's been a long and difficult journey, but the new star rollover inserts are installed. They have all been sanded flushed and epoxied in place. The final piece was to insert the actual white star into the insert and screw down the switches underneath. I learned a ton doing this and I'm very happy with the results.
So, now that I've finished that I figured I would try something else I've never tried before. Here's a hint.
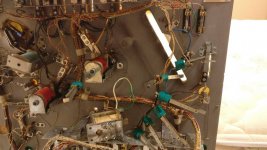
See that empty space? I've already removed all the switches and the coil. Yep, I'm going to give the drops a shop job.
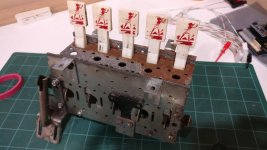
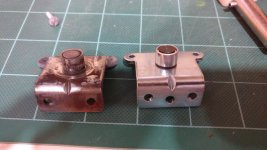
It's a bit of a mess. The top and one of the inside walls are pretty rusted. The springs are all there, but I can see rust on them and some of them are stretched oddly. I'll replace all of them for new springs. I already have brand new silkscreened replacement drops from PBR that I purchased nearly two years ago.
I've been avoiding this for a while now. Well, ever since I read that it's a pain in the ass to replace them. There is a cutting method and then the long way to do it that I've chosen. This thing is pretty bad. I might have to get it re-plated. I've never done that either.
If anyone has any advice on where to start I'm all ears.


It's been a long and difficult journey, but the new star rollover inserts are installed. They have all been sanded flushed and epoxied in place. The final piece was to insert the actual white star into the insert and screw down the switches underneath. I learned a ton doing this and I'm very happy with the results.
So, now that I've finished that I figured I would try something else I've never tried before. Here's a hint.

See that empty space? I've already removed all the switches and the coil. Yep, I'm going to give the drops a shop job.

It's a bit of a mess. The top and one of the inside walls are pretty rusted. The springs are all there, but I can see rust on them and some of them are stretched oddly. I'll replace all of them for new springs. I already have brand new silkscreened replacement drops from PBR that I purchased nearly two years ago.
I've been avoiding this for a while now. Well, ever since I read that it's a pain in the ass to replace them. There is a cutting method and then the long way to do it that I've chosen. This thing is pretty bad. I might have to get it re-plated. I've never done that either.
If anyone has any advice on where to start I'm all ears.
I'll be starting on the drop banks from my Lucky Strike soon and I've not done any Gottlieb EM ones before but having done loads of Bally and Stern SS banks my advice would be completely disassemble it and then rebuild. They're not that hard tbh when you rebuild them from scratch....unless there's something I don't know about Gottlieb ones  The massive 10 drops one I've got to do should be interesting, it's got 2 of the big reset coils on it...one at each end!
Fifty
Registered
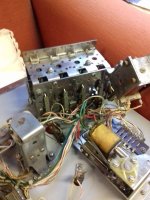
A little more teardown of the 5 relay bank on Surfer. I don't know why this mech is so rusted. The rest of the game has some rust here and there, but this is easily the worst I've discovered. It's odd, because parts of it almost look new and other sections look like they were left out in the woods for a decade. This may take me longer than I thought.
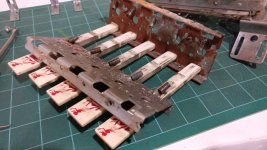
I actually managed to get the reset part out in one piece. This was the area I was dreading. It's pretty clean compared to some of the other areas of this same mech.
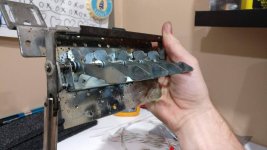
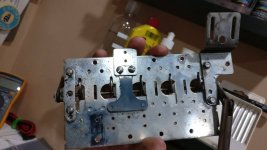
All the rust in it's glory!
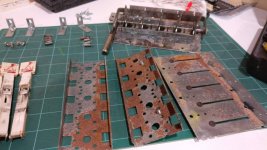
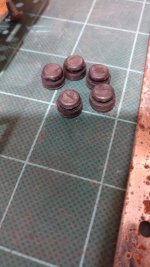
I even managed to get the little black rubbers out without tearing them. Bonus!
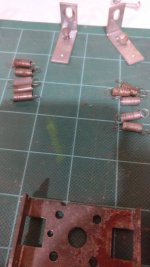
The springs aren't horrible, but I've ordered all new ones. They've done their time.
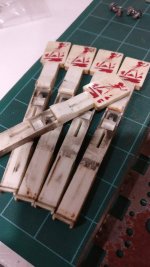
The drops are being replaced with new silkscreened ones from PBR. The old ones are in one piece with no fading, or cracking. Really, it's just the paint wearing off that isn't very appealing. I could probably clean them up and re-use them, but I already have the new ones. I'll probably get them clean, inspect them again and save them for a rainy day.

I actually managed to get the reset part out in one piece. This was the area I was dreading. It's pretty clean compared to some of the other areas of this same mech.


All the rust in it's glory!

I even managed to get the little black rubbers out without tearing them. Bonus!

The springs aren't horrible, but I've ordered all new ones. They've done their time.

The drops are being replaced with new silkscreened ones from PBR. The old ones are in one piece with no fading, or cracking. Really, it's just the paint wearing off that isn't very appealing. I could probably clean them up and re-use them, but I already have the new ones. I'll probably get them clean, inspect them again and save them for a rainy day.

Last edited:
Fifty
Registered
I had some time tonight and decided to completely disassemble my Surfer relay bank. It is a mess.
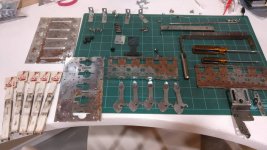
I have the opportunity to sand blast it, but I was warned by the operator that it would leave the metal very exposed so he suggested powder coating it right afterwards. He also mentioned that sand blasting may open up some of the holes a bit and that powder coating may seal some holes. I've never read about this anywhere else in a pinball forum. I am wondering how true it is. Do you have to tap and die the holes after powder coating for the screws? To me, this would ruin the powder coating.
If anyone can weigh in on this I would appreciate it.
I also found some tiny nylon standoffs at work. I'm going to repurpose them for my AFTERGLOW PCB.
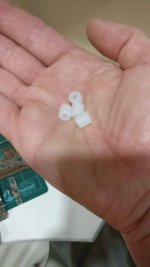
I don't have screws that will fit right now so I'll have to make a trip to the hardware store. I also have an order coming in from Titan with some hex head screws that I can maybe use if they are thin enough.
I'm looking forward to installing this. Check out the Christmas candy cane wiring @stumblor used to get me in the holiday spirit! Thanks again Davey!
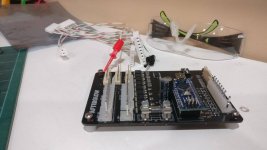
That's it for now. It gets dark at about 5PM and the temperature has really dropped so it's tough to get into the unheated garage and shine up metal. I need more indoor projects! Ha ha!

I have the opportunity to sand blast it, but I was warned by the operator that it would leave the metal very exposed so he suggested powder coating it right afterwards. He also mentioned that sand blasting may open up some of the holes a bit and that powder coating may seal some holes. I've never read about this anywhere else in a pinball forum. I am wondering how true it is. Do you have to tap and die the holes after powder coating for the screws? To me, this would ruin the powder coating.
If anyone can weigh in on this I would appreciate it.
I also found some tiny nylon standoffs at work. I'm going to repurpose them for my AFTERGLOW PCB.

I don't have screws that will fit right now so I'll have to make a trip to the hardware store. I also have an order coming in from Titan with some hex head screws that I can maybe use if they are thin enough.
I'm looking forward to installing this. Check out the Christmas candy cane wiring @stumblor used to get me in the holiday spirit! Thanks again Davey!

That's it for now. It gets dark at about 5PM and the temperature has really dropped so it's tough to get into the unheated garage and shine up metal. I need more indoor projects! Ha ha!
I had some time tonight and decided to completely disassemble my Surfer relay bank. It is a mess.
View attachment 126653
I have the opportunity to sand blast it, but I was warned by the operator that it would leave the metal very exposed so he suggested powder coating it right afterwards. He also mentioned that sand blasting may open up some of the holes a bit and that powder coating may seal some holes. I've never read about this anywhere else in a pinball forum. I am wondering how true it is. Do you have to tap and die the holes after powder coating for the screws? To me, this would ruin the powder coating.
If anyone can weigh in on this I would appreciate it.
White vinegar is what you need, leave to soak for a while and watch all the rust lift off the metal. Use a toothbrush to scrub the awkward areas. Then polish.
Fifty
Registered
I'll give this a try. I've attempted using cider vinegar on rusty legs before, but the results were not great even after a 48 hour soak.White vinegar is what you need, leave to soak for a while and watch all the rust lift off the metal. Use a toothbrush to scrub the awkward areas. Then polish.
+1 for white vinegar, did a lot of rusty Gottlieb bits recently and will have more to do from the bottom of the playfield soon 

Fifty
Registered
Quick update tonight. I received my updated Creech ROM in the mail so I had to install it and give it a try!
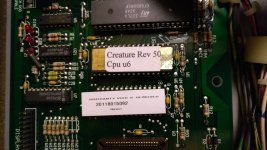
Check out the old ROM. It's an original from 1992. This pin has never been upgraded.
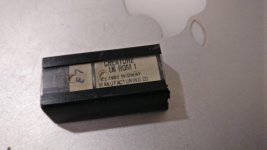
I didn't have a chance to play much tonight, but I did try out the new rescue options. I switched it to PATTERN from RANDOM so that the girl was always found in the second SEARCH. Worked like a charm.
I was really interested to see how the new ROM would effect the LEDs. I noticed some of the LEDs that usually ghosted on my machine did not. I need to do further testing to see if it is just my mind playing tricks on me.

Check out the old ROM. It's an original from 1992. This pin has never been upgraded.

I didn't have a chance to play much tonight, but I did try out the new rescue options. I switched it to PATTERN from RANDOM so that the girl was always found in the second SEARCH. Worked like a charm.
I was really interested to see how the new ROM would effect the LEDs. I noticed some of the LEDs that usually ghosted on my machine did not. I need to do further testing to see if it is just my mind playing tricks on me.
Got my creature rom yesterday also, got it installed today. Seems pretty good so far but unfortuanetly only had a few games before I had to head back up home..
thanks to @Neil McRae for the heads up
thanks to @Neil McRae for the heads up
Fifty
Registered
Alright, so I tried using white vinegar today on my rusty parts. I am definitely not happy with the results. The vinegar did remove quite a bit of the rust, but it also removed all of the plating on the metal leaving it a dull grey. I am not sure if I can polish it back into better shape of not. I'll give polishing a try tomorrow.
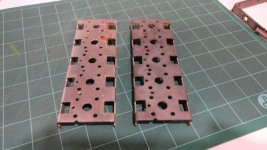
All of the plating was gone after 30 minutes in the vinegar. I left it soak for about 8 hours total.
The one on the left has not been worked on. The one on the right was in the vinegar.
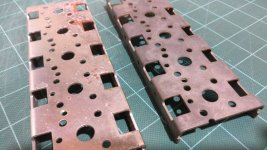
Here is what the bottom looks like. This is where the majority of the rust is/was.
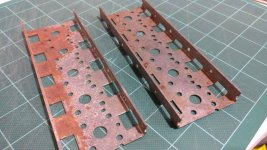
Overall, I will say I'm disappointed in the results. Usually I use a brass wire wheel to remove the rust and then polish. This method is very quick and does not require a lot of effort. The drill and brass wire wheel do all the work. I just have to avoid getting in the way.
After the vinegar bath there is still rust that remains, so I'm still going to have to take a wire brass wheel to it anyway. The vinegar did not save any time, and had the negative effect of removing all the plating. I don't think I'll try this method again.
Hopefully I can polish the metal back to a shine.
I have used cider vinegar in the past on pinball legs. It did not remove any plating that time, but I was not happy with the results then either. Live and learn.
All of the plating was gone after 30 minutes in the vinegar. I left it soak for about 8 hours total.
The one on the left has not been worked on. The one on the right was in the vinegar.


Here is what the bottom looks like. This is where the majority of the rust is/was.

Overall, I will say I'm disappointed in the results. Usually I use a brass wire wheel to remove the rust and then polish. This method is very quick and does not require a lot of effort. The drill and brass wire wheel do all the work. I just have to avoid getting in the way.
After the vinegar bath there is still rust that remains, so I'm still going to have to take a wire brass wheel to it anyway. The vinegar did not save any time, and had the negative effect of removing all the plating. I don't think I'll try this method again.
Hopefully I can polish the metal back to a shine.
I have used cider vinegar in the past on pinball legs. It did not remove any plating that time, but I was not happy with the results then either. Live and learn.
D
Deleted member 2463
Looks awesome!
Sent from my iPhone using Tapatalk Pro
Sent from my iPhone using Tapatalk Pro
Fifty
Registered
It's definitely cleaner. The vinegar worked there, but the fact that it removed all the shine off the metal is terrible.Looks awesome!
Sent from my iPhone using Tapatalk Pro
D
Deleted member 2463
Try Ceder oil!It's definitely cleaner. The vinegar worked there, but the fact that it removed all the shine off the metal is terrible.
Or get the metal powder coated.
Fifty
Registered
This doesn't make sense to do on a $400 game. Especially on something most people won't even see. Plus there is the added cost and time the game is down.Or get the metal powder coated.
@Neil McRae Cedar oil? Really? I'll look into it.
@Moonraker Those look pretty decent. I don't see any rust on your mech. Which game is that?
Last edited:
Haunted House upper playfield.@Moonraker Those look pretty decent. I don't see any rust on your mech. Which game is that?
Before:
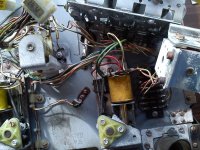
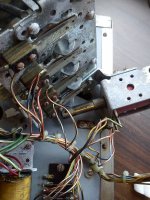
Pictures don't capture the solid rust on the inside/outer plate which was probably worse than yours. I also use a sharp blade to remove stubborn, a toothbrush and rust and wet/dry sandpaper where necessary. I only left them in the vinegar for about an 1 hour, possibly not even that long.
If you are unhappy with the rust and want to keep the price to a minimum then rattle can the thing.
Fifty
Registered
I don't think rust on anything makes anyone happy (except for the rust). Depending on how things shine up I'll probably go this route.If you are unhappy with the rust and want to keep the price to a minimum then rattle can the thing.

