What's new
Pinball info

Register a free account today to become a member! Once signed in, you'll be able to participate on this site by adding your own topics and posts, as well as connect with other members through your own private inbox!

Mini Shop Jobs - SURFER, CFTBL, Other

Fifty

Registered
Joined
Jul 29, 2020
Messages
227
Location
New Brunswick
Alias
Timmy B
So I have a very rough Surfer. I bought it for $400CAD at least a couple years ago and it was a mess. It didn't work at all except for GI, and even then only half of the GI was working. I'm pretty sure I overpaid, but being the genius I am, I decided this would be my first EM. I have never worked on an EM before. Parts were missing, parts were seized, parts were burned out. I put in an order and got to work on what I could while waiting for delivery.

The game wouldn't start. Then I managed to get it started but it was intermittent. Any normal person would have given up on it, but it was my only pin. A year passed, missing parts were replaced with help of some very generous Pinsiders. I learned a **** ton that year. I probably learned more in that year than I did in 2 years of college. Anyway, long story... the pin started reliably every time. Scoring works, everything is counting and it plays like new. It still looks like hot garbage, but well... there it is.

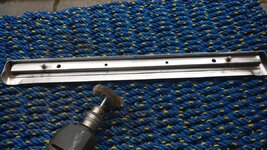
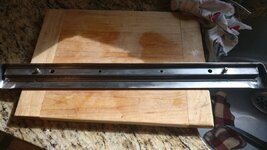
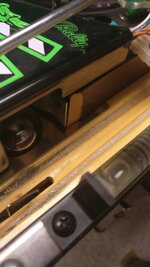
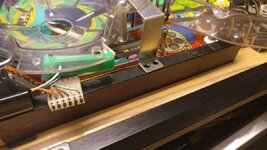
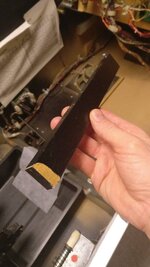
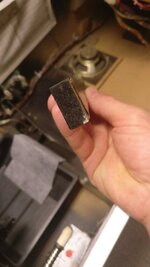
Since I'm under the hood of this pin all the time, I have grown sick of seeing the disgusting lockbar and the lockbar receiver. The shooter plunger was pretty beat up, so I decided to replace it. I went to install the new one, but I couldn't stand to look at the lockbar components any longer. Out they came. Both were crud covered pieces of uck and rust. I don't have any before pics of the lockbar receiver, but it was worse than the lockbar. Here are some before shots and a few afters.
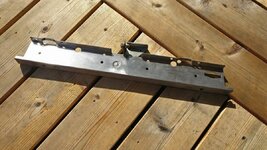
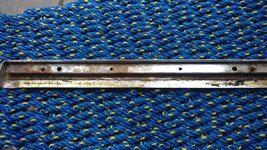
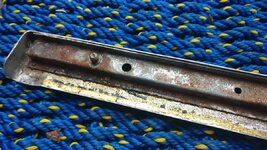
lockbarrecv.jpg lockbar.jpg lockbar2.jpg lock3.jpg lock4.jpg

The first photo is the lockbar receiver after the initial pass with the brass wire brush

Second photo is the before shot of the lockbar. I started cleaning one section already.

Third is a close up of the lockbar crud

Fouth is after the initial pass with the brass wire brush

Last photo is the finished lockbar. It's not perfect by any means, but I'm not looking for perfection just clean.
 
Last edited:
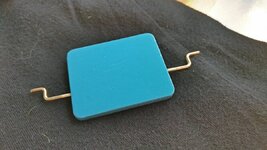
Another day on Surfer, but this time I wasn't under the hood. Since the game is playing great I decided to finally take the generic spinner off the game. I'm not sure where this spinner even came from or how it ended up on the game. It has a red arrow on one side and a blue arrow on the other. This leads me to believe it came off a Stern Stars.

spinner.jpg

Or I guess I should say it "had" a red arrow on one side and a blue arrow on the other. My Dremel made quick work of the paint and in no time at all I was down to bare metal. A quick cleaning, and I began spray painting. I just happened to have a small can of blue spray paint that I had been holding onto for almost 30 years. I gave it a quick rattle and test spray. Good enough for me. Remember, this isn't a restoration. I just want the pin to look as nice as possible. First of 3 coats...

spinner2.jpg

Sanded it down with 800 grade, 2nd coat, sanded again, 3rd coat. It came out alright, still some imperfections but good enough for me.

spinner 3.jpg

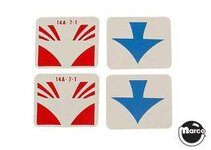
I ordered the reproduction decals from PBR over a year ago and never looked at them. I finally took them out of the sealed plastic bag and they were a lot nicer than I thought. I had originally thought they were laminated and would need a clearcoat over them after they were applied, but these things were already shiny, and laminated. I'm not sure what the technical term is but they were glossy and new and thick. The corners were already round and everything. When I went to apply them to the spinner they were the exact size. They fit perfectly! No trimming. So much for all my spray painting and sanding. Well, at least I know it's the same colour blue under there!

spinner4.jpg

I have the nylon spinner washers in my parts order as well. I haven't found them yet so it'll have to stay this way for now. I wanted to see it installed!
 
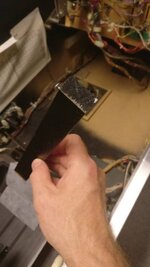
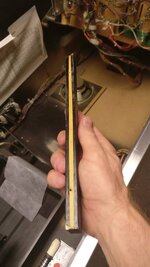
Started working on my Creech tonight. One of the siderails was missing the black wood veneer wrap. I didn't notice it at first but once I did it bugged the hell out of me.

So I bought some replacement wrap. It cost me $12CAD so under $7GBP. This gave me a 40cm x 200cm roll. I only needed maybe 10cm x 30cm but this was the smallest roll they had;
https://www.amazon.ca/gp/product/B00755CBY6/ref=ppx_yo_dt_b_asin_title_o00_s00?ie=UTF8&psc=1

Here is the damage. It was right by the ball eject into the plunger lane.
side1.jpg

First step was to get the screws out of the top
side2.jpg

Then the bottom. I had to move one of the maintenance arms out of the way. Surprisingly, there were only two screws holding this piece in from under the PF.
side3.jpg side4.jpg

Here's the piece removed from the playfield.
side5.jpg side6.jpg side7.jpg side8.jpg

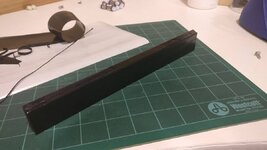
Now to remove the old wrap and put on the new. The white stuff is the old adhesive. It was pretty tough to remove. I tried using a heatgun, but the best method ended up being a sharp knife at a good angle and some 120 grit sandpaper.
side9.jpg side10.jpg

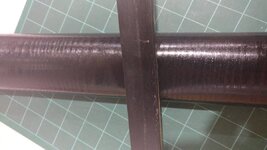
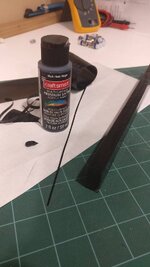
Here's it is wrapped up in the new wood veneer. I haven't smoothed it out quit yet. Oh, and I made sure to follow the direction of the fake grain on the old wrap. Since I have it out of the pin I might as well repaint the ends using some craft paint I keep for touch-ups.

side11.jpg side12.jpg

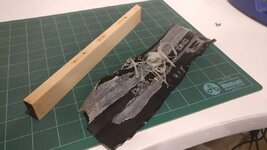
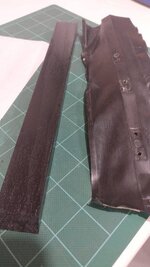
Here's the finished product with the old wrap beside it. The new stuff is much more shiny. I am guessing 30 years of age will do that. I was never going to find an exact match. Hopefully it won't stick out like a sore thumb once install back in the pin.
side13.jpg

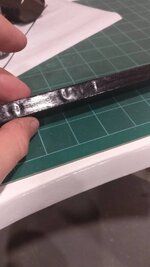
But Fifty, how are you going to know where to put the screws in? Ha ha! I thought the same thing. I figured it would be a pain in the ass, but the new wood veneer is not very thick (same as the old stuff) so it actually reveals the indentations underneath. I'm able to see where the holes are just from the compression I put on it. I'll pierce the veneer with a precision pick so that the screws don't bite and twist it up.
side14.jpg

I'll post a pic of it back in the machine tomorrow. I want to let the paint dry overnight and give the adhesive some time to bond.
 
Last edited:
Great job Tim. I did consider changing the wrap on my rails too but in the end I just gave them a bit of a spruce up (they weren't missing chunks out of them like yours though!)

I've gotta say though the rest of the machine looks really nice, especially the under playfield mechs.
 
Great job Tim. I did consider changing the wrap on my rails too but in the end I just gave them a bit of a spruce up (they weren't missing chunks out of them like yours though!)

I've gotta say though the rest of the machine looks really nice, especially the under playfield mechs.
Yeah, she's in pretty good shape overall. Some areas bother me, but it's nothing I can't fix. Before re-installing the rail I think I'm going to try to sand out the plunger lane and paint some clear on it. That bothers me quite a bit and I'd hate to re-install the rail only to accidentally hit it with the sandpaper.

looking good Tim, your mod is departing tomorrow so you better get cracking....
Exciting stuff! I can't wait!
 
As promised here is the side rail re-installed. It looks great and you don't notice that it is shinier than the other rails at all.
creech1.jpg

When I went to re-install I started putting my whirlpool bowl back in place. It dawned on me that all the screws are different in each area of the bowl. Does anyone have a photo of what theirs looks like that they could share? I'm pretty sure the bolt holding down the habit trail to the bowl is not correct. It works, but it doesn't look right.

c2.jpg c3.jpg c4.jpg
 
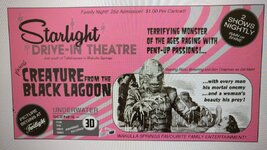
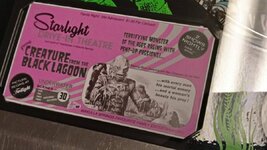
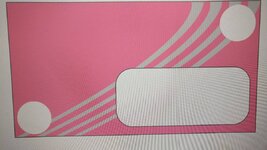
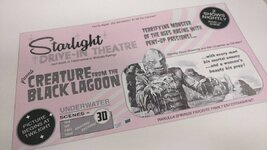
I've been playing around in Adobe Illustrator. I am not familiar with the software, but much of it isn't new to me. I use to use a program called ColdFusion or Fusion (I think they were bought by Adobe or AutoCad) and AI seems pretty similar to it with all it's layering and tools. Anyway, I have searched endlessly for apron cards for my Creature but none of the ones out there appealed to me much. Most of them are just large images of Gillman with "CREATURE" littered over top of them. I am usually a big fan of PinballCards.com but the apron cards for Creature I found too dark (in theme and colour), and the images are too muddled. It's hard to see exactly what is there. I even had them professionally printed onto cardstock and the black was just too much.

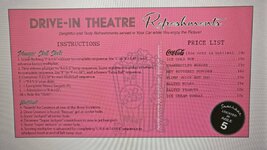
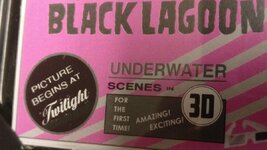
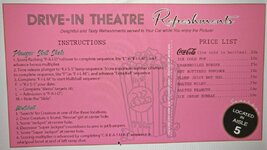
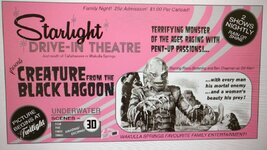
I wanted some fun apron cards that fit better with the overall drive-in theme of Creature. Inspired by drive-in adverts, drive-in signage, and newspaper ads I started creating my first set of cards. I went through many revisions, but I think I have finally settled on the ones below. I have sent them off to the printers to get them printed onto heavy cardstock. Hopefully I can post a photo of them in the pin by tomorrow. For now, here is a shot of v5 and some of the older versions in the pin.

Left Hand Side Card
c1.jpg

Right Hand Side Card
c2.jpg

Here are some photos of older versions. I went through many different "hotness" levels of pink. I was trying to match the pink Cadillac in the game.

c3.jpg

c4.jpg

c5.jpg

I'm open to comments and suggestions. I may tweak the design more after I see how it turned out from the printing shop.
 
Nice. I like those cards and you have tapped into the aged beauty of this game. Would you share the image?
 
Nice. I like those cards and you have tapped into the aged beauty of this game. Would you share the image?
Thanks @Calimori I don't mine sharing them with you at all, the more the merrier. The idea was to share them. Just let me pick-up the heavy cardstock ones I have on order and give them a final check. I'm worried the hot pink will make the text difficult to read. On my laser printer it's a bit dirty but legible. I'm hoping a commercial grade printer will capture it better and have crisp black lines. I should be picking them up tonight.
 
awesome cards mate and the final rules ones came out SWEEEET, real nice work
Thanks! I couldn't have done it without your help. Did you notice the RHS card with the revamped font? I took your suggestion and changed Theatre to the same font as Drive-In and Refreshment now has the script type font.
 
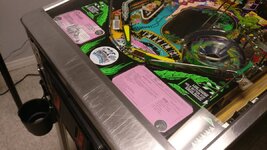
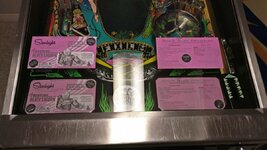
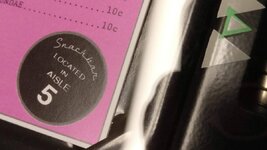
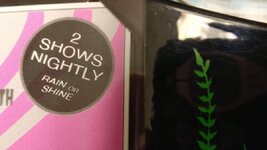
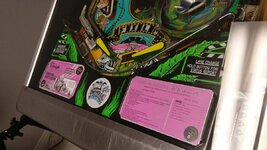
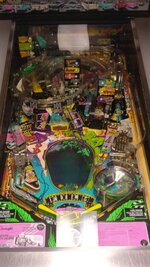
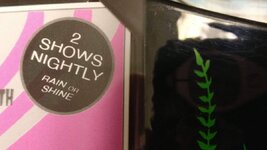
Installed my apron cards over the weekend. There is a bit of bleed on the buttons. The RAIN or SHINE, TWILIGHT, and AISLE5 buttons that is. I am also seeing some ghosting on the RAIN or SHINE button. I am not sure if it is an opacity issue or what is going on there. It is very faint, but enough to bother me. Other than that, I am VERY happy with the look of these cards. The pink is perfect in my eyes. They look great in game! @Calimori let me tweak one final time and then I'll send it to you.

I really need to get that fluorescent light taken down.

c2.jpgc3.jpgc4.jpg

c5.jpgc1.jpg

c6.jpg
 
They look fantastic, really go well with the hot pink playfield.
Don’t tweak them for too long. :)
 
I think the problem has to do with the underlying layers. If you look closely at this image you can see the swipe of the claws (the grey lines) travelling through the "2".

c1.jpg

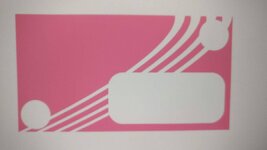
The black button on the top layer is at 100% opacity so I'm not really sure why the underlying layers are showing through. Rather than understand it, I went the route of my old screen printing days and just separated the colour layers completely. So I cut out the pink background and the claw swipe like this;

c2.jpg c3.jpg

This should eliminate the funky see through bits that were happening with the commercial grade printer. Oh, I increased the font size on the buttons as well. For the TWILIGHT button I intentionally let the font break out of the inner circle and increased the font size so that the sparkles were more easily seen. For the Snackbar button I moved the word Snackbar to the outside and changed the colour to white. I thought it gave it a bit more pop. The font was increased on the RAIN OR SHINE button as well to avoid the black bleeding.

c4.jpg c5.jpg

Does anyone remember what the snackbar callouts are? Is there a pretzel one? I played last night but only got ICE COLD POP, CHARBROILED BURGER, and HOT BUTTERED POPCORN. I think there is a fourth one. If it is for the pretzel then I want to add it to the PRICE LIST on the apron card like I did the others. I remember it being PLUMP JUICY HOT DOG which is why this one is on the menu already. Are there 4 or 5 callouts for the snackbar?
 
Does anyone remember what the snackbar callouts are? Is there a pretzel one? I played last night but only got ICE COLD POP, CHARBROILED BURGER, and HOT BUTTERED POPCORN. I think there is a fourth one. If it is for the pretzel then I want to add it to the PRICE LIST on the apron card like I did the others. I remember it being PLUMP JUICY HOT DOG which is why this one is on the menu already. Are there 4 or 5 callouts for the snackbar?

You are right, it's pretzel. The five snackbar food awards are: burger, hotdog, pretzel, popcorn and drink ("ice cold pop").
 
You are right, it's pretzel. The five snackbar food awards are: burger, hotdog, pretzel, popcorn and drink ("ice cold pop").
Hey @slippifishi ! Good to see you here! I still haven't had time to give the PIN2DMD Editor a try!

Pretzel. I thought I remembered that one. I don't remember the exact callout. Warm pretzel? I don't know if I can trigger the Snackbar callouts through the service menu. It might be one of those hidden sounds that can't be tested, but I'll give it a try.
 
I believe you bash the man who was perving on you and your girl in the car.
The more we highlight, the weirder this game must sound to outsiders.
 
There is both the ability to beat up the guy watching the kiss with a mortal kombat style decapitation fatality, and you can also strangle the snack bar guy - "choking fatality" it's called on the display. The snack bar will explode too under the right conditions!

1599635167345.png

1599635189396.png
 
You can choke the snackbar vendor every time if you want. You just have to be fast enough on the flipper buttons. Same with the exploding snackbar. My personal fav is the FATALITY a.k.a Mortal Kombat for the peeping tom character. Midway developed Mortal Kombat in the 90's and the fun carried over to CFTBL.

I’m sure it’s “here’s your warm pretzel”, and isn’t that the callout where you can bash the flippers and strangle the waiter guy?
Warm pretzel sounds right. I'll add that to the menu under the PRICE LIST.
 
There is a Mortal Kombat cheat code on Theatre of Magic if I remember rightly, some sort of flipper combo brings up a cheat code for the video game on the dmd.
 
Back
Top Bottom