What's new
Pinball info

Register a free account today to become a member! Once signed in, you'll be able to participate on this site by adding your own topics and posts, as well as connect with other members through your own private inbox!

In Progress Indiana Jones: The Pinball Adventure Begins - Picture Heavy

Calimori

Staff member
Joined
Mar 15, 2012
Messages
4,235
Location
Luton, UK
Alias
Calimori
I know there have been some amazing examples of fix-ups and shop logs for IJ but I will post mine here to share the adventure with others.


This IJ comes via Replicas but was apparently in a French Cafe for a good number of years. Replicas was going to make this one special but time and space has meant he has passed on the project to me.
Replicas has included some of the parts he has collected to make this one special and so this is going to be my biggest project yet. I have done full strip downs on the play field on my two other machines but this is going to go to another level.
The play field will be stripped, mylar removed, treasure cove polished, all metal parts tumbled, replaced or re-plated, new screws, posts and rubbers. Anything that is not in serviceable condition will be replaced. The cabinet will be rubbed down, repaired and new decals fitted. The lockdown and side bars might be replaced with gold/bronze coated parts depending on the future wife's taste as this one is being done for her.


It has some years of grime but is in very good condition considering it's life, it has honest plastics and original parts which is where I like to start a project. The plan is to spend the next few weeks learning and fixing the machine so it fully works (not long until my wedding so I need a distraction).
I have found some interesting bodges and fixes so far and noted some issues so it is time to start the Pinball Adventure.


With a blue sky overhead (which is caused by the light coming through the plastic roof of Martin The Delivery Man's Van), the machine arrives
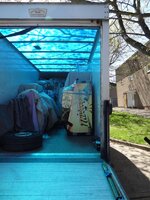

DSC03690_zps2fc19856-1.jpg


The machine was well wrapped for transportation and quickly dropped into the pinball loading area in the hall way
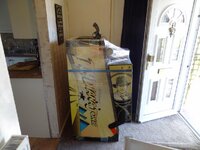

DSC03691_zpsefcbcacb-1.jpg


The kitchen door is too narrow so some machine needs to occur to get a machine into the man cave. I haven't finished decorating the door space until I work out how make it wider without damaging the kitchen walls.
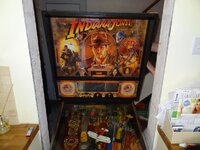

DSC03693_zps0d9528ac-1.jpg


The rule is I can have my pinballs in the man cave and as long as it doesn't effect the kitchen the Lady of the house won't complain. But it wasn't really fitting no matter how hard I tried. The gun launch is very dangerous to male genitals and the freezer door didn't open.
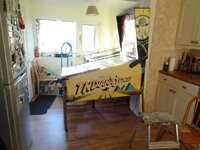

DSC03695_zpse076e62e-1.jpg


CoolDan came over for some PCB work and we stumbled on a better way to set it up, and as I am claiming this is her machine, "my pinballs" are not in the kitchen part but hers are. Problem solved.
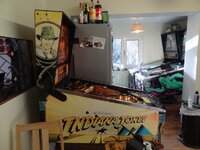

DSC03709_zps7873ceb1-1.jpg


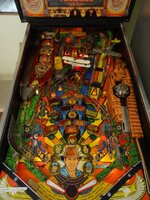
A shot of the play field for people to let me know what is missing or parts they have to sell

DSC03711_zps354f782d-1.jpg


The play has seen better days and have clearly been repair at some point but is now being held together by dirt. If anyone has a minty one for sale let me know

DSC03705_zpsef4eac76-1.jpg


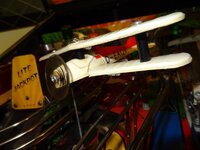
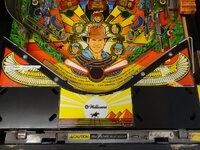
The apron is in good condition but the decals are not, Replicas sent me some so this is an easy thing to fix

DSC03713_zps37005145-1.jpg


The play field has mylar over the main areas that has worn through over the years leaving some interesting cracks and marks but what looks like a good play field beneath


DSC03720_zps0e9769a4-1.jpg


Cracked mylar and a broken slingshot plastic


DSC03721_zps854ebba2-1.jpg


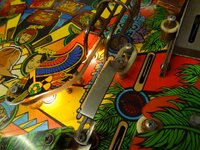
Plastics are original but have scratches, metal is dirty and bolts and screws have fur on them. Cleaning them is going to be a pleasure

DSC03718_zps411e4d0c-1.jpg


The centre targets are broken and I will be needing to buy some of them. The plastic behind is a mess with tape but Replicas has supplied me that.
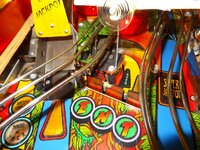

DSC03714_zpsc5d30a6c-1.jpg


There is a bracket on the right but nothing on it?? I wonder what went there.
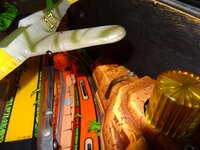

DSC03716_zps081470db-1.jpg


The top play field is in perfect condition, mainly because the ball never gets in there due to a solenoid problem
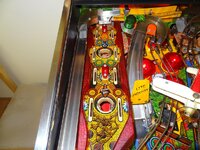

DSC03719_zps1e03c821-1.jpg


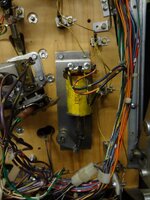
The solenoid for the top lockup post was holding the plunger/post when energised and never let go. The coil appears to have seen better days and has selotape holding it together. You can see the windings and it doesn't look safe.
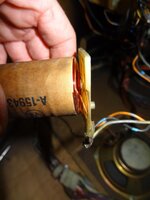

DSC03708_zps22ce2965-1.jpg

The question is, is it likely just the coil shorting or is there also a problem with the transistors?
Sadly I don't have another A-15943 coil to quickly test it and therefore can't be sure. The bad coil has now been removed so we can safely play the game with the top play field feature not coming into play.

There is a line out on the DMD and it appears to have already had the legs replaced with wire so I shall see if I can fix it or get a replacement at some point.

The wanted/parts list so far:


  • A-15943 coil
  • Bi-plane
  • Drop targets
  • NOS slingshot plastics
  • All new star posts
  • Credit Button
  • Buy-In Button

I will add to this list the issues and fixes as I do them, just to capture the experience for future generations. :)
 
Does the coil energise / lock on when game is switched on? If so then it's prob the driver transistor that has gone down ,but also check for stuck switches and the pre driver circuit for that coil.
 
A tip re: the cracked mylar is to remove using the hairdryer method rather than freeze spray. I had the same sort of thing on my FT (although a lot more cracked) and tried with freeze spray to start but it just came up in tiny little pieces and would have taken forever. Seemed to come up slightly easier using the hairdryer but expect it to take some time either way.

Re: that bracket on the idol ruins plastic, I don't think anything goes there and you'll probably find that it's been put on to hold the ruin plastic in place. Mine just has the screw to hold the plastic in place but if yours is cracked around the screw then perhaps that was added as a way to keep it in place?
 
I have some slingshot plastics you can have Gratis.
If you want them sending out via post then PM me your addy, if you can wait till we next see each other then thats fine.
Looking forward to watching this take shape.
 
Does the coil energise / lock on when game is switched on? If so then it's prob the driver transistor that has gone down ,but also check for stuck switches and the pre driver circuit for that coil.

It doesn't pull the plunger down but I can feel it is energises, when a switch makes the plunger drop, then it stays locked on so possibly the lock transistor has gone. I will replace both. I will need to learn what a pre driver circuit is and will check that too.


A tip re: the cracked mylar is to remove using the hairdryer method rather than freeze spray. I had the same sort of thing on my FT (although a lot more cracked) and tried with freeze spray to start but it just came up in tiny little pieces and would have taken forever. Seemed to come up slightly easier using the hairdryer but expect it to take some time either way.
Replicas put in a full can of freeze spray so I will try doing both methods and report back. I guess the hair dryer approach is to heat it up and slowly peal back the same as the freeze spray? Do I apply the heat to the top side of the mylar or the table side?


Re: that bracket on the idol ruins plastic, I don't think anything goes there and you'll probably find that it's been put on to hold the ruin plastic in place. Mine just has the screw to hold the plastic in place but if yours is cracked around the screw then perhaps that was added as a way to keep it in place?
The ruin plastic bolt hole is slightly chipped but a simple washer will hold it in place, glad to hear I am not missing a toy or something.


I have some slingshot plastics you can have Gratis.
If you want them sending out via post then PM me your addy, if you can wait till we next see each other then thats fine.
Looking forward to watching this take shape.
You are too kind, I will be in touch. Thank you again for all the bits you supplied which will make this project a lot easier. Weronika is playing this every day so will be a bit annoyed when I start taking it to pieces.
 
I can feel the coil buzzing but the plunger isn't pulled down. If I push the plunger you can feel it buzzing in the coil but it does slowly come back. Then it appears to be activated, a switch or test and then the "hold" element of the coil seems to lock it and never wants to release it.
There are some assumptions being made by me here. :wackoz:
 
Yeah check the coil resistance and its diode and the driver transistor for that coil,also the coil sleeve and the complete mechanism.
 
i had a play on this coil with Geoff. it seemed to me that something was sticking - i think i suggested we look at the sleeve and the spring .... but then we got distracted by something else :)
 
Yep,check the whole thing if the coil is looking on then it will over heat and begin to melt the sleeve thus making it bind to the plunger,also check your coil circuit fuse rating or it will over heat and burn all sorts out:(
 
I guess the hair dryer approach is to heat it up and slowly peal back the same as the freeze spray? Do I apply the heat to the top side of the mylar or the table side?

Thats right mate, I generally kept the heat on the top side of the mylar just ahead of where I was peeling. If there was a particularly stubborn bit then I'd give it some heat on the table side to loosen it off. The usual rules of take it nice and easy and don't apply too much force when peeling apply :thumb:
 
Wow! Looks like another mint IJ is in the making?

Good luck with the rebuild, I'm looking forward to the updates!
 
Steve, I might come over and view your project as what I have seen of your work so far has impressed me. I might bring my cab for you to play with. ;)
 
Sgt GrizZ supplied a spare TIP and the reassurance I needed on testing the old one. Sure enough, the lock TIP was shorting on one leg. I can post pictures but you don't need them, I managed to get some time and fit it today and the new coil because the old one felt too fragile.

Dirty Face Dave was right, good man and thanks for the advice, all the flipper fuses were 4A SB not 3A SB as the manual states. I swapped them whilst the board was out and now "The Path to Adventure" is working.
Now to swap some bulbs so it makes some sense on how to plot your path through the maze. A box of more bits will be arriving next week before the strip down but this is going to have to wait for the wedding to be over in two weeks time. Or will it. ;)

Yes, it probably will have to wait. :(
 
Good to know it was a easy fix.
Thought your Mrs was wanting you to get the POA fully working.
Your not telling me you are going to let a little thing like a wedding get in the way of you fixing the POA?
Only Joking.
 
Wedding done, post wedding stuff complete. Honeymoon in a month so I am going to sort the next round of things. Issues to be addressed before full strip down:
  1. The right ramp diverter spends most of it's life sending the ball to the Path to Adventure. I only realised this was a glitch when the right ramp switch started to complain. A switch test showed the switch was fine. The diverter solenoid works and holds too, then I realised it is missing a spring to return the plunger to the open position, as I have tested this with the playfield at an angle it always seemed to work but when the game is playing gravity is not on it's side. The manual doesn't show a spring either but I can't see how it would work without one.
    If an IJ owner can confirm theirs has a spring on the plunger, like for a slingshot/jet bumper, I would appreciate it.
  2. There are a lot of soldered wires onto pins with no connectors. I am going to have to fix most of the PCB cards under the playfields. There appears to also be two sizes, if there is any further advice or web sites on what sizes to order I would appreciate it.
  3. MUFCMUFC is selling me a opto card to replace the one for the ramps as this has been hacked and might be the cause of a weak opto.
  4. The DMD has been had several lines repaired and it currently has one vertical lines out at each end. As the legs have been cut off and wires soldered in place, I might just give in on it as it will always be bodged.
Other than that, it appears to be playing well, only missing a few plastics that can be bought. The German plane is also close to snapping in half but I expect to be able to fix that. Looking forward to getting stuck in now. :)
 
Really interesting read Calimori. And it's nice to see just how many Pins you can squeeze into a relatively tight space - maybe my mission to squeeze another 1 or 2 into our back room is realistic after all. My idea is that if I can gather one or two together in the next year or two then perhaps it gives me some good arguments when we come to move. ;)
 
  1. The right ramp diverter spends most of it's life sending the ball to the Path to Adventure. I only realised this was a glitch when the right ramp switch started to complain. A switch test showed the switch was fine. The diverter solenoid works and holds too, then I realised it is missing a spring to return the plunger to the open position, as I have tested this with the playfield at an angle it always seemed to work but when the game is playing gravity is not on it's side. The manual doesn't show a spring either but I can't see how it would work without one.
    If an IJ owner can confirm theirs has a spring on the plunger, like for a slingshot/jet bumper, I would appreciate it.

1. No IJ here, but I'd be 99.99% sure there should be a spring fitted.

2. http://easypinballpro.com/connect/
 
I have found pictures with a spring on the plunger, so I am going to do the same, just need a spring.

Thanks for the link, hopefully I can start to learn the right connectors, where do people buy theirs from? RS do sell them but they offer so many options and some I bought were wrong. :oops:
 
Replicas had sent me a box of spare parts which contained springs, bulb holders, IDC connectors and loads of other things to help me on my adventure.
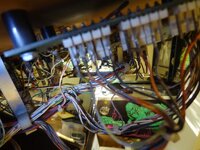
The machine had a lot of wires soldered to pins which makes removing the cards interesting, I had a picture in focus but I prefer this one with Creech getting a look in:

i263.photobucket.com_albums_ii125_calimori_pinball_DSC03815_zps52fc7a78.jpg

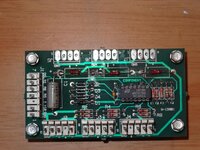
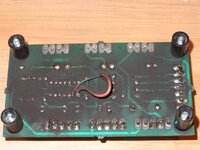
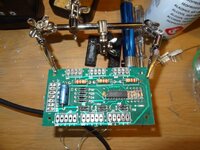
You can also just see that this card has a track repair on the under side which required further investigation. I used the spare IDC connectors sent by Replicas and put the wires back into connectors. The card then came out and showed it's full glory.

i263.photobucket.com_albums_ii125_calimori_pinball_DSC03847_zps2b05590d.jpg

i263.photobucket.com_albums_ii125_calimori_pinball_DSC03849_zpsec13e96b.jpg

The wires to repair the tracks was working but the state of the board meant I was never going to be happy with it.

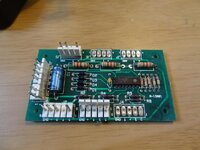
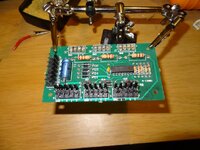
The board from MUFCMUFC arrived and it was slightly different. It didn't have the same holes for the stand off posts and it was using J5 and not J4. If I was going to use it I needed to fit a five pin header connector to J4 and whilst doing that I might as well replace J2 as it had cracked plastic. RS Components only had black header pins so why not replace them all.

i263.photobucket.com_albums_ii125_calimori_pinball_DSC03836_zpscf2f3cc2.jpg

i263.photobucket.com_albums_ii125_calimori_pinball_DSC03841_zps6c4ffa32.jpg

i263.photobucket.com_albums_ii125_calimori_pinball_DSC03845_zpsae0dd283.jpg

Simple process to do it, heat up the solder underneath, use a solder sucker to remove as much as possible. Heat and the header pin will start to move, gently pull them out with pliers as they are hot.
There was signs of possible corrosion so I washed the board in a vinegar solution, soaked it in foaming spray and then cleaned it up with IPA. I checked all the components on the board and they appears to be working. I put it in and the optos all seemed to work so the LM339 chip is safe for now. The board didn't have the right size holes for the black stand off legs but had come with some PCB stand off clips so I used them.

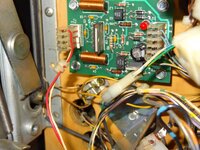
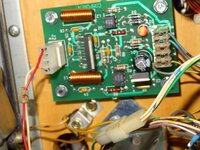
Whilst checking out connectors I had previously spotted this connector which is wired up the wrong way round, breaking the clip on the header. It is for the motor for the Path Of Adventure mini table and putting it the other way round means the motor doesn't work.

i263.photobucket.com_albums_ii125_calimori_pinball_DSC03851_zpsa367a1b8.jpg

Time to do some molex crimping. Again I removed the broken header and replaced it with a new one. Crimped the wires and fitted a new connector though I do say it looks wrong compared the IDC connector at J1.

i263.photobucket.com_albums_ii125_calimori_pinball_DSC03852_zps866b2f3f.jpg

The trough emitter board had soldered pins so a new molex connector went onto that. Plus I fitted some new 270 Ohm, 2w resistors where they were broken.
http://www.amazon.co.uk/gp/product/B00AKVBASK/ref=oh_details_o07_s00_i00?ie=UTF8&psc=1

The centre hole opto appeared to be not be working and couldn't be detected at the distance required across the under ramp. If I waved the emitter and receiver close to each other it would work. The receiver would detect torch light (none LED, incandescent) at a distance so that was ruled out as being the issue. These little opto boards are cheap to replace but I wanted to try out a few things. The board had already showed signs of repair and I suspect the wrong wave length emitter was fitted. I used a new 5mm, 880NM IR emitter bought off ebay:
http://www.ebay.co.uk/itm/390461031622?ssPageName=STRK:MEWNX:IT&_trksid=p3984.m1497.l2649
That worked and at that price, they are handy to have spare to keep a game running. I know there is a debate about repair or replace when something is freely available but I like to know I can get my games running again quickly plus enjoy this stuff.

Replicas box of stuff had a few springs for coils and a quick spring fitting had the right ramp feeding the ball to the return under normal situations and to the POA when running. Here is a picture of the coil without a return spring, you will have to imagine it with a return spring on the plunger and it is not that much more interesting that without.

i263.photobucket.com_albums_ii125_calimori_pinball_DSC03803_zpsea316119.jpg

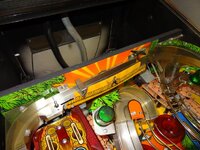
Now a few pictures of the so called "missing plastic" that was apparently removed from production due to costs cutting and replaced with a sticker. The plastic can be bought easily, as can the lighting boards that provide a very simple glow. Having the proper hole for the light is something that I would have thought most operators or home owners would not bother with but it would seem a lot of owners have done this or it wasn't that rare as there are more machines out there with it than we IPDB thought.

i263.photobucket.com_albums_ii125_calimori_pinball_DSC03830_zps91664e0c.jpg
Plastic not sticker.

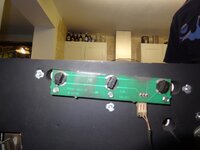
i263.photobucket.com_albums_ii125_calimori_pinball_DSC03829_zps5cac75c6.jpg
The light board and routed hole in the back board.

There is one more board, for the coin mechanism, to have a connector fitted and then everything can be taken apart for the strip down and clean up. The DMD still needs replacing or repairing so if anyone has a good one let me know.

The machine now has no switch errors, so no credit dot. These games were made to keep working when switches failed and they adapt to guess where the ball is. When all the switches work properly, you can notice a change in how the awards and modes work, you get a better light and sound show too.

Thanks to the guys for the parts mentioned and also to Wizcat for his "Repinning-Molex-Connector" thread which I keep coming back to for part numbers and sizes. A great little thread for anyone wishing to repair their connectors.
 
When you gonna finish the tiling, as you're a couple of cut tiles short there... ;)
 
Oh no i saw the beer - i was most distraught that it was up on the cupboard and hadn't been drunk.... That was when i noticed the tiles........ ;)
 
I would have taken the original J2 connector off the old board and put it on the new board rather than replacing all the connectors on new board... :confused: :D
 
The logic was that if I didn't get the new board working quickly, I still had a fully working old board to play with. I need to keep the Wife on side and she plays IJ most days.
 
Re. the gun being dangerous to genitals; I remember that a site insisted on the gun being replaced by a simple flat button (as on Dr. Who), for exactly that reason. I've seen Fish Tales suffer the same fate as well, ruining the video mode.
 
Back
Top Bottom