Pinball info
You are using an out of date browser. It may not display this or other websites correctly.
You should upgrade or use an alternative browser.
You should upgrade or use an alternative browser.
Complete Hook - The Restoration You've Been Waiting For!
- Thread starter PeteB
- Start date
Then put some red film in the speaker panel window.Thats awesome i want a red DMD
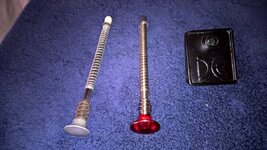
I dug this photo out of the old vs new (from 1stoppinball) on mine, the pic is deceiving I think they're the same length. The tip sits just behind the apron cover - it works fine but now you've got me wondering if it's shortAnyone else have a problem with short shooter rods on Hook?
PS really like the coloured ties on the chase light, I can see other colours working well too, that must be the cheapest bling out

I dug this photo out of the old vs new (from 1stoppinball) on mine, the pic is deceiving I think they're the same length. The tip sits just behind the apron cover - it works fine but now you've got me wondering if it's short
It looks to me like Pete's outer spring is too long (hence the tip being too short) when I compare the springs in your photo with his...
I did wonder the same thing myself, but it's a brand new standard spring so shouldn't be the case. The tip is sitting so far back that on a full powered plunge the ball doesn't even make it to the first hole on the ramp
I'm going to try a different outer spring but I think the problem is that I bought the wrong shooter rod. I took a risk on the one 1stoppinball stocks because it had the right red knob, but actually the part numbers are completely different. Hook uses a 530-5023-00 rod (530-5023-02 is the same) and so far I've only found Best Of Pinball who stock them.
Mine (and the outer spring) was from 1Stop Mel too and it can easily shoot the ball over the 3 skill shot holes and back round the Clock ramp. I can remove it and post some measurements if that'll help you check they're the same.
Edit: I note on their site that the DE outer spring is shorter than standard at 0.75".
Edit: I note on their site that the DE outer spring is shorter than standard at 0.75".
Last edited:
Think we've cracked it.
The new outer springs I have in stock are indeed 266-5010-00 as I've check my orders, but they are longer than what's supposed to be there. Perhaps a manufacturing mistake?
Gonna pop a new outer spring on and hopefully this will solve it.
The new outer springs I have in stock are indeed 266-5010-00 as I've check my orders, but they are longer than what's supposed to be there. Perhaps a manufacturing mistake?
Gonna pop a new outer spring on and hopefully this will solve it.
i had a similar problem recently when i replaced my plunger springs - the shooter tip was hardly making any contact with the ball, and in the end the only thing i could identify as the culprit was a long outer spring. not having a spare, and the original crushed and tossed, i ended up taking some wire cutters to cut a few loops off the (super stiff) outer spring. fixed my problem.
It's not actually mine, it's a game I'm restoring for a client but it hasn't arrived yet. Should be here in the next week or two hopefully, and I will do a shop log on it with lots of photos.
If your DMD is dead, there are now LED replacements available for these Data East games
If your DMD is dead, there are now LED replacements available for these Data East games
I'm with cooldan this atrocity must be undone  I hope you've got twinkly bulbs though behind Tinkerbell cos that looks good.
Can you tell us what flame tool you use to polish the ramps? On this machine the crystal clear ramps really bring to life the back of the playfield.
Can you tell us what flame tool you use to polish the ramps? On this machine the crystal clear ramps really bring to life the back of the playfield.
Exactly this haha! Yeah I'm gonna go back to all white. I know people have different tastes but I think either all cold white for a modern look seems best, or if you're into the incandescent look then all warm white. Both look clean and smart.
I'm with cooldan this atrocity must be undoneI hope you've got twinkly bulbs though behind Tinkerbell cos that looks good.
Can you tell us what flame tool you use to polish the ramps? On this machine the crystal clear ramps really bring to life the back of the playfield.
Yep, I've got the twinkle bulbs under Tinkerbell now. Looks great. I'll shoot a video of the game when it's done.
For flame polishing, I've tried a few different torches but what seems to work best, and safest is a Creme Brulee torch (chefs torch). This is the one I use, it was £10 off the bay:
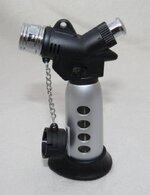
And refillable lighter gas for a couple of quid:

Some things I've learned about flame polishing:
- Make sure the plastics/ramps are washed and super clean, as any remaining dirt will be melted into the surface permanently.
- Always keep the flame moving, if you stay in one spot then little bubbles will form and it's ruined. There's no coming back from that.
- Do 1 pass and let it cool for 5 minutes. If the ramp/plastic is complex then do it in stages. What you don't want is for it to bend out of shape.
- 2 - 3 passes is usually enough to make them crystal clear.
- Do both sides for extra awesomeness, but keep the flame away from decals or reverse screen print.
- Wax the ramp after for a silky smooth finish. For complex parts you can't reach when buffing, use Pledge instead.
- Practice on old scrap ramps first to get the hang of it.
I take my cap off to you sir ,a lot of dedication and excellent work 

Thanks for the advice on flame polishing, I've ordered that precise one from here if others are interested
http://www.ebay.co.uk/itm/251701168638
Will get some practice and report back.
http://www.ebay.co.uk/itm/251701168638
Will get some practice and report back.
Had to do that to my hook as well the original ones were trashed. Did a flipper rebuild kit with new flipper switches as well
That's exactly what I've done, everything new including new flipper bats and super bands. Old bats had to go as they were white SEGA ones instead of yellow DE ones. Some might think this is overly fussy but I actually discovered upon removing them that they were all cracked anyway.
Some not very exciting things showed up in the mail today:
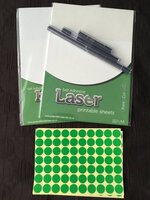
Chip sockets for some electrical tweaks, I like to socket troublesome chips. A4 full sheet laser labels both in gloss and matt so I can recreate all the Data East cabinet labels. And most exciting of all, some green dots. Because DE games are always full of these little green dots lol!

Chip sockets for some electrical tweaks, I like to socket troublesome chips. A4 full sheet laser labels both in gloss and matt so I can recreate all the Data East cabinet labels. And most exciting of all, some green dots. Because DE games are always full of these little green dots lol!
Tonight I've printed off some nice custom Hook cards which were then laminated. They look nice, and I usually do these custom cards but I'm starting to thing they're a bit OTT and its not clear to see the instructions etc:

So I've done some standard white cards cards as well. I have to be honest, I think I actually like the look of white cards better. What do you think?
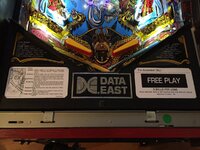
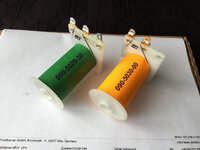
Been having some flipper issues as well. Despite a full rebuild including new coils, the flippers seem a bit weak, and that's saying something for Data East who usually have overly strong flippers. So I removed the Solid State Flipper board and cleaned all of the fuses and their holding clips. I also cleaned all of the header pins using a Fibreglass pen.
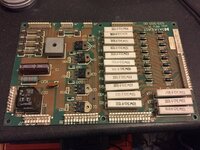
Next was to take a look at the PPB board. Again cleaned all of the fuses and their clips, cleaned all of the header pins, and also checked for burned up/damaged connectors in the back box. I've also replaced the Bridge Rectifier on this board. Everything now seems to be 100% with nice strong, snappy flippers!

So I've done some standard white cards cards as well. I have to be honest, I think I actually like the look of white cards better. What do you think?

Been having some flipper issues as well. Despite a full rebuild including new coils, the flippers seem a bit weak, and that's saying something for Data East who usually have overly strong flippers. So I removed the Solid State Flipper board and cleaned all of the fuses and their holding clips. I also cleaned all of the header pins using a Fibreglass pen.
Next was to take a look at the PPB board. Again cleaned all of the fuses and their clips, cleaned all of the header pins, and also checked for burned up/damaged connectors in the back box. I've also replaced the Bridge Rectifier on this board. Everything now seems to be 100% with nice strong, snappy flippers!

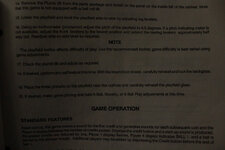
New on the list of problems. Testing the game, the playfield feels a bit "floaty" and so obviously needs to be a bit steeper. The manual clearly states that the playfield should be at 6.5 degrees:
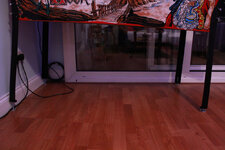
My front leg levellers are all the way down, and the back levellers are fully extended as far as they will go:
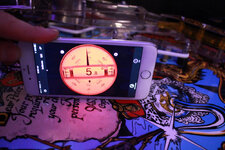
But the playfield is sitting at 5.8 degrees. Hmm. Anyone else have this problem? I hope the cabinet is not flawed with the leg holes in the wrong place, or maybe the playfield support brackets are not high enough. Neither of which can be adjusted.

My front leg levellers are all the way down, and the back levellers are fully extended as far as they will go:

But the playfield is sitting at 5.8 degrees. Hmm. Anyone else have this problem? I hope the cabinet is not flawed with the leg holes in the wrong place, or maybe the playfield support brackets are not high enough. Neither of which can be adjusted.

But the playfield is sitting at 5.8 degrees. Hmm. Anyone else have this problem? I hope the cabinet is not flawed with the leg holes in the wrong place, or maybe the playfield support brackets are not high enough. Neither of which can be adjusted.
I checked my Hook and it's pretty much the same. I'd say it's the way Hooks are and the manual is wrong.

