What's new
Pinball info

Register a free account today to become a member! Once signed in, you'll be able to participate on this site by adding your own topics and posts, as well as connect with other members through your own private inbox!

In Progress Homebrew DIY - 10 years in making

dave

Site Supporter
Joined
Apr 10, 2014
Messages
912
Location
Hampshire
Alias
Horse
I was here 10 years ago with a pipe dream of building my own game after the p-rocs came onto the market. :) I wasn't going to create a log but thought if people started asking how to do this when completed it's much easier to refer to a public place where there is a photo and explanation and if I do go through the pain of finding parts to make another one I can reference it public. I don't want to be a gatekeeper and pretty much 95% of every bit of work I have done in Pinball is given open source (games and tools) anyway so why not. Mission Pinball and their documentation has lots covered for every mech and boards, ThePinballRoom (YT) and his Led Zeppelin log too I would recommend.

My idea originally back then was wanting to retheme a BSD with a P-ROC, but there's no way I could do that to that game, in the long run it's miles cheaper if you're going down that route but I would rather make a 2.0 of BSD and just rewrite and enhance the game.

I've used most of the software frameworks out there but not MPF, that's fairly new in comparison to what I was using to interface a P-ROC but I have written user interfaces with Kivvy (MPF display engine). I was writing games on the original pyprocgame alongside VP and we gave that virtual community access to play CCC after spending a few nights getting VP connected with a controller.

SkeletonGame, which is a fork of the original PyProcGame and made by Professor Ocean was also good while it lasted, for me anyway. By that point there were the p3-rocs which added the RGB options and running a better display / game engine SDL compared to PyGame.

I think TNA used SkeletonGame, American Pinball did but started to roll their own of it. It's great and it's fully functional just the same as MPF is but to me is it severely limiting for the GFX and overall work speed.

Last year or maybe the year before that I made my own little framework to interface with a P-ROC called PinGod. Having the experience working with the previous tools and frameworks I could roll my own instead with no limits (apart from a 32bit PinProc).

Some games including the visual pinball work could take 2 years on and off which is now cut down to months (even with FT job).

I am software based and that's what interests me the most and producing audio. Pinball has it all and to start out with no one will have every skill set to do what they want but don't let that hang over you if you are wanting to make a game.

----------------------------------------------------------------------------------------------------------------------------------------------------------

I don't want to log every step or document everything because don't want to bore with small things and it's extra work for me as it also takes so much finding parts and then add in your workdays, there's not much actual time going on the game only working towards it but some of it may help someone at least doing a P-ROC game in the future.

The game I am doing now I wrote years ago and over the years I have done rewrites for it, the last write which was for PinGod is going to stay the same for the most part but after the 4th display I've bought now I am settled with a 27" (not the heavy JJP one), so all scenes will have be redone but it's going to be cool because larger FHD. It will feature movie like it always has but just better quality. I'm not into pinball games with just a video playing and no substance, most of time and with this game you won't get the chance to look anyway, but it's all about capturing it in a box and with that display to top it off.

If you are not able to skip scenes to pop the ball from somewhere then I find that annoying as well, stop / start it might be known as. So there's no way you will be made to stand there watching a film you should be flipping most of the time and able to skip.

----------------------------------------------------------------------------------------------------------------------------------------------------------
Basic Features To Reach Wizard:

* 6 Short Timed Modes = Can be fully complete or incomplete = Multiball mode available when complete
* 3 Multiballs (Stackable BSD) (Repeatable)
* Mutliball = 6 Time modes
* Wizard Mode (Multiball) - Bash toy

Does feature skillshots, video modes and everything in between but I want to give you the idea that this is kind of a Williams style makeable wizard and taking mostly from a BSD. Completable by a good player or someone who has practiced on it. A reachable goal and not so much grind. If it's too easy (which it shouldn't be then I will make it harder). A guy I used to know used to say "It will eat your kidneys" and that's what I like in any game to keep you coming back to beat it.

Game Parts / Features:
* Full RGB inserts and GI RGB

Coils / Devices:
* 2 x Lightning Flippers (Williams)
* 2 x Slings (Stern)
* 3 x Bumpers (Williams)
* 2 x Scoops (Custom PBL and BSD Rat Scoop)
* 1 x Drop Target
* 1 x VUK (coffin popper)
* 1 x Trap Door (ToM) (flipper coil)
* 1 x Trap Door Bash Toy
* 1 x 4 Ball Trough (PinballLife)
* 1 x Kickback towards player. (F-14 Jagov)
* 1 x Playfield Wizard Bash Toy, Lift and Spin

Ramps:
* 1 x Large center ramp from Judge Dredd - TODO: diverter
* 1 x Cellar / House Ramp (TODO)

Extra Additions that could make it to final:
1 x Magnet (stern)
1 x 2 Inch flipper
1 x Spinner

Boards (P3-ROC) (Will change, need more):
1 x P3-ROC (link)
1 x Power Entry (link)
4 * SW-16 (link)
2 * PD-16 (coils, flashers)
3 * PD-LED (28 RGB per board)

Targets:
* 6 x Round Stand ups
* 4 x 3-D Targets
* 1 x Standard Drop Target

Software:
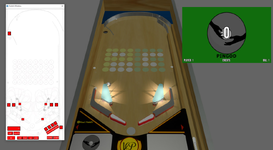
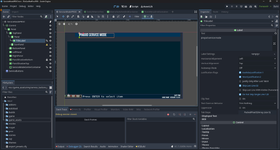
PinGod = NetProcGame (PinProc) (C#) and Godot game engine Sreenshot of the "Scenes" development environment.
1693948473315.png 1693949172019.png

Useful Resources / Software:

🔗
Dropbox share: Drawings, VPX, P-ROC, Blender Assets (Dropbox)

Images / Vector:
🔗
Inkscape (Chocolatey) (Official Site (https://inkscape.org/)) - Vector
🔗Gimp (Chocolatey) - Images

3D:
🔗
Blender (Chocolatey)
🔗Mission Pinball CAD models (MPF) - 3D Parts / Cad drawings

Simulators:
🔗
Visual Pinball 10.8 Download (GitHub) - (Releases)

Video:
🔗FFMPEG (Chocolatey) -
command line convert, join, split etc. Godot use ".ogv" format. Have tested 4k good.
🔗KDenLive (kdenlive.org) - Video Mixing

Video Resource:
📼 Pinball Room (Youtube)
📼 Jab (MPF) (Youtube)

PinGod / Netproc:
PinGod - Github | Documentation | Documentation PinGodNetProc
Netprocgame - Github | Documentation (docs are generated from source. I have been through and documented anything missing or not making sense)

Audio:
🔗
Audacity (Chocolatey) - Can everything you need aside from compose a song.

* Sequencer Workstation: Studio One - always use most of the built in FX when I can, good sequencer for recording
* Synths: Phase Plant ($10 kilohert sub FREE KILOHEART Vsts (may work in audacity) , Serum
* EQ: Voxengo GlissEQ (mid side), Waves H-EQ, Waves SSL channel
* Reverb Delay: Vahalla verbs, Waves H-Delay

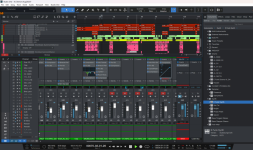
Screenshot: A.I Demon Feat. Musk. Shows mixer (bottom), main view, instruments (right)
1695682868028.png
 
Last edited:
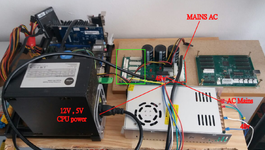
Starts off with your "basic" wiring into the mains.

A 48v and an ATX power supply being fed the mains through the power entry. This should just power the PC and the 48v, there's nothing else connected at this point.

Pretty old motherboard that I picked up really cheap, a fanless graphics card (has had no real stress test on graphics yet, the nvidia driver was an absolute PITA on linux), I have better spare)

PinGod doesn't run too well on a raspberry Pi and it's quite a ballache to build Godot for that platform, more hassle than its worth when these motherboards are miles cheaper than a Pi. It's not like you don't have the room for one either.

1693949667495.png
 
Last edited:
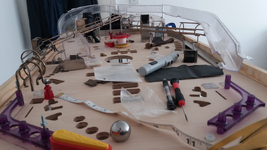
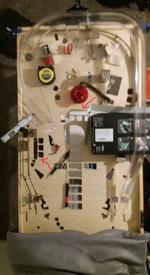
Because I already had a game I just decided to cut those holes at work, some changes to be made but I all I used was an SVG and had it cut. To do the inserts next I will test all holes and get the right fit for final but as you can see I am not worried about playing it or testing right now.

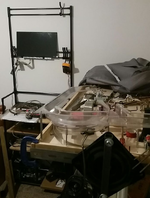
As you can see this is in a bedroom so I can't be routing holes here, after I have worked in the mechs I am confident enough that a 2nd pass done correctly it should be enough.

* This playfield used to be 45" long the same as a BSD but now is 42" stern size.

* The sheer size of the entry to left ramp should be a given to anyone but you don't get wizard mode for spamming shots.

* Right ramp shot is subject to change (baywatch). There is a ToM trap door there but it still needs a ramp + wire that comes back to the right flipper.

* This was a little while back the playfield is pretty much empty compared to this now.

* The ToM trap door usually has a trough and popper for that, but that toy will pop up instead during a multiball and then pop down for your super jackpot.

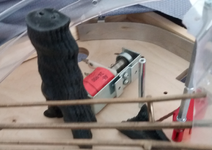
* You can see the Jagov F-14 inspiration to the right of the left ramp as a tree kicker. Eyes open for that one, there's going to be no getting away from it when the bumpers out it there.

* Center circle is another bash toy that comes from the playfield. Like Iron man. The toy is too big for a pin so I have to scan it or remodel, which have already done. It had animation wired to it as well to use in the graphics. She is the wizard mode, most of the time she will be in the hole, depends, it could be really easy when all is said and done.

1693950320255.png
 
Last edited:
* Just a really quick search for a tree model
* Downscale and print.
* Printed flat on the back on the plate. Low settings on a resin printer was done really quick.

Can't wait to try this shot to see how bad it is. Hopefully not too unfair.

1693951489134.png1693951518451.png
 
Last edited:
First bodge. I spent far too long chasing a BSD ramp or similar so I ended up with a new Judge Dredd. JD is a wideboy game so it had about 2" and just glued it lol.

Hopefully can be smoothed over, I haven't done anything to it just left it to dry and that's ok. The lengths you go to find these parts it's easier to to just do this and move on.

1693951801580.png1693951988235.png
 
Last edited:
Top down view when I glued the ramp. No chance fitting targets correctly there, the drawing has already been adjusted for this and try do as you go. The inserts have been shifted to make room for front mounted.

Now when I see this view I'm thinking about an extra flipper. In BSD the mist multiball takes room from both sides that "are spare".

If you had a right flipper where the Mist ball appears from then you could hit the cellar, you could hit the targets but for a stranger take that could go on the left as another lower left. That shot you could hit most places near the hold under the left wire and if you bricked the mode hole that's a free flip.

Ramp bodge sticks out nicely here.

1693952752695.png
 
Last edited:
Simulations of earlier versions.

📼 ED - All modes EGB Wizard (Youtube 2016) - SkeletonGame Python P-ROC

📼 ED - PinGod Port (Youtube 2022)

You notice stuttering in the Python versions and was always a bit temperamental and also difficult for your average user to install.

---------------------------------------------
PinGod Demos running in VP: (Note: These games are not using P-ROC but it's the same just simulated with a single flag)

Pindar (Gorgar) (Testing 3D performance) (Youtube)

Playboy Boogie Mod (Adding display, rewrite the rules) (Youtube)

Knight Rider (FP Remake) (Display can be full screen 2nd monitor) - (Youtube)

He-Man (FP Remake) (This game is Tron rules and Tron layout) (Original wrote on the train when I was going to SWL and playing Tron :) ) - (Youtube)

Nightmare (Amiga) - (Youtube)

-------------------------------------------------
NetProcGame source:

I have a fork of `NetProcGame` done by Adam Preble, he did the original interfacing and pyprocgame which later taken on by Compy (scorebit?) which I think they will be probably be using part of as the base for a P3 and Unity.

* Base interfacing with PinProc. Linux / WIndows.
* Refactored library
* Builds packages separately from PinGod, then I just use the packages in a game project.
* Database added Sqlite = necessary for all machine items, players, storing games, audits, adjustments. Too much work with a pile of config files.
* Database init file for anything you need to change / add
* Fakepinproc, PinProc unit tests

1693958931786.png

TODO: automated very basic build that can be downloaded so you can wire a USB to a PROC straight out of the box.

Github | Documentation

------------------------------------------------
Pingod source:

This is having work done at the moment while I make the service mode, this is still in the dev side but as soon as I can get round to testing it these will build (linux, win) and can be downloaded.

The download should work out of the box simulated and also with a P-ROC USB wired. There is single cfg file here you can change simulated. Simulated will fake a P-ROC board and you can use the switch window to play it.

Before you run it you can edit your `init_proc.sql` or `init_p3roc.sql` to your machine but anyone can run it as an executable as it is to test it.

1693958999184.png

GitHub | Documentation
 
Last edited:
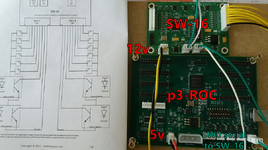
How to wire P3-ROC SW-16 Board:

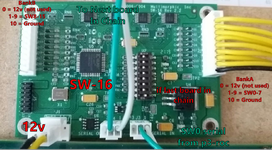
16 switches on 2 banks. 22 AWG on the serial and bank wires, 18 AWG on the power inputs. Its not recommended to use the dedicated switches on the P3-ROC board and I can't remember why but an extra board instead should cover your cabinet switches like dedicated switches normally would.

Sometimes I wire a 5v 12v from another PSU other than the pinballs CPU machine and plug in the USB to my machine. It's portable at the moment though with quick disconnect if want to do that.

Example with it turned off (this does work though) :) . I won't lie the first time I wired one of these I saw smoke because I used the 12v (which isn't used here) and short circuit. It melted so quick so be careful with 12v.

🔗SW-16 V1 -- (jab) (mpf) (youtube)

1693983753938.png

Closer look at the board wired on BankA.

1693983792365.png

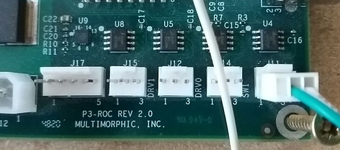
Serial outs: (it's collecting dust)


1693983847868.png
 
Last edited:
PD-LED Example (multimorphic):
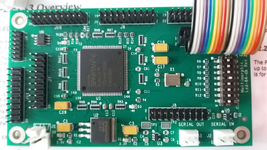
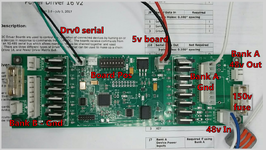
If you are going to use RGB lighting then you will get 28 lights per board (4 per bank). These boards run off the DRV serial from the P3-ROC and can be chained with the Power Driver boards.

These boards you can also use for servos and motors. I haven't personally tested any servo or motors yet but I do want a few toys moving here and there, just everything I have in the way of servos are really small.

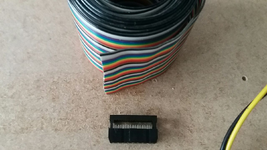
To create the bank wire you can use ribbon cable and this connection with teeth, it's not too much work but it is work I don't really like doing and would probably go for a pre built set in future.

1694022534256.png

1694022571996.png

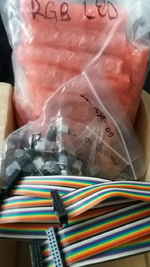
You can buy sets of wire for this at PinballLife. If you were getting something from them anyway (like you will have to at some point in homebrew 90% of time in UK) then I would probably go that route. I still have loads more to make up but wanted enough while test.

1694022783438.png

1694022979501.png

References:

Custom Pinball Machine: 004: PD-LED Test (Youtube)

Multimorphic P3-Roc - MPF Hardware Series (Youtube) - Helpful when starting out. The same as the software always was for P-ROC the manual isn't enough you have to go searching or asking.

PinGod LEDS Config:
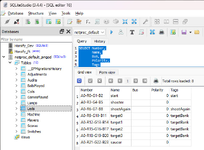
A0-R0-G1-B2
A0-R3-G4-B5

The name you can reference for scripting and the tags you can group by. This table is slightly different with additions, after going through the Stern / JJP manuals it will include a location and also a location to be used on a playfield overlay in the service mode.


1694028230547.png
 
Last edited:
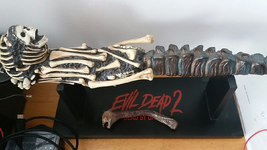
Displays:

I've been through a few at this point trying to make a decision and it's 4 now to be exact. The game wasn't never made targeting a DMD but it's possible in the framework as it should work the same as the older pyprocgame. (I've separated that off into another library anyway so it's a bit easier to go through if it ever came to that one day)

Stern 15" 720p - First choice was just to go with a Stern size, not too big just right really with speakers. You can get a laptop display and a controller board anywhere that covers this size instead of buying a "stern" one for example, but you could still be looking at over £100 for that with a board. At this point though I was still going to a use a raspberry Pi so it was all going to be quite relaxed in the display.

Ebay (2nd Hand) Apple 27" - Can't remember the model number here off hand, but it's pretty much identical to what JJP use. Controller boards something like £30. Turned it on as soon as I got it and big lines in the screen, dodgy, he gave a refund but he did try that one on. The end of the day why would you use that anyway and it that could just go pop anytime. It also weighed a tonne so not worth it.

Laptop IPS 17" 1080p - This is a better display compared to the previous and it's cheaper, like with all replacement you should be able to find a controller board. I think I had to ship from Ali Express for that one though. Hacked a B&M £15 clothes stand for most of the electronics and it sat on there very nicely but I just got tempted to go bigger again. You put all the effort in anyway to make the game so you may as well push the boat out a little more.

1694030750600.png

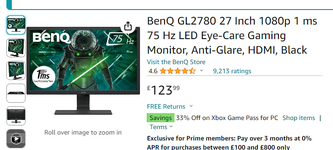
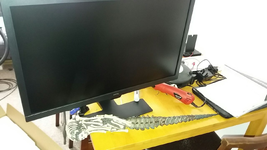
27" monitor - I think I had paid nearly the same for a 15" and board. Down the line it should be easily replaceable if it breaks. People are generally wanting bigger than 1080 now so it's not bad.

1694031171024.png

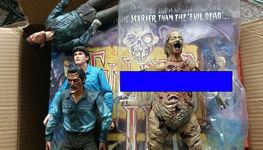
Quick unboxing, haven't tested it. First look at the Kandarian dagger which is about the same size. Will get to 3D scanning and scaling it down for reuse.

1694031934504.png

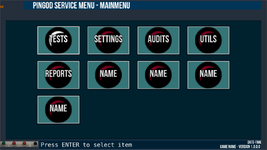
The service mode should play nice. You can make it look at lot better but I just prefer it was fully functional before that going to deep into styling anything because you will end up adjusting that anyway. Just make half decent then finish, if you get round to it.

1694032110141.png


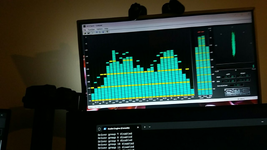
The 15" display didn't go to waste as that is now used to analyse audio when working with audio and it's more than clear enough to do that, a little washed out. I don't usually have it running if I'm just listening to music but when working with audio it's a godsend RME soundcard babyface.

1694032355283.png
 
Last edited:
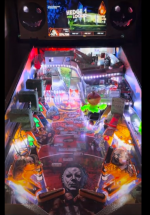
The rgb leds. are they addressable or just ordinary Leds?

Yeah those ones are ordinary with 4 legs. You can do addressable and if you were using just a single colour that would be much less cost.

2048 single colour or 682 individually addressable RGB LEDs connected through serial chains. 256levels per LED results in a possible color depth for RGB LEDs of 16M colors (256*256*256).

I have got some addressable to test but it puts me off like a Christmas tree pinball, good if subtle.

I think all of these are from multimorphic, pinball life do some of their own too which I could have. The green ones are RGB flashers.

1694039611929.png
 
Last edited:
Brilliant stuff, I’m following too.

Cool. You might like the part where I have to use a ToM trap door. It's been holding me up for a while now. I was going to try and make something myself but using parts from other game it's a much safer option especially for that and should be less likely to get balls stuck.
 
I didn't expect to be going back to NetProcGame and having to do more work on the main software but at some point yesterday it just started to dawn on me the questions like:

How do you use script a hold coil for flippers, for trap doors, diverters?

It turns out after I got into the code that if I had wired my flippers already then they would have just flipped with no actual hold. Glad I have found this now because if I had wired something I would instantly think I had wired it wrong or something stupid along those lines and not pointing to the software.

The PDB P3-roc boards came a little later on and this PDB was a configured as a Stern. With a P-ROC and a Stern / Data East then the hold coil from what it appears in code is held up by a pulsed patter. I have williams flippers anyway but it doesn't matter which ones you have. The Hold coils don't have to be wired to a separate lower power (should stay on 48v) they are held up by a continuous pulse of 0, which from what I can guess is the low power hold by barely switching it on.

So you if you added a diverter you could just pulse the main then add lower power, for example:

Code:
PulseDiverterMain (50);
PulseDiverterHold (0);

DisableDiverterMain();
DisableDiverterHold ();

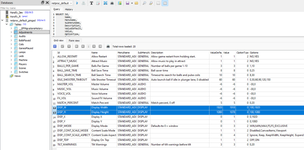
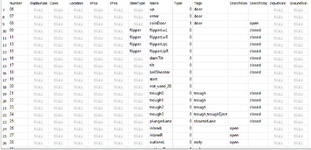
I should be done with the databased Machine items. Looking through the stern manuals and their tables (sw, coil, lights) where they list their items we can make very similar exporting, not only export but if you added the position then an overlay can be generated so you would only have to set these positions once. Should be able to generate manual pages from the values we have here similar to a stern list which saves you keeping a long winded spreadsheet.

It's no trouble going through a good database browser like SqliteStudio but I think it needs web server admin to change these values in a much quicker fashion and to be to be able to assign by board auto rather than manual adding coil / led addresses.

Coils:

* Added Return / Voltage wire ( should be set to like BLK BRN) or just (BLK) for a single colour wire.
* Added voltage = On the Power driver boards you can do up to 80v per bank. You could have a bank of 48v and a bank of 12v for flashers
* Conn = Stern have CN2, CN11 etc to show what connector was used
* X and Y Pos = This is a double and can be the position on a playfield in milimetres. So many uses for this especially with the type. For switches it could be Leaf, Flipper.
* Pulse time can be used in a script now, flipper Mains were hard coded to 34ms.
* Location is usually Playfield, Cabinet
* ItemType (bumpers) - By setting the item type to `bumper` then these coils are auto fired, which is quicker than scripting the coil. They are disabled when you disable the flippers, like on a tilt.

1694113332797.png

Switches:

Same as above really, has different names for the wire though. ItemType of flipper means these will be picked up when game is created and your Main + Hold added providing the coil name matches the switch: eg SW: flipperLwL = Coil: flipperLwLMain

1694113674170.png
 
Last edited:
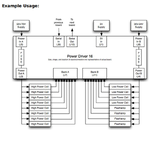
Basic PD-16 Power driver board Wire / Setup: (multimophic) (manual)

Just for photographic reference a basic initial setup for driving coils and flashers. For this to actually work then the high power line has to be grounded to low ground, which is usually wired to the coin door to cut the power.

I have linear actuator for lifting beds or whatever it's for I don't know, but I'm pretty sure it can handle lifting a toy from a playfield. Should be able to use that from a 12v bank. To make that go back down you need to reverse it which should be possible as well. That job is after the cellar.

Three main mechs and ramps have what really held me up. To get the cellar working isn't just a case of fitting a ToM trap door that also has to have a bash toy which is not always up and be able to subway the ball, so I think that needs its own hold coil divertor as well.

1694120844645.png1694118594867.png
 
Last edited:
Understandable if want to make NSFW but this is the worst of it. The language isn't bad either in the game.

Toys / Props:
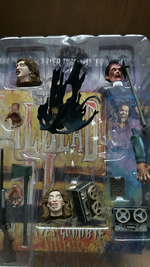
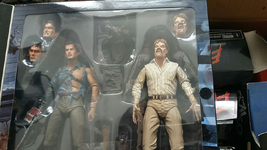
She has been 3D modelled, 7" figures are just too big to fit inside a game unless you chopped their legs off. Ever since I had set eyes on it she was always there from the start, the same as her neck is in the cellar, it was based off these toys. She has to rise out of the playfield in a wizard mode so if the game is that hard then she'll be there a while waiting for a good player.
1694183451725.png
Some doubles, these are good because spare axes, miniature daggers, book, spare hands. Game does feature a workshed where Linda should be, maybe with a door that opens when enter that scoop, which is the castle scoop (rats) in BSD.
1694183601077.png


The laughing deer and Ed Getly, would be cool he could fly. The skillshot was always a Deershot but want to go a bit further than BSD does because I have more room to play with in the display.

1694183742047.png

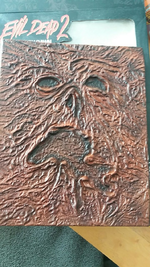
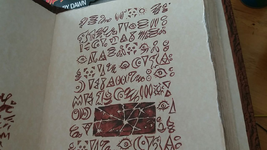
An expensive (official) Necronomicon, not worth the money but it's official so probably wouldn't go down. Just part of the package, you can't fit that anywhere, the same as the dagger although that is looking like a topper.

1694183923556.png

1694184029810.png

The official dagger. About 25" long, it is a weapon and part of Henrietta neck which will pop up in the cellar. That has remodelled 3D as well but haven't printed any yet.

1694184045696.png
 
Last edited:
The rgb leds. are they addressable or just ordinary Leds?

Found videos of yours on youtube from the game you sold and I went through a few, you have loads of demos for the addressable (arduino).

It's a nice way of doing it really, the space jam is good and the weird science backglass and the eight ball is good as well.

I have a strip pretty much the same as what you have there which I didn't think I would use. The inserts are RGB and so is the GI but TBH I probably could have gone down that route for GI.

There is a driver compy added for a teensy board (🔗 OctoWS2811) which I think came from the MPF guys so I would use that, but still could make a driver for other boards like what you have or had, arduino.

After watching some of your demos there's plenty of use for adding them or even on their own. I think it's a recent game, Halloween maybe, but they're everywhere and all around, just seemed a bit cheap. When I look at my strip and your strip it's like I wouldn't want those "big" bulbs visible. I think I had the immediate impression that's what they were for.
 
At the time i’d only found those big bulb type but soon got onto using the much nicer smd ones.

I found the other day a version that’s just 1mm sq. - ideal for small mods
 
At the time i’d only found those big bulb type but soon got onto using the much nicer smd ones.

I found the other day a version that’s just 1mm sq. - ideal for small mods

I see, but even still, behind a back glass for example in weird science they are still good and you won't see the actual bulb there. This is probably where I will use some.

I don't like them visible like this, even if they are tiny they are still visible stick on strips, I find it tacky.

1694264210669.png
 
Last edited:
yes i agree. a bit of white acrylic plastic makes a nice diffuser

Yes those standard RGB will also need diffusing under an insert. If your game isn't light enough in a pitch black room then it's probably worth going down that road to fix that. Maybe that's they did that on Halloween.

Just while I am on the subject TNT amusements went through Scooby Doo (spooky) and lifted playfield. I suspect a P3-ROC's too expensive for these guys now because they've gone and the poor girl was off at the pinball party Pinfest.

I believe the Scooby Doo was off due to a dodgy auto plunge mech as no manual plunger.

Will have to check out the TNT video.
 
I believe the Scooby Doo was off due to a dodgy auto plunge mech as no manual plunger.

Will have to check out the TNT video.

I see, I wasn't there I just picked up from it being off. Classic 2 +2 :)

They get a bit sarcastic with the load time, they even cut the video: TNT Scooby (Youtube)
 
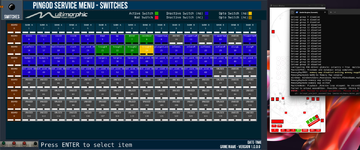
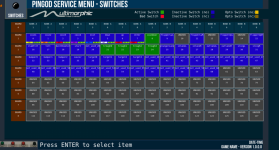
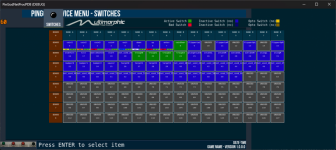
Shouldn't be doing this today but have had it hanging over me to get the matrix switch view done with added colours.

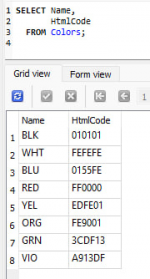
Added a colour table with 3 char names. Stern manuals are like this in their tables and it's easy enough to add more if needed.

1694276545563.png

Switch Table example:

Single colour or dual colours. Most likely I will just have a single colour but it gives support for two colour wire. Went with our standard with the ground just for example but mine will probably stay black on ground wires there.

1694276376528.png

Switch matrix view with added wire colours:

1694276787134.png

If you resize the view then can see this is off but apart from that being out everything should resize. EDIT: In the adjustments menu set aspect ratio. For any size you can set to ignore and will fit any size.

If you were to use for a P-ROC with 64 switches and another view for dedicated then these columns could be bigger and maybe still be readable and usable on a 15". The view would be different using an original P-ROC anyway but I'll do that another time.

1694276828041.png
 
Last edited:
Recording / Playback Demo:

This had to have some work for P-ROC but it's pretty good now. I just captured the process it takes me to record and playback a game from this UI.

Code can be debugged in Visual Studio with breakpoints as well, so it's very handy, very quick on the development and testing.

You can change the name of the record file and it will save one for you under that name, when you want to play it back just have the correct name for that. Had the same in Python but this is quicker to config etc.

 
P3-ROC Opto Transmitter / Receiver wiring / boards / Trough:

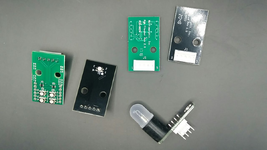
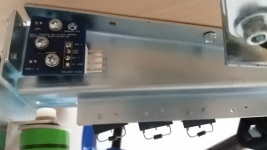
I had avoided even looking at opto's until yesterday but actually not as bad as it seemed. It took me until yesterday to realize there are two on the trough opto board, that's how much I've avoided it for now :)

1694333843313.png

The receiver.

1694333911639.png

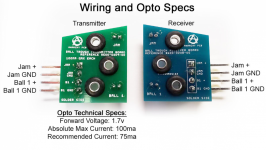
Resistor is needed on the transmitters (green). If 5v went in then I make that 44 ohms resistor needed for recommended current, don't count me on that, I'll soon tell you if I burn it because apparently they go up pretty quick. (LED Series Resistor Calculator) (link)

1694334075729.png

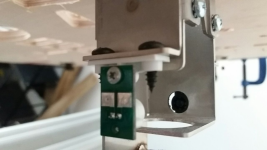
Another one in a scoop from PinballLife. Haven't found specs for this one, but has to be similar if not the same.

1694334379982.png

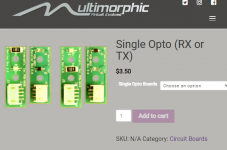
You can purchase cheap Opto from multimorphic and these allow you to just run a 12v in, which can also be chained to other transmitter, the same goes for an extra ground on the receiver. I have one of these that I think needs to fill another scoop which is missing a switch.

1694334610042.png

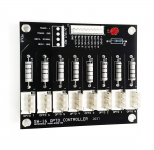
Another option here to save some work with resistors is an Opto Controller for SW-16, where you could run a whole bank into one. No brainer for $20 but the less shipping from there the better. (link)

1694334741034.png

There are smaller versions of this board too which I missed out on. I would actually prefer a couple of smaller opto boards rather than one but this will tie me over.
 
Last edited:
Back
Top Bottom