Pinball info
You are using an out of date browser. It may not display this or other websites correctly.
You should upgrade or use an alternative browser.
You should upgrade or use an alternative browser.
In Progress Gottlieb "Road Race" (1969)
- Thread starter MajesticPinball
- Start date
I do remember that from last year, it stressed me out just keeping up with itNearly 2.months ? Blooming luxury
Read @astyy 3 weeks dash from last year for some inspiration
No one minds a bit of wet paint on the Friday night lock-in
Very impressed at all your work so far, even EM's need love. It's good to see one getting the full restore.
nudge.fudger
Registered
Yeah, very nice work and a cool old pin.
What's the secret to getting the insulation on the wires so clean on these 45-50+ yr old games?
(guessing maybe a toothbrush dipped in naphtha/IPA and plenty o patience?)
What's the secret to getting the insulation on the wires so clean on these 45-50+ yr old games?
(guessing maybe a toothbrush dipped in naphtha/IPA and plenty o patience?)
Thank you, I wasn't intending to keep it but probably will, starting to fall in love with the old girl! I literally just use soapy water and a nail brush, dry it as best I can with a towel and leave it to air dryYeah, very nice work and a cool old pin.
What's the secret to getting the insulation on the wires so clean on these 45-50+ yr old games?
(guessing maybe a toothbrush dipped in naphtha/IPA and plenty o patience?)
nudge.fudger
Registered
Will be sweet firing her up for a game after all the attention to detail in the cleanup - i'm tempted* to have a go at cleaning the base board loom in my SkyLab as was having to trace black wires back a few inches to find the colours in relation to the schematic the other day - thanks for sharing your method.
* the old conflict : doing what you know you need/have to do to get the game up and running again to enjoy playing it sooner or doing a bit extra on it and delaying those first plays ...
* the old conflict : doing what you know you need/have to do to get the game up and running again to enjoy playing it sooner or doing a bit extra on it and delaying those first plays ...
Dirty looms are my pet hate. Makes it hard to see the colours plus it's not nice getting covered in gunk every time you touch a wire, it's a long process but definitely worth the hassle!Will be sweet firing her up for a game after all the attention to detail in the cleanup - i'm tempted* to have a go at cleaning the base board loom in my SkyLab as was having to trace black wires back a few inches to find the colours in relation to the schematic the other day - thanks for sharing your method.
* the old conflict : doing what you know you need/have to do to get the game up and running again to enjoy playing it sooner or doing a bit extra on it and delaying those first plays ...
A Delivery from Euro Pinball arrived today and I must say I'm a little disappointed. Andy only had 7 white star posts left so I bought those and got the rest from Euro Pinball and they're a off-white cream-ish sort of colour. The ones from Pinball Mania are so a much nicer crisp whote but I guess I'm going to have to hide them in the back of the machine so that they don't stand out now - which is a shame 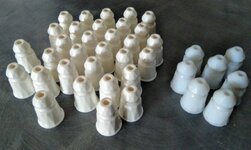

nudge.fudger
Registered
if they are NOS and were originally a more brilliant white when made perhaps leaving in bleach for a week might help restore some whiteness?
Worth trying a couple on the off chance? (have heard of oldskool BMX restorers getting some results with off-white Skyways/Peregrines)
They still look very nice but I know what you mean
(it's the same with the old reel bands in vintage fruits that gradually degraded with exposure to the fluro tubes - fitting repro bands with a white as opposed to yellowed background and some new cool white tubes and you do notice the difference - they really sing and you can get a subtle but attractive fresh looking indigo tint when lit).
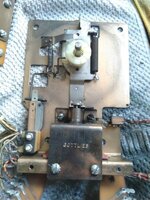
Credit unit fully dismantled, cleaned/polished and adjusted - sadly I don't have any pictures of what it was like before work, but it was in a pretty similar state to the rest of the backbox mechs.
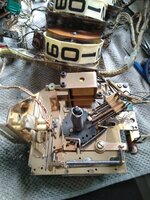
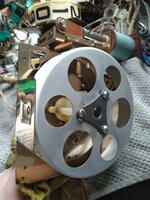
Ball In Play Unit before:
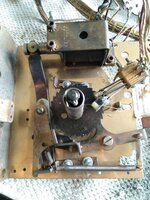
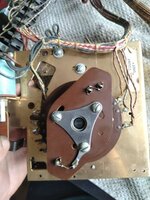
After - Excuse the lighting:
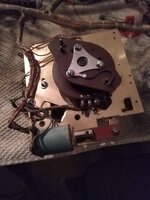
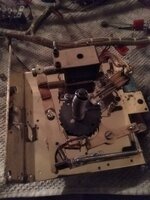
Next up the 0-9/Match unit, score relays and then the backbox is more or less done!


Ball In Play Unit before:


After - Excuse the lighting:


Next up the 0-9/Match unit, score relays and then the backbox is more or less done!
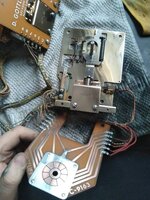
Thanks for the nice comments, really helps as all this polishing is getting a bit tedious  0-9 unit is now done the contacts polished up really nicely, I also replaced 2 of the wires on top of the stepper as the insulation was fraying badly and looked a bit nasty. Again please excuse the rubbish photos, the camera on my phone isn't the best!
Before:
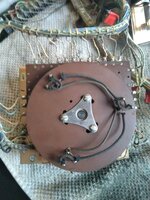
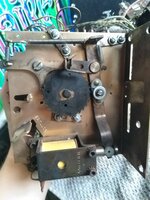
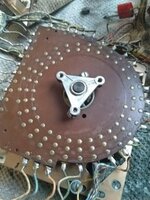
After:
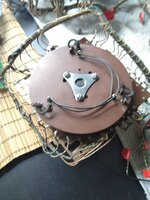
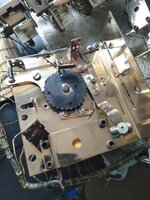
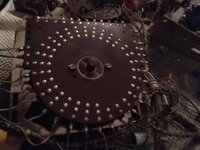
Also rebuilt 1, 10, 100 & 1000 point relays and found a broken switch blade, will need to try and find a replacement somehow - if anyone has any Gottlieb switch blades please get in touch!
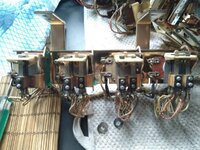
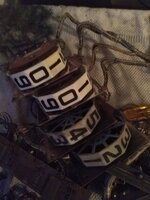
Backbox hardware polished as best as I could, the score reel brackets have a little rust on the top which I removed and polished out as best I can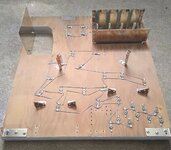
Before:


After:


Also rebuilt 1, 10, 100 & 1000 point relays and found a broken switch blade, will need to try and find a replacement somehow - if anyone has any Gottlieb switch blades please get in touch!

Backbox hardware polished as best as I could, the score reel brackets have a little rust on the top which I removed and polished out as best I can

Worth a gander around the other relays for any unused/not wired switches that you could rob from, dunno for Gott's but apparently this is common on Bally where relays would be reused between games and some switches were present but not used.if anyone has any Gottlieb switch blades please get in touch!
I have been checking as I've been working my way round as it's handy to have spares but so far nothing extra. I might have to just buy a spare used relay off eBay to rob the switches from. Hoping somebody might have a few spare knocking aboutWorth a gander around the other relays for any unused/not wired switches that you could rob from, dunno for Gott's but apparently this is common on Bally where relays would be reused between games and some switches were present but not used.
Well it's been an interesting week, spent an absolute fortune in parts and also got my card cloned by a seller in Germany while trying to buy new jet bumper bodies, so had to cancel my card and find somewhere else that sells the correct ones. All sorted now!
Anyway, with 1 month to go to Pinfest it's going to be a very close call. Sent a box parts off to my local powder coaters for blasting and a Chrome effect powder coat and they're saying it will take between 3-4 weeks. I'm also waiting on a big order from The Pinball Resource who are quoting between 2-6 weeks on shipping so whether of not the machine makes it to Pinfest is almost out of my hands.
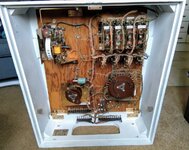
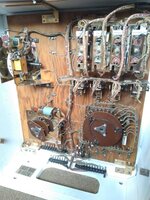
Anyways, backbox guts are reassembled, just need to staple the 2 labels back inside, will clean up the outside on the backbox when I do the cabinet:
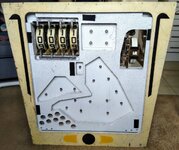
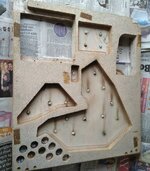
Began stripping the underside of the playfield and it's proving to be challenging. I need a workshop BADLY, working off the sofa in your living room is really not ideal and absolutely back breaking! Bolts on the top and bottom of the flipper shoe/shaft sheered off so I'm going to have to figure out a way to remove that. Also a few disintegrated jet bumper coils - I've ordered 3 new ones so will just replace the lot!
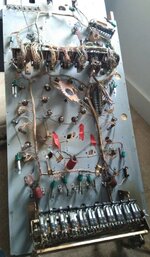
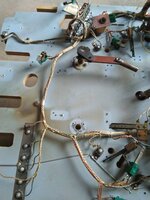
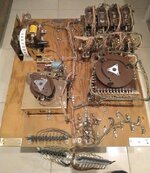
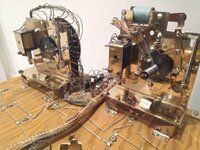
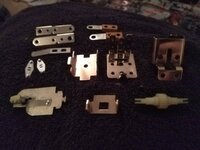
Took the relay bank in the middle of the playfield off and stripped the whole thing down, polished all the metalwork, cleaned and adjusted the switches but for some reason only took 1 picture of the "scan relay" in bits and nothing else. Will take more soon:
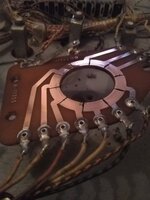
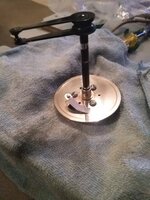
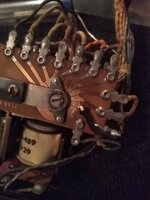
Contacts on the central spinny thingy-bob cleaned up very nicely:
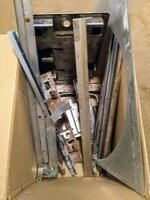
Box of bits off the the powder coaters, come home soon my pretties!
Anyway, with 1 month to go to Pinfest it's going to be a very close call. Sent a box parts off to my local powder coaters for blasting and a Chrome effect powder coat and they're saying it will take between 3-4 weeks. I'm also waiting on a big order from The Pinball Resource who are quoting between 2-6 weeks on shipping so whether of not the machine makes it to Pinfest is almost out of my hands.
Anyways, backbox guts are reassembled, just need to staple the 2 labels back inside, will clean up the outside on the backbox when I do the cabinet:


Began stripping the underside of the playfield and it's proving to be challenging. I need a workshop BADLY, working off the sofa in your living room is really not ideal and absolutely back breaking! Bolts on the top and bottom of the flipper shoe/shaft sheered off so I'm going to have to figure out a way to remove that. Also a few disintegrated jet bumper coils - I've ordered 3 new ones so will just replace the lot!


Took the relay bank in the middle of the playfield off and stripped the whole thing down, polished all the metalwork, cleaned and adjusted the switches but for some reason only took 1 picture of the "scan relay" in bits and nothing else. Will take more soon:

Contacts on the central spinny thingy-bob cleaned up very nicely:


Box of bits off the the powder coaters, come home soon my pretties!

For anyone interested I contacted the seller yesterday to see if he knew much about the machines history. It was a gift to his brother 30 years ago and previously to that he believes it came from an arcade somewhere in Rhyl. I doubt it spent 20 years in an arcade so there might be a missing link somewhere but you never know, I could only be the machines 3rd owner
I wouldn't be surprised if it was among the games in an arcade in Rhyl in the late 80's. The largest place there (it may have once been a dancehall) had a huge space behind the front foyer, reached down some steps. The newest pinball was a Space Station, placed in the foyer, but there were quite a few electro-mechanical games in the main hall.
Sounds a lot like that could have been it's home then. Do you know the name of the place by any chance?I wouldn't be surprised if it was among the games in an arcade in Rhyl in the late 80's. The largest place there (it may have once been a dancehall) had a huge space behind the front foyer, reached down some steps. The newest pinball was a Space Station, placed in the foyer, but there were quite a few electro-mechanical games in the main hall.
Sorry, I don't think I even took in the name. Other things coming back to me are the tendency of the ops there to offer the dubious incentive of more balls per game (e.g. 7 bpg on High Speed, 8 on Space Shuttle) rather than keeping their machines in a decent condition. But there was also the fastest, cleanest, meanest F-14 I ever saw.
Been busy this week polishing even more bits - I've gone through almost 2 tubes of Autosol on this machine so got more of that on order.
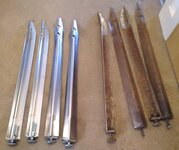
The legs that this game came with are some of the worst I have seen. Buying new legs always feels like a treat so I thought with all the work polishing everything on this game it would be a sin not to treat myself. Went for 28" instead of the early Wedgehead standard of 31" as I just prefer lower games. (Obviously I got new bolts too as the originals are also pretty nasty!)
Backbox door resprayed and a nice new lock fitted. Could do with one more coat on the inside of the door but I ran out of paint and not overly important at this stage. Before:
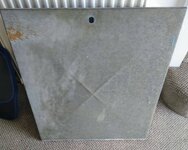
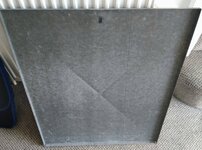
After:
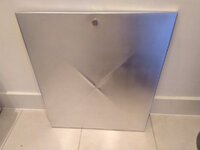
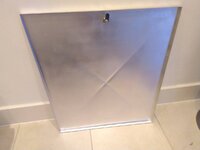
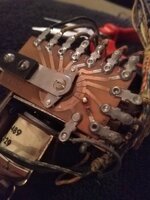
Noticed while servicing the 'Scan Relay' that it had a burn out trace so I very carefully repaired that and tested it, all good now:
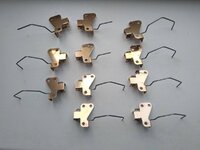
Playfield switches dismantled and polished. Will wax the playfield before installing these:
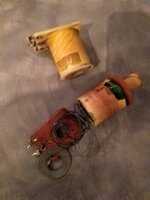
These flipper coils had seen better days! Cleaned off all the burn marks around the flipper mechs too while I have it all off:
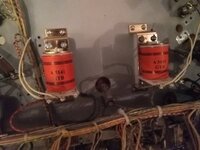
New ones installed on freshly polished brackets, waiting on a complete flipper rebuild kid from the PBR to arrive so can't do much more with the flippers for a while
The legs that this game came with are some of the worst I have seen. Buying new legs always feels like a treat so I thought with all the work polishing everything on this game it would be a sin not to treat myself. Went for 28" instead of the early Wedgehead standard of 31" as I just prefer lower games. (Obviously I got new bolts too as the originals are also pretty nasty!)

Backbox door resprayed and a nice new lock fitted. Could do with one more coat on the inside of the door but I ran out of paint and not overly important at this stage. Before:


After:


Noticed while servicing the 'Scan Relay' that it had a burn out trace so I very carefully repaired that and tested it, all good now:


Playfield switches dismantled and polished. Will wax the playfield before installing these:

These flipper coils had seen better days! Cleaned off all the burn marks around the flipper mechs too while I have it all off:

New ones installed on freshly polished brackets, waiting on a complete flipper rebuild kid from the PBR to arrive so can't do much more with the flippers for a while

I'd love to see this in the flesh close up once finished. To see a EM in the same condition that it would have left the factory it was made is a rare thing .
Well done for taking the time to make this an exceptional machine once finished.


Well done for taking the time to make this an exceptional machine once finished.


Cheers buddy! It should be ready in time for Pinfest if you're going?I'd love to see this in the flesh close up once finished. To see a EM in the same condition that it would have left the factory it was made is a rare thing .
Well done for taking the time to make this an exceptional machine once finished.

Look forward to it.
Finally plucked up the courage to hack the right flipper shaft/boot off. Tried drilling out the broken grub screw but wasn't getting anywhere, in the end decided to carefully use my dremel to cut the top of the flipper shaft off and remove it that way. Everything is being replaced anyway so doesn't matter that it got hacked up: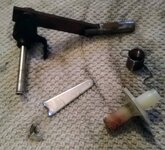
Outhole assembly, slingshot mechs, lane switches and standup switches all polished, adjusted and reassembled:
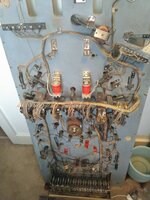
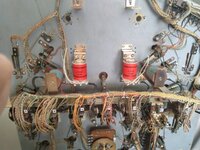
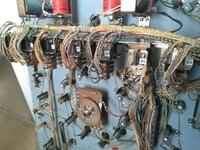
Only thing left to do under the playfield is clean the inserts, reassemble the jet bumpers (waiting on parts) and tackle the large trip relay bank.
I've put an order in for some warm white LEDs for under the playfield. Don't worry EM fans, the top of the playfield will be lit with incandescent bulbs! The reason for the LEDs is mainly to keep the temperature down as much as possible inside the cab but also they will hopefully illuminate the inserts a lot better. I will be putting the same LEDs in the 3 jet bumpers for the same reason, I've got replacement jet bumper bodies and caps so the LEDs should prevent those from buringing or yellowing over time.
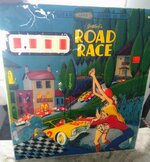
Time to tackle the backglass, it's not the best but it's decent for 50 years old. Protecting it with a few coats of Triple Thick and had a bit of a disaster. While making off the windows in the glass I dropped a piece of tape and it landed sticky side down on the most delicate part of the glass - I'm not even going to try and remove the tape as it will take the paint straight off so I guess that's now part of this games story
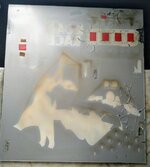

Outhole assembly, slingshot mechs, lane switches and standup switches all polished, adjusted and reassembled:


Only thing left to do under the playfield is clean the inserts, reassemble the jet bumpers (waiting on parts) and tackle the large trip relay bank.
I've put an order in for some warm white LEDs for under the playfield. Don't worry EM fans, the top of the playfield will be lit with incandescent bulbs! The reason for the LEDs is mainly to keep the temperature down as much as possible inside the cab but also they will hopefully illuminate the inserts a lot better. I will be putting the same LEDs in the 3 jet bumpers for the same reason, I've got replacement jet bumper bodies and caps so the LEDs should prevent those from buringing or yellowing over time.
Time to tackle the backglass, it's not the best but it's decent for 50 years old. Protecting it with a few coats of Triple Thick and had a bit of a disaster. While making off the windows in the glass I dropped a piece of tape and it landed sticky side down on the most delicate part of the glass - I'm not even going to try and remove the tape as it will take the paint straight off so I guess that's now part of this games story


In the long run I want to replace this glass so if anyone has a way of recreating a backglass or just happens to have a Road Race glass hanging around (I'm not holding my breath) please let me know!
Bgresto has done this game, but I think yours will come up quite nice if you can get a good match on that background blue 
http://bgresto.com/?p=1379
http://bgresto.com/?p=1379

