Lovely thorough restoration work this - top job!
Pinball info
You are using an out of date browser. It may not display this or other websites correctly.
You should upgrade or use an alternative browser.
You should upgrade or use an alternative browser.
Complete Fishy, Fishy, Fishy! - 3 x Fish Tales Restorations
- Thread starter Ant-H
- Start date
Thanks mate. I’m really enjoying working on these and hopefully they will look great once I get the decals installedLovely thorough restoration work this - top job!
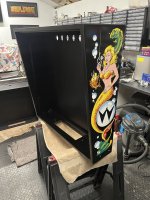
Time for the decals. Back boxes are first. These came from Mr Pinball in Australia, and I have to say they are the best FT decals I’ve come across.
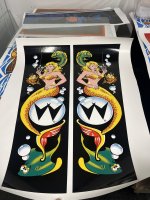
The colours are nice and bright and when you run your hand over them, you can feel the different contours of the print.
There is one point that you have to be aware of when installing the cabinet decals which I’ll explain when I do them.
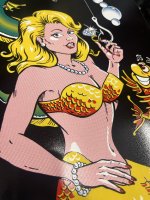

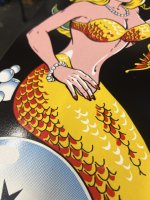
To get a super smooth surface, I wet sand the sides which knocks off any dust particles in the paint and leave a glass like surface.
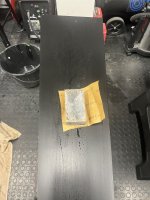
After flattening the decals out over night, they are a lot easier to apply.
I use the back edge of the back box as a guide and trim the decals in the corners so that I can line them up.
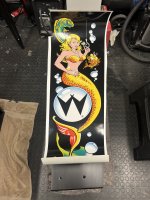 Once I’m happy with the alignment, I weigh them down using the transformers.
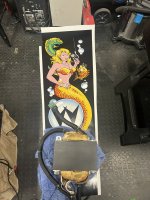
I’ve applied decals using both the dry and wet methods but I personally prefer using the wet method.
I peal back approx a quarter of the decals and trim the backing paper.
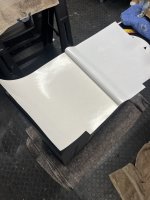
I then wipe the surface down again with a tack cloth.
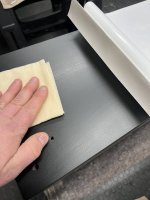
I spray a small amount of application fluid and apply that end of the decal.
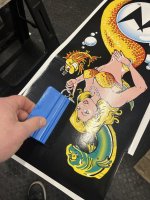
Once one end is down, I remove the the weight and apply the other end using the same process.

The excess is then removed by sanding all 4 edges which also leaves a nice bevelled finish.
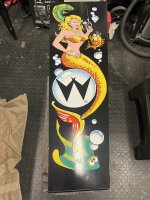
Once the first one was out the way, I moved onto the other 2. Overall these were great the install in terms of alignment and print quality and came out great
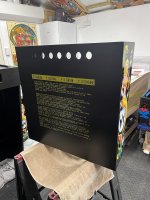
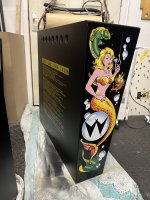
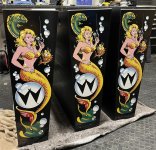

The colours are nice and bright and when you run your hand over them, you can feel the different contours of the print.
There is one point that you have to be aware of when installing the cabinet decals which I’ll explain when I do them.


To get a super smooth surface, I wet sand the sides which knocks off any dust particles in the paint and leave a glass like surface.

After flattening the decals out over night, they are a lot easier to apply.
I use the back edge of the back box as a guide and trim the decals in the corners so that I can line them up.
 Once I’m happy with the alignment, I weigh them down using the transformers.
I’ve applied decals using both the dry and wet methods but I personally prefer using the wet method.
I peal back approx a quarter of the decals and trim the backing paper.

I then wipe the surface down again with a tack cloth.

I spray a small amount of application fluid and apply that end of the decal.

Once one end is down, I remove the the weight and apply the other end using the same process.

The excess is then removed by sanding all 4 edges which also leaves a nice bevelled finish.

Once the first one was out the way, I moved onto the other 2. Overall these were great the install in terms of alignment and print quality and came out great


These are looking stunning. Awesome to see a craftsman at work - love it!!
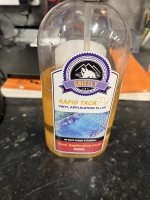
It’s a spray I like to use as it’s easier push out any lump/air pockets if there’s some fluid in there instead of just air.@Ant-H "Application Fluid"??
Plus it gives you more flexibility just in case you needed to re-adjust the decal as it can still be lifted slightly.
It’s used mainly by sign company’s in applying vinyls to glass or to vehicles etc.
You can make your own with some warm water and a little washing up liquid.
This is what I use.
Well there ya go! Had never heard of it, nor seen it mentioned anywhere... I'd best get some of that for the next project!! Thanks Ant!
Previously i had either applied dry or used the washing up liquid trick (however never liked the "wet" method as whilst it gave flexability there was always concern about how it affected the adhesion of the decals.... however you cant beat somethig that the trade use for applying Vinyl!
Previously i had either applied dry or used the washing up liquid trick (however never liked the "wet" method as whilst it gave flexability there was always concern about how it affected the adhesion of the decals.... however you cant beat somethig that the trade use for applying Vinyl!
Yeah the fluid drys after a couple days so you don't get any issues with them peeling up.Well there ya go! Had never heard of it, nor seen it mentioned anywhere... I'd best get some of that for the next project!! Thanks Ant!
Previously i had either applied dry or used the washing up liquid trick (however never liked the "wet" method as whilst it gave flexability there was always concern about how it affected the adhesion of the decals.... however you cant beat somethig that the trade use for applying Vinyl!
I’m sure I saw a video of one of the main pinball manufacturers using a spray when applying their decals as well, I just can’t remover which one it was
The main cabinets are next. I generally always start with the coin door decal as with some designs you need to get this on first in order to try and line up the artwork on the sides.
I actually forgot to take some photos of the coin door decals being applied but once on, I cut around the leg protectors and fishing reel handle and removed the decals.
If you don’t do this, I can pretty much guarantee that you will get wrinkling once the parts have been fitted.
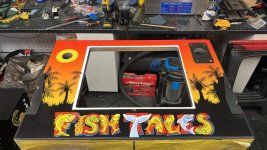
I actually find installing the side decals a lot easier that the front.
With the sides, the first job is to wet sand them down and trim some of the excess off the decals.
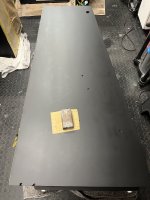
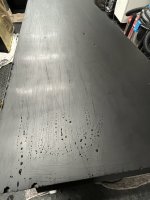
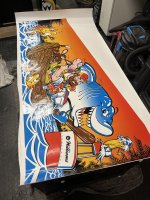
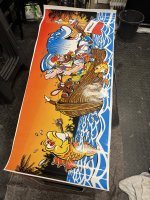
If anyone ever installs these decals themselves you have to start with the left side first.
This is due to the left decal having the colours bars present at the lower front corner.
If don’t do this side first, your have issues matching the 2 sides up.
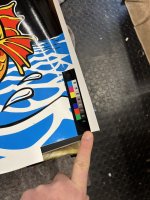
I basically trimmed this off along with the bottom corner at the other end of the decal to line up the decals. I could then match up the other side to this so that they matched as close as I could get them.
Once all sides were squared up, I used the transformers again to weigh one end down.
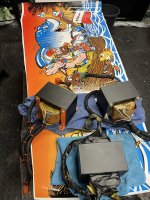
And like before, I cut off about a 3rd of the backing paper off followed by a quick wipe down with a tack cloth.
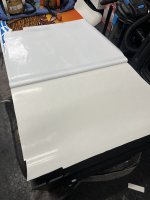
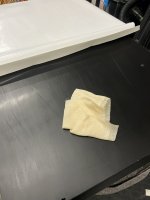
I then spray a good amount of the application fluid and stuck the first end down, pushing out any bubbles with a felt covered squeegee.
Once that’s down, the transformers get removed and the same process is repeated on the other end.
When it comes to removing the excess decals, you can trim the edges with a straight edge and sharpe blade.
I prefer to sand them off as imo you you get a perfect edge and nice bevel.
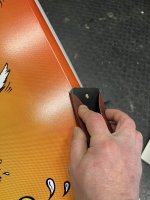
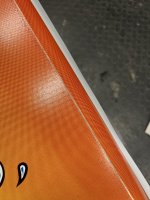
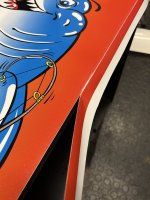
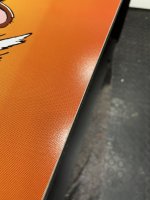
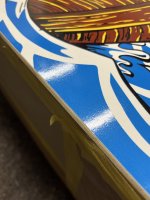
I then go around and continue to trim around the leg protectors.
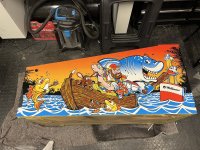
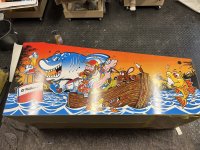
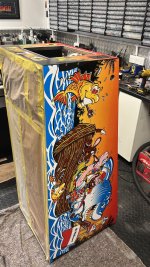
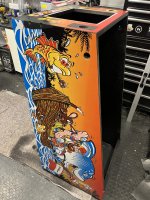
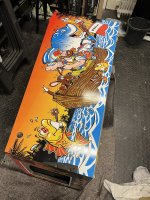
It basically took me the whole day to get all 3 cabinets done, but It’s was worth taking my time as they came out great.
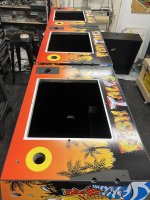
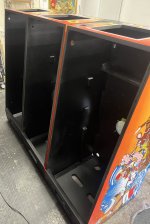
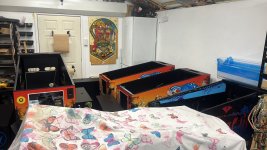
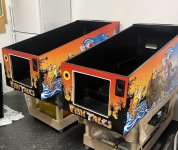
Next job is to restore the underside of all 3 cabinets
I actually forgot to take some photos of the coin door decals being applied but once on, I cut around the leg protectors and fishing reel handle and removed the decals.
If you don’t do this, I can pretty much guarantee that you will get wrinkling once the parts have been fitted.

I actually find installing the side decals a lot easier that the front.
With the sides, the first job is to wet sand them down and trim some of the excess off the decals.


If anyone ever installs these decals themselves you have to start with the left side first.
This is due to the left decal having the colours bars present at the lower front corner.
If don’t do this side first, your have issues matching the 2 sides up.

I basically trimmed this off along with the bottom corner at the other end of the decal to line up the decals. I could then match up the other side to this so that they matched as close as I could get them.
Once all sides were squared up, I used the transformers again to weigh one end down.

And like before, I cut off about a 3rd of the backing paper off followed by a quick wipe down with a tack cloth.


I then spray a good amount of the application fluid and stuck the first end down, pushing out any bubbles with a felt covered squeegee.
Once that’s down, the transformers get removed and the same process is repeated on the other end.
When it comes to removing the excess decals, you can trim the edges with a straight edge and sharpe blade.
I prefer to sand them off as imo you you get a perfect edge and nice bevel.


I then go around and continue to trim around the leg protectors.


It basically took me the whole day to get all 3 cabinets done, but It’s was worth taking my time as they came out great.


Next job is to restore the underside of all 3 cabinets
Last edited:
Blimey Ant, I reckon it would have took me all day to do ine decalThe main cabinets are next. I generally always start with the coin door decal as with some designs you need to get this on first in order to try and line up the artwork on the sides.
I actually forgot to take some photos of the coin door decals being applied but once on, I cut around the leg protectors and fishing reel handle and removed the decals.
If you don’t do this, I can pretty much guarantee that you will get wrinkling once the parts have been fitted.
View attachment 252331
I actually find installing the side decals a lot easier that the front.
With the sides, the first job is to wet sand them down and trim some of the excess off the decals.
View attachment 252326View attachment 252327
View attachment 252328View attachment 252329
If anyone ever installs these decals themselves you have to start with the left side first.
This is due to the left decal having the colours bars present at the lower front corner.
If don’t do this side first, your have issues matching the 2 sides up.
View attachment 252330
I basically trimmed this off along with the bottom corner at the other end of the decal to line up the decals. I could then match up the other side to this so that they matched as close as I could get them.
Once all sides were squared up, I used the transformers again to weigh one end down.
View attachment 252332
And like before, I cut off about a 3rd of the backing paper off followed by a quick wipe down with a tack cloth.
View attachment 252334View attachment 252333
I then spray a good amount of the application fluid and stuck the first end down, pushing out any bubbles with a felt covered squeegee.
Once that’s down, the transformers get removed and the same process is repeated on the other end.
When it comes to removing the excess decals, you can trim the edges with a straight edge and sharpe blade.
I prefer to sand them off as imo you you get a perfect edge and nice bevel.
View attachment 252344View attachment 252335View attachment 252336View attachment 252338View attachment 252337
I then go around and continue to trim around the leg protectors.
View attachment 252339View attachment 252340
View attachment 252343View attachment 252345View attachment 252346
It basically took me the whole day to get all 3 cabinets done, but It’s was worth taking my time as they came out great.
View attachment 252349View attachment 252350View attachment 252352View attachment 252351
Next job is to restore the underside of all 3 cabinets
Blimey Ant, it would have taken me all day to get one decal right I reckonThe main cabinets are next. I generally always start with the coin door decal as with some designs you need to get this on first in order to try and line up the artwork on the sides.
I actually forgot to take some photos of the coin door decals being applied but once on, I cut around the leg protectors and fishing reel handle and removed the decals.
If you don’t do this, I can pretty much guarantee that you will get wrinkling once the parts have been fitted.
View attachment 252331
I actually find installing the side decals a lot easier that the front.
With the sides, the first job is to wet sand them down and trim some of the excess off the decals.
View attachment 252326View attachment 252327
View attachment 252328View attachment 252329
If anyone ever installs these decals themselves you have to start with the left side first.
This is due to the left decal having the colours bars present at the lower front corner.
If don’t do this side first, your have issues matching the 2 sides up.
View attachment 252330
I basically trimmed this off along with the bottom corner at the other end of the decal to line up the decals. I could then match up the other side to this so that they matched as close as I could get them.
Once all sides were squared up, I used the transformers again to weigh one end down.
View attachment 252332
And like before, I cut off about a 3rd of the backing paper off followed by a quick wipe down with a tack cloth.
View attachment 252334View attachment 252333
I then spray a good amount of the application fluid and stuck the first end down, pushing out any bubbles with a felt covered squeegee.
Once that’s down, the transformers get removed and the same process is repeated on the other end.
When it comes to removing the excess decals, you can trim the edges with a straight edge and sharpe blade.
I prefer to sand them off as imo you you get a perfect edge and nice bevel.
View attachment 252344View attachment 252335View attachment 252336View attachment 252338View attachment 252337
I then go around and continue to trim around the leg protectors.
View attachment 252339View attachment 252340
View attachment 252343View attachment 252345View attachment 252346
It basically took me the whole day to get all 3 cabinets done, but It’s was worth taking my time as they came out great.
View attachment 252349View attachment 252350View attachment 252352View attachment 252351
Next job is to restore the underside of all 3 cabinets
Once the decals were finished I gave the underside of the cabinets one last sand with 240, followed by 600 grit paper to remove any scrapes or staining.
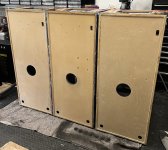
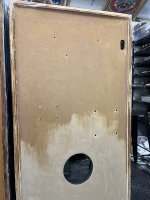
I then sealed the wood with 2 coats of a satin sealer.
MDF is like a sponge but by giving them a coat of sealer, it gives the wood some protection from satining and mild water damage as the product I use seals the fibres of the MDF.
It also gives them a nice colour/finsih
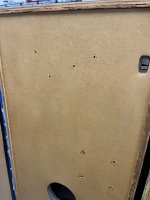
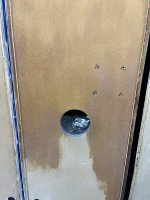
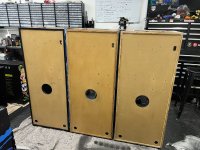
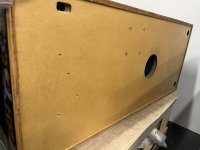
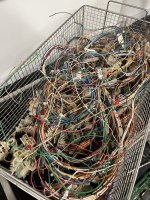
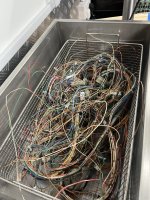
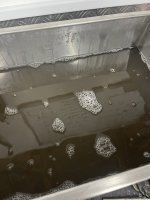
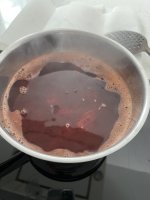
Whilst I was doing that, I chucked the cabinet and lamp board harnesses in the ultra sonic for 2 x 25 minutes cycles at 40 degrees.
I find at this temperature, it really pulls the years of dirt off the wires which turns the water brown.

I then sealed the wood with 2 coats of a satin sealer.
MDF is like a sponge but by giving them a coat of sealer, it gives the wood some protection from satining and mild water damage as the product I use seals the fibres of the MDF.
It also gives them a nice colour/finsih


Whilst I was doing that, I chucked the cabinet and lamp board harnesses in the ultra sonic for 2 x 25 minutes cycles at 40 degrees.
I find at this temperature, it really pulls the years of dirt off the wires which turns the water brown.


Next jobs are probably my favourite to do. Putting all the powder coated and shiny parts back on the games 
First up is installing new earth braiding on all 3 of the cabinets/back boxes.
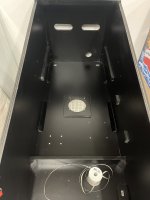
For some reason, I always start with the main cabinet. Leg plates, vents and all the other cabinet parts go in first. I also fitted different colour flipper buttons on each game. Red, orange and yellow.
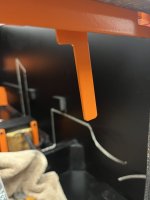
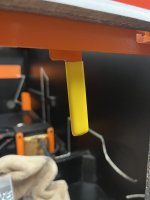
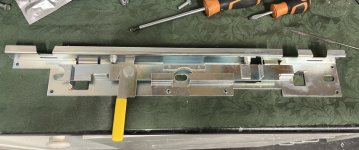
The lock bar mechanism got rebuilt with new yellow handle sleeves and polished adjustment screws.
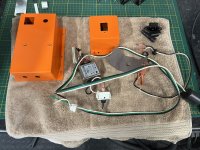
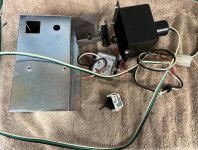
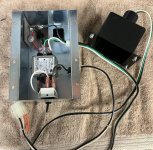
The mains electric boxes then got rebuilt.
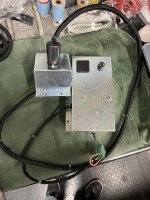
Fishy No1 and No2 are going with a full PinSound set up so larger subwoofers and shaker motors were also installed.
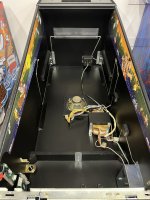
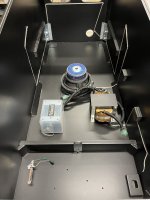
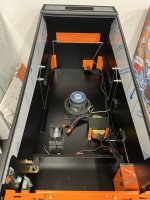
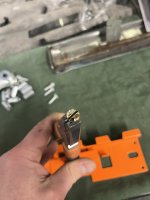
One thing that was really bugging me was the zinc plated shaker motor in Fishy No1 which has the orange powder coating.

So I made the decision to remove it, take it apart and paint it so it matches the rest of the parts in that particular cabinet
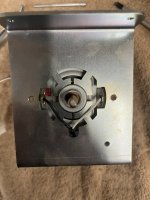
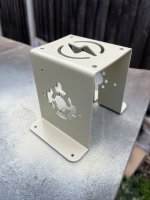
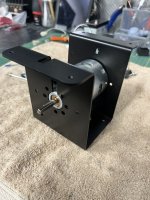

I have installed art blades in Fishy No3 as well, but if I’m honest, I’m not really happy with print quality of them so I might remove them and add mirror blades like the other 2 .
.
To help keep the cabinets look good, I buy loads of Velcro strips and use the soft side to help stop any damage to the glass when sliding it in or out as well as when bolting the back box to cabinet.
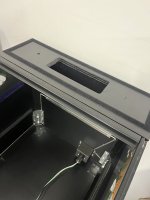
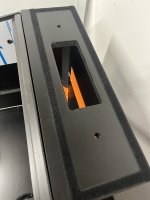
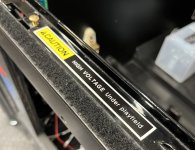
The back boxes got the same treatment, with the knockers along with newly powder coated/zinc plated pcb plates and brackets going in first.
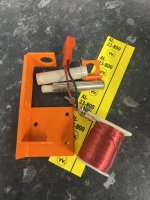
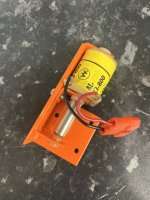
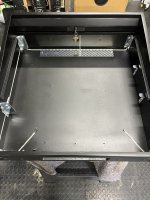
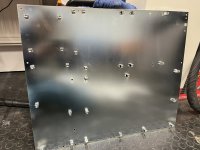
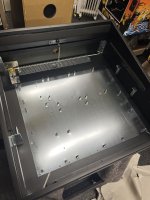
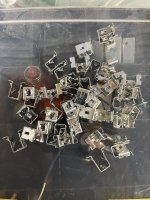
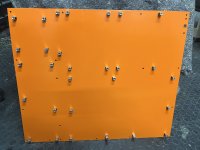
Before I installed all the boards back, one of the first jobs I did at the start of the restorations was to service all of them.
One of the power driver boards had been butchered in the past with new bridge rectifiers and a coupe of caps being changed
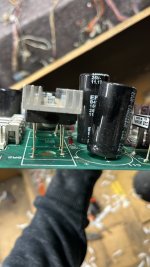
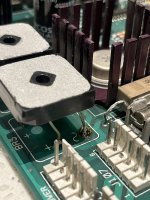
First job I did was to clean all the boards and along with @Happypin, we fitted new caps on the power driver boards along with new bridge rectifiers with longer legs to help with cooling. So they should be good now another 30 years.
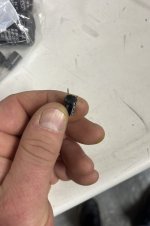
When the caps were removed, a couple of the smaller ones had started to leak. You could smell that they were leaking, one in particular was truly ****ed
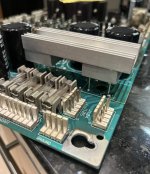
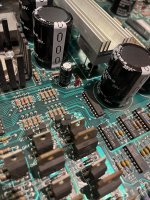
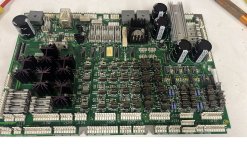
I also reflowed the solder on all the connectors, installed NVRAM and socketed the U20 chip used for the switches, so that if it ever goes pop, the owners can easily fit a new one.
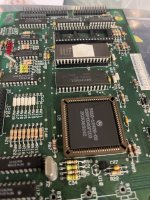
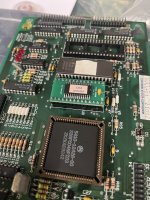
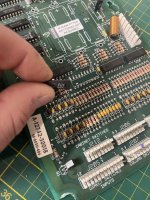
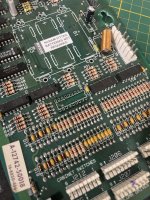
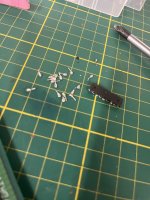
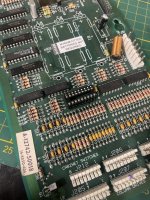
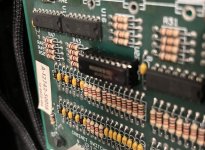
As I had done all this at the start, it was a quick job to get the boards re-installed into each back box along with the replacement stickers that I made.
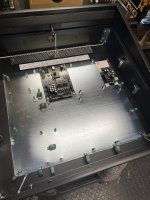
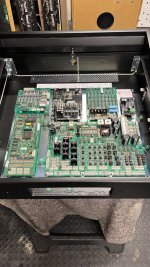
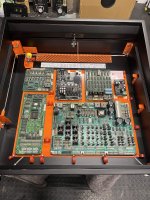
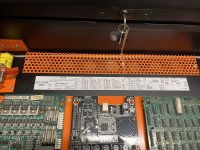
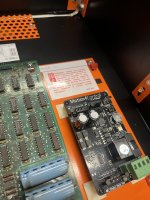
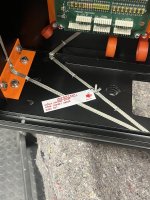
I also installed a new coin door to Fishy No3.
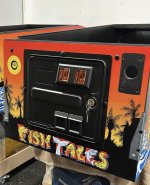
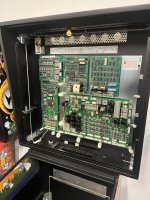
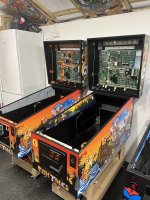
If the weather holds out, the next job will be to restore the lamp boards and toppers
First up is installing new earth braiding on all 3 of the cabinets/back boxes.


For some reason, I always start with the main cabinet. Leg plates, vents and all the other cabinet parts go in first. I also fitted different colour flipper buttons on each game. Red, orange and yellow.
The lock bar mechanism got rebuilt with new yellow handle sleeves and polished adjustment screws.


The mains electric boxes then got rebuilt.


Fishy No1 and No2 are going with a full PinSound set up so larger subwoofers and shaker motors were also installed.


One thing that was really bugging me was the zinc plated shaker motor in Fishy No1 which has the orange powder coating.
So I made the decision to remove it, take it apart and paint it so it matches the rest of the parts in that particular cabinet


I have installed art blades in Fishy No3 as well, but if I’m honest, I’m not really happy with print quality of them so I might remove them and add mirror blades like the other 2
To help keep the cabinets look good, I buy loads of Velcro strips and use the soft side to help stop any damage to the glass when sliding it in or out as well as when bolting the back box to cabinet.


The back boxes got the same treatment, with the knockers along with newly powder coated/zinc plated pcb plates and brackets going in first.


Before I installed all the boards back, one of the first jobs I did at the start of the restorations was to service all of them.
One of the power driver boards had been butchered in the past with new bridge rectifiers and a coupe of caps being changed


First job I did was to clean all the boards and along with @Happypin, we fitted new caps on the power driver boards along with new bridge rectifiers with longer legs to help with cooling. So they should be good now another 30 years.
When the caps were removed, a couple of the smaller ones had started to leak. You could smell that they were leaking, one in particular was truly ****ed


I also reflowed the solder on all the connectors, installed NVRAM and socketed the U20 chip used for the switches, so that if it ever goes pop, the owners can easily fit a new one.


As I had done all this at the start, it was a quick job to get the boards re-installed into each back box along with the replacement stickers that I made.


I also installed a new coin door to Fishy No3.


If the weather holds out, the next job will be to restore the lamp boards and toppers
Last edited:
couldnt agree more ....ants work is second to noneThe best do er upper of pinball machines in the Uk, by far. Great work Ant
100% agreeThe best do er upper of pinball machines in the Uk, by far. Great work Ant
These look great, good to see these games getting the proper treatment they deserve.
Top end work for sure
Numero uno!
Top end work for sure
Numero uno!
For sure - attention to detail is top notch. Proper job!These look great, good to see these games getting the proper treatment they deserve.
Top end work for sure
Numero uno!
Very good of you to share your work in such detail also.
These will be keepers wherever they end up
Incredible work on these. Its like a production line!
Fishy no.1 used to be mine. I picked it up from a non collector on FB marketplace. I did the MPU repair (it was my first ). Not sure those Panasonics were mine though haha.
Fishy no.1 used to be mine. I picked it up from a non collector on FB marketplace. I did the MPU repair (it was my first
Thanks mate, and yeah it does feel like a production lineIncredible work on these. Its like a production line!
Fishy no.1 used to be mine. I picked it up from a non collector on FB marketplace. I did the MPU repair (it was my first). Not sure those Panasonics were mine though haha.
What you did to the mpu board must have been ok as it’s still working
Yeah I don’t mind sharing my work. My thinking behind it is if anyone wants to restore there own game, they might be able to use some of my photos as a guide to help themFor sure - attention to detail is top notch. Proper job!
Very good of you to share your work in such detail also.
These will be keepers wherever they end up
Yeah I forgot how much fun Fish Tales is to play.These look great, good to see these games getting the proper treatment they deserve.
Top end work for sure
Numero uno!
I’ll eventually dig mine out of storage and give it the same treatment
I’ve tried sanding inside my workshop in the past using a hoover/extractor, but you still seem to get dust covering everything.
Weathers been pretty good this weekend, so whilst the suns out, so is the sander
Finished stripping all the back box lamp boards and have started prepping them for paint by sanding them smooth.
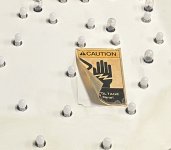
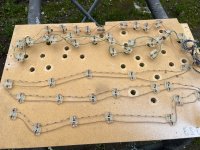
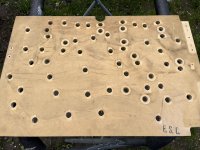
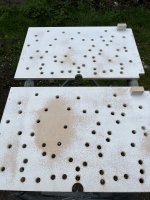
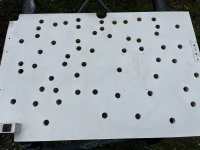
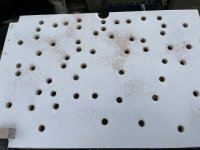
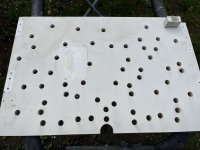
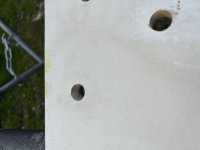
The one from FT No2 in particular is terrible.
I don’t know how but someone in the past had managed to spill some kind of yellow liquid all over it, as well as the lamp sockets. And being mdf, it’s soaked right into the wood
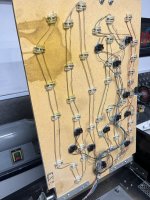
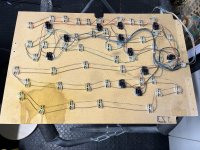
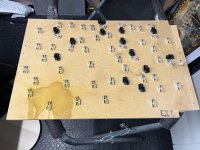
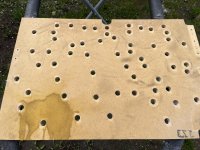
Ive tried cleaning the lamp sockets in the ultra sonic but it did nothing.
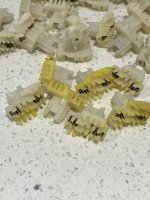
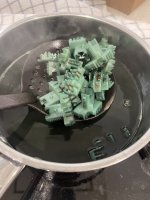
So in the end I dyed them green to match all the cable clips that I’ll do
Weathers been pretty good this weekend, so whilst the suns out, so is the sander
Finished stripping all the back box lamp boards and have started prepping them for paint by sanding them smooth.


The one from FT No2 in particular is terrible.
I don’t know how but someone in the past had managed to spill some kind of yellow liquid all over it, as well as the lamp sockets. And being mdf, it’s soaked right into the wood


Ive tried cleaning the lamp sockets in the ultra sonic but it did nothing.

So in the end I dyed them green to match all the cable clips that I’ll do

After a lot of sanding I was happy that all 3 boards were ready for paint. I even managed to completely remove the yellow staining on FT No2.
I masked up all the holes and gave them a good coat of high build primer first.
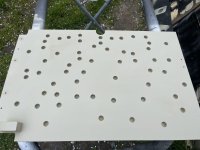
When dry I flatted this down with 600 grit sand paper and cleaned the surface with panel wipe. I then applied 3 thin coats of a matt white paint.
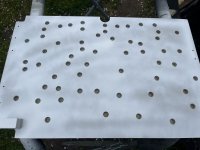
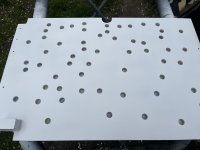
By slowly building up the paint it results in the nice smooth finish.
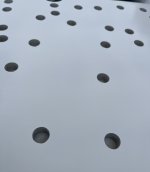
I left the paint t to fully dry over night before masking up the holes on the other side so I could seal the back of the boards with a satin clear coat.
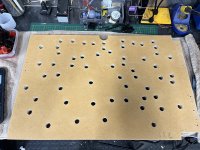
I also dyed the lamp sockets for FT No1 and fitted them in place, followed by the GI and flasher harness and the brackets.
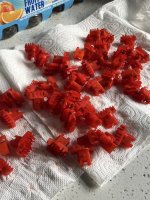
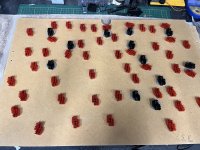
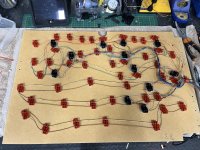
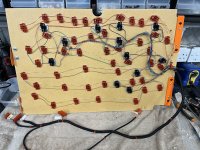
Once the first one was done I just repeated the process for the other 2 games and fitted the boards back to each back box.
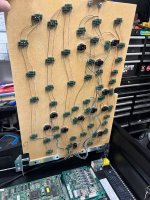
I also made a new cover plate decal to goes on the top of the game.
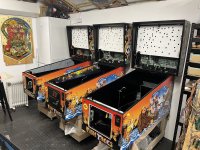
The final job to finish these off is to apply new caution labels to the fronts but I just need to print them.
Last job I did was to reinstall the cabinet harnesses and cable clips.
The owners or Fishy No1 and 2 wanted the harness braided which for me, after replacing lamp sockets and switches is one of the most boring and time consuming job there is, but forced myself to do it
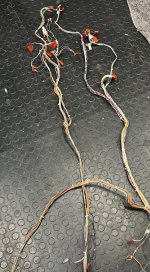
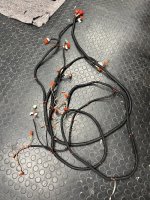
Fishy No1
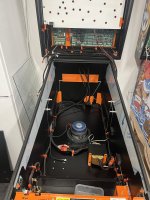
Fishy No2
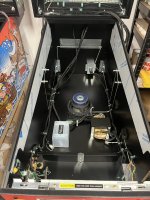
Fishy No3
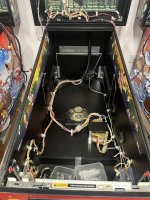
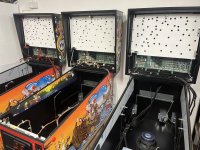
I’ll tidy the wiring up and then the Toppers will be next followed by the armour and I want to try out a mod on the fishing reel handles on all 3 games.
I masked up all the holes and gave them a good coat of high build primer first.

When dry I flatted this down with 600 grit sand paper and cleaned the surface with panel wipe. I then applied 3 thin coats of a matt white paint.


By slowly building up the paint it results in the nice smooth finish.

I left the paint t to fully dry over night before masking up the holes on the other side so I could seal the back of the boards with a satin clear coat.

I also dyed the lamp sockets for FT No1 and fitted them in place, followed by the GI and flasher harness and the brackets.


Once the first one was done I just repeated the process for the other 2 games and fitted the boards back to each back box.


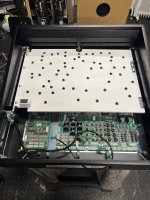
I also made a new cover plate decal to goes on the top of the game.


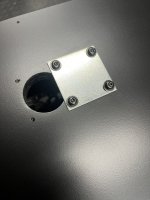
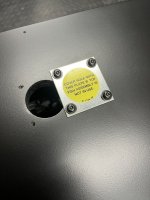
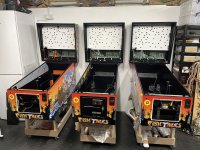
The final job to finish these off is to apply new caution labels to the fronts but I just need to print them.
Last job I did was to reinstall the cabinet harnesses and cable clips.
The owners or Fishy No1 and 2 wanted the harness braided which for me, after replacing lamp sockets and switches is one of the most boring and time consuming job there is, but forced myself to do it


Fishy No1

Fishy No2

Fishy No3


I’ll tidy the wiring up and then the Toppers will be next followed by the armour and I want to try out a mod on the fishing reel handles on all 3 games.
Last edited:
Those photos you could be back in the factory in the 90's!!! what a beautiful sight
Wonderful stuff AntAfter a lot of sanding I was happy that all 3 boards were ready for paint. I even managed to completely remove the yellow staining on FT No2.
I masked up all the holes and gave them a good coat of high build primer first.
View attachment 253033
When dry I flatted this down with 600 grit sand paper and cleaned the surface with panel wipe. I then applied 3 thin coats of a matt white paint.
View attachment 253031View attachment 253032
By slowly building up the paint it results in the nice smooth finish.
View attachment 253052
I left the paint t to fully dry over night before masking up the holes on the other side so I could seal the back of the boards with a satin clear coat.
View attachment 253035
I also dyed the lamp sockets for FT No1 and fitted them in place, followed by the GI and flasher harness and the brackets.
View attachment 253028View attachment 253030View attachment 253036View attachment 253038View attachment 253039
Once the first one was done I just repeated the process for the other 2 games and fitted the boards back to each back box.
View attachment 253040View attachment 253041
I also made a new cover plate decal to goes on the top of the game.
View attachment 253042View attachment 253043
View attachment 253044View attachment 253045
The final job to finish these off is to apply new caution labels to the fronts but I just need to print them.
Last job I did was to reinstall the cabinet harnesses and cable clips.
The owners or Fishy No1 and 2 wanted the harness braided which for me, after replacing lamp sockets and switches is one of the most boring and time consuming job there is, but forced myself to do it
View attachment 253046View attachment 253047
Fishy No1
View attachment 253050
Fishy No2
View attachment 253048
Fishy No3
View attachment 253049
View attachment 253051
I’ll tidy the wiring up and then the Toppers will be next followed by the armour and I want to try out a mod on the fishing reel handles on all 3 games.
Cheers Andy.Stunning Ant absolutely Stunting! you have gone far and beyond in the terms of “restoration” these are so much more and very tastefully done imo
Your TSPP is slowly moving up the list
I actually started restoring the toppers before the back boxes, but decided to help save space in the workshop, I wanted to install them onto each box once restored.
So I put them aside and finished the back boxes first.
I’m glad I did make a start though as there was quite a few stages to there restoration, so I’ve added quite a few photos as a reference just in case anyone else wants to do the same to their topper
The condition of all 3 toppers was as expected for being 30 years olds. The topper domes were also battered.
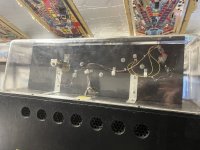
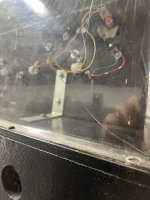
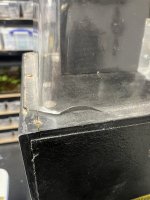
The first job was to dismantle each one into there component parts so I could see what needed doing.
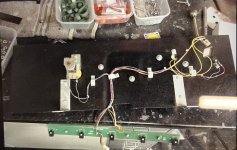
I started with the backboard and like the cabinets, they got the exact same treatment.
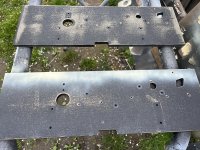
Once all the damage was filled and they were sanded smooth, I undercoated them and gave them 2 coats of satin black.
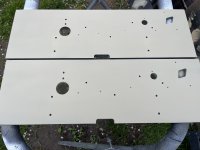
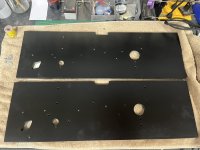 Whilst they were drying I turned my attention to the panel artwork and fish themselves.
All 3 sheets of artwork were filthy dirty and after cleaning them with some simple green they came out looking great
These were then stapled back to the topper boards.
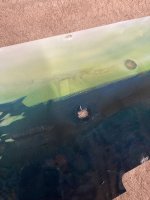
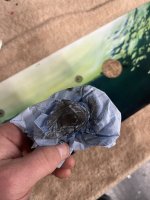

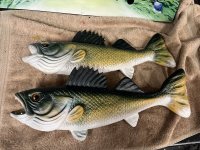
The rubber fish were really bad. The backs had a lot of staining and coil dust on the backs and they all seemed to have a sticky grease like coating.
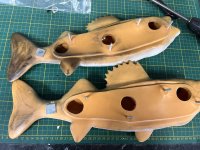
I put them in a deep fat fryer first (my ultrasonic) which removed the dirt, but the greasy coating remained.
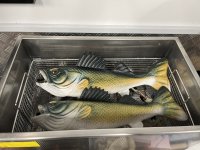
I then used some white spirit with a magic eraser, which did the trick as they looked like new afterwards. Though they did take a lot longer to clean that I expected.
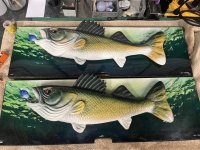
These then got attached back onto each board.
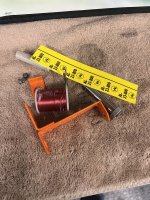
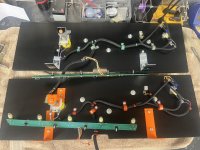
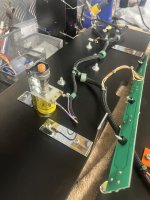
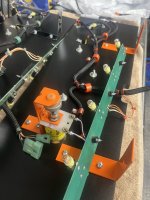
The trailer knockers were then rebuilt and the harnesses were re-installed along with the mounting brackets
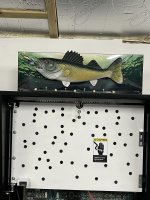
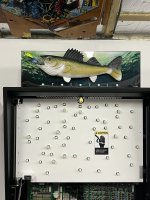
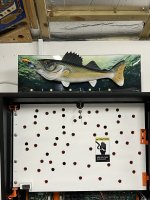
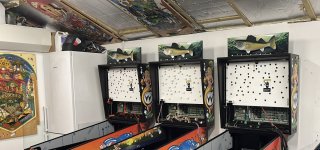
I wanted to add a little mod to each one, so I purchased 3 different fishing lures to add to the back boards.
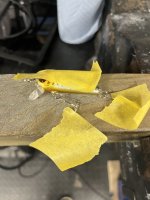
Obviously as these were real fishing lures, the hooks were dangling down and ideally I wanted them to look like they would when being pulled through the water.
So I taped them down and glued each hook at a slight angle.
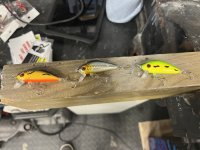
I then used a dremel tool and made a small 1/4” hole on the back of each one so I could glue in a 2” long hex bolt.
I drilled and small hole in the back board, and slid a 1” spacer over the bolt so that the lures could be mounted away from the boards.
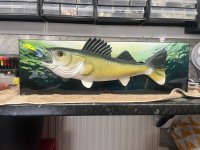
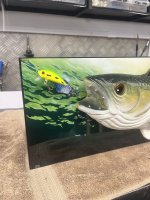
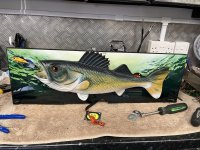
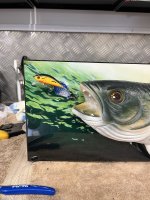
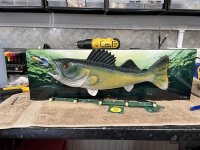
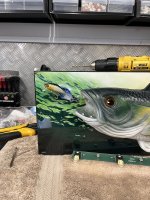
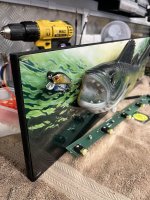
Once these were done, I could mount them back on to each back box.
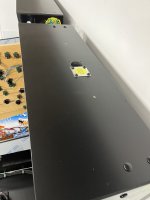
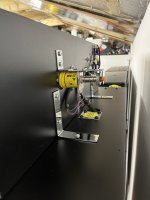
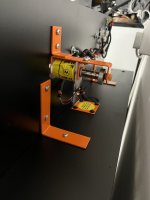
The last job to do for the toppers was to install new domes to replace the old cracked and damaged ones I took off.
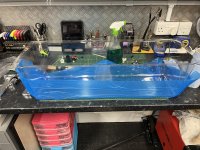
Before they could go on, I wanted to add the reflective foil which were on the old ones. When looking to buy the foil, I could only find Ministry of Pinball with any stock.
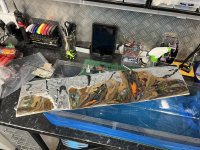
It’s quite a tricky job to install and still look good imo, due to the awkward shape of the domes and the foil itself being really thin and are prone to easily creasing.
I basically did the same “wet” method as I do when applying cabinet decals and they came out better than I expected.
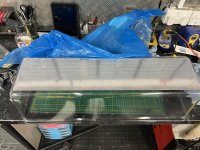
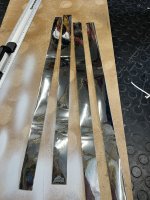
There is also a small strip of foil that should go just under the topper lamp board. However when I looked into the part number to buy a few, it seemed that they are no longer available to purchase anywhere.
So I ended up buying an extra piece used for the dome and cut it into strips, which worked out great
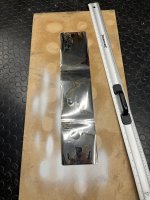
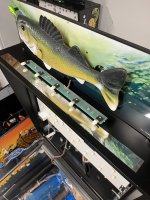
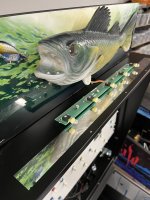
The last couple of jobs were to install replacement shell decals and fit the domes in place with the correct security screws.l

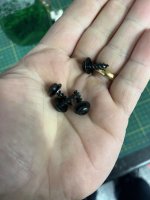
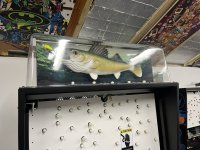
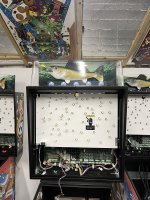
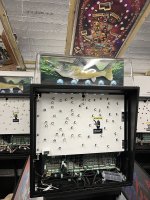
So I put them aside and finished the back boxes first.
I’m glad I did make a start though as there was quite a few stages to there restoration, so I’ve added quite a few photos as a reference just in case anyone else wants to do the same to their topper
The condition of all 3 toppers was as expected for being 30 years olds. The topper domes were also battered.


The first job was to dismantle each one into there component parts so I could see what needed doing.

I started with the backboard and like the cabinets, they got the exact same treatment.

Once all the damage was filled and they were sanded smooth, I undercoated them and gave them 2 coats of satin black.

 Whilst they were drying I turned my attention to the panel artwork and fish themselves.
All 3 sheets of artwork were filthy dirty and after cleaning them with some simple green they came out looking great
These were then stapled back to the topper boards.


The rubber fish were really bad. The backs had a lot of staining and coil dust on the backs and they all seemed to have a sticky grease like coating.

I put them in a deep fat fryer

I then used some white spirit with a magic eraser, which did the trick as they looked like new afterwards. Though they did take a lot longer to clean that I expected.

These then got attached back onto each board.

The trailer knockers were then rebuilt and the harnesses were re-installed along with the mounting brackets


I wanted to add a little mod to each one, so I purchased 3 different fishing lures to add to the back boards.
Obviously as these were real fishing lures, the hooks were dangling down and ideally I wanted them to look like they would when being pulled through the water.
So I taped them down and glued each hook at a slight angle.


I then used a dremel tool and made a small 1/4” hole on the back of each one so I could glue in a 2” long hex bolt.
I drilled and small hole in the back board, and slid a 1” spacer over the bolt so that the lures could be mounted away from the boards.


Once these were done, I could mount them back on to each back box.


The last job to do for the toppers was to install new domes to replace the old cracked and damaged ones I took off.

Before they could go on, I wanted to add the reflective foil which were on the old ones. When looking to buy the foil, I could only find Ministry of Pinball with any stock.

It’s quite a tricky job to install and still look good imo, due to the awkward shape of the domes and the foil itself being really thin and are prone to easily creasing.
I basically did the same “wet” method as I do when applying cabinet decals and they came out better than I expected.

There is also a small strip of foil that should go just under the topper lamp board. However when I looked into the part number to buy a few, it seemed that they are no longer available to purchase anywhere.
So I ended up buying an extra piece used for the dome and cut it into strips, which worked out great


The last couple of jobs were to install replacement shell decals and fit the domes in place with the correct security screws.l


