What's new
Pinball info

Register a free account today to become a member! Once signed in, you'll be able to participate on this site by adding your own topics and posts, as well as connect with other members through your own private inbox!

In Progress Fishy, Fishy, Fishy! - 3 x Fish Tales Restorations

Ant-H

Site Supporter
Joined
Oct 17, 2020
Messages
1,309
Location
London
I was asked to do full on super mint restore on a Fish Tales last year, with the plan to start it this Feb/March along side the BSD restore.

Another forum member then contacted me last November and asked if I wanted to do a super mint restore on his FT, so I thought as I’m already going to be doing , I could probably do another at the same time side by side like I did with the 2 TAFs I completed last year.

Then randomly in January I was asked by someone else if I could restore their pin, which when i asked what game it was, turned out to be another FT 😂.
This one however will be a full on cabinet restore and shop of the original playfield, so I thought why not 🤔😬

Only after they were all delivered did the realisation set in that I might have a small issue with space and more importantly storing all the parts 😂

Fishy No 1

This one overall was a good players condition game and the best one out the 3. I believe it had been previously owned by @Gonzo and @Colywobbles so has criss crossed the country over the past couple of years.

The cabinet had be re-decalled in the past and the decals seemed really good quality but unfortunately had started to wrinkle in quite a few places.
IMG_4590.jpegIMG_4305.jpegIMG_4304.jpeg
IMG_4302.jpegIMG_4296.jpegIMG_4295.jpegIMG_4292.jpegIMG_4293.jpeg
IMG_4299.jpegIMG_4303.jpeg
The Playfield had the usual wear you see on Fish Tales in the common places and some of the inserts were quite raised.
IMG_4591.jpegIMG_4592.jpegIMG_4596.jpegIMG_4595.jpeg
IMG_4594.jpeg
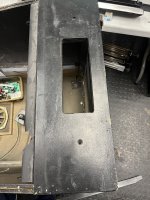
In the back box there are a few wiring hacks but nothing terriable and boards looked good. Luckily the mpu had a remote battery holder installed as they had started to leak 😮
IMG_4598.jpegIMG_4599.jpegIMG_4602.jpegDF68875F-1BF2-4DA6-916C-A40599021787.jpeg
 
Fishy No 2

This one was completely original apart from the XL screen. IMO, this one was probably the worse as a whole in terms of overall condition.
The cabinet was really bad. Every corner had chucks of wood missing.
IMG_5786.jpegIMG_5790.jpegIMG_5785.jpegIMG_5784.jpegIMG_5783.jpegIMG_5782.jpegIMG_5781.jpegIMG_5780.jpegIMG_5778.jpeg
When this game was made, they also decided to use a piece of white laminated mdf for the base.

Unfortunately this was scraped and damaged so I’m not too sure yet how to fix this without painting the underside, which I’m not keen on doing.
IMG_5779.jpeg
Playfield wise, it was the same as the others on the top, but had some serious rust issue on the bottom. Most screws, sockets and switch brackets were rusty, which will be fun removing without them snapping 🤔😮😂
IMG_5799.jpegIMG_5800.jpegIMG_5802.jpegIMG_5803.jpeg
IMG_5801.jpeg
When getting old games I love seeing some of the old fixes that have been done in the past to keep the games working and in most cases making money.

A bit of welding and Hammerite was all that was needed to keep this game going 👍🏻
7A0E2CB1-FC24-47E1-92B0-79EF841BC37E.jpeg
 
Last edited:
Fishy No 3

By the time this one arrived I didn’t take many photos of it. Again this in usual condition for a game of this age.

IMG_7727.jpegIMG_7726.jpegIMG_7724.jpegIMG_7723.jpegIMG_0087.jpegIMG_0088.jpeg
IMG_0089.jpeg
Probably the worst part was at the front of the cabinet which I noticed was really loose. Upon closer inspection I could see it was only being held on with 2 round headed nails at the top😮😂
IMG_7722.jpegIMG_7725.jpegIMG_7730.jpeg
 

Attachments

  • IMG_7720.jpeg
    IMG_7720.jpeg
    161.2 KB · Views: 5
The plan for these 3 games is to work on them at the same time, so while the filler or resin is drying on one, I’ll jump onto the next.

The first thing I usually do is to fully strip everything back so that I can fix any structural issues before starting the seemingly endless Job of filling and sanding.
IMG_7304.jpegIMG_7305.jpegIMG_7306.jpegIMG_7307.jpeg
As Fish Tales no1 had already been restored at some stage, removing the decals was a lot easier. I could literally pull them off by hand.
IMG_7747.jpeg
I could then see any previous filler work which I removed so that I could start with a solid base again.
IMG_7308.jpegIMG_7309.jpegIMG_7350.jpegIMG_7310.jpegIMG_7311.jpeg
As this game had quite a lot of damage to the corners I opted to use fibreglass filler so that it would put some strength back into the cabinet.
The only problem with that is that, is it’s a real pain in the **** to sand down 🙄
IMG_7360.jpeg
IMG_7359.jpegIMG_7356.jpegIMG_7355.jpeg
As that was drying I turned my attention to the inside of the cabinet. Straight away I could see 2 things that needed looking at.
The first was the missing support to the lower left of the base
IMG_0425.jpeg
IMG_7348.jpeg
I made a new piece and glued and nailed it into place.
IMG_7363.jpeg
The second issue was on the left had side. There was an approximate 500mm long area in which the plywood was delaminated and bubbled up.
IMG_7316.jpeg
I basically cut the delaminated section until I got back to a solid section, then turned the cabinet on its side and filled with resin.
IMG_7318.jpegIMG_7457.jpeg
The last bit to do was on the base. I had noticed when it was tombstones that there was a strip of wood missing on one side.
IMG_0426.jpeg
I removed the damaged area wood and cut a small strip which I then glued in place.
8C858BD0-FAE7-4D09-AEA5-FA4A17B63DE9.jpeg
Once dry, I back filled the voids with resin which I can then sand smooth when it’s hardened.
IMG_7377.jpeg
The back box on this game wasn’t to bad and other than the usual little bit of damage to the corners, the only restoration I had to do structurally was to re-glue and secure one of the corners which had completely come away and split.
IMG_7749.jpegIMG_7750.jpeg
Once all the major jobs were done everything got its 1st coat of filler. Whilst that was drying , I jumped onto Fishy No2
 
Last edited:
Fish Tales No2 need a lot more work doing to both the cabinet and back box compared to the other 2, so I spent quite a bit time on this one.

First thing after removing the decals, was to look at the extent of the damage and what needed fixing.
IMG_7297.jpegIMG_7298.jpegIMG_7299.jpegIMG_7342.jpeg
I ended up removing the battered sliders on the back of all the cabinets as I find it easier to fill and sand with them not there. I’ll make some new ones to replace them.
IMG_7328.jpeg
After closer inspection I could see the the front panel was bowed slightly and had come away from the base.
IMG_0546.jpeg
So I glued the clamped it back into place and sunk some 70mm screws in to make sure it wouldn’t come apart again.
IMG_0545.jpegIMG_0550.jpeg
The next job to tackle was the top of the cab, where the back box sits. This top piece of wood is never flush with the sides.
IMG_7338.jpegIMG_7339.jpeg
For me, I like all the corners and edges square and straight so to do that it’s needs filling. However I don’t recommend using regular filler as it will definitely crack.
So I remove approximately 5mm around the whole section as this will allow me to back fill with resin which won’t crack.
IMG_7341.jpeg
When it came to the underside of the base, I really wasn’t sure what to do, as they used a piece of mdf that was covered with a white vinyl.
It had been damaged over the years so my original plan was to fill the damage and then eventually paint.
IMG_7384.jpeg
The problem with that is I’m not keen on painting the base.
So I ended up spending nearly 2 hours slowly sanding the white coating off. It was not an enjoyable job as the stuff did not want to come off 😬😂
But I was really happy in the end. This will get some more sanding and then sealed/varnished along with the other 2.
IMG_7513.jpegIMG_7502.jpegAny corners where the ply had delaminated were glued and pinned back in to place before the resin and first coat of filler was applied to the entire cabinet.
IMG_7343.jpegIMG_7344.jpegIMG_7345.jpegIMG_7455.jpegIMG_7456.jpegIMG_7386.jpegIMG_7385.jpegIMG_0549.jpeg
Once dry I sanded everything down with 120 grit before going over everything with a pencil and circling any areas that needed more filler.
The resin always needs a thin layer of filler over the top in order fill the tiny air bubbles that you get when using it.

I used 240 grit for the next round of sanding and basically repeated the process until all the edges and corners are nice and straight.

I’ll use the primer coat later on as I final check before applying the top coat.
IMG_0547.jpegIMG_0548.jpegIMG_7572.jpegIMG_7573.jpegIMG_7574.jpegIMG_7575.jpegIMG_7577.jpegIMG_7576.jpeg
Final job I did was to make the new sliders and pin them in place.
IMG_0533.jpegIMG_0544.jpeg
Fishy No3 is next along with the back boxes, which again for Fishy No2 needs alot of work.
 
A lot of these Bally/Williams cabinets were made using off cuts/panels from other titles and the third Fish Tales cabinet was no exception.

When I was taking a closer look at the cabinet I noticed that the top panel was made from the side of a TAF back box 😮😂
IMG_7719.jpeg
The obvious area that needed sorting on this cabinet was the front. I could see it was very loose and when I removed the side rails I could see why 😮
IMG_7837.jpegIMG_7840.jpeg
It was literally being held on with 2 x two inch nails.
IMG_7838.jpeg
When I removed these the top of the front panel could be pulled right forward.
IMG_7841.jpegIMG_7839.jpeg
I ended up pulling it apart slightly and running aload of glue down the corners on both sides, pinned it together and then clamped the entire cabinet up. I also counter sunk some 70mm screws in as well for good measure.
IMG_7848.jpegIMG_7850.jpegIMG_7857.jpegIMG_7858.jpegIMG_7856.jpegIMG_7858.jpegIMG_7852.jpeg
When dry added some more resin to some more larger bits of damage before giving the cabinet its first coat of filler.
IMG_8074.jpegIMG_8073.jpegIMG_8256.jpegIMG_8255.jpegIMG_8257.jpeg
Whilst that was drying I started on all 3 back boxes.
Fishy 1 and 3 were not that bad but No2 needed a lot more work doing to it.
IMG_7734.jpegIMG_7743.jpegIMG_7745.jpegIMG_7735.jpeg
IMG_7740.jpeg
The back looked like it had been in contact with water or in the damp location as the mdf was quite swollen compared to the other 2.
IMG_7736.jpeg
IMG_7737.jpeg
I could also see a previous fix under the paint where the back box latch goes.
IMG_7738.jpeg
So I gave the panel a rough sand using 60 grit pads to try and smooth it out a little.
IMG_7739.jpeg
With some of the paint removed I could see the previous fix which looked like polycel wall filler to me. It had clearly lost a big chunk in the past.
IMG_7751.jpeg
IMO problem with using regular wood filler in this area is as soon as I install the new latch and lock it in place, the screws will loosen and the filler will crack.

So I just removed it entirely and back filled with resin.
Which once sanded, gives a much stronger and overall better finish.
I also added fibre glass filler to the edges of all 3 boxes to avoid cracking once they’ve been all smoothed out and painted.
IMG_7752.jpeg
IMG_7755.jpeg
IMG_7759.jpegIMG_7809.jpeg
On the top of all 3 back boxes I decided to plug up the holes where the topper is mounted with glue and tooth picks before cutting them back and skimming over the top with filler.

The reason for that is when it comes to fitting new topper domes I can drill new holes and have a good fixing anchor to screw into. Plus the holes in the new domes were slightly different from the originals.
IMG_7753.jpeg

IMG_7754.jpeg
Once this was dry I could start with the filling and sanding of all 3.
IMG_7810.jpegIMG_7811.jpegIMG_7812.jpegIMG_8018.jpegIMG_8019.jpegIMG_8020.jpeg
The the stage for these will be primer but I’ll do that once the cabinets are ready as well.
 
Last edited:
I think FT1 may have been mine previously. I was tempted to get it restored myself, but as ever the urge to cycle my lineup took over!

Out of interest, what sort of rough price would we be looking at for a full cab and playfield restoration? My WH2O could be on the list...
 
I think FT1 may have been mine previously. I was tempted to get it restored myself, but as ever the urge to cycle my lineup took over!

Out of interest, what sort of rough price would we be looking at for a full cab and playfield restoration? My WH2O could be on the list...
Correct Jonathan, I bought it off you 👍
 
Awesome work Ant ! Really is.

I am a fan of resin as well....

Thanks a lot. For me resin is the way to go when rebuilding corners or large damaged areas.
Regular wood filler is perfect for general purpose filling of light damage but is just to soft for any areas that might take a knock.

I actually use 4 different types of filler when restoring the cabinets, each one is good for different purposes.

Does the UK need another Manny? Someone to make great cabinets that can be purchased - ready to prime and decal?

I’ve discussed this with others a few times now, and my view is due to the cost of materials etc now, I just don’t see the UK being a big enough market to make it financially viable, which is a shame.
 
Probably a market for both amazing work like this and a ‘Manny’ , can’t remember why he stopped doing them ?
He threw a strop.

Manny was an excellent woodworker. A craftsman. But he had an ego that constantly needed stroking. Even his wife had to (please no stroke jokes).

The WPC cabinet is not a great design - the four corner joints would be much better with a decent mortise and tenon joint than a 90 degree cut.

It depends if restorers price up the hourly rate of repairing a cabinet to a high standard. Surely if you could buy a new cab it would be more cost effective?

With CNC machines now it wouldnt take long to knock these up. You only need a couple of set of decent clamps to assemble them.

You can buy plywood already with the coating on it so no more spraying before applying decals, once I had to apply a new set of decals onto a new CGC cabinet. Took me 20 minutes.

There are cabs that have a few different things on them, ie - shooter rods or start buttons - extra ball buttons - speaker position and transformer position but I am sure you could sell a set of router patterns.....
 
You would have thought with Vpins etc alongside real ones (and cabs arent easilly available nowadays - I do remember the days where people would give them away - now they are sold!) there would me slightly more demand than there used to be.
Maybe a Cab that would be easilly adaptable to both... a "real" cab lets say, with mounts that could be added as screen supports etc.

Wood is now expensive. So cant see these being "cheap" though! Wood + Time to setup/CNC + wear and tear on tools etc. Deffo a good "slow burner" for someone though should they have the skills and be so inclined!
 
A lot of these Bally/Williams cabinets were made using off cuts/panels from other titles and the third Fish Tales cabinet was no exception.

When I was taking a closer look at the cabinet I noticed that the top panel was made from the side of a TAF back box 😮😂
View attachment 250733
The obvious area that needed sorting on this cabinet was the front. I could see it was very loose and when I removed the side rails I could see why 😮
View attachment 250717View attachment 250730
It was literally being held on with 2 x two inch nails.
View attachment 250718
When I removed these the top of the front panel could be pulled right forward.
View attachment 250715View attachment 250716
I ended up pulling it apart slightly and running aload of glue down the corners on both sides, pinned it together and then clamped the entire cabinet up. I also counter sunk some 70mm screws in as well for good measure.
View attachment 250714View attachment 250719View attachment 250709View attachment 250711View attachment 250713View attachment 250711View attachment 250712
When dry added some more resin to some more larger bits of damage before giving the cabinet its first coat of filler.
View attachment 250707View attachment 250708View attachment 250705View attachment 250706View attachment 250731
Whilst that was drying I started on all 3 back boxes.
Fishy 1 and 3 were not that bad but No2 needed a lot more work doing to it.
View attachment 250721View attachment 250728View attachment 250729View attachment 250722
View attachment 250727
The back looked like it had been in contact with water or in the damp location as the mdf was quite swollen compared to the other 2.
View attachment 250723
View attachment 250724
I could also see a previous fix under the paint where the back box latch goes.
View attachment 250725
So I gave the panel a rough sand using 60 grit pads to try and smooth it out a little.
View attachment 250726
With some of the paint removed I could see the previous fix which looked like polycel wall filler to me. It had clearly lost a big chunk in the past.
View attachment 250692
IMO problem with using regular wood filler in this area is as soon as I install the new latch and lock it in place, the screws will loosen and the filler will crack.

So I just removed it entirely and back filled with resin.
Which once sanded, gives a much stronger and overall better finish.
I also added fibre glass filler to the edges of all 3 boxes to avoid cracking once they’ve been all smoothed out and painted.
View attachment 250693
View attachment 250698
View attachment 250694View attachment 250695
On the top of all 3 back boxes I decided to plug up the holes where the topper is mounted with glue and tooth picks before cutting them back and skimming over the top with filler.

The reason for that is when it comes to fitting new topper domes I can drill new holes and have a good fixing anchor to screw into. Plus the holes in the new domes were slightly different from the originals.
View attachment 250697

View attachment 250696
Once this was dry I could start with the filling and sanding of all 3.
View attachment 250699View attachment 250700View attachment 250701View attachment 250702View attachment 250703View attachment 250704
The the stage for these will be primer but I’ll do that once the cabinets are ready as well.
Loved this thread cheers Ant
 
Back
Top Bottom