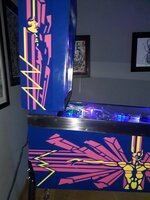
So i have embarked on my first efforts to bring back a bit of Sparkle to Elektra.
I got the machine a couple of months ago from Solar Sailor who had got the machine working, completed and LED conversion and an put an overlay of the upper play field.
I have never done anything like this before so its a bit of a learning curve and thanks to all of you who have posted amazing work i have gleaned a lot of information.
So to build up confidence I started with the coin door. It was a bit rusty but has polished up OK on the bench polisher, for the Eagle eyed (I wish I was), I have found the missing springs which and screws in the depths of the garage which vibrated off the table during buffing. - NOTE TO SELF: Put bits and pieces in pot when buffing.
Next up bottom playfield, its in pretty good shape but a couple of bits of wear and some Mylar on the hands

So I do a bit of touching up with acrylic paint, what to do with the Mylar, so after watching You tube a reading what should I do
1. Leave it
2. Heat it
3. Freeze it
4. Try and get some goo gone
Friday night and I have had some beers, I have an air duster can so can upside down and hit the mylar, it goes icey, pull off really slowly hit with spray and Sh*t

It looks worse on Saturday morning: NOTE TO SELF: do not make rash decisions whilst drinking beer
So I strip, touch up , polish and wax and here is the result, I am not entirely happy but some of it looks better than before

So I have got this far so decide lets carry on and order a stencil kit from PIMP in the US, its been a while and they left customs yesterday so should be here.
In the meantime I embark on stripping down. Wow there is miles of wiring in here. These little bolts are a nightmare why does nothing in the socket set seem to fit. Ahh its becuse they are imperial NOTE TO SELF: Get a 1/4 inch bolt driver, that's so much easier, thanks Amazon for the speedy delivery.
Next stripping down. Lots of labelling/photos and putting stuff in zip bags, I found it useful to bag in sections, upper playfield, LHS lower playfield etc. I hope that works out when putting things back together. Bad news though, damage on the board, I don't know how that happened. There was a burning smell one night when playing, the RHS lower flipper coil was super hot but I can't see a connection there!

Wires out, next up getting the plexi glass out, what a nightmare that was. worrying about snapping things, anyway I carefully removed the screws got the plexi out and I have temporarily re-fixed with the glass out. I knew that a bit of paint would lift, mainly the lower part of the diamond as you could see this has lifted already. About 3 hours of Novus 2 and its come up pretty good. There was plenty of grime and a strong outline of an egg made up of years of ming around the viewing window. I have got rid of the draft excluder stuff as it seems to be a bit of a dirt trap and sanded and painted around the opening

I have left the lifted bit of the diamond on an not sure whether to leave that or not. Started touching up the playfield but needs more work.

QUESTION. I want to paint the black side rails, any suggestion for paint, should I use 2K?. I will need to use a rattle can. Thanks
Now onto the cab: NOTE TO SELF. Buy respirator before starting. Thanks Amazon for the speedy delivery

Hours of sanding later and a bit more to go

The side rails had deep scratches and annoying dents on the top where the top box was folded down and various other dents up there.
I heated the dents with a gas can blow torch and then squeezed them in a vice. I worked out pretty good and they look better and a couple of dings look to have gone
Lots of sanding, more to go and the deep scratches are out

So shortly the stencils should be here and I can move onto the painting
QUESTION/VIEWS, should I paint all of the inside of the box or mask up. Which primer/paint to use/estimated number of cans
I am hoping PIMP sends the RAL numbers so I can get correct colours, these look expensive
https://www.riolettcustomaerosols.co.uk/ral-paint-colours/

2 Weeks Later
Bit of progress on the playfield - should have taken a few more before shots
Here are a few


Playfield is back together
Full Rebuild of the 4 main flipper
Spend a while cleaning wiring
Spent hours polishing ramps etc
Cab is now sanded and ready for primer, got 6 cans of Upol from Amazon (when they turn up its satin black)
NOTE TO SELF - double check orders...
Painted side rails satin black
Ordered 12 cans of Upol primer from Amazon - which took ages to arrive - No thanks to Amazon this time for their speedy delivery
PIMP stencils are here...


Decided on polishing out the lifted piece of diamond from the perspex and attempted a touch up.

It looks better from the front
Ignore the paint over splash, I am annoyed with myself about that
I got the machine a couple of months ago from Solar Sailor who had got the machine working, completed and LED conversion and an put an overlay of the upper play field.
I have never done anything like this before so its a bit of a learning curve and thanks to all of you who have posted amazing work i have gleaned a lot of information.
So to build up confidence I started with the coin door. It was a bit rusty but has polished up OK on the bench polisher, for the Eagle eyed (I wish I was), I have found the missing springs which and screws in the depths of the garage which vibrated off the table during buffing. - NOTE TO SELF: Put bits and pieces in pot when buffing.
Next up bottom playfield, its in pretty good shape but a couple of bits of wear and some Mylar on the hands
So I do a bit of touching up with acrylic paint, what to do with the Mylar, so after watching You tube a reading what should I do
1. Leave it
2. Heat it
3. Freeze it
4. Try and get some goo gone
Friday night and I have had some beers, I have an air duster can so can upside down and hit the mylar, it goes icey, pull off really slowly hit with spray and Sh*t
It looks worse on Saturday morning: NOTE TO SELF: do not make rash decisions whilst drinking beer
So I strip, touch up , polish and wax and here is the result, I am not entirely happy but some of it looks better than before
So I have got this far so decide lets carry on and order a stencil kit from PIMP in the US, its been a while and they left customs yesterday so should be here.
In the meantime I embark on stripping down. Wow there is miles of wiring in here. These little bolts are a nightmare why does nothing in the socket set seem to fit. Ahh its becuse they are imperial NOTE TO SELF: Get a 1/4 inch bolt driver, that's so much easier, thanks Amazon for the speedy delivery.
Next stripping down. Lots of labelling/photos and putting stuff in zip bags, I found it useful to bag in sections, upper playfield, LHS lower playfield etc. I hope that works out when putting things back together. Bad news though, damage on the board, I don't know how that happened. There was a burning smell one night when playing, the RHS lower flipper coil was super hot but I can't see a connection there!
Wires out, next up getting the plexi glass out, what a nightmare that was. worrying about snapping things, anyway I carefully removed the screws got the plexi out and I have temporarily re-fixed with the glass out. I knew that a bit of paint would lift, mainly the lower part of the diamond as you could see this has lifted already. About 3 hours of Novus 2 and its come up pretty good. There was plenty of grime and a strong outline of an egg made up of years of ming around the viewing window. I have got rid of the draft excluder stuff as it seems to be a bit of a dirt trap and sanded and painted around the opening
I have left the lifted bit of the diamond on an not sure whether to leave that or not. Started touching up the playfield but needs more work.
QUESTION. I want to paint the black side rails, any suggestion for paint, should I use 2K?. I will need to use a rattle can. Thanks
Now onto the cab: NOTE TO SELF. Buy respirator before starting. Thanks Amazon for the speedy delivery
Hours of sanding later and a bit more to go
The side rails had deep scratches and annoying dents on the top where the top box was folded down and various other dents up there.
I heated the dents with a gas can blow torch and then squeezed them in a vice. I worked out pretty good and they look better and a couple of dings look to have gone
Lots of sanding, more to go and the deep scratches are out
So shortly the stencils should be here and I can move onto the painting
QUESTION/VIEWS, should I paint all of the inside of the box or mask up. Which primer/paint to use/estimated number of cans
I am hoping PIMP sends the RAL numbers so I can get correct colours, these look expensive
https://www.riolettcustomaerosols.co.uk/ral-paint-colours/
2 Weeks Later
Bit of progress on the playfield - should have taken a few more before shots
Here are a few
Playfield is back together
Full Rebuild of the 4 main flipper
Spend a while cleaning wiring
Spent hours polishing ramps etc
Cab is now sanded and ready for primer, got 6 cans of Upol from Amazon (when they turn up its satin black)
NOTE TO SELF - double check orders...
Painted side rails satin black
Ordered 12 cans of Upol primer from Amazon - which took ages to arrive - No thanks to Amazon this time for their speedy delivery
PIMP stencils are here...
Decided on polishing out the lifted piece of diamond from the perspex and attempted a touch up.
It looks better from the front
Ignore the paint over splash, I am annoyed with myself about that
Last edited:

")


 great game Elektra.
 . Keef.