What's new
Pinball info

Register a free account today to become a member! Once signed in, you'll be able to participate on this site by adding your own topics and posts, as well as connect with other members through your own private inbox!

Buttons over the lights on my playfield seem to be lower than the surface is this right?

Pinball newby.

Registered
Joined
Mar 19, 2016
Messages
41
Location
rutland
Hi Folks
Whilst cleaning the playfield on my 1974 Segasa Triple action machine I noticed the buttons covering the lights seem to be lower than the surface so when the ball goes over them it deviates as it runs into the "manhole cover"over the bulb.
Is this right or has my machine aged and they have shrunk back?Is it perhaps a sign that the table has been wet in the past and is drying out in my house ( I'm thinking like a furniture maker as that's my trade).Have I perhaps removed wax that was previously making it flat?
How do I fix this or is it just because of the age of the table?
Many Thanks
Alick
20160410_213255[1].jpg
 
They're called inserts and they can move over time (either sink likes yours have done or raise up a bit). It's caused by the heat from the lamp affecting the glue that holds them in place. Heat up any affected ones with a hairdryer then get them level with the playfield again before glueing them back in place with super glue from underneath :thumbs:
 
Best way to level them is get a flat piece of wood bigger than the insert, heat the insert up from underneath with the hairdryer until the glue is soft enough for you to push it proud of the playfield (be gentle) and then tap it back down level using the wood. That should mean you get it dead level (or very close to) the playfield. Wait for things to cool down then run some super glue round the edge of the insert underneath and that should keep it in place for ever :thumbs:
 
I hope the inserts aren't ' dished ' which happens a lot on older machines, a lot more work to fix ( not that I've done it ).
 
Best way to level them is get a flat piece of wood bigger than the insert, heat the insert up from underneath with the hairdryer until the glue is soft enough for you to push it proud of the playfield (be gentle) and then tap it back down level using the wood. That should mean you get it dead level (or very close to) the playfield. Wait for things to cool down then run some super glue round the edge of the insert underneath and that should keep it in place for ever :thumbs:

Thanks for that I'll pick up an offcut tomorrow.:)
 
I hope the inserts aren't ' dished ' which happens a lot on older machines, a lot more work to fix ( not that I've done it ).

Good point Kev :thumbs: If they are dished then you'll need to take them out (same hairdryer method but push them out of the playfield) put a piece of high grit sandpaper on a flat surface and then rub the face of the insert on it until you've made it flat again...then replace in the playfield as above :thumbs:
 
N
Good point Kev :thumbs: If they are dished then you'll need to take them out (same hairdryer method but push them out of the playfield) put a piece of high grit sandpaper on a flat surface and then rub the face of the insert on it until you've made it flat again...then replace in the playfield as above :thumbs:

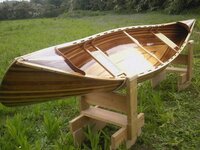
That shouldn't be a problem as being a cabinetmaker I have plenty of sandpaper at work too.Did I happen to mention I also make these..:)Photo-0019.jpg
Cheers
Alick
 
Wow! You should be doing Cab refurbs then! Saying that, looking at that masterpiece, Cabs would be well below your capability!! :)
 
Might I suggest that you look at videos on damaged inserts before your repair. If you damage one it could devastate the look of your machine. If it is a rare one/ impossible to replace/ faded like the others - it could prove tough to recover from

 
Might I suggest that you look at videos on damaged inserts before your repair. If you damage one it could devastate the look of your machine. If it is a rare one/ impossible to replace/ faded like the others - it could prove tough to recover from

Thanks for that DRD I have just watched it and I can see It will take a while for me to sort out as I also have a line of small white inserts where the ball runs off at the near end.I don't think my game has much rarity value but I do want it so that the ball doesn't deviate as it runs over them.
Cheers
Alick
 
Wow! You should be doing Cab refurbs then! Saying that, looking at that masterpiece, Cabs would be well below your capability!! :)
Yes I did think it might be interesting to remove all the works from a machine that has a knackered cabinet and build it into a beautiful wooden cabinet with wood inlays for the numbers etc.Might take a few thousand hours to complete though!
Cheers
Alick
 
I have lifted some of my inserts and they are a great improvement but I have to admit it is not an easy operation.When they have been heated enough should they come out easily because I do find I still have to hit them quite hard which is very un-nerving with the play field leaning on the back box?
I have a piece of card to prevent damage to the paintwork between the back box and the play field which helps but I am frightened of breaking the back box glass with shock from the hammer blows.
I have done the worst offenders so may leave the rest rather than risk damage.
Cheers
Alick
 
They are always hard to shift. A good technique is to use a socket set - find the socket that is approximately the size of the insert, then use that to gently ease the insert out (reheat the insert if it is not moving). I attach the socket to a 2-3" extension bar because you can grip that in your hand and apply steady pressure, rather than trying to use your thumb against the socket itself.
 
They are always hard to shift. A good technique is to use a socket set - find the socket that is approximately the size of the insert, then use that to gently ease the insert out (reheat the insert if it is not moving). I attach the socket to a 2-3" extension bar because you can grip that in your hand and apply steady pressure, rather than trying to use your thumb against the socket itself.

Yes I have been using a socket extension piece and have also found a dowel the rights size is slightly softer.
 
I have a piece of card to prevent damage to the paintwork between the back box and the play field which helps but I am frightened of breaking the back box glass
I'm sure Rudis advice is good for this task, but in general a piece of pipe foam is useful to protect the backbox (good for when folding it down for transport too).

WP_20160414_08_01_14_Pro.jpg
 
Back
Top Bottom