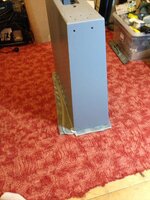
oh I baught some of them
Pinball info
You are using an out of date browser. It may not display this or other websites correctly.
You should upgrade or use an alternative browser.
You should upgrade or use an alternative browser.
In Progress Bram stokers shop log and mods
- Thread starter RudeDogg1
- Start date
Wherever it's from, you should replace it with new fishpaper from the group buy

Rudi I'm sure that is off the coffin kickout solenoid
Cheers Kev
Now all working apart from the tiny left hand gate coil which is dead. This thing now plays fast as fook much more responsive
Well done Rudi are you going to share a few photos of your finished projectNow all working apart from the tiny left hand gate coil which is dead. This thing now plays fast as fook much more responsive
I take it back it's now decided to blow f105 every time I turn it on. Any ideas what I should be looking at guys?
Whatever f105 is the fuse for? 

Short Circuit somewhere in one of the circuits it protects - Solenoids #1-8 (See table below)
Do any of these coils lock on when you turn the game on?
I'd start by unplugging J130, then measuring the resistance between each of pins on the connector (playfield side) and ground looking for dead shorts (Anything less than 3.5-4Ohms here isn't right). Do the same thing on the pins on the board side. This should allow you to narrow down where the fault lies pretty quickly.
If it was working properly previously but has suddenly stopped its most likely to be one of the TIP102 drive transistors: Q82,Q80,Q78,Q76,Q64,Q66,Q68 or Q70.
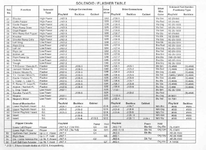

Whatever f105 is the fuse for?
Very helpful [emoji13] there's about 8 coils on that fuse. That we're working fine until mid game
Right people bare with me I'm crap with multi meters. So which of the numbers on the ohms settings do I need to have it set to? And when I test each pin on the connector I take it I'm ment to have the black on the earth? Should the machine be on or off? Poor things pretty lifeless at the mo only the gi lit no life in anything else
Machine should be switched off. Hook your black probe underneath the ground braid when taking all of these measurements. You're looking for shorts so if your meter doesn't auto range choose a low ohm setting.Right people bare with me I'm crap with multi meters. So which of the numbers on the ohms settings do I need to have it set to? And when I test each pin on the connector I take it I'm ment to have the black on the earth? Should the machine be on or off? Poor things pretty lifeless at the mo only the gi lit no life in anything else
Your meter should make a continuous bleep if it's on the right setting and you're looking for shorts. Touch the leads together to see if you're on the right setting.
Ok well just checked each pin on j1030 on the 20k setting I get 9.80 on each pin and 2m I get 0.09 on each which leads me to believe it is indeed a tip102. What's the best way to narrow down which one? Grounding the tip? Or is there a better way. I have a feeling it won't fix the dead machine prob that it's caused tho
Well she's fully working again neil f was kind enough to come out again. Took us a while to track the prob down which ended up being part of the winding on the shooter coil had worked loose and poked out the wrapper and shorted to the bracket. And the dead cpu was a Rudi error when checking the fuses I'd put one of the ribbon cables on only one side of the pins [emoji15]
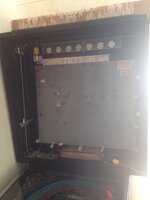
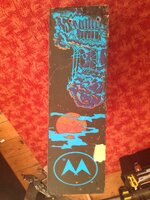
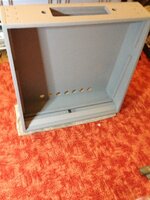
Well as I now have my machine back from its stint at work and the sun is out I thought it was time to restore and redecal the cab. Stripped the head of all its innards.
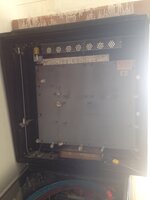
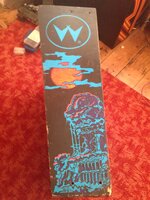
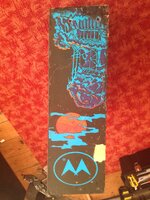
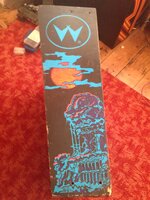
As you can see the sides of the head are quite battered and all the decals have turned white but somebody has sharpied them. I did attempt to remove the decal but it would appear the head is screen printed but the cab is decals is this normal?


As you can see the sides of the head are quite battered and all the decals have turned white but somebody has sharpied them. I did attempt to remove the decal but it would appear the head is screen printed but the cab is decals is this normal?
Hi Rudi yes this is totally normal. When producing they would use various suppliers for cabs and back boxes. Some suppliers would decal others would screen print, it depended on supply at the time. Around BSD they would of been at full production so to maximise supply various manufacturers were used and most probably the same supplier was used for each.Well as I now have my machine back from its stint at work and the sun is out I thought it was time to restore and redecal the cab. Stripped the head of all its innards.
As you can see the sides of the head are quite battered and all the decals have turned white but somebody has sharpied them. I did attempt to remove the decal but it would appear the head is screen printed but the cab is decals is this normal?
Just sand the backbox down to the wood and then work up the sanding grades to get to a babies bum finish

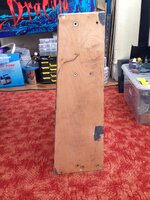
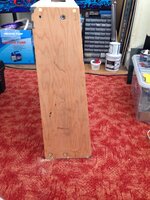
Well some more progress tonight got at the paint sanded off only took about 25 mins.
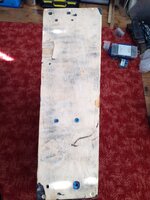
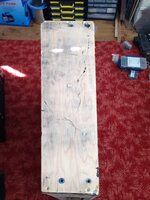
That's just a first pass with 120 grit will start filling tomoz night. No the discs I'm using arnt your conventional discs these are far superior. They are called autonet by mirka. Yes more expensive (think I paid £5 for 10) they don't clog and get very little dust if your sander has a bag or vacuum mine just has a bag and it collected pretty much everything. I only had to use one disc for the whole head and I think it will last well into the filler stages.
Here's what the disc looks like after doing the head
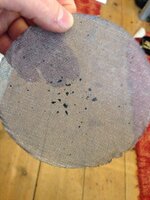
As you can see only a few specs have clogged. I'm using the same model of sander manny used to use which is a makita BO5031 5" Random orbital. I also use a pad saver because these discs run hotter so it protects your machines Velcro pad


That's just a first pass with 120 grit will start filling tomoz night. No the discs I'm using arnt your conventional discs these are far superior. They are called autonet by mirka. Yes more expensive (think I paid £5 for 10) they don't clog and get very little dust if your sander has a bag or vacuum mine just has a bag and it collected pretty much everything. I only had to use one disc for the whole head and I think it will last well into the filler stages.
Here's what the disc looks like after doing the head

As you can see only a few specs have clogged. I'm using the same model of sander manny used to use which is a makita BO5031 5" Random orbital. I also use a pad saver because these discs run hotter so it protects your machines Velcro pad
what/whose decals are you going to be using for it Rudi ?
Cheers
kev
Cheers
kev
I bought them over a year ago at the time they were the only place you could get them can't remember the bleddy name tho I'll get back to you
No worries Rudi I just wondered if they were from PeteBI bought them over a year ago at the time they were the only place you could get them can't remember the bleddy name tho I'll get back to you
Cheers
kev
No worries Rudi I just wondered if they were from PeteB
Cheers
kev
Ministry of pinball it was
So I attempted to do the filling yesterday but it was so hot outside it was going off befor I had a chance to use it sighs....
Yeah - mine is decalled on the body and screen printed on the backbox too
Sent from my iPad using Tapatalk
Sent from my iPad using Tapatalk
A few questions for the veterans on here that restore a lot of cabs. This is the first cab I've redecalled.
How far in do you trim the decals?
When you fit the metal leg protectors do you cut the decal around them?
How far in do you trim the decals?
When you fit the metal leg protectors do you cut the decal around them?
I just trimmed mine back with a sharp blade at a slight angle. Then I ran my hand along the edge to make sure the decal wasn't going to get caught and lifted if someone brushed against it.
As for the leg protectors; I just fitted them straight over the decal with no trimming. I left the cab for quite a while before fitting them though.
As for the leg protectors; I just fitted them straight over the decal with no trimming. I left the cab for quite a while before fitting them though.
I just trimmed mine back with a sharp blade at a slight angle. Then I ran my hand along the edge to make sure the decal wasn't going to get caught and lifted if someone brushed against it.
As for the leg protectors; I just fitted them straight over the decal with no trimming. I left the cab for quite a while before fitting them though.
I'm sure I've seen someone say they cut around them
Disclaimer: I've not restored a cabinet.I'm sure I've seen someone say they cut around them
Having said that I've plenty of shoplogs where people do and don't cut the decals around the legs (the worry being that they'll cause the decal to pucker). As @Wiredworm said, don't rush to refit the legs so that the adhesive has plenty of time to harden. The other option is to get some of those Stern-style leg brackets that keep the leg just slightly proud of the cabinet surface.

