What's new
Pinball info

Register a free account today to become a member! Once signed in, you'll be able to participate on this site by adding your own topics and posts, as well as connect with other members through your own private inbox!

In Progress Ben's Whirlwind restore

benwillcox

Registered
Joined
May 24, 2016
Messages
56
Location
Oswestry
Hi chaps, inspired by the thread here by @kev a I'm shortly about to start restoring my own Whirlwind so thought I would document it here.

I've restored a few machines in the past, but always just concentrated on getting the playfield bits and mechanics/electronics as good as possible, without really paying much attention to the cabs. This time I'm going to redecal the cab too and get the thing looking decent.

I acquired this Whirlwind probably about 15 years ago now from a member of the uk.pinball Yahoo Group, as a trade for my Operation Thunder + cash. I never did anything to the machine restoration wise (except fix the topper), but simply played it. Mechanically and electronically it works perfectly (but missing the knocker), however cosmetically the cab is rough and the playfield isn't in great nick with considerable wear around the spinning discs.
Then I took a bit of break from pinball for a few years, but have got the urge to get back into a project. I see over the last 10 year or so pin prices have gone up considerably, so it probably wouldn't hurt to chuck a few quid at this one.

Here's a few pics before I start:

It's a '6 footer', i.e looks alright from a distance in the dim light of a gamesroom (or garage) :)

siiEcGiQOjUHPv3jtmVz3ZGcJ_FU3F73CxlpdbVEibHGaLzQyFYxZQ4LcTwn-wo_tvCF5h5fvx7tlksUglIOKQ9riqrIbgL7bsKW9dfgxwOpKMPeMVDUXOZiQN5AhruYnvUXw69Q1NM=w2400


The topper is the only thing I did to the machine all those years ago, it was yellow and cracked so that's been repaired and painted and the grilles removed and cleaned/painted silver. The replcement decals I got from Marco Specialities were terribly pixellated so I never fitted them. Need to find some decent quality repros now, and that fan blade needs a proper clean.

AvnIxjS_vbQXVmCDe1D3ECisb8k9wcBGQ6PhCgfSwr5mN8gr1BsO2ip6rMXPWZeV_Kjfgc149LV9gqPhCNHs-n8rAsw0zG8fmQI9TyNHGx2crcUL2PobirFd4nIdzBTItv7Jtp0Qz0k=w2400


Coin door knackered (been forced open around the lock) and missing most of the mech, so need to find a replacement.

JrsaETx4-lOrSdpOnxdEFGSFaQhvCGjvFahqxWR31mxMaVtexZB_hUWWw-ab2KXCaAZpvaRYrIrJEkDnnFqGduMUxlb93GQXgXtOJv2YiD3ei4DV7u-h5sJjMTj7NbG3tXX9Tsp3u_Y=w2400

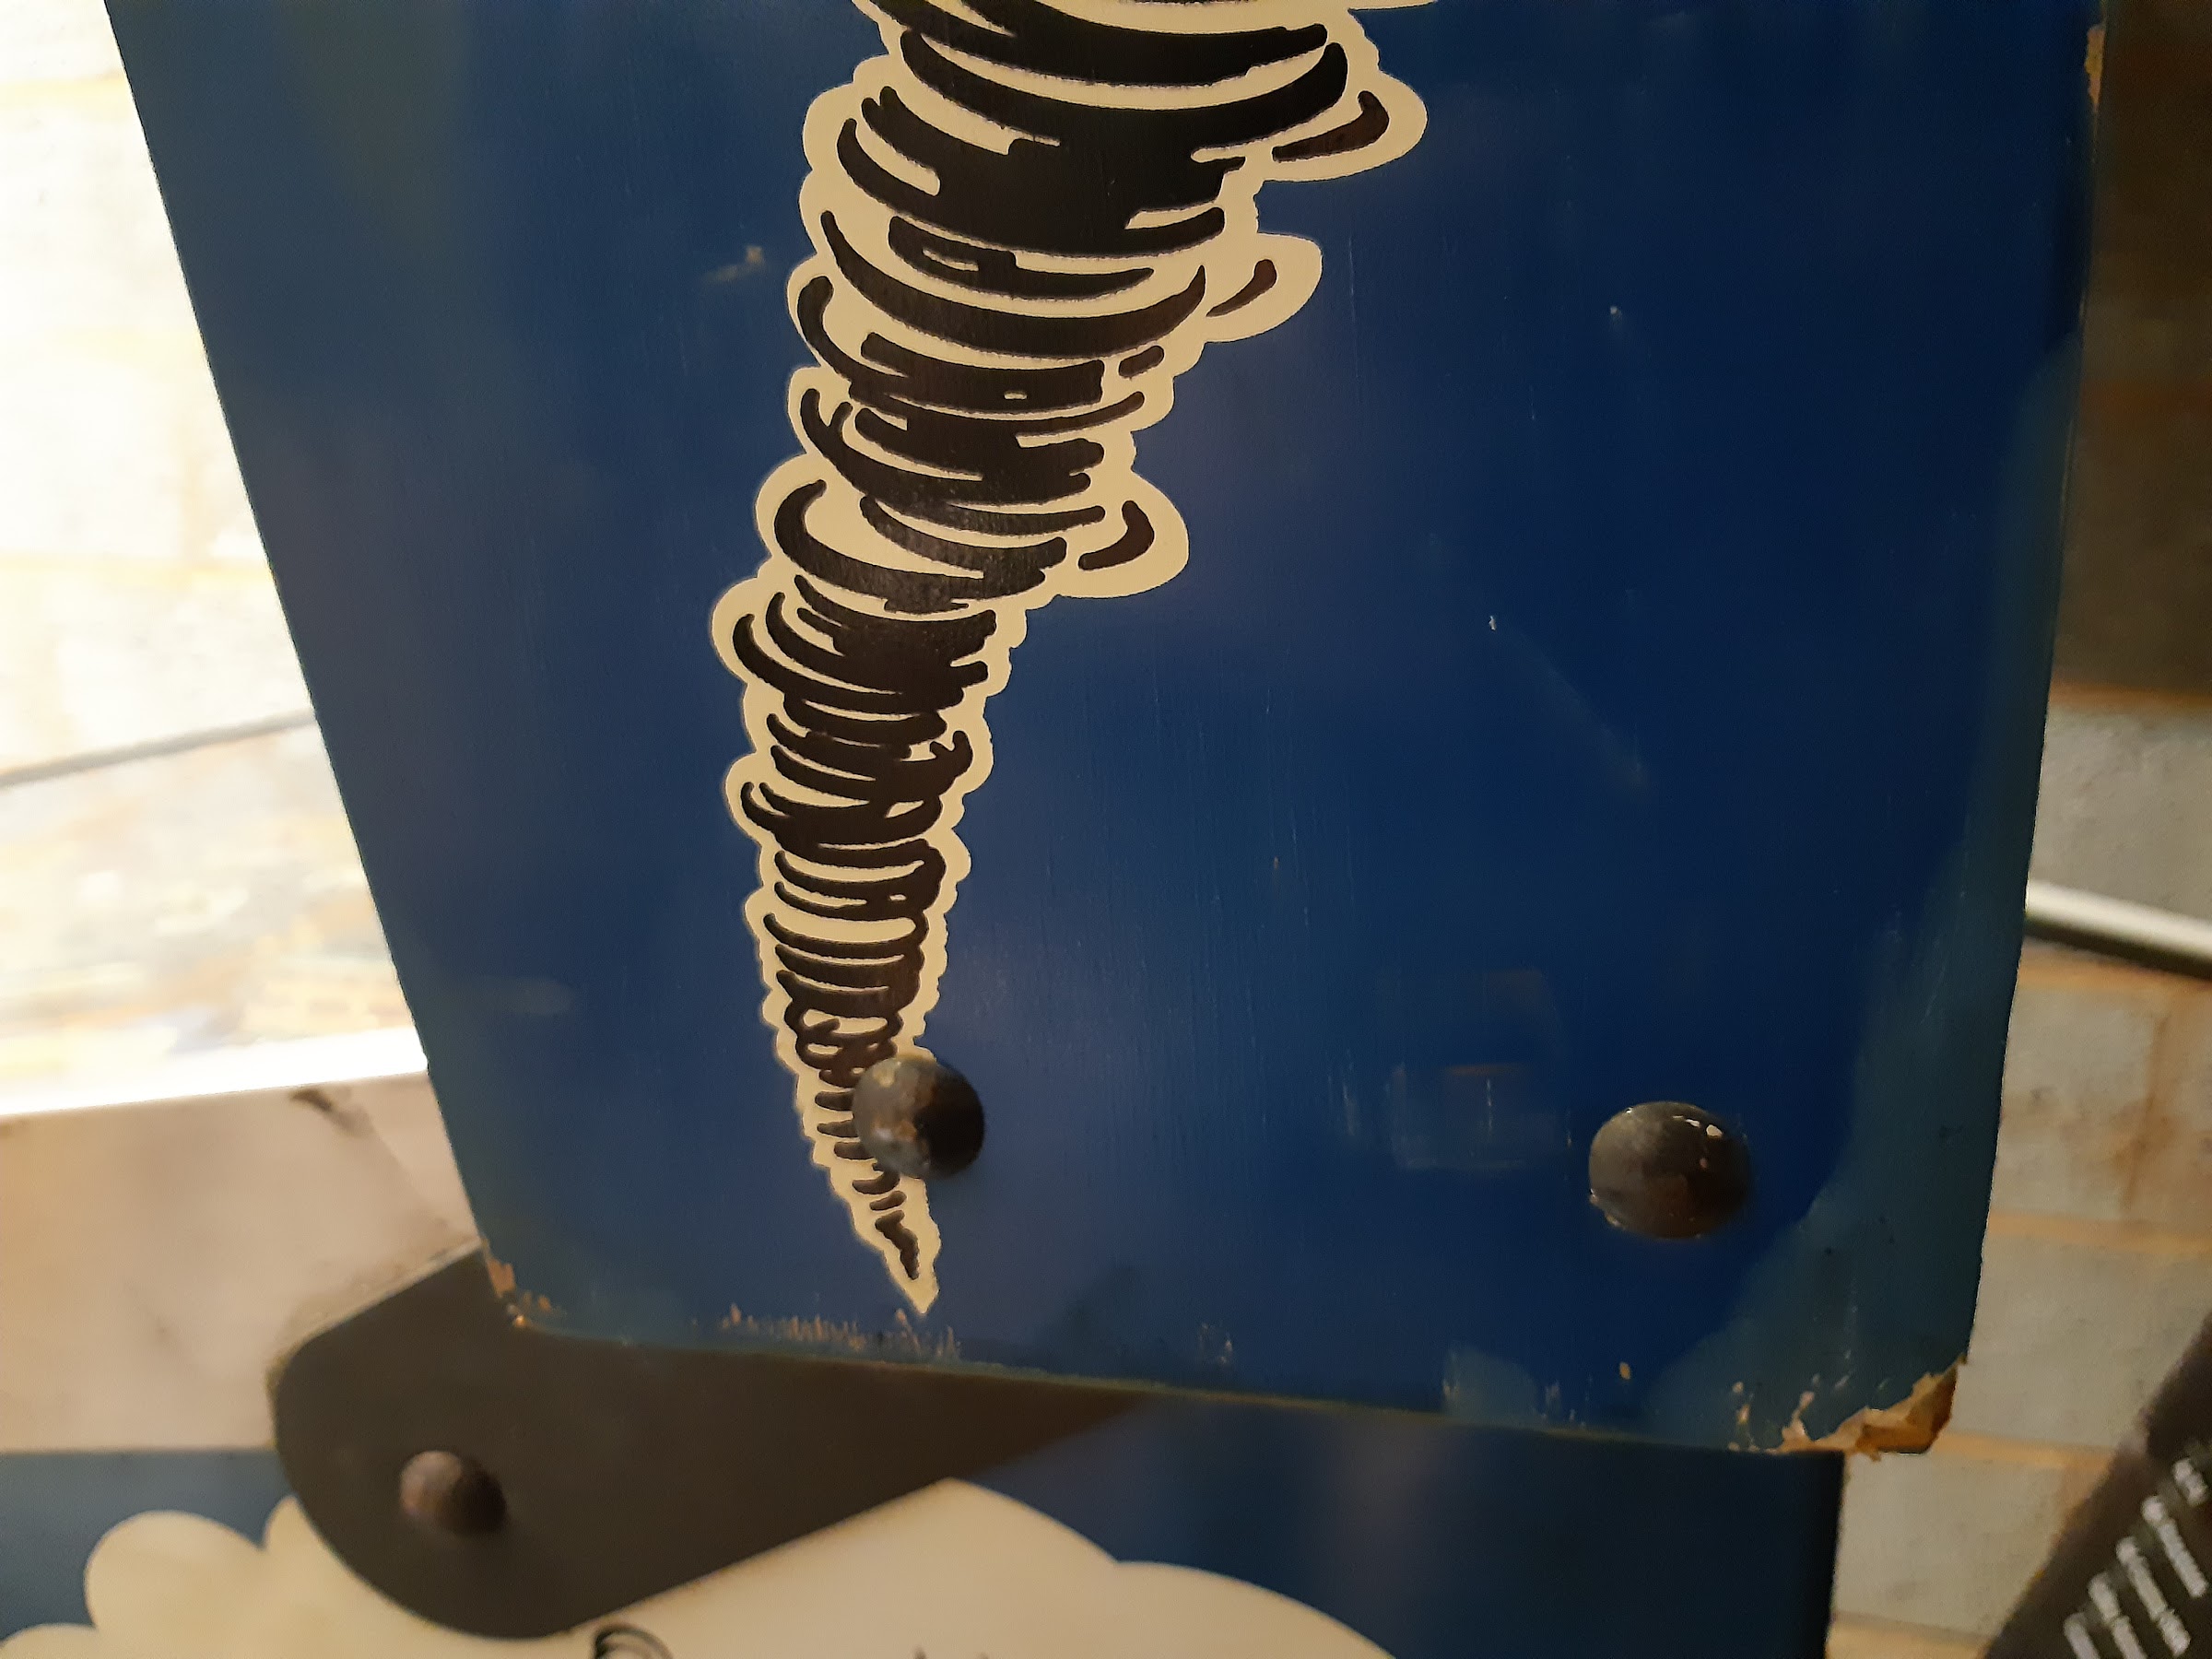
Cab and head has the usual chips and dings etc, nothing a bit of a filler shouldn't be able to sort out given a bit of elbow grease. Repro cabinet decals wern't available 'back in the day' when I got the machine, so it's great we have the opportunity to get these things looking nice again.

OCh_AHtZwXJ-_CnUT-iC0PU0XfsHhj62ZIGkFJc3BC3v0Fp_n70m8XPBOqFD6R3jr3O7WASGgpwlZpRSSMlG-r3xqVZyPhmwSu1c1S8g2Mftv1T9KKkG2lycuKFiEVOPJE-RaNhCQ6A=w2400


DRWoqtO2SRlWnlPpaIcTjaqcE5Esebsa6Y_uasYMk5jmIZCsATIntdAZo_8n_56XkmXwmQolDav8SWOCDaqXl7U4MXK04OVNE5LmEaNy9hh4SevxOVrvBnEBbtpV32Q2gwe8vrsbSEc=w2400


XRMfwBlxVExzcPjNvdyPbs_FIc3Tk5ajI3ogA7oQ-A2nxbsbsWRdRxCvLGkWC9WYJ-70qTHVMlI-ubTnPMxTeO4-cXP8Dg2sre0HMUF-ErTRVYXnoCKD3-ncDTuG3QTuScBBPX7NfRo=w2400


Playfield is mylared (not the rare Diamond Plate version sadly) which I plan to remove. Could be a disaster, but I'm doing it. I see there's a couple of playfield repro options now from CPR and Mirco. They are expensive and lots of controversy about quality and chipping/pooling of the clearcoat though. We'll see when we get to that stage.

XRMfwBlxVExzcPjNvdyPbs_FIc3Tk5ajI3ogA7oQ-A2nxbsbsWRdRxCvLGkWC9WYJ-70qTHVMlI-ubTnPMxTeO4-cXP8Dg2sre0HMUF-ErTRVYXnoCKD3-ncDTuG3QTuScBBPX7NfRo=w2400


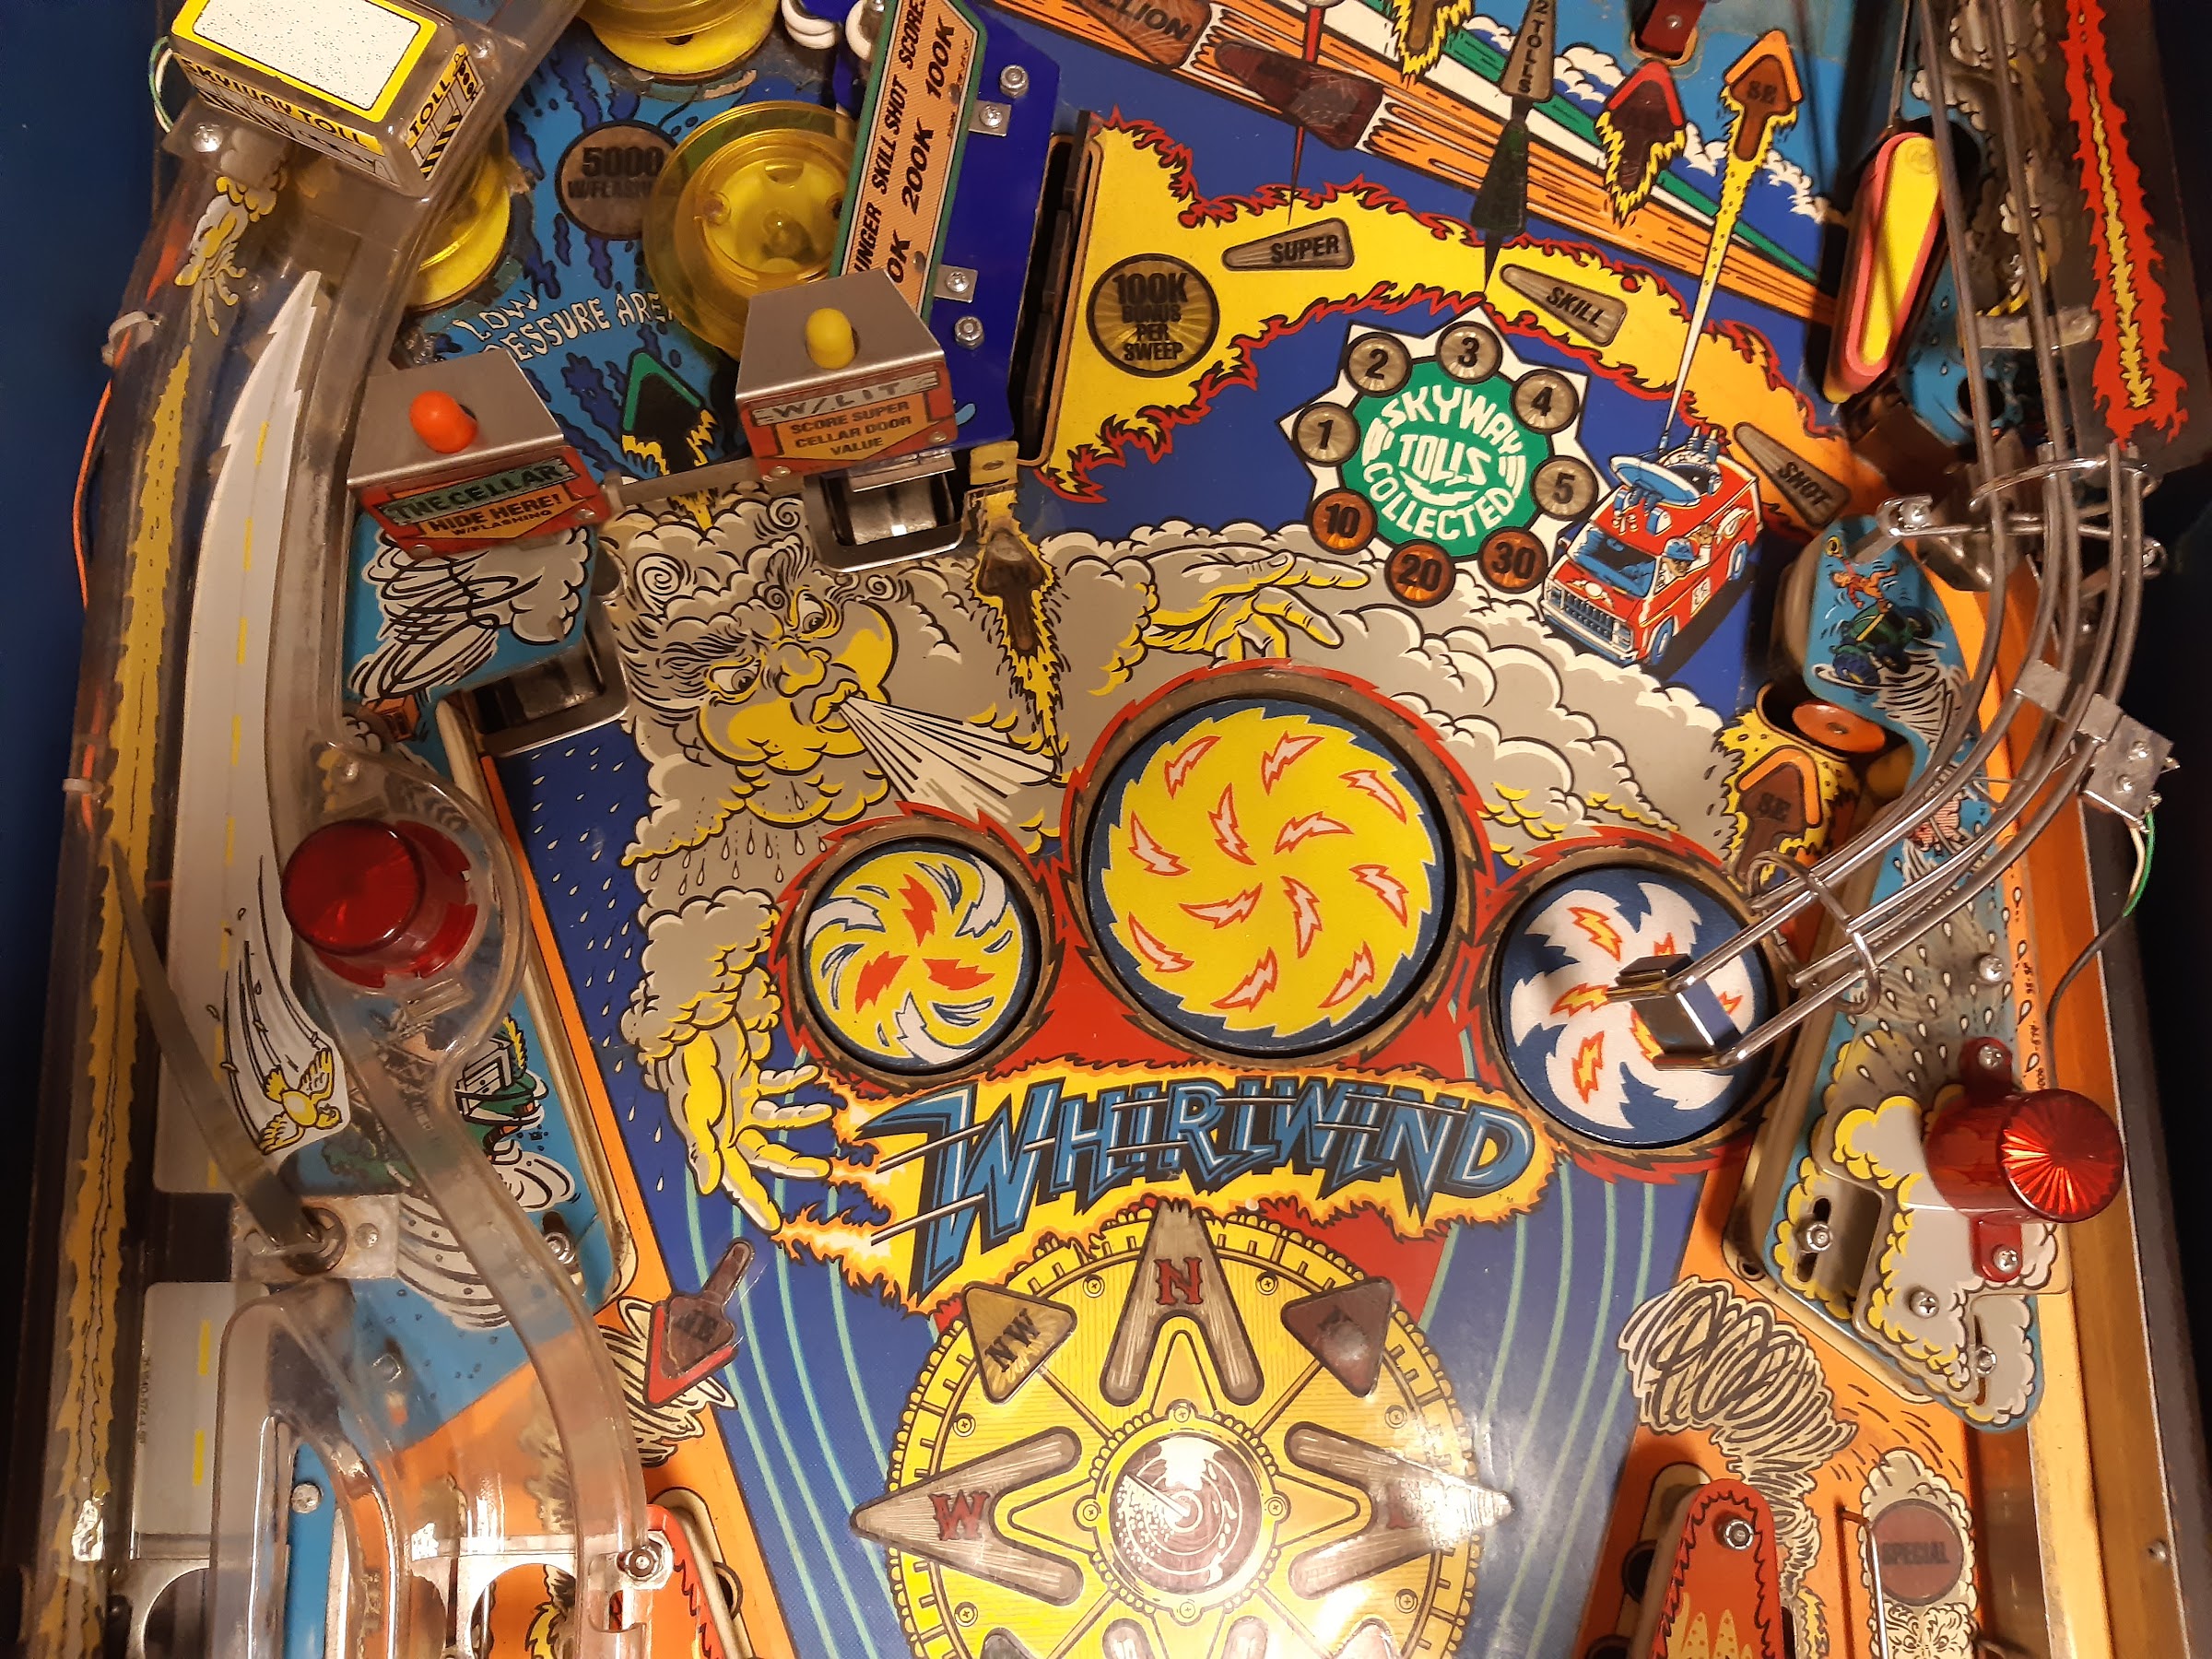
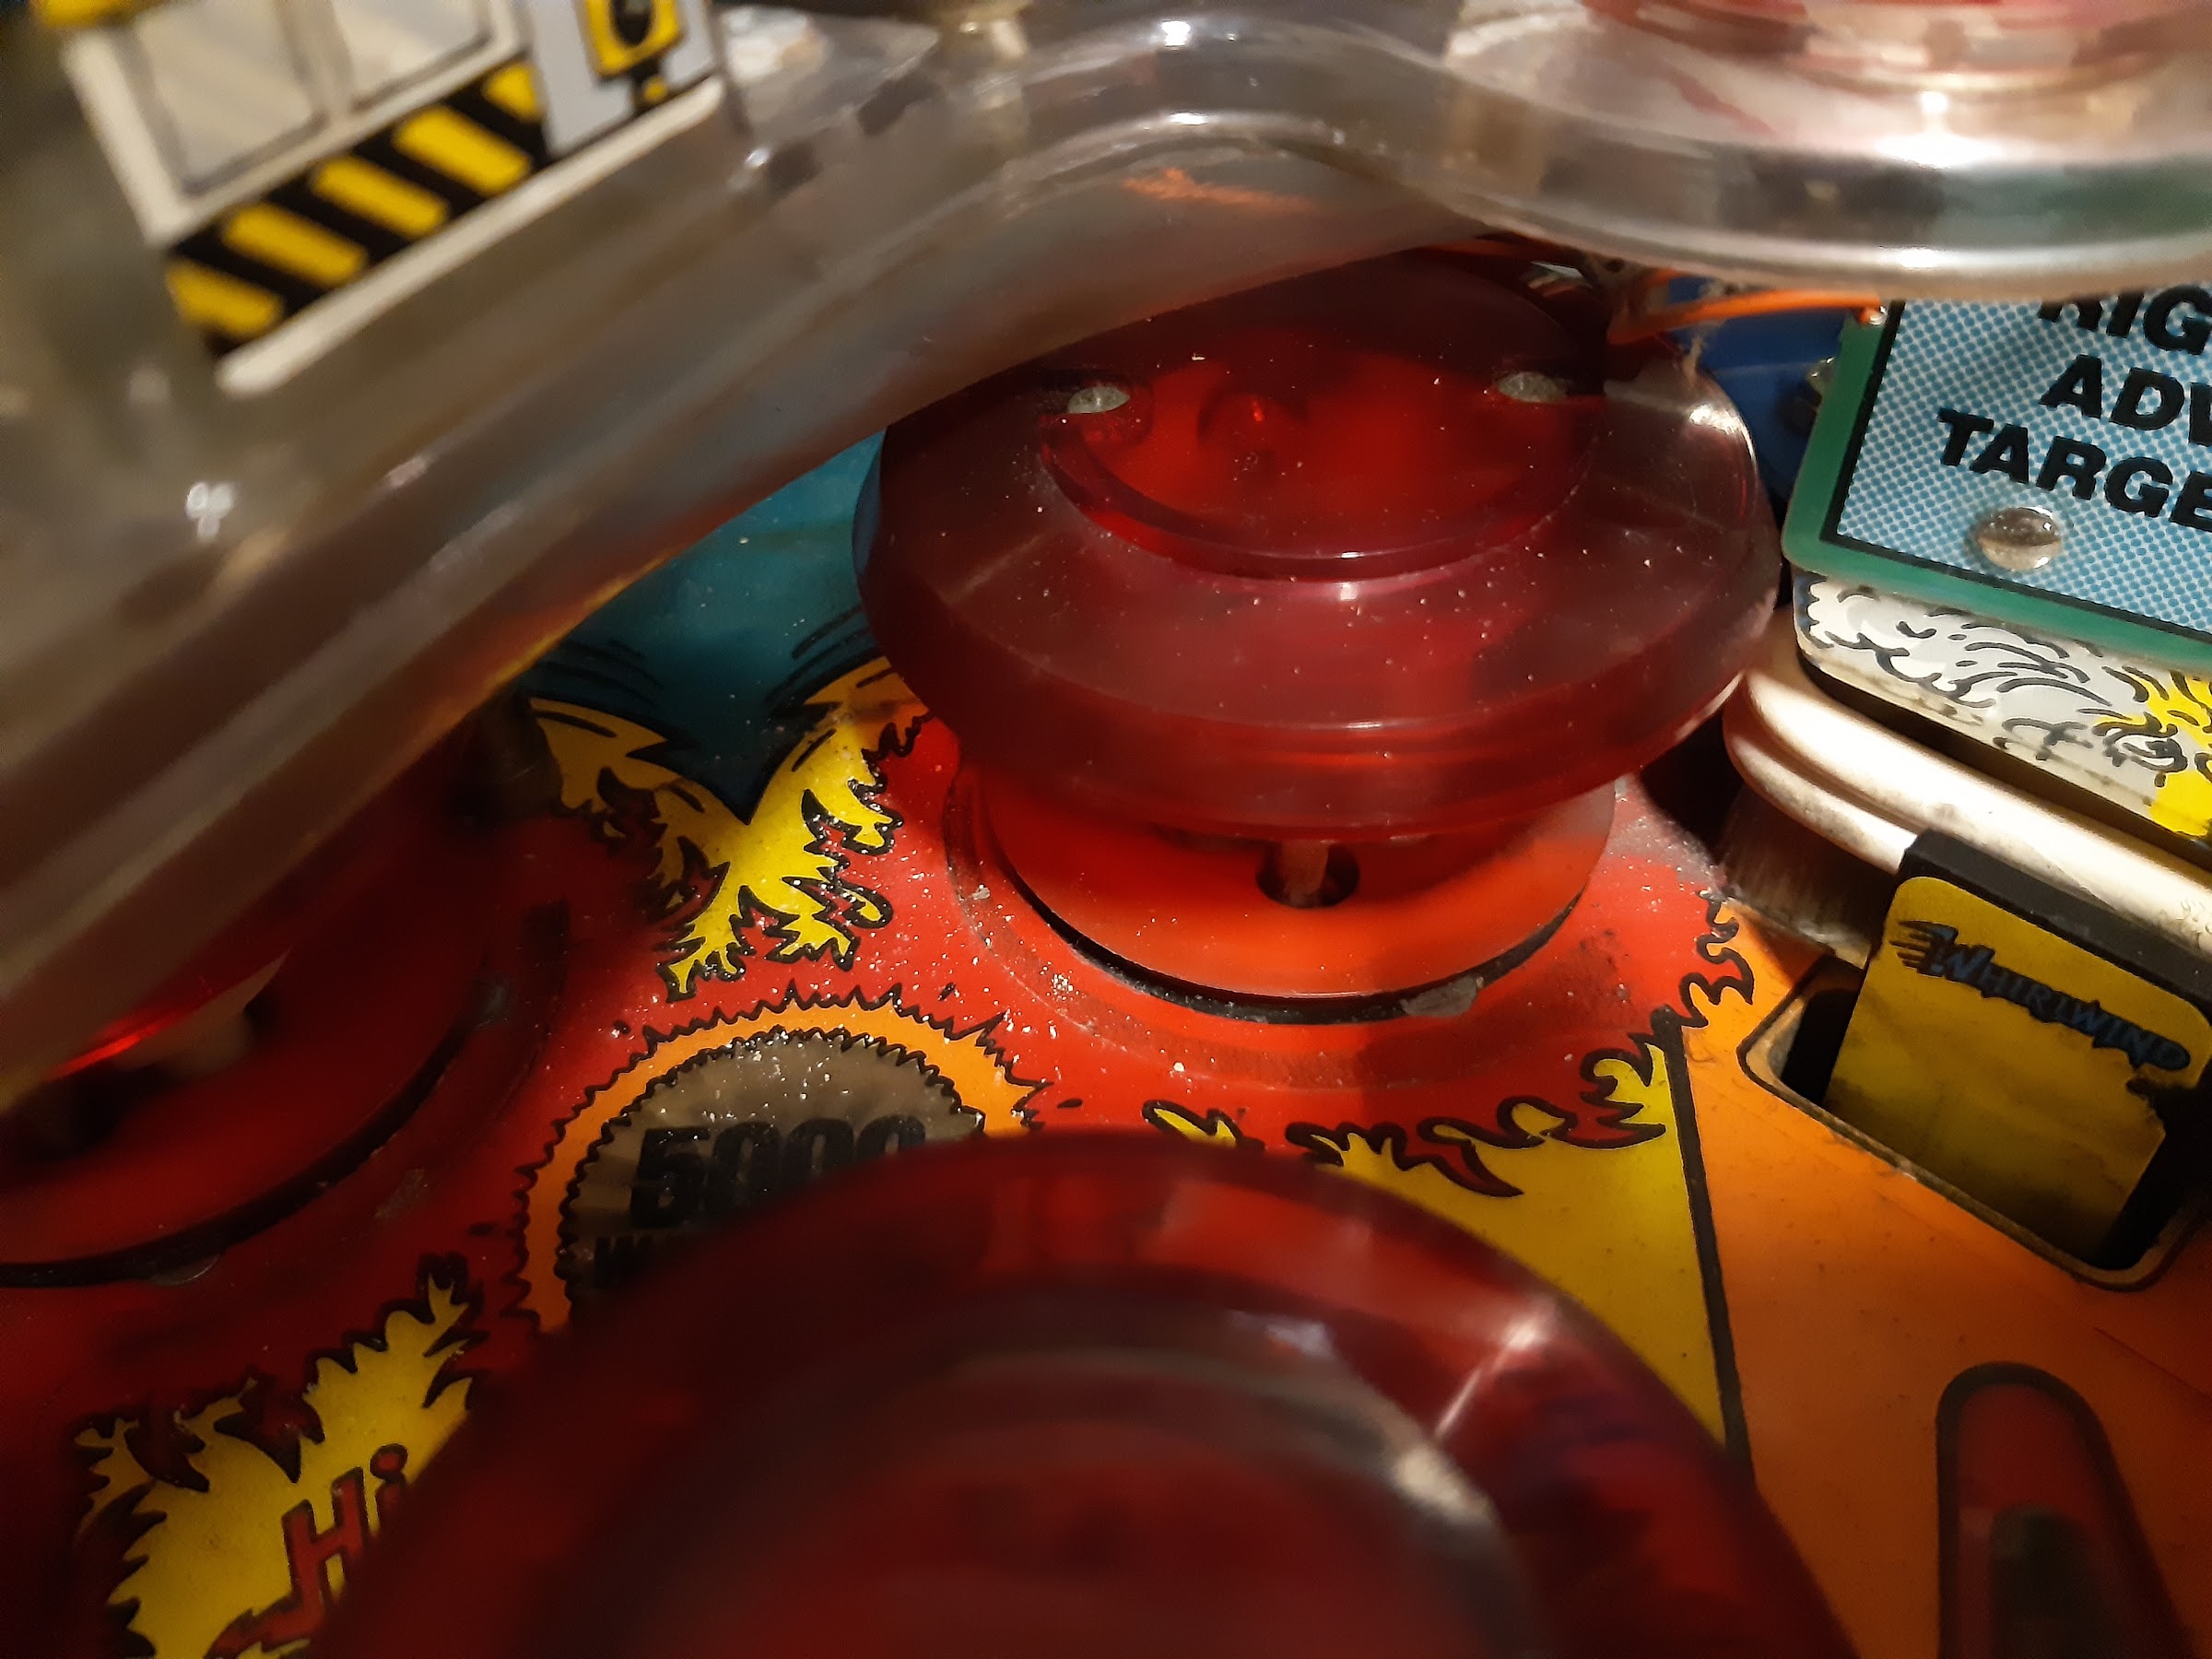
Wear around the spinning discs is pretty bad

eGMpHlu9oWYH7TGn1CnyPHvqWg4u0xRSTt3lM-QR0PpIsXeWA_FeAXF0dJiymI7fNQO1CJ56pFVSWF8rfvpkOE3nlhOpfEsazgL8hkA1L-fz_kt1tpXDAJLwzLrfbOR7lKt56qXfcPM=w2400


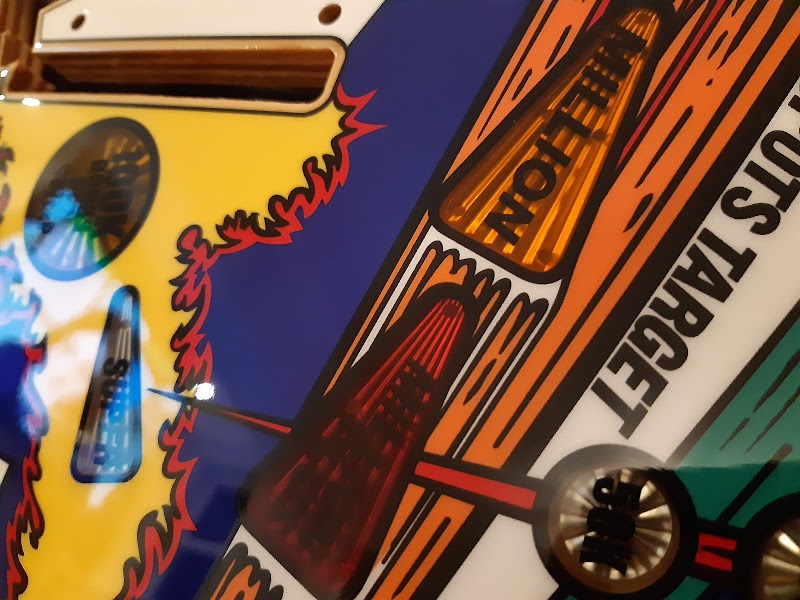
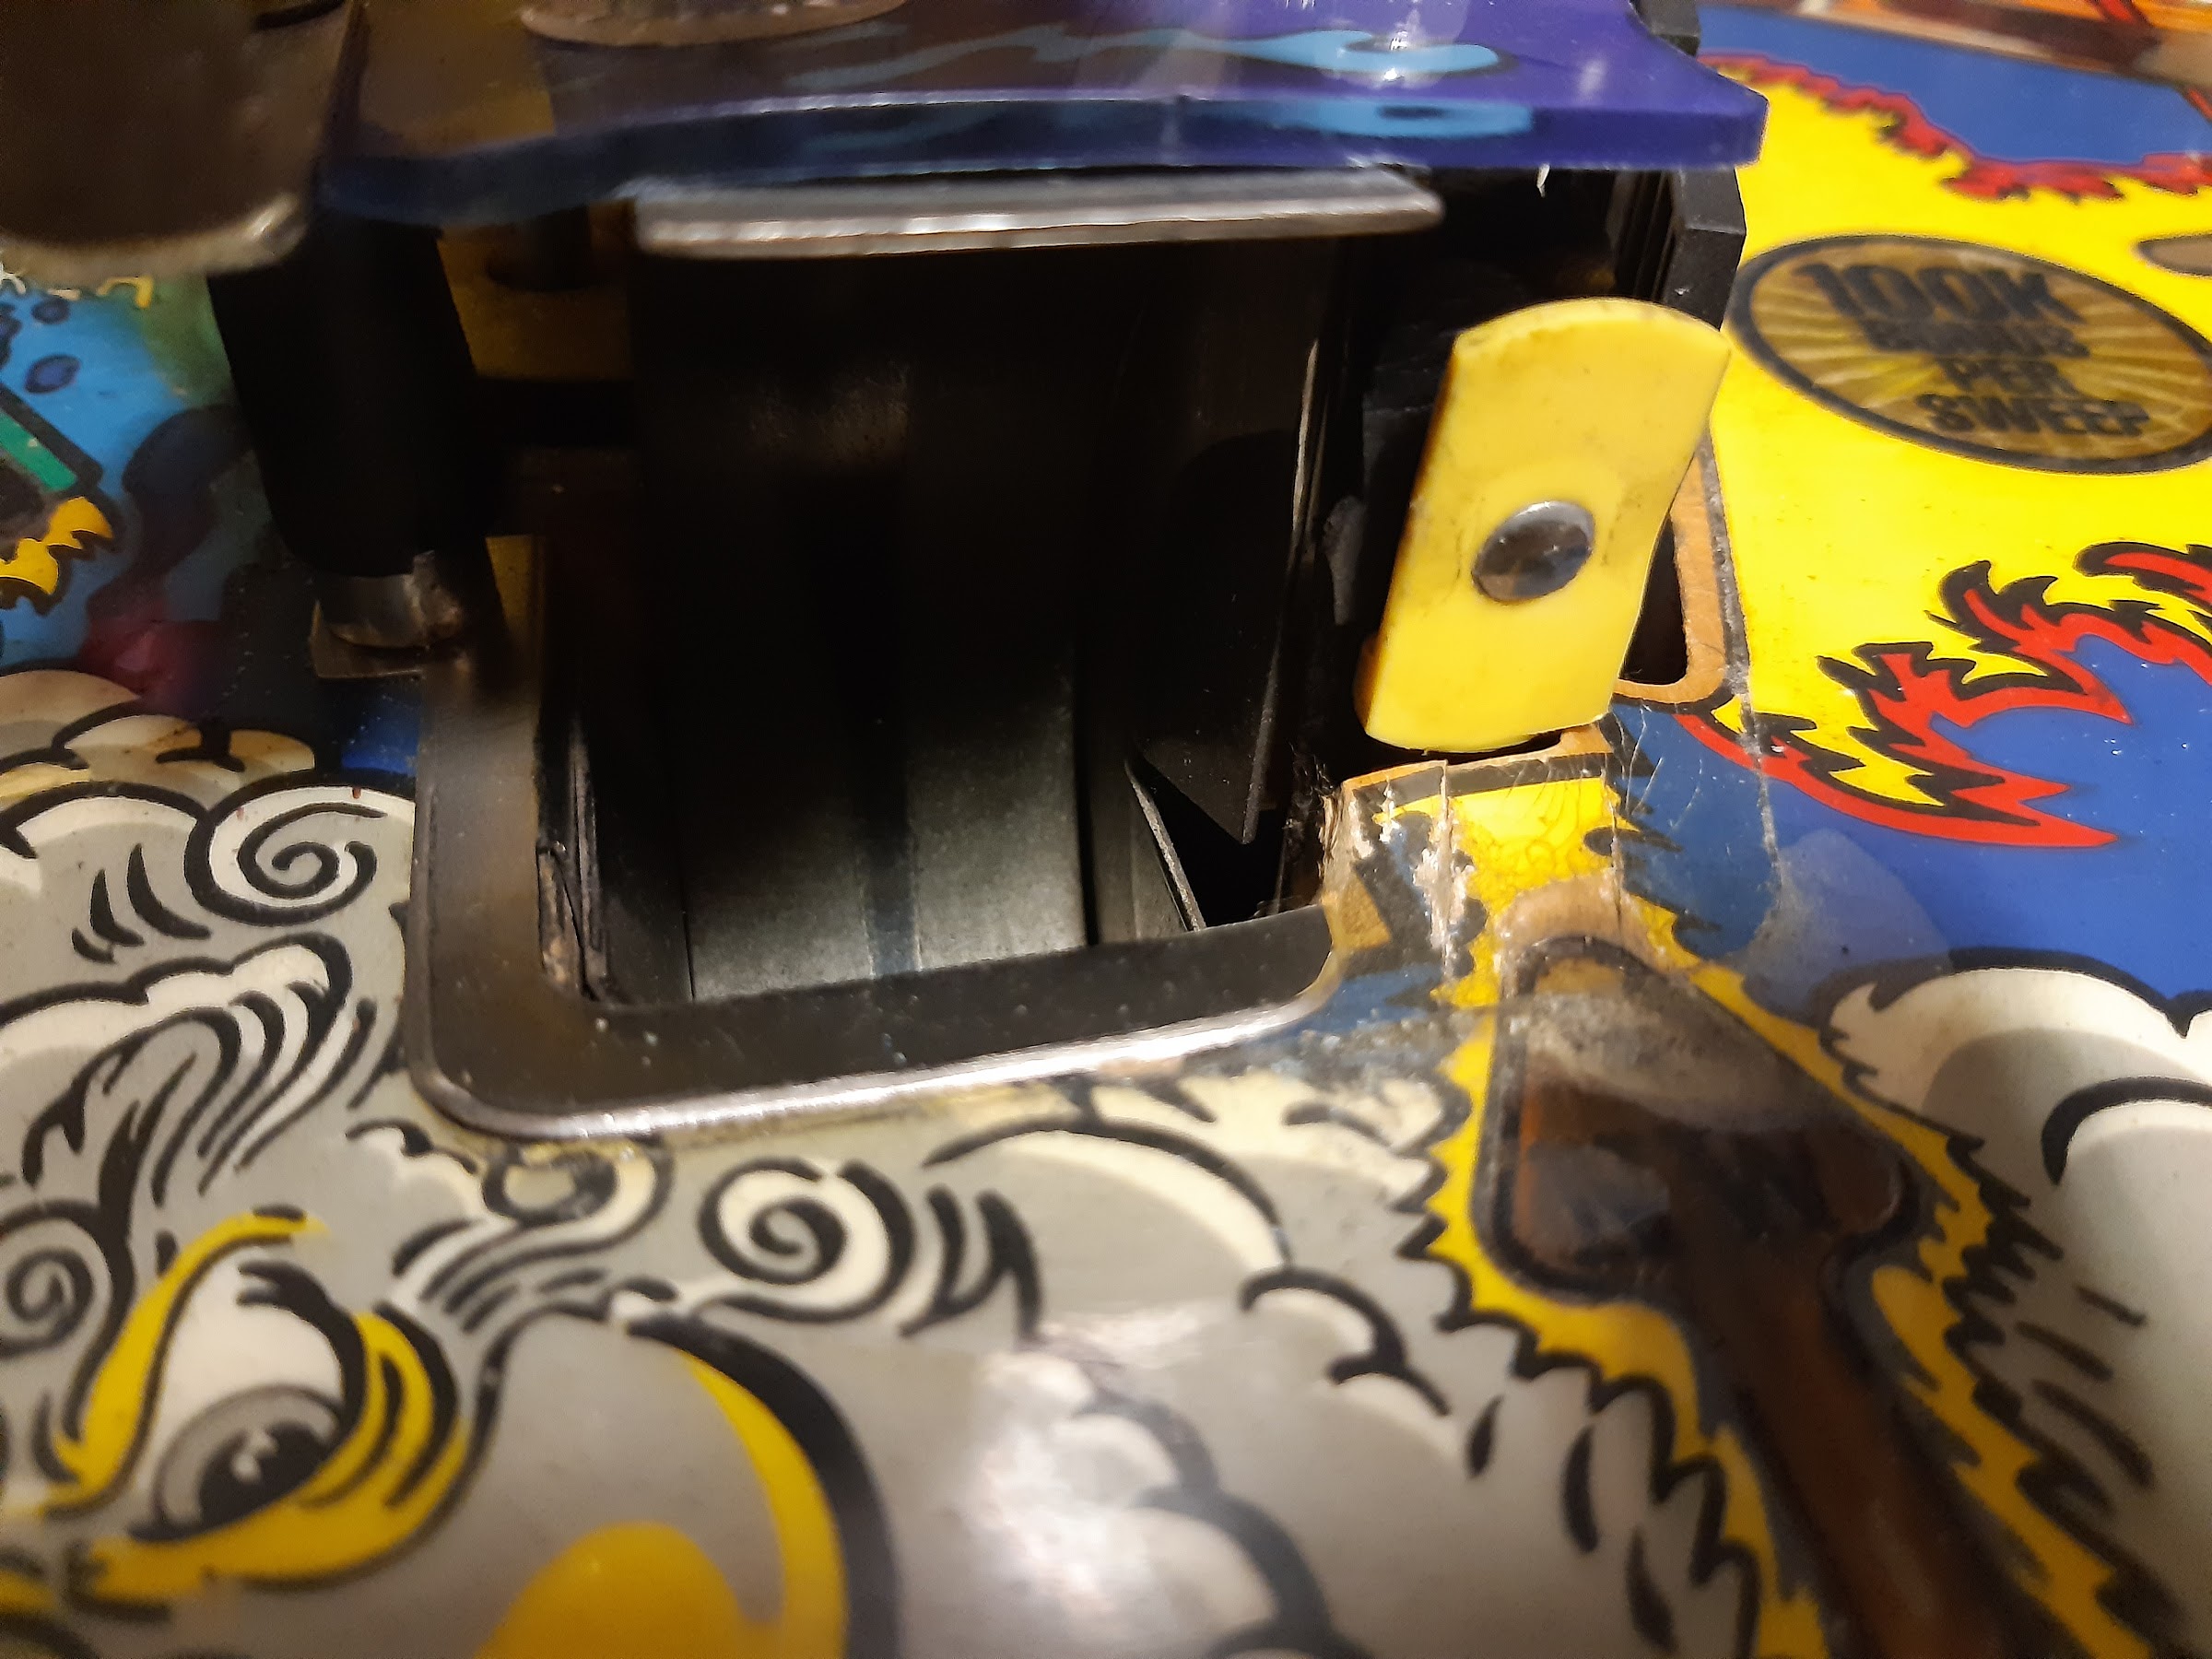
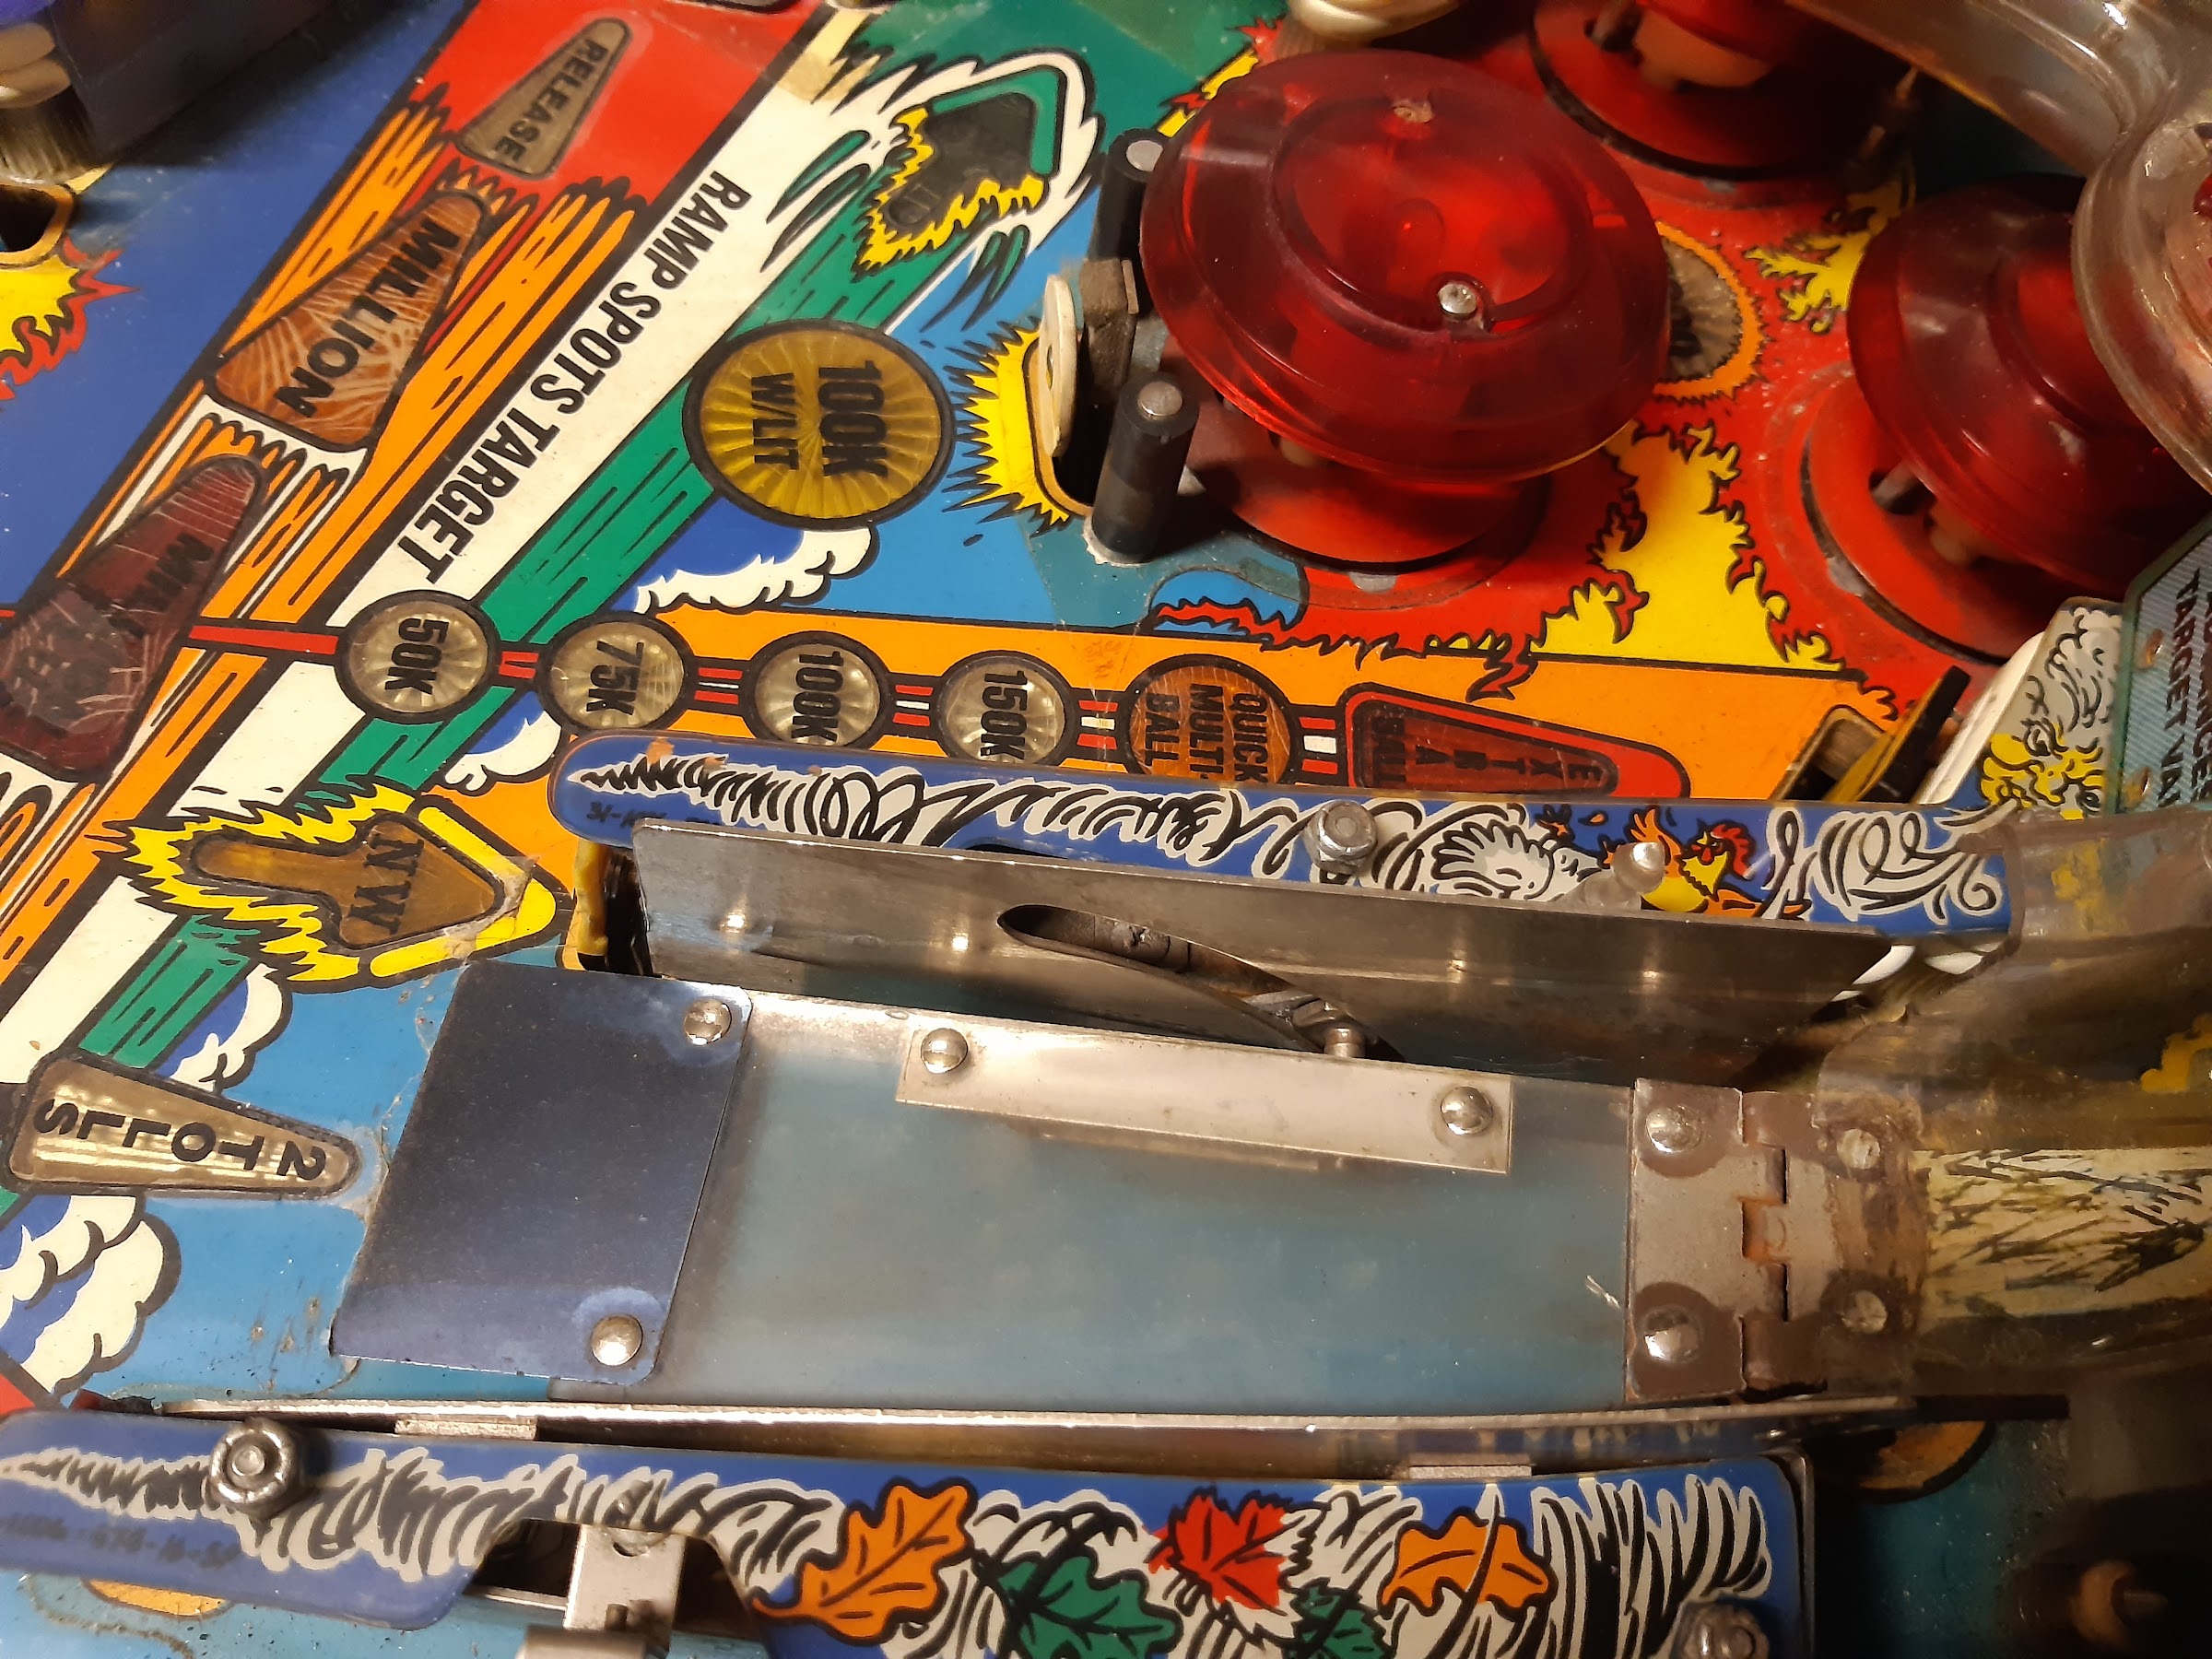
Damage around the NW target is a bit dodgey looking. It has Cliffy protectors around the holes though.

NjAq5MX163WX49zI_LV-tV6fFamH60ktmKXydrxq5VnYk658WFECj5xxXx2QinyOV2MOlv9eIsmdnpa-ObVg3NCQiFuwr0_GORIpI0z_-z2G7L5-80rNuKBer8yAmry6SqcIdqsly2M=w2400


Ramp looks like it's been repaired at the hinge.

k97jOkWwiJf_xpZ8EJl3vJ0cXCFk3owwWLhwluWvi9EEK3Ezp9YtBY8SDP8O75byAZ-84c7OxKGnQrfyg8omf2MRl-xv5MzwQ8j2Ep802wJdgi63vlEwRH2zY9gftE4MVRHkx6NmLj0=w2400


Generally dirty and grimey

GNeqUoVvfXgzWSYh8beO23YhiCAi9ocOLxrOLcqGXza_h_LaOA0ukdYb-5eumTxqahkUHUrAL26__AJeJ_q0ZEubUOrJgVyfFhfRI_TG_rBDzGgzxwXcwr9c5aoIeROX5bRKgjFdt7A=w2400


Underside doesn't look too bad. Obviously all this will be stripped right back and cleaned, tumbled, polished etc.
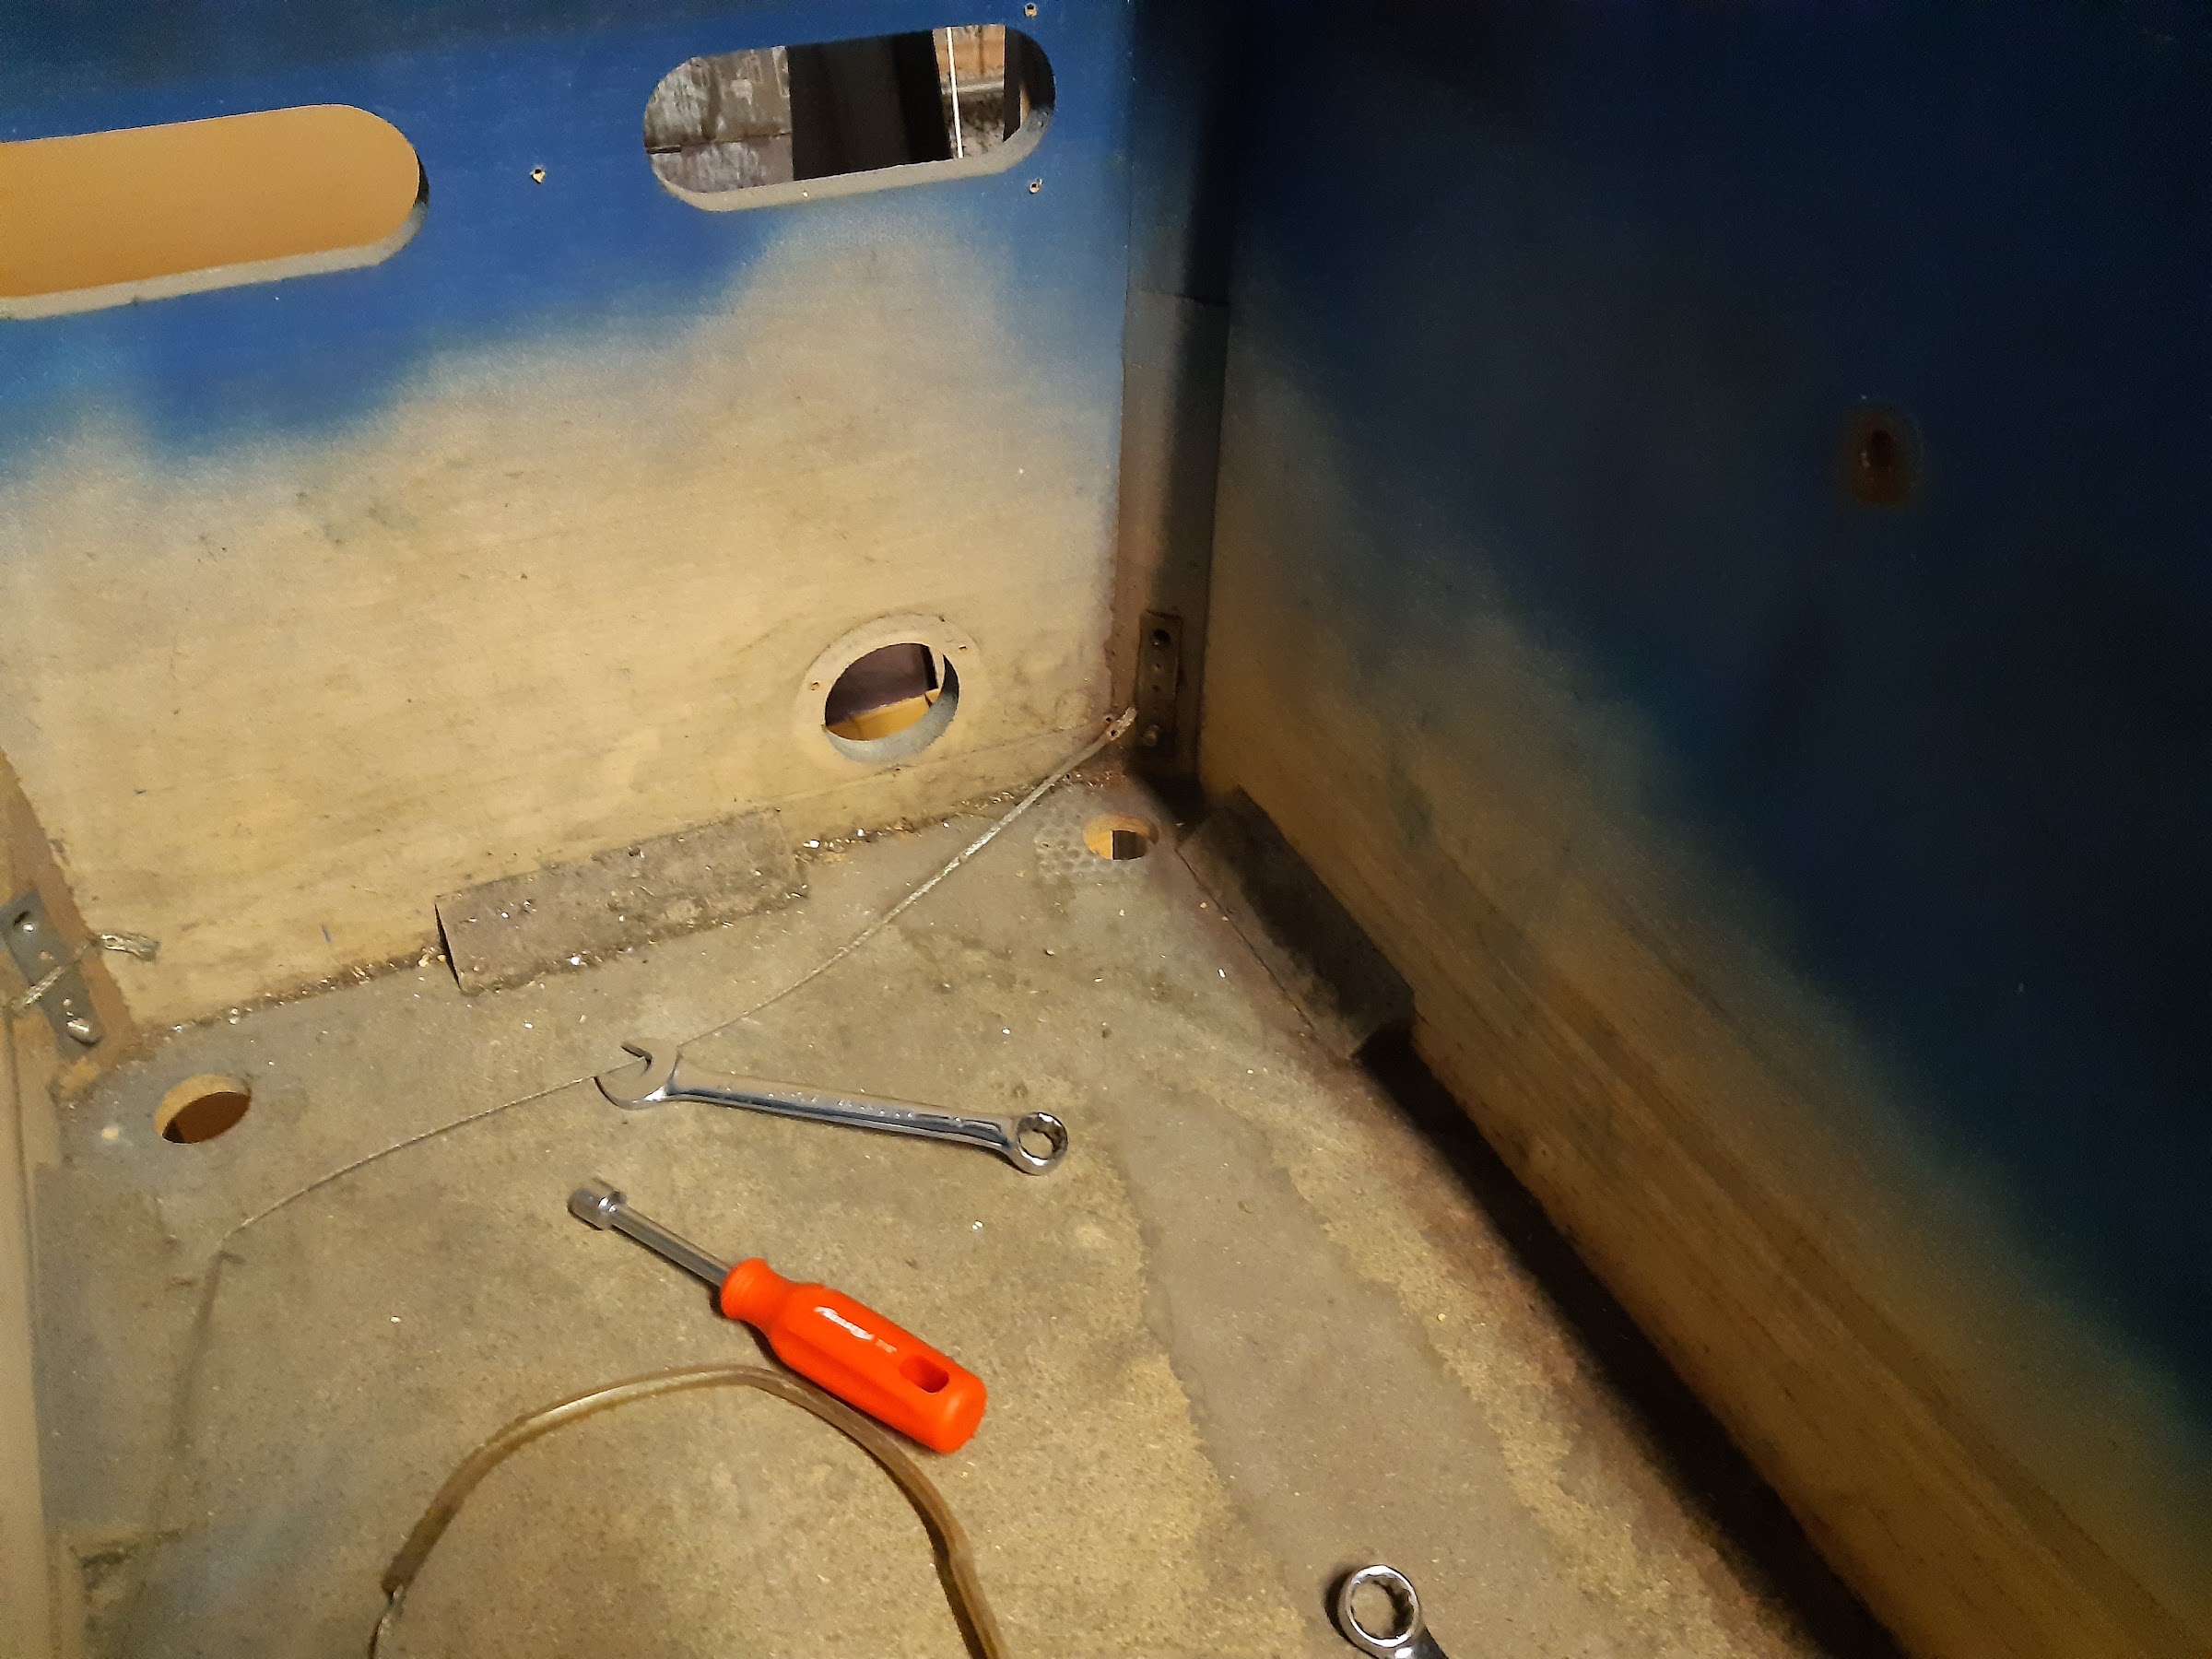
q7V6CkcZMAXRrVE2erhZAj8W3cpJiz6nDqgLwNr2F2v39ZPP1TlMvujNKAoCIXpZsTP2thwY2GwvRgSnq1L7zszLCAr9Kagr6e0TtcxLlKZO8KU5RimB4pWvYDunCDa47RgAO6qwe2g=w2400


Cab filthy inside.

f5hDuaBXySvmPG1-nB8os-YxTAd3lRTEvGwao-VbXjNHZRYgUMgSKzUKld5WmpnC8cgD2vzOQT8WmaCZyW8ZP79U1TwlmzbhvCpTRRYzX0yIdFJRWSQd_26Dp5D2EqunxuMjQbqwZBM=w2400


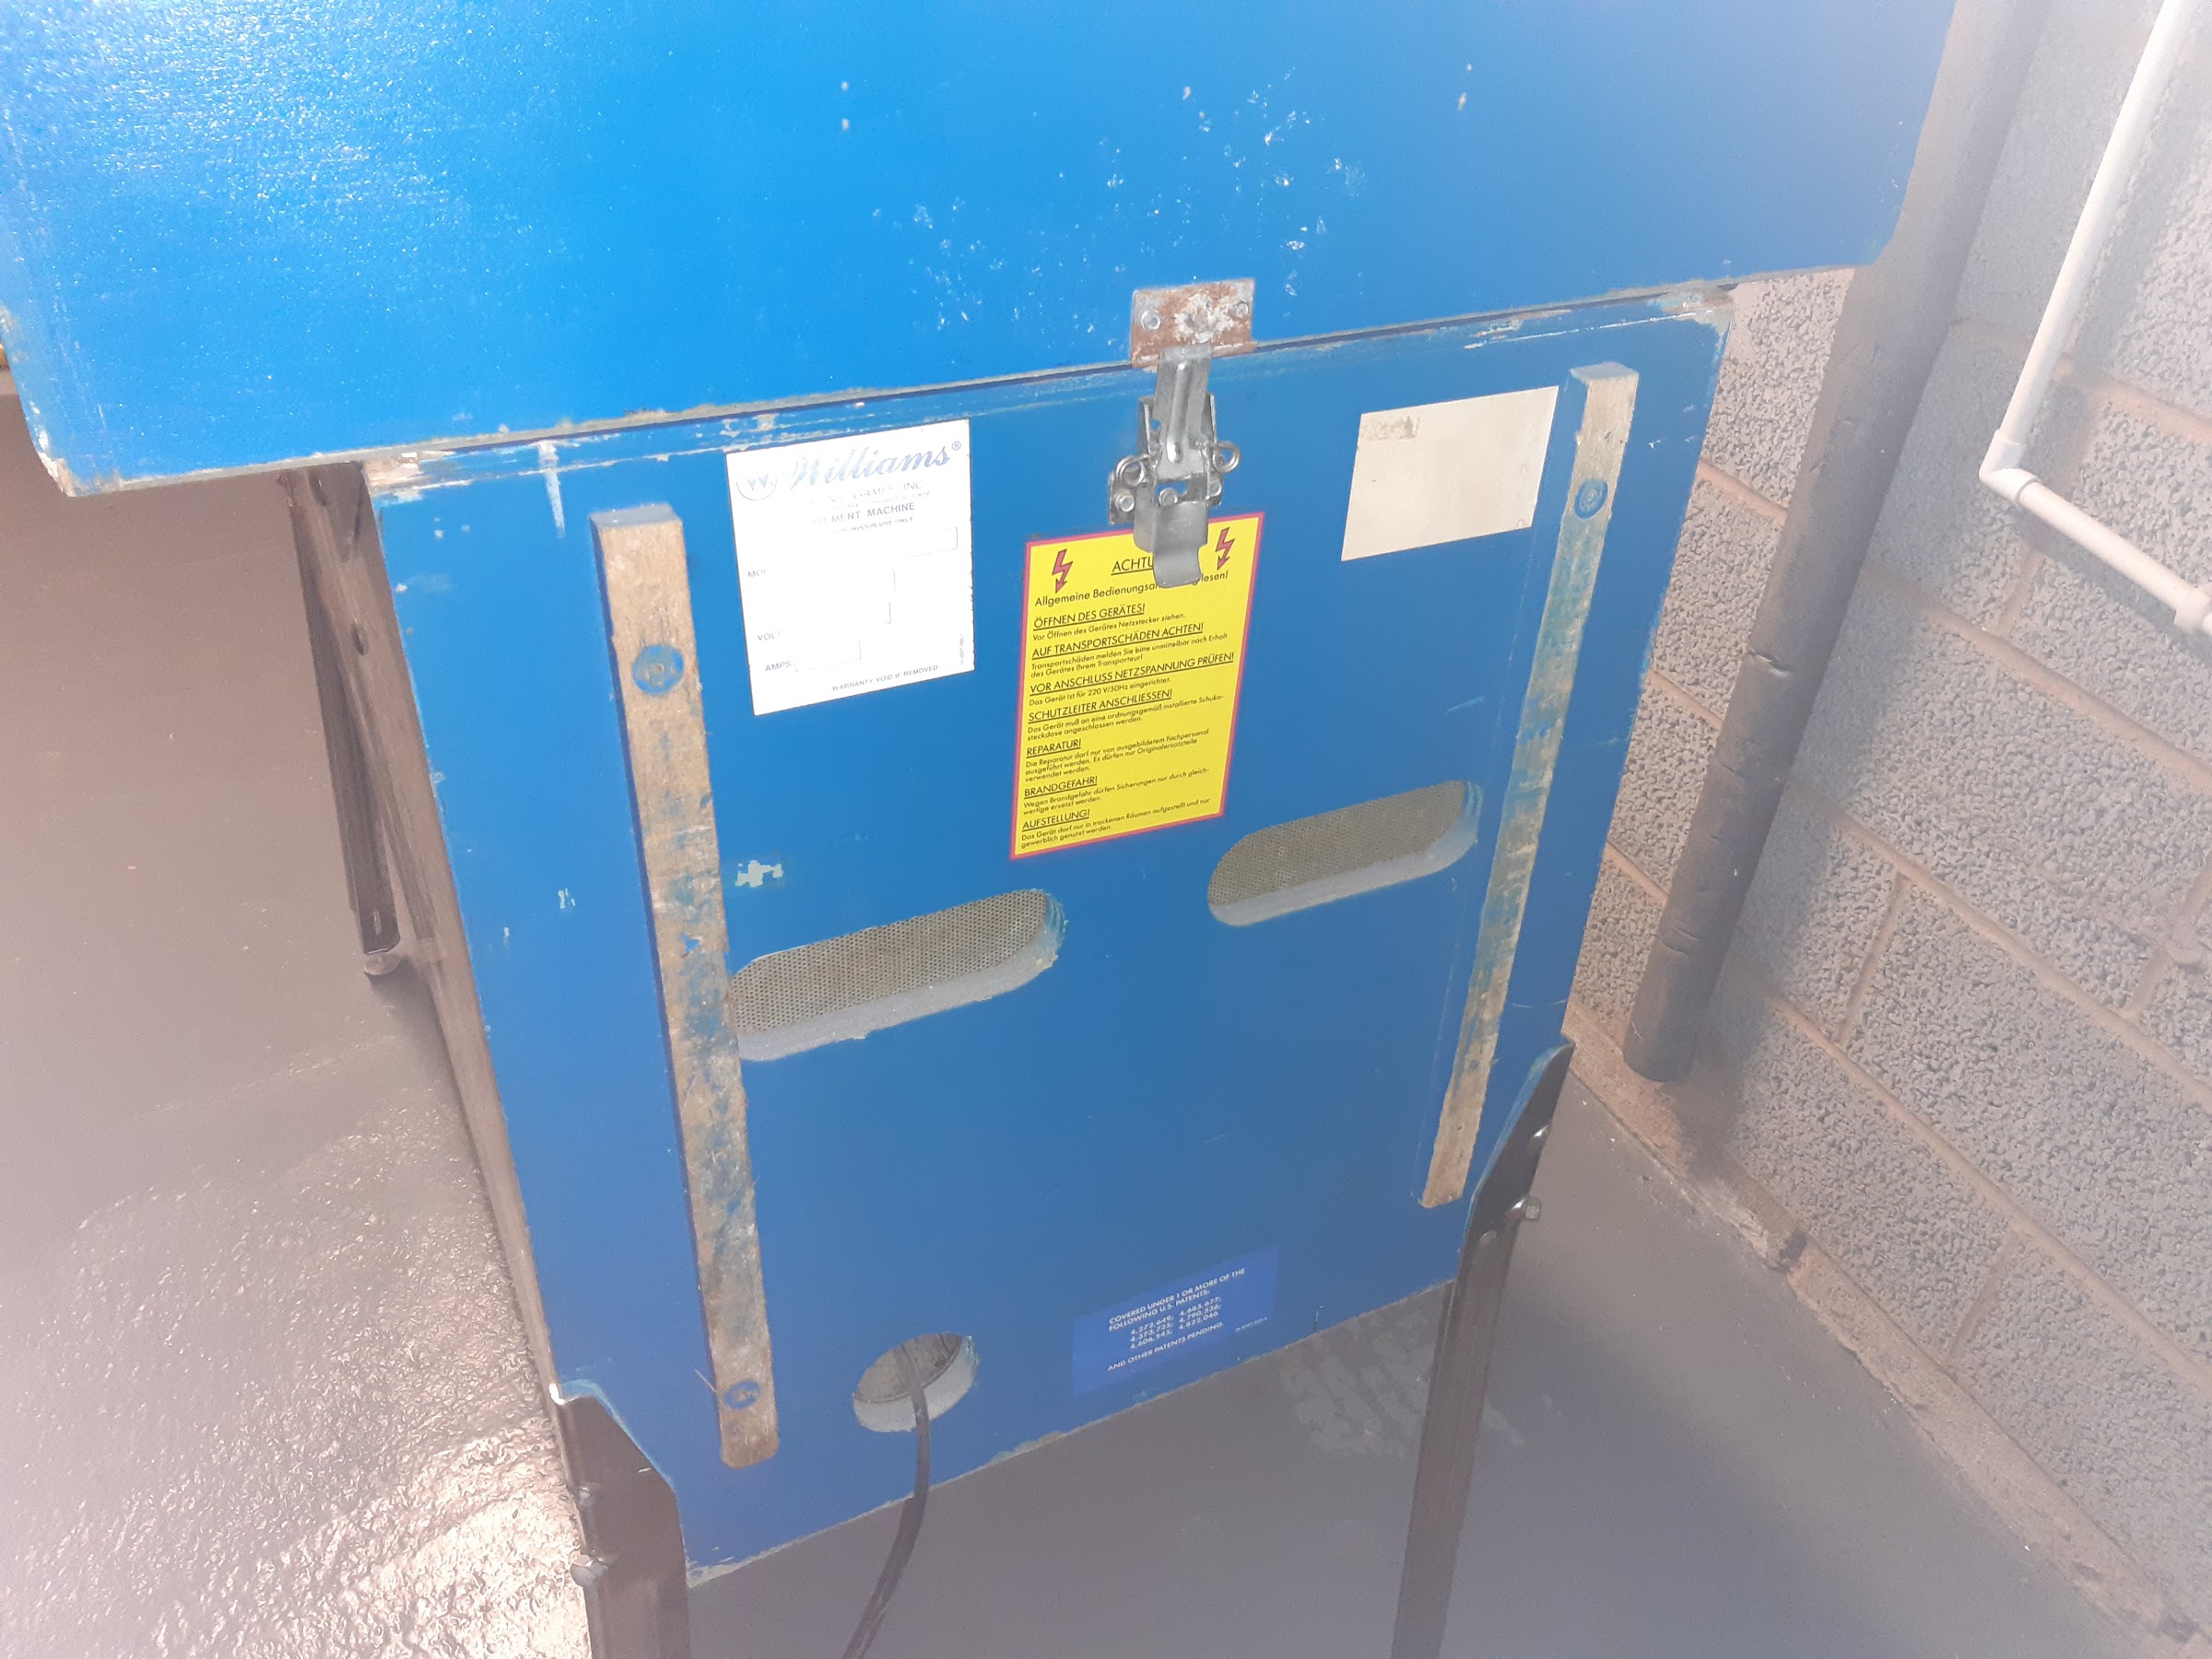
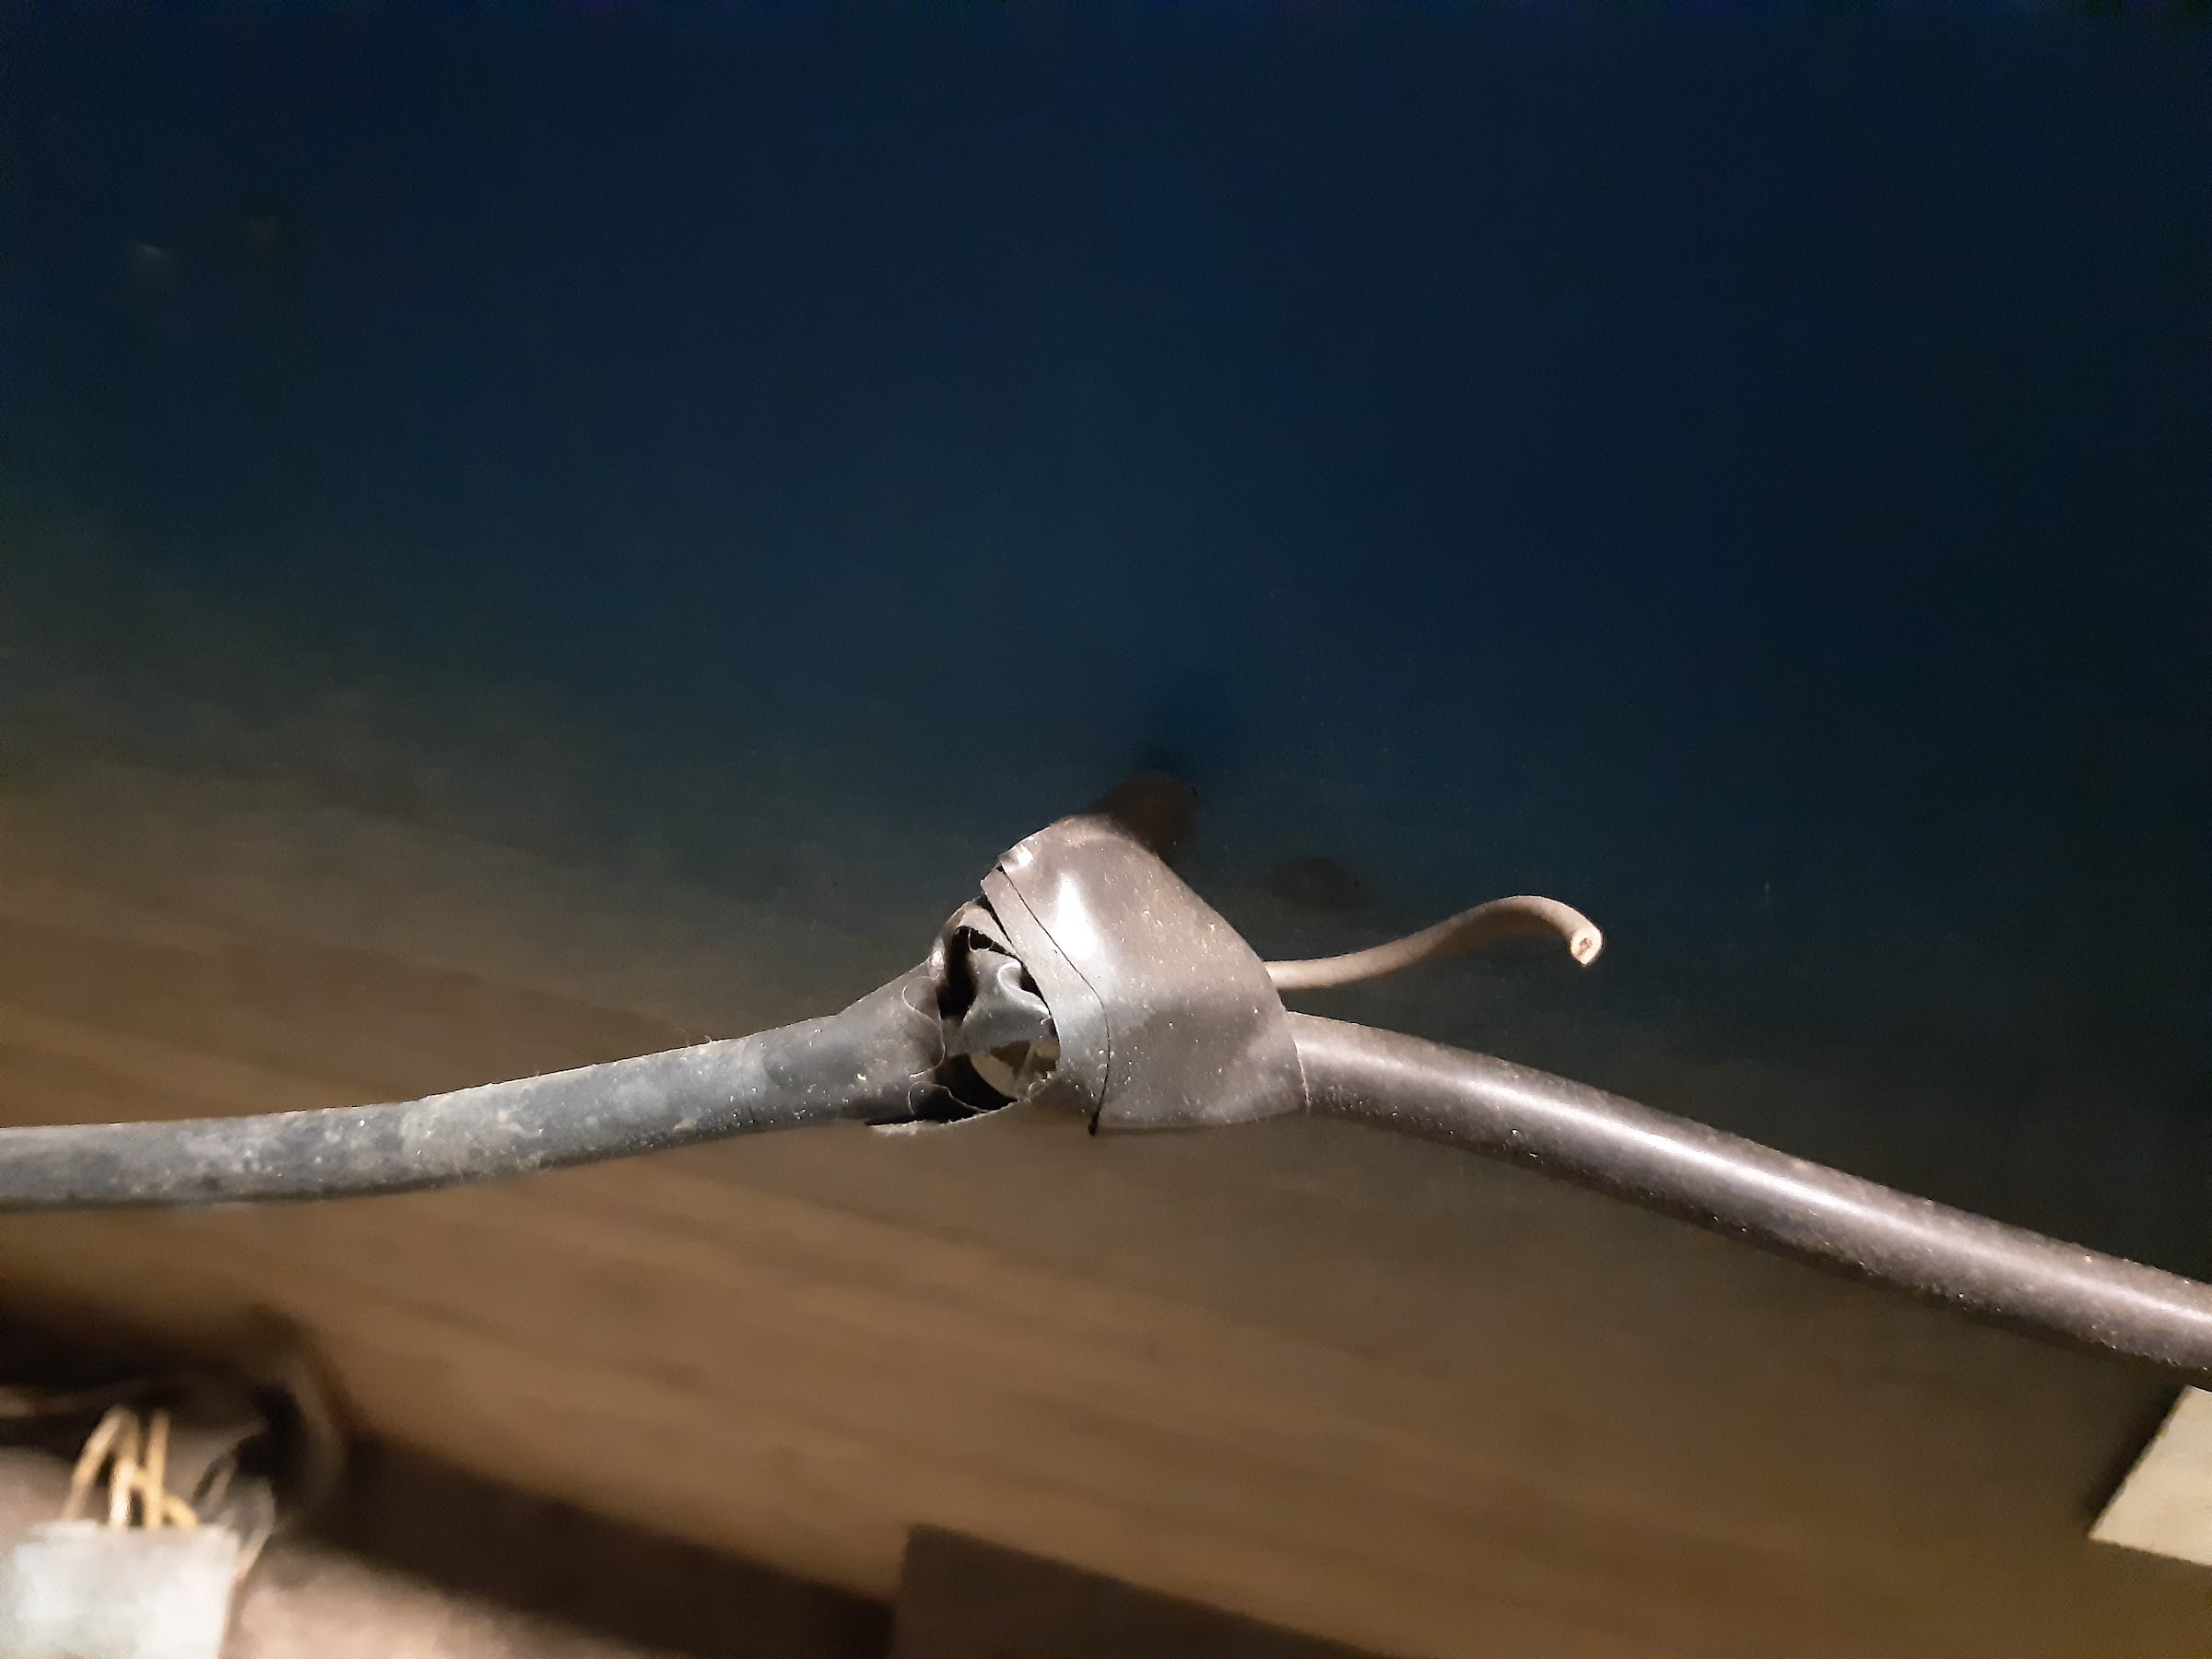
WTF has happened here, that does NOT look safe! Obviously will be sorted.

lEitODFWdg6lrYsjhCmLPSksA0ETWJD1cbfq10EfTP7PVRZhAi1fguZIwW7uVVvGeUSrT_WRyFn_6SeJDryM79PGhtv4zNnrAdQ3bXa58xMBRmD5SaBeKYj5jpMqYhTny-Zjc-qjeq8=w2400


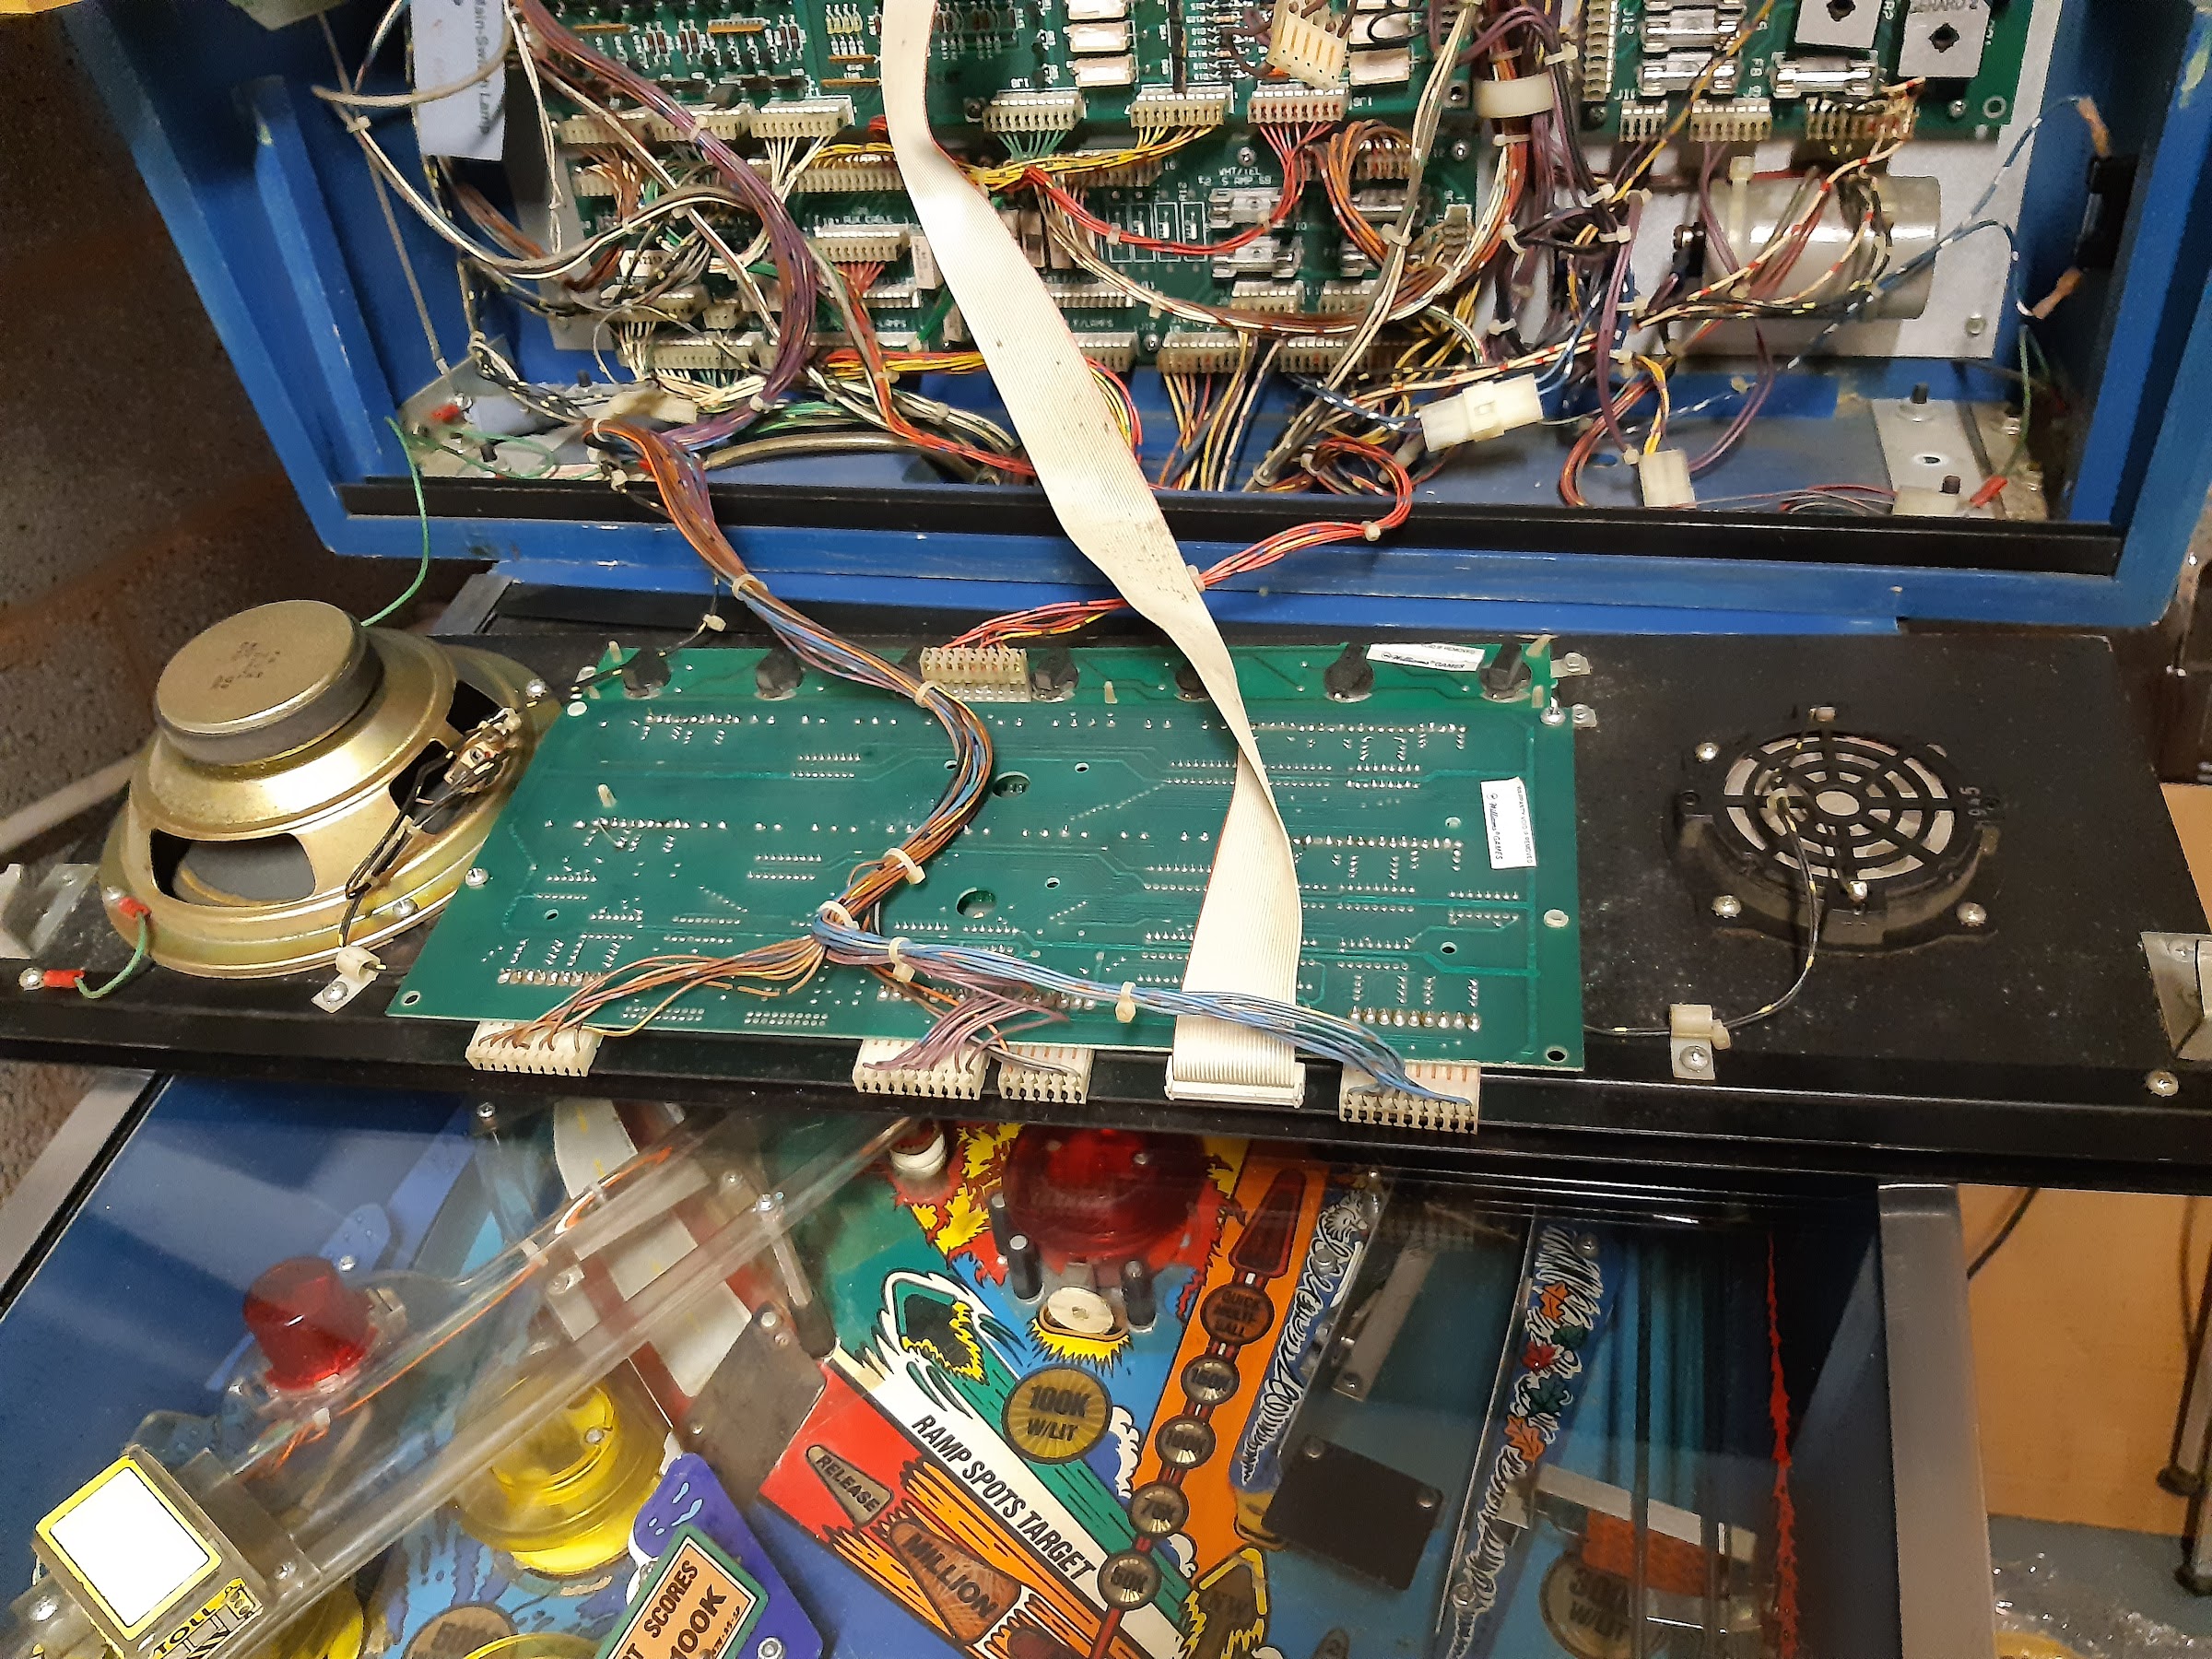
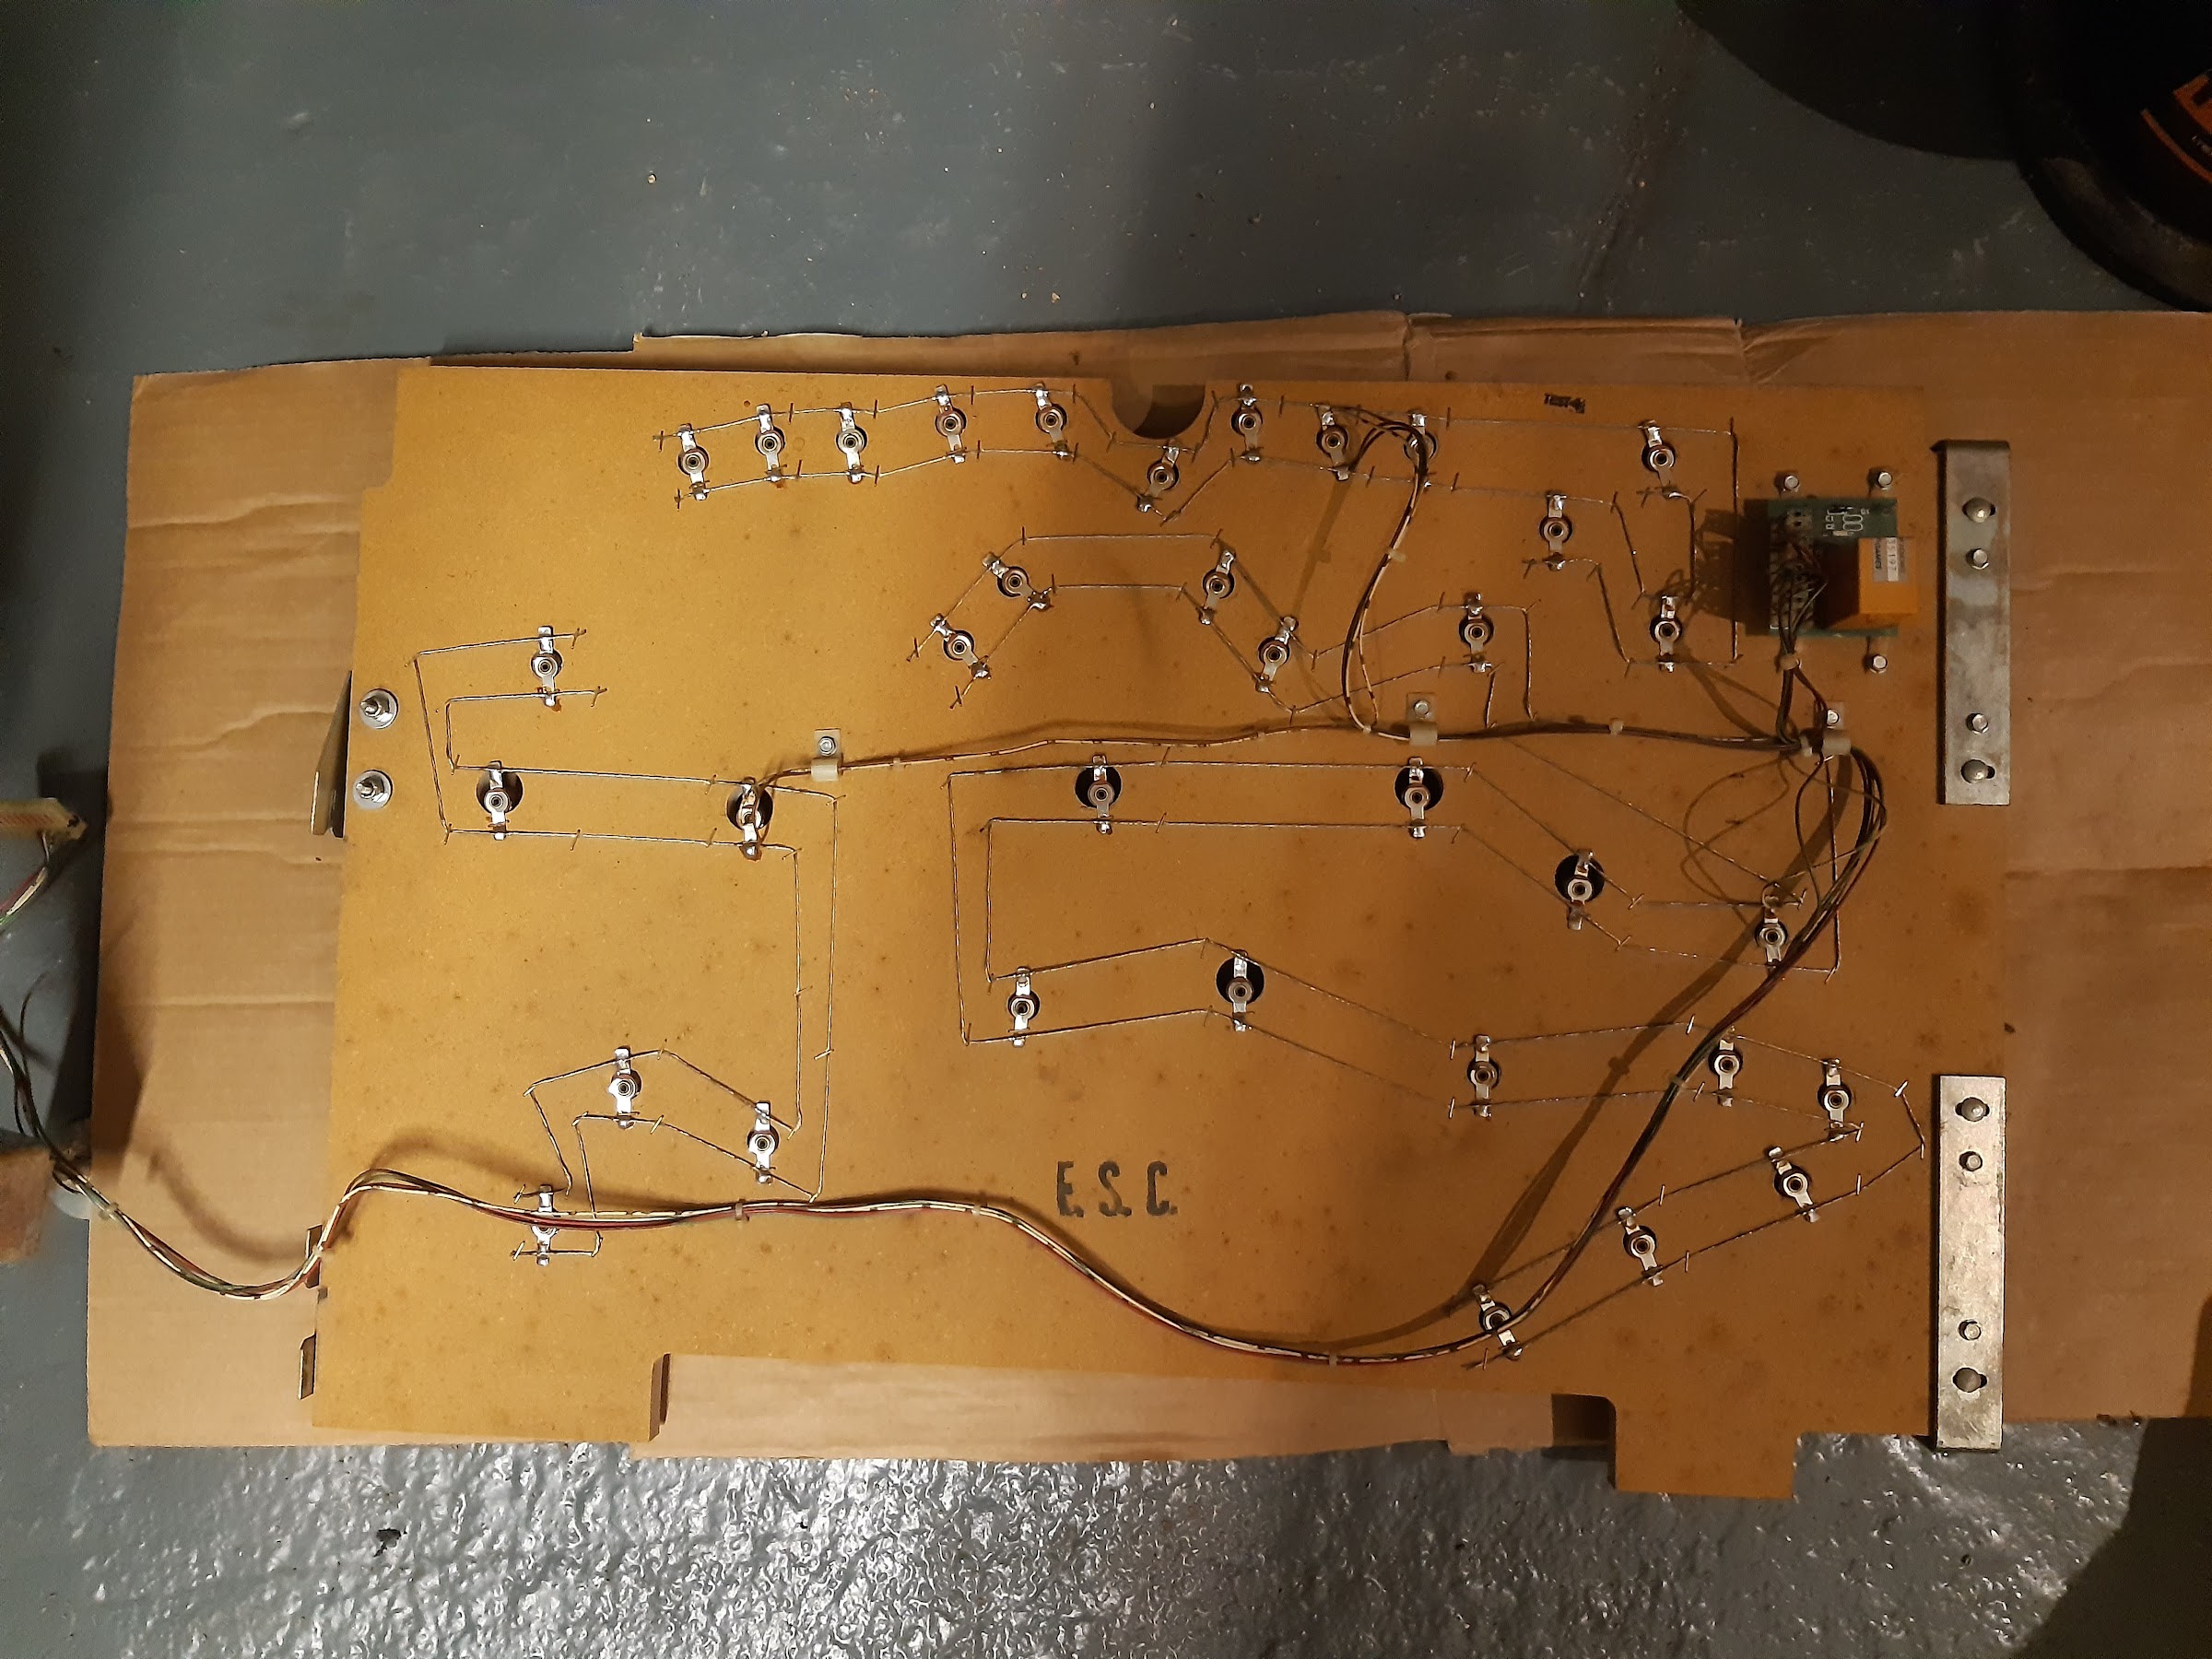
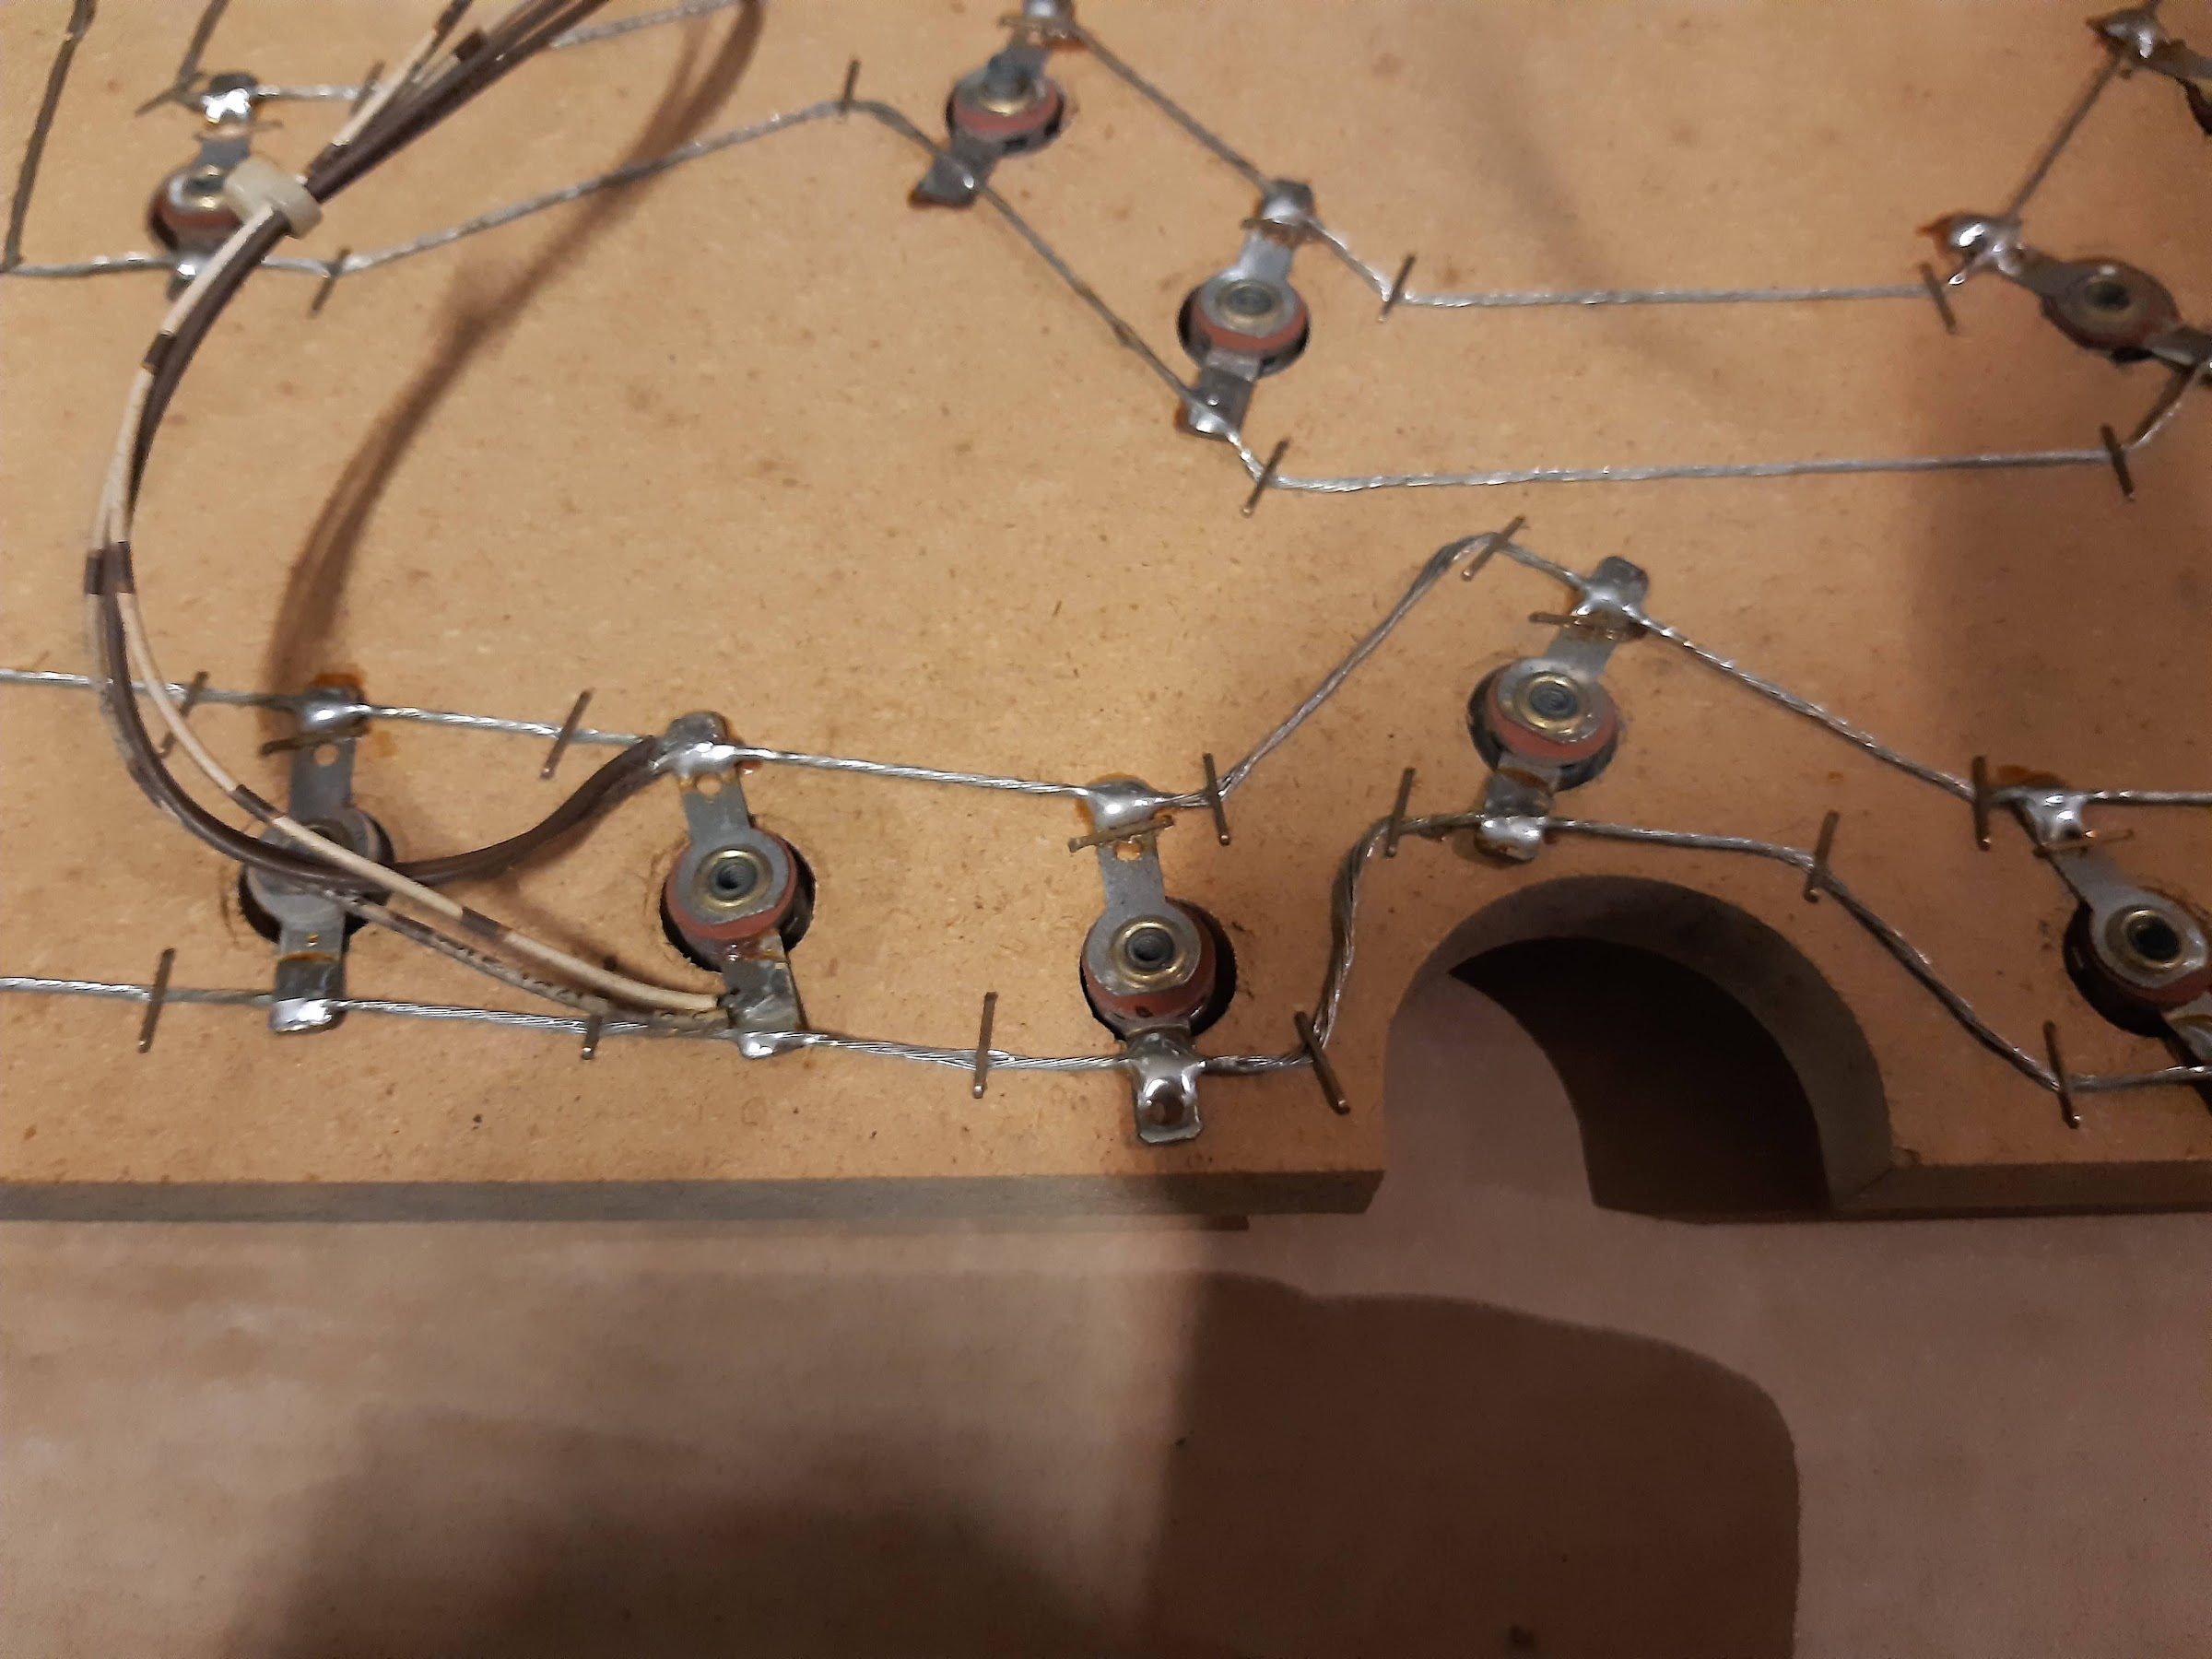
Inside the head the boards are complete and unmolested. Missing the knocker though.

ZprK3LDtlUVaV22jmhCu-rK0bpTxz-89CMLcCsAiW6nMUdEaIZ1tnU98gSsemT_8v6UKbM6NVg6SHgPsbrXM4MyeGJrrrUvWL-Y6ekeqkcf8cyxuPxJTfCAW869w8mlRyt94MLxc3U4=w2400


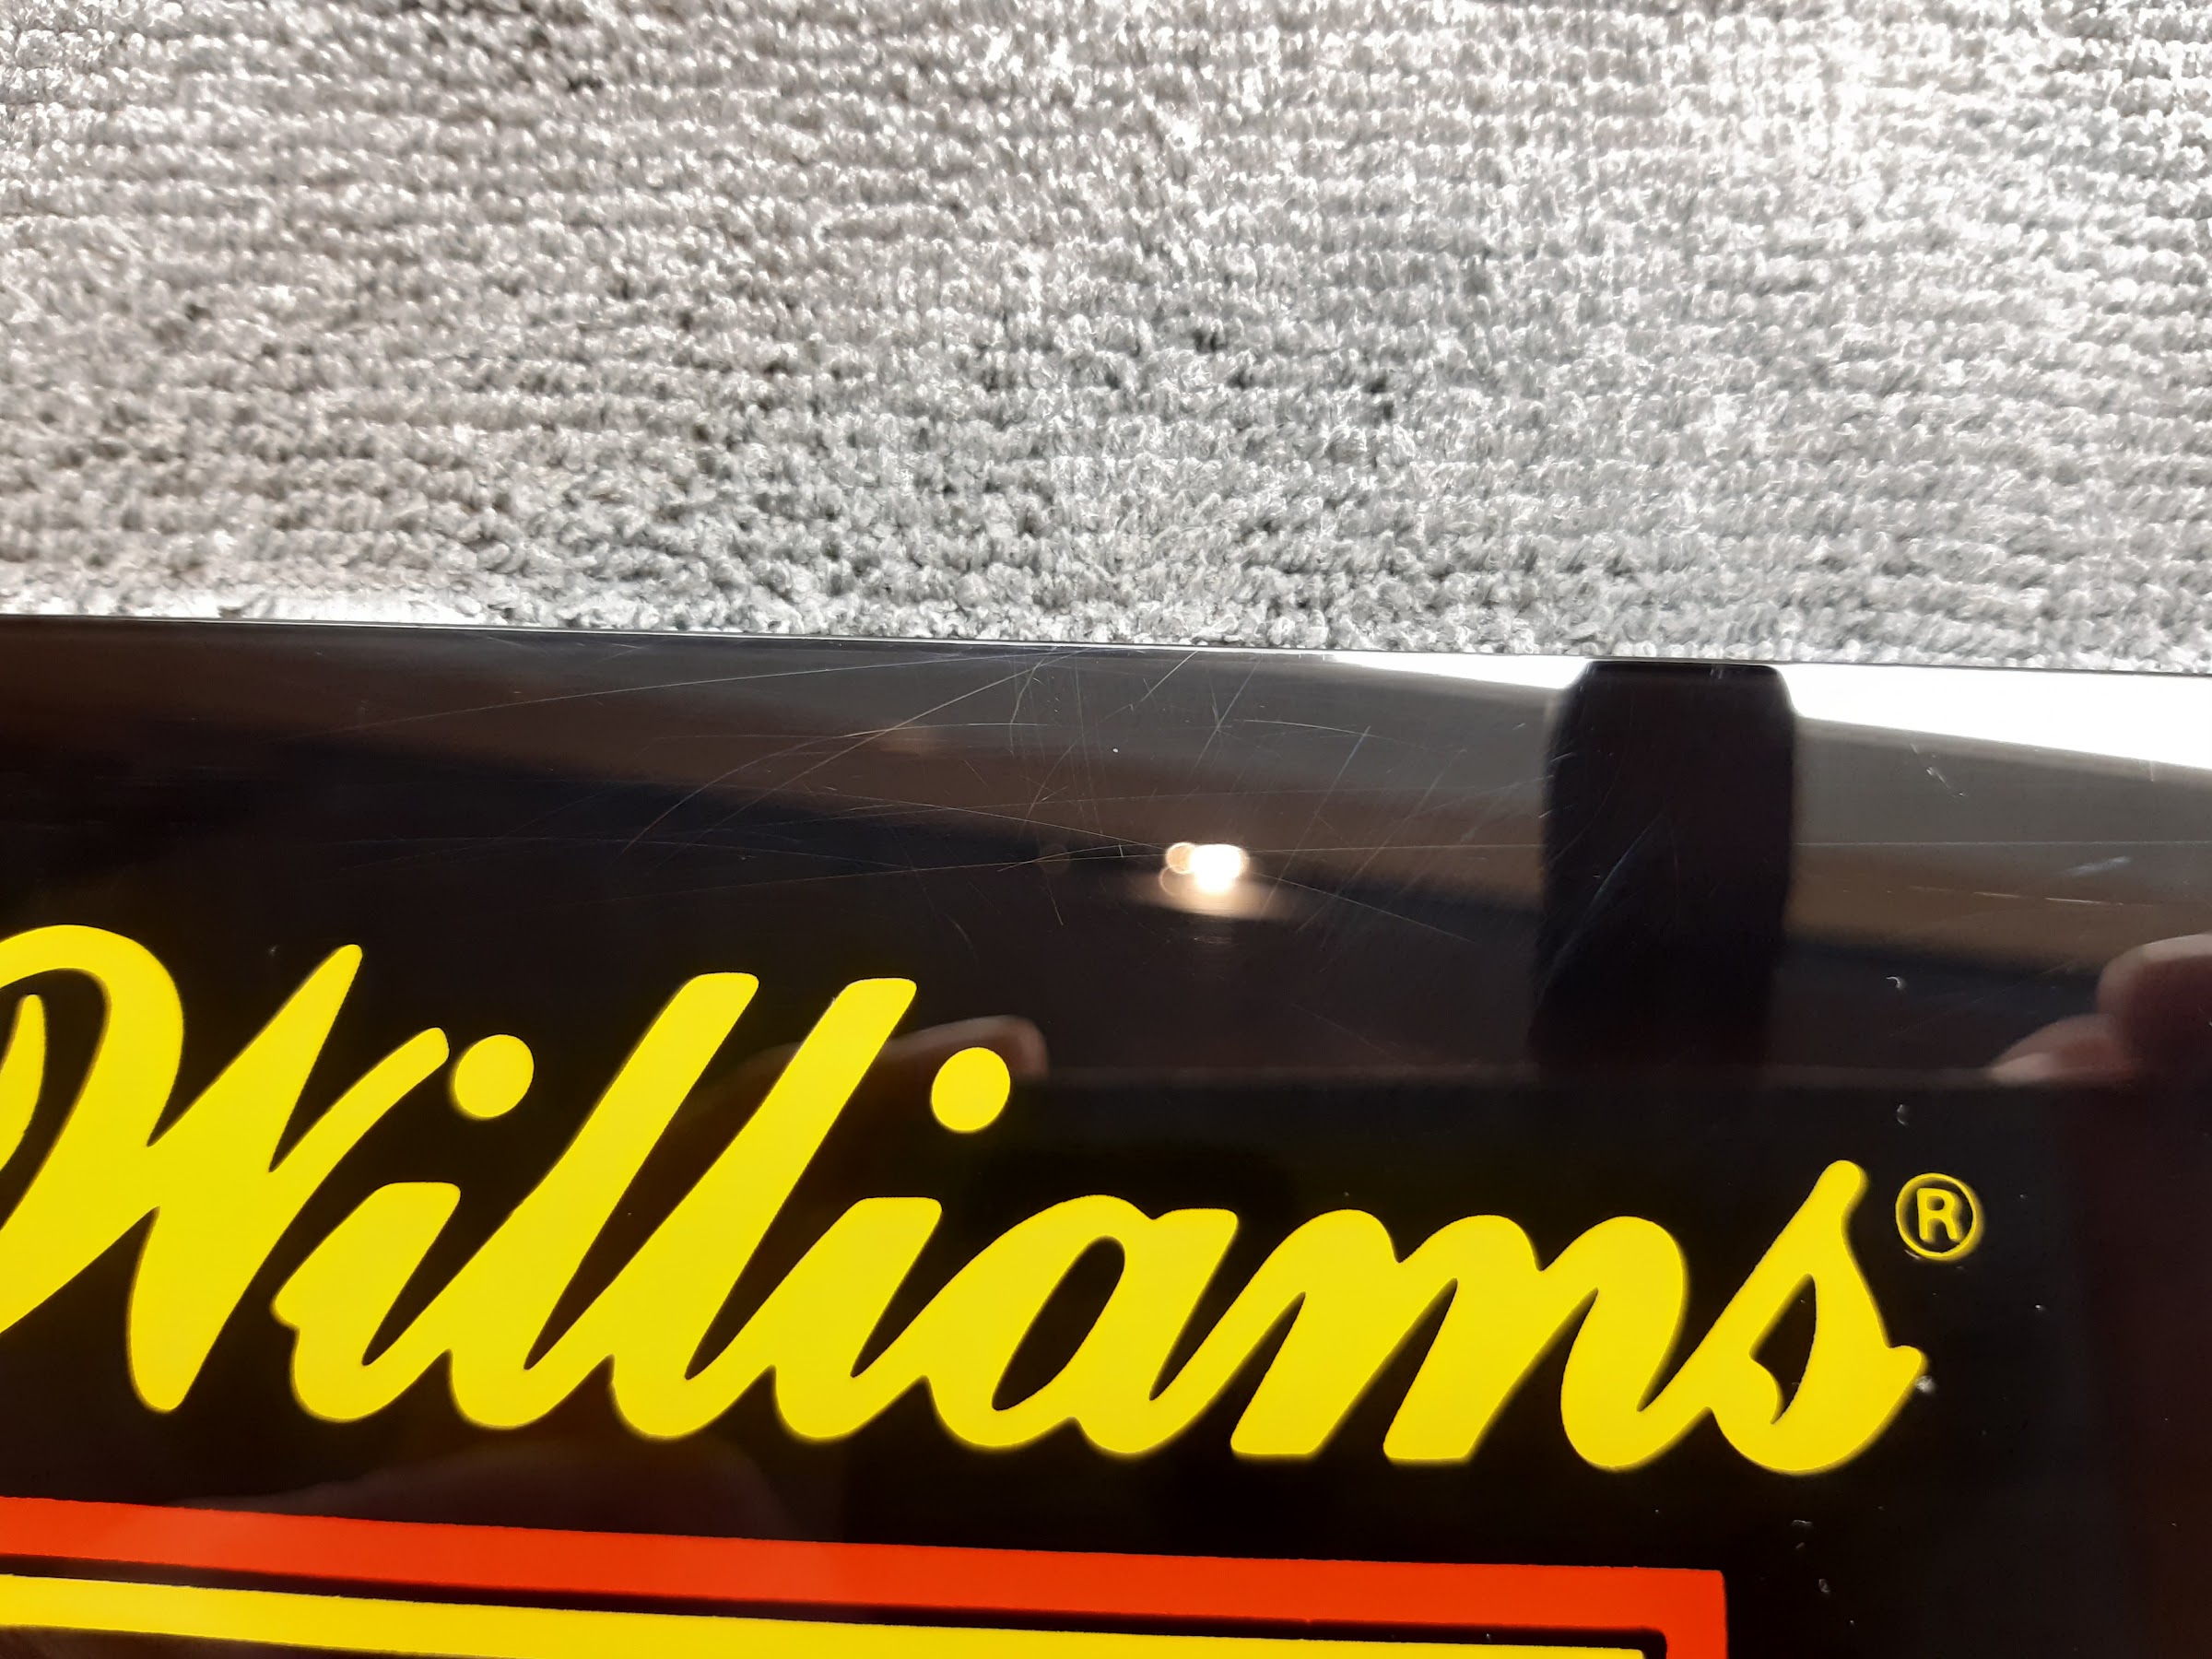
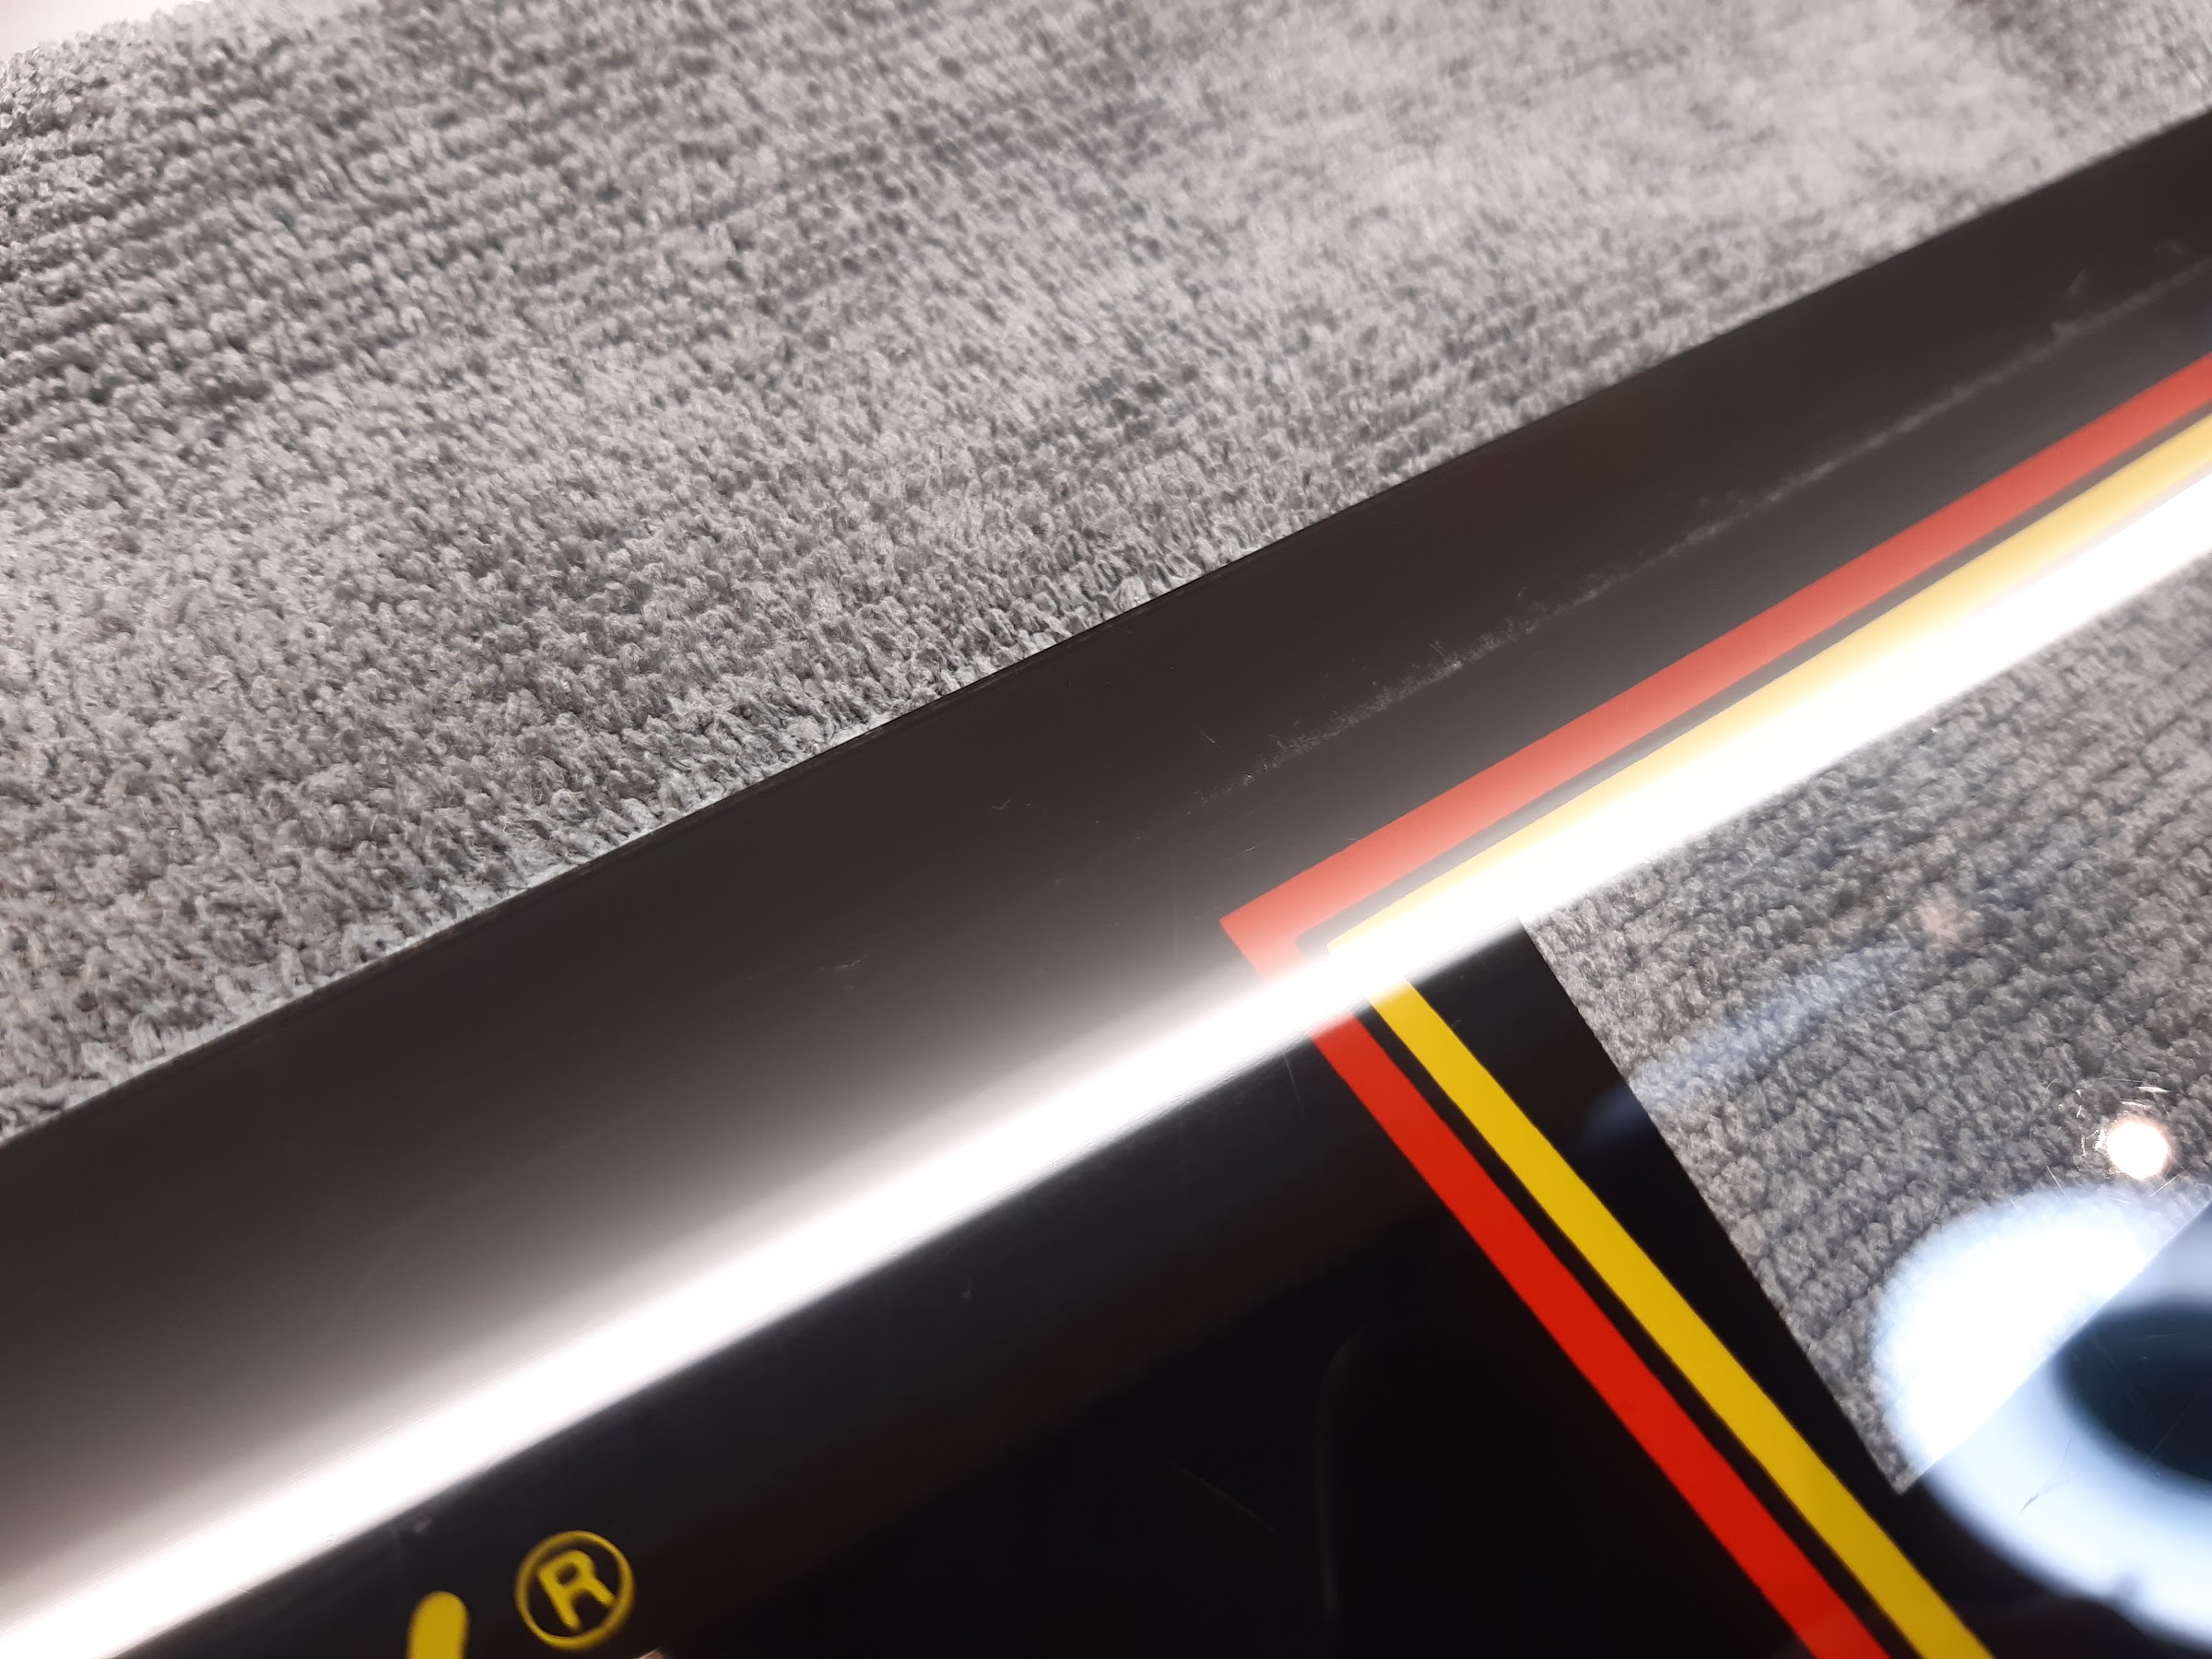
Translite is OK, a couple of small scuffs on the rear but generally decent. It's the later W print, not the Cubs/stickered version.
Displays seem nice and even with no burnt segments that I can see.

0xDY9fVkYo-_YIBIswCgge86p7lKJQJNT0Kkx0PBx025BX741AmPn5QJm45ZerngaiBmiMBlk6DZcepM7-1CHaLPXOMe9HfUM5NgZPbNMXaKwF0N-JLrM00TyNLl6T1c8zvJ6kGxS2g=w2400


So there we have it, need to pull my finger out and make a start instead of just talking about it!
 
Last edited:
This is great, cant wait to see how it turns out! regarding the topper decals, mine has a repro topper and decals that came with the machine, and the decals are decent quality, only thing is im not sure where they came from. @Jsyjay any Idea where you got the topper decals?
 
That's great thanks for the info guys as I shall definitely need to source some decent ones when I get to that stage.

I made a start on some simple bits to ease myself into it gently.
Removed the topper and fan, and stripped the fan motor down to clean and put all the various screws and bits into the tumbler. I use corn-cob and Autosol in a Lyman 1200 polisher.

Taken lots of photos like this as I disassemble, to make sure I remember where everything goes:

ilHbeQpwgSO6k_G2p73gtwNxl-eh9VswN4AJeDlTxgifYyDuO0T10VJFnA5urG7JyPsZb7EtDqnSedS_rREp_p2zk2ZiNnJGUtoWcxKLwgUdLPiS8TK61BldkeKvcPK39j5cIzAAZPA=w2400


Then I removed the speaker panel:

PexXuVUB0nKuPur0w4uLDAcDhGmaOEWzHa9AHeG_0GrZLDlr2VWOVgkKQ1uG188n1_c2tSshaebEyJ1KBlTDxT_DCX9hz0L6ucJ-astBr-t9YCGjpBizNl1VC5S4DJMeubfWKb6zEsc=w2400


All metalwork like this chucked in a polisher for a couple of days:

2Nt3Xn3O8lQ1tG8XBSlJBIRpz8GFoDllzKGzQfxPkRqpi7UU1KkBZvsgU2u4d9TnQrgZvE2qLQE9oi57V2Uwy15XcCfrepqwtNsEE2kzFreZOQ7UM8kMk3CqYqZKwG6vEOyf_zRe5BQ=w2400


It comes out a lot nicer, although I might give this a bit longer:

MPs5r37uJVSlJnsUMaOLE6iBjHvHZ8mRC0ZuTztyAbI-uSO-WllR97gl_o4ClSt7xYjSlYJaYMgsUGoNlWiQv1rgAQMvhOwJBQExulyXCtpyCqYLM6PhvYGn2wRkyi8EWhBS1MVy7wE=w2400


Removed the display board to give it a once over and a clean. I gave it a clean with a soft brush, a bit of water and spray cleaner, then dried off with a dry cloth and finally with my hot air tool to get it completely try. The glass has been replaced previously which explains why it's still nice and bright, but a little bit of damage has been caused, and there are lots of large solder blobs on the component side of the board which you can't see here:

JRjlYjbWI_h_J18A6Ly0qG49cMA1Pu7rV-RAsiU63w3zoN5QehzCU0wyKW9yWhV0f4kweSnW7jZwXfX1cTHMRF7BHrb27Bswr52fkkVsuRQvSTgKqaKGXCiZ8AdEX-c2syrOnFzi6Vk=w2400


To be fair it's a little tricky soldering in new glass which I discovered doing my Fire many years ago. The pins are very flat and springy, the PCB holes are very large but with very thin tracks. Trying to align everything and get it soldered nicely is a bit of challenge. Also, half of the PCB supports are either missing, broken, or the adhesive is not sticking, so the glass is just flapping about in the breeze:

UpHlNuzaxCOtTIA9BGA0UrAT-1wRr6EDE_Lba04KpmazmWsn2iklgq3Tlur6yP09VZlRwSIDy7W0sal3n8MfdEhdPU60JdDjTZU5-imBYsN3YFO2d5NZS1ay7z-4jFKPSoV441pcpBo=w2400


One of the black vinyl display masks is missing too so that will need sorting (although it's hard to actually notice this when it's mounted in the machine).
Managed to locate the same type of PCB supports for the glass. They are Richco LCBSB-6-01 ART available from RS components. Then I discovered that the other supports that hold the lamp board are also still available, although seemingly not through RS. Digikey have them, part number LCBS-L-5-01 so I shall also source those before reassembly as a couple are cracked or bent:

OBf0S6UuI5yFY9rWfbwwBrCt9PcEZPT2ptWO1pDXMYxsoLFbKSoPxZ-3Xa51LGvRD_ZC9PbL4ErVhn-kRllb7UlfhFKGeXdokjuzR2mpEphfDHFyZ5cM-U8pWBjX8yPXyXeNk_Jvpcw=w2400


There was a bit of sticky residue on the glass with missing vinyl mask, and I decided to remove the other one too so if I have to get a couple made up then they'll both match. I quite like this Sticky Stuff remover for this sort of task:

ewIhRD0Ob_NMuDQqF8alNeexhvIVegLMMQXD3s2b8m7D-I2QGMI6QQZGNQ4kx2mBxHCBvZT9uW8wkovAfZOAF0LS5kFjgE054om0Cnss9kYJIzopDG6FyZ3o0_jJvSJj98ymR4phdbg=w2400


Now we have shiny clean glass that is actually mounted to the PCB! Of course if the display had been worn I likely would have changed it for a modern LED equivalent. I resoldered all the pins, removing the old solder with a solder sucker and using fresh:

niMpPYuiRJ4SDI8n914Brqdmnqt_gYtR8AgHIFkk351mGWnfYEvUvfHQLYHU5pV9DGxQ2ebB8qEK9AvWfj1fgatYzWT5sIcNI1NY2eTqaXX72g5EGTg2__-5ETiLY8UR5a08qGv4O_o=w2400


All the flux cleaned off with PCB cleaner:

fRbm_PEBROlJ_bzJgySpnemrDpN3ZxNrDgDdA7xsNBEEQgfwSH70QuRqBBruiAf_xuZT7I0X6zqqDSSWQrX74pnZRnOTQepYHaNO5g2qoysd1YMBbxx08yli7DIIG-VDEptSccSL7nI=w2400


Display board done (just a reflection on the bottom left, not a scratch):

1HF18rE0tmYcI2dak8xrGe7ZLzUjPF_WH0CY5pdU6SwHP7wxgFZ_N1oUKg6YrUSIq1RiH5Dwymbk3OlMsE7XThmDXqJcpiFLiNMcjywTWmlLlqLzA3-ueY2r-wZdSmV_x531W5tNsNU=w2400
 
Last edited:
It feels like I've not achieved a lot yet but have been doing a few bits and bobs.
Been pondering what to do about the cabinet, either Radcals or normal decals. The Radcals look good but are a bit more expensive, but I'm not convinced about the finish of the edges where the side and fronts meet. I know it's thin, but makes me think that it looks like two pieces of clear perspex have been butted together. So, I'm thinking probably decals, unless anyone has any thoughts?
Also LED vs incandescent. I've never really liked the harsh white look of LEDs, but I know they have improved a lot over the years and can achieve a colour temperature close to that of conventional incandescent lamps. I certainly would prefer the longevity and low maintenance aspect of LEDs, if they look right. So it's probably a case of choosing the right brand.

I've been polishing all the metalwork from the topper and speaker panel in my tumbler, so it's all nice and shiny now. I removed the speaker panel plastic from the wooden backboard to give it a clean up and polish, it peeled away with only minor resistance.

Reverse side of plastic is filthy, cleans up nicely with a light clean and polish with Novus 2 obviously being careful not to damage the silk screen layer:

Z-oEIH2lCTkHXNe7-XEhsgoL8cdVAE23xkCjZoJDFkRhR-7JNoH42d4rEbz0xd4NhREHEA-HM4pLK3jAk77dbn8FrywCLZNOFc3IfjJT0E_af4Y4bVGG9GKUt85lpcQgj3xhaH8aQMo=w2400


Nice:

fGXWezuQN4abRFa_-oHFNWKVhHbyR1AIutHnoIVvGTXAIHKYvVCwDs9BcZ4Mi1j-JNMQho3H2mJo1a4ML7w3-Dv_5JOsX7h9-opJZBVzBBGgKHfJNWS4oaX3wbMQr9kUb2YlJ0GDNzk=w2400


The trouble with acrylic is that it scratches very easily, even wiping with a 'clean' duster is enough to add loads of micro-scratches to the surface. Have a look at this to see what I mean:
Jxyx7z4bVuRF1S_0S1VE5dp7a68zrUGY57sqFanlqBTfDNEgxoAZcPwux6HCG98tTc2GDqdvdYGZbr14UWlR1cFqwBUgyablfUdNphaDc7wzC0t9Bx8ZR9fAZhhHS_IIo3tx2AOU1zM=w2400


So I thought I'd have a good go at removing these. I wrapped a micro-glass cloth (these are finer than micro-fibre) round a foam pad on my drill, and did some trials with different polishing compound. There's the Novus that we all know and love, but thought I'd also try out some car polishing compound, and then polish as well. My theory being that Meguiars Compound would be similar to Novus 3, and Meguiars Polish being similar to Novus 2:

gqEOcy_lX7enBM3KGVseHm3d_arhXvnRkqyYBZOFzvzVG9Y7ebtU__steQ5laRlCmhzP6_qGRMcVmnJQNZhWTHepuA_l53PyKhH9dkUZ4QfdjbqubmBag55ZW3uY8mi9ROJJXWihZb0=w2400


Using the same technique one would use when detailing a car, that is start with the more aggressive compound first, and work the polishing tool in and alternating pattern of left/right, then up/down overlapping lines it started to remove some of the scratches:

uuif7GR8iBOhU0WH2qyiSo_RPtxekPshQDSqKTE1ZFPlPh76UhU59qyyqHGdTSAIg6BxdtlWuIBd82Cqf4zAqeVfvEGtXxkxdn0CzYcvZeFvSmFsa3DD8Mh-Ql6GJW7O9NZJYjUvNvo=w2400


Then eventually, after a lot of passes with the Compound and then afterwards more passes of the Polish, it came out pretty decent:

RtkOP0E0WFdsVWbwqWxxdZvpZ-1_Y-OOSIu3DBl9Mm_GcnC_gTmbYexI9G03Ii2JWWkAmI8FqzWoxyLblZPmn3V4L38DUCcr9I6tiqIxFDT9FI8MOW4TjQuoHgThTBqaGCbnlHttxZg=w2400


I came to the conclusion that the Meguiars stuff was just as good as the Novus, and it's a bit cheaper and more available in the UK so seems like a good choice. On the following image you can see where I did all this first on the left side of the panel. The line is caused by the scuffing of the translite channel at the top of the speaker panel, it polished out quite nicely with the above method:

-ddKPMHWCZ4PXpIFe__e6PY0LwWwJVmySAUhWozJXLhtRw2NpjmUQZle-7dJw7l5clfQpYm3G33_kF5M_qFu08IJSrBk7y1HYYsdNKtEvtVNKTblpou3D2RP7aO_K3UOZeiKPoeE69E=w2400


The main problem with all this is that it only takes one tiny speck of dust to get onto the surface and the polishing process then adds new scratches in. You could literally go on doing this forever and it will just get scratched again when it's cleaned at a later date, so you have to call it a day at some point!
Looks alright now:

PMP471W1V986a1C0HxEQk7_oAI1xwHNCHEIGhP7TaK4kXI8Idt6P7QmIpJDf_dlm8ATpwaZaqFFtZyiEQqsW3TA22aq7uGhPhCd0kgMW_h85pKdSkVdoVJQBfurme0dNMd7CzEHTEyQ=w2400


Anyway, the replacement lamp PCB mounting stand-offs arrived from Digikey. These are also used on the relay PCB mounted to the back of the backlight board in the head, so I might as well replace all this old yellowing plastic:

ib6IVNlB8fobPyzdHAatymHpPIbBt5h60sHAEwPfEHGkPclrHxI9nEiPZ6vfq6FI_CPkcMRAjY6KNjqEDFI3oPFrgegOEfZuWdp-_6jQgdAHdav63LaQH7ajifzliv7d0kJJpcd8cro=w2400
 
Last edited:
I've also now removed all the PCBs from the head, to check and clean up.

There are one or two previous repairs that I will clean up a bit, such as this type of thing:

xqWUk3_e4prbYiBos8D4eABxkXQ7uj8DEcVYdZv9--_WL2b_iKBHgfkFxR8OZx2dWv52ZmrOvRMUfC1Eqy7hUcevwVodiP7T82DhSycT-UqjqavJ4q5A3uyhHqFZtNxfHTgcKAouSUk=w2400


And here looks like we've had a flash lamp stuck on at some point, toasty:

oIjZBcO0Gv7Frzs_2SG-2vL1ZLhe1ki3IumubyEzDfW5qg49oCk5xxfKmtqRzTtGpnB7YURVJLPDjsVERpZO2Vf_Y8AePcB0lyKoO58-VgTgoELccakq5AoOQhlXT44vUR2V4WFcQR8=w2400


All molex connectors looks fine except the GI (surprise!), so that will be replaced:
klINJnPmn0OTJoR_u5qhQ9Yz8QcqdraKFniRpe6vzJfxTv4BOsmniW0iXthkKmxgUtmPUblzFF-JCBHX4MccBO2kHEei5yU2RrnNRTl6qFnpOAtU-0dsnpEA40CM6y20-WnkvlEXAXs=w2400


All boards have been cleaned with a soft brush, water and cleaning solution, first removing all socketed ICs, and all fuses removed, values checked, and fuse holder contacts cleaned:

plVyQrsGlAc-H2eI0TJUhm4JjQ-XCCitGy9oulpeFwJ0I00evz3beLlO3VazxxO2zdau7JYpytakyNWwm2PXppx30VqZGae-ZZXOO4nO9rlNp5sc1n_ZAWWrrKSVo-wZOW6d3-VRgnE=w2400


There seems to be some debate about whether to re-cap the PSU board as a matter of course, or 'if it's not broke... etc'. They all look in good condition so I'm thinking just leave as is... will I regret it?

Back plate is out of the machine:

8mWvhoZuuKrn2yik8Ot_KrYCvRU1t9-WcpKchVweJVvtb0_eQTU6eHutj9KMVXRdneu7ouNDoA-unYnsHd--F6wlrrIXYkP3idMj4wXPCb4L70aLZCDB2rbczQi8mFHUvyFggz-AEVU=w2400


Cleans up nicely, all PCB mounting clips removed:
67JK6QxiF7RUEkyVRNRAJu5amiuT0l8SzPGMJDHFf7wQM7S5_myCmZzDuMzjyALtgIW8kXowNPG7ivNQvx8Wz3gzKC61M0nRqRg_LPIi2iZGxMhbTc2RyZth7zOTjTNTJaJSvF5sRMY=w2400


I've had all the mounting clips in the polisher for a couple of days but am struggling to get them clean. I think they're stainless so should come up nicely, but there seems to be a coating of crud on them which won't shift. Tried them in my new ultrasonic cleaner which does nothing. Trouble is I don't know what they're called so can't find them through any of the usual sources. Any ideas?:

s9mBup_8-jmcKULi-fKUTp7WwEPyJ7IjO2qJSBo5ILsMj9Obc6temA6Q7O6YsB4TTzX57tQy9pvFvHSARmomY5B098_QqVcMaK2qBj1G42DdeoMkkAVuXwpRg4zclL2wH8tamG_RC0s=w2400


Also cleaned up the stainless vent plate from the rear of the head, comes up nicely with a bit of metal polish:

2VhYPZlOL7ZZVcq9eohKmxMhJKMMuPmT9LkoWRXYORrLBNDLBhAQv8tURh9EgIs6mSo70aJLfUmJzqukISWqs4FnTiTrze6ZIFJ9ikCbf_my2xipwW6hkXQCyO81HyT4lsrJE4BHrfE=w2400
 
Last edited:
I've been following his thread with great interest, and DMD on a Whirlwind, wow! He's certainly a great asset to the hobby that's for sure, I'm really interested to see how the upgrade turns out.
 
I managed to find a source of the stainless steel mounting clips, which are described as 'PCB standoffs' (completely obvious of course, not sure how I didn't think to search for that before), but at £2.50 each I won't be replacing the 30 or however many it is!

I decided to try some alternative media in my tumbler instead of the corn-cob, so ordered some crushed walnut shell which I believe is a bit more aggressive. I've got a bit of a thing for CIF at the moment as a general purpose cleaner, so thought I'd try it out in the tumbler with the walnut shell and gave it a good old squirt.
Well I think I've found the new magic formula! Everything seems to come up nice and shiny in very little time, the stainless standoffs have come up a treat. The walnut shell is also slightly a finer grade than the corncob and seems to be less susceptible to clogging in screw heads etc, so I'm very pleased with the new combination!

I've now stripped the cabinet of all metalwork and earth braid etc. Generally the cabinet is nice and solid, although there is a little bit of staining on the bottom from some liquid that appears to have entered from the mains cable inlet hole:

u3Zs3yz70GLgWuBmUlyGF1uiNXZZ7O2CbZolN90i5NzjgsR48r02yewujveVqU2sEV9O5JAleW6TBWgiXkCeImAQDIz4haJiZH4oI3DmDFBG0fiatdMaaZgQmYATdbF78NtJTyNe2Ds=w2400


Made a start sanding the base. Very satisfying seeing all the crud disappear leaving the nice clean chipboard behind. I only had a detail sander available at the start but have now got a 125mm random orbital sander which I'll use for all the large flat areas:

hH7OF2mkDDmCYm7oqSfsrLDhFBPmaEsuQGuVS5a6uyX1GQqAf8cXAgDou2yYwK7-yy26ePc7FUJO2RsTneoSIQjqejU3QQ5JmQ2rluTTTR9Z7_pSZuxoTjoTORyBSwsr7LXRo3ICSYo=w2400


I was hoping to be able to finish the inside of the cab as original, i.e. a bare chipboard bottom, however I just can't get all of the water stain out so I'm going to have to paint the bottom. I might finish it all in blue, or do the bottom white as a contrast perhaps.

Now for many more hours of sanding and filling....
 
Last edited:
That Maguiars compound and polish is good stuff, I sprayed my sons bonnet the other week using rattle cans and after a flat and machine polish the clear coat came out smooth as silk. Just bought an orbital sander to do my cab as well, should be here soon. In the end went for the 125mm Makita 5041.
This is going to look gorgeous when it’s finished👍
 
Last edited:
Looking great Ben. Getting the cab looking fresh is hard yakka but it'll all be worth it in the end.

Where did you get your walnut shell from?
 
Thanks guys. Must admit I cheaped out on the sander, got this 35 quid jobby from Toolstation https://www.toolstation.com/bauker-400w-125mm-rotary-sander/p21389 . It seems decent to be fair, the only annoying thing is the dust catching bag is crap (as expected) but the attachment is a weird oval shape which means I'll have to bodge something to attach Henry to it. Sanding discs (and triangles for the detail sander) are really cheap in Toolstation though (I think they work on all 125mm sanders) so I stocked up on a load of different grits.

This is the walnut shell: https://www.amazon.co.uk/ProRep-Ground-Walnut-Grit-Litre/dp/B00AGCXWH0/ they also do a 'sand' variety which I assume is a much finer powder, would be interesting to know if this is as effective as the grit as it would be even less likely to get stuck in the nooks and crannies I would think.
 
That's going to look great! your attention to detail is amazing, have you decided which decals to go for?

Found some detailed pics the other day (whilst looking for something completely unrelated) of a WW with radcals installed.....

 
Thanks Kev, I'm 99% sure I'm going to get the Pinballdecals.eu ones that we discussed on your thread, but I'm waiting until I'm further in the strip down and building up a shopping list then I will go on a massive spending spree!

I've considered the radcals but aside from them being a bit on the pricey side they just look a bit plasticy and like a piece of acrylic has been stuck on the cab if you know what I mean, so I think I'll stick with the conventional decals.
I'm pretty sure I'm going to have to get a repro playfield as well as this one is pretty rough (but will decide for sure when I have the top side stripped), but very nervous about the Mirco one reading threads on Pinside - various images on there of the drilling/routing way off from the artwork, and specifically on the WW one of the insert graphics is completely missing! CPR seem to have sold out so not a lot of choice here, would be nice to be able to see one in person before spending that cash.

Most of the metalwork is so far coming up nicely in the tumbler using the new 'magic' formula, but a few pieces like the lockdown receiver are a bit crusty, so I called a local plating company today and will drop a load of bits round for them to assess/quote on getting it re-plated when I'm a bit further on in the playfield stripdown.

Started stripping down the backboard lightboard thingy (the proper name escapes me, unless that's it):

VWZfPIsreMvRcwUgp_wVHFoLd5n731HTe6EBL-8SLm_Y4cux7Fy05OB6hX4nhP-NQGW6yvghi0FGn1Bukg92ZPiqWQ7E2GO7GrM5bGaaFQwwoLXhUdFRBQQI3PMcT1ccCnLVeY1KidY=w2400


The backside is looking a bit stained and the lamp sockets need a good clean/polish so it's all coming off:

eB9-BRtjwqj1U2Qb-PtOHjoDacFySI-O_ZkrxxNcmZYy5I4EcTnSdHZT_txpH-kcDybrVty7DMB1GE6tsHp8Lbl6P3QmW57UmAo3eJOzcWbrPy0q8TI3ca3l_GPTN5b9h1zXgiUSKn8=w2400


All these staples have to be removed and the lamp sockets desoldered (which will then go in the tumbler), its a bit laborious:

L0KMMyqfTXhBuP82oQ88k9vAykh4_Qz7bdXXu5quU5x-R5Y3q4lGKIf2XxdizkvDXuaxymJAsluvrIs9-MGxhFvdW8ZE2rpAssPy4XikM7O1qd3Vca4tAJmJA2Hfo0uaIKSwMeb3PZQ=w2400


I worked out how to hack the 35 quid sander for a Henry adapter - remove the dustbag then there is a normal round dust extraction connector!

v86WXHdUICIJ62GYV7zcKek0eKzB76IRhVElZ1AeZ3mm84pum6llFy60DR9u6Wn86OqfRtviL4w24zLErXAQDTV639qZbOJtpyMxaF_HSuVZNFo46elzmBtgwBDxHU36ka9Ql5X0Fcw=w2400
 
Last edited:
I used warm white LEDs for the GI to keep the incandescent look, I tried various Non ghosting LEDs for the inserts but always got ghosting so I’ve kept them as standard good quality bulbs for now.


Sent from my iPhone using Tapatalk
 
Cheers yes still undecided about the LEDs, I want it to look like incandescents but also want the longevity of LEDs, although saying that it's not a huge issue for home use. There are a few full LED upgrade kits around, but before spending £100 quid or so on LEDs I think I might just try a few first and see if I prefer a combination like you have done.
I've seen the LEDOCD stuff which looks like a good product to get that conventional look, but on the other hand it seems a bit mad to spend a load on LEDs, then an LEDOCD board when I could just fit conventional bulbs for a fraction of the cost.
 
If you need a manual mate I have a photocopy manual you can have for postage. I just managed to get a real one so to speak so don’t need it. It’s all there and In good nick.
 
As a matter of fact I do, that would be brill thank you I've been using a PDF version on the computer but not as convenient as flicking through a paper copy.
I'll drop you a PM, or DM, or whatever it's called on here.
 
Well progress has been slow. I've stripped down the head and the cab, sanded all the old paint off and now going through the process of filling all the dings and marks and fixing the corners etc using the trusty Ronseal 2 part wood filler. It's a pretty tedious process of filling, sanding, and repeating again and bloody again to get it perfect.
Getting there now though. One area I have found tricky is smoothing out the chamfers on the base of the cab, getting the angle right. So I built a tool to help, where I can just wrap a piece of sandpaper around the end block and run it back and forth across the cabinet edge. It's not perfect but does help a bit. It could do with being built with a bit more precision and be adjustable, but I can't seem to find anything commercially available. Chamfer planes do exist which might work, but maybe not so good on filler.

QHt5n3fzgXWazYGoak-_klEa26xvLWIassJebfxb8evAkoWg5atskQA57Gsdd0k5YN-JVOgbsLubOgJAshffzwZxb3yUTX02qu-ldzQL1CI8srsapfwtaepSHmiteMCNXTJxVf8uOlg=w600


I did have a bit of a near disaster, as we had a huge electrical fire in our consumer unit in the middle of the night, which is in the garage where all the pinball stuff is. The main 100A tails were arcing together and set the consumer unit on fire, and molten plastic was dripping down onto the floor below. Unfortunately the populated playfield was leant up against the wall pretty much underneath the consumer unit :-(
But by a miracle, most of the melted plastic dripped onto the plastic flex-conduit on the wiring loom, and only a very small section of the loom itself has ended up with damage. Lots of smoke and soot particles all over the playfield and assemblies, but as it's pre-stripdown this isn't a massive problem as I'll be going through everything anyway. Could have been a lot worse.

I started building a rotisserie in preparation for working on the playfield, just having a bit of trouble sourcing some suitable angle-iron for the end swivelly sections right now, so if anyone has any suggestions..?
Very kindly @Spandangler sent me a hard copy WW manual, which will be very handy, especially when I start putting everything back together and have completely forgotten what goes where and I need to start fault finding as it's been so long, many thanks!

Had a delivery from pinballdecals.eu of the cab decals, they seem decent:
WkBBZ1JZ5jMjEnTTci1G3pe-DKithxpYRPmadi9BOG70oZ_JUzgMuBZfizWUgBmpGIAN-xlgE9A1ZpL4A3yH9A6RX3-tbtYhWyo3iPNSxESjXsM0-WTZ3fw4ziq-32kbtKuXLnc6Wow=w600


I also saw that CPR are re-running the Whirlwind playfields, as I wanted a new playfield but didn't really want the Mirco one as it's missing one of the insert prints, so got an order in with Pinball heaven for a CPR playfield plus mirrored backglass and a plastic set. Might as well do it properly. I presume it's somewhere on a ship on it's way over to the UK, will be exciting when it arrives!

Right, back to the sanding....
 
What a nightmare on the consumer unit mate. I’ve actually just upgraded mine to a metal one. Glad I did by the sounds of it. Even worse than your scenario. If mine had of failed, my Brevel sandwich toaster could’ve got ruined
 
Top work, this is going to turn out great! Close shave with the consumer unit, that could have been a disaster 😮
 
Guess what I picked up yesterday? Ok I'll show you:

usJMBzoe5Seot3UTth6_U5Ev_Z0eun6uwg4w-6uRCo5Zj8aWJjkOr8PPRBiyjowa4D8NfIw-kMx6hpjsYwJ98Z2O7a4phB4GU8gkV5_ZoDc1ZJ2x0Xidq5N5_v7kTOhLuN_bMdF88D0=w800


Brand spanking new shiney CPR repro playfield, thanks to @philpalmer, and @Pick Holder for the logistics of getting it to me!

Just unwrapped it for a quick inspection and snapped some pics on my phone, it looks veeeeeeery nice, I could eat my dinner off it!

bJ-aoH9nf9M9NMmcdhvHIVscor98FoMBeoJRv5uS9oKlgRPKbRoSw80HUjUJLapmsaJsK7tLXMx7RUULUhelBXVfew1kUHlQevst0b4WpQQCdwxHNljotuutZyfVzWNU6eY_K0Vym6Y=w800


i6DRHqpCdoiHgjDS2zwGDTcNKi-EBSa2rFGbC47VhMJALLiWiyEQEBOTKRBZ2BTWYFrIvwc9M3LDdlgdmEflNUv8DTuLU25pod2rzD-Z1BExpUAuqLeCQdEh7XVQ75hPJEbR2vib1Rc=w800


As we're moving house in a few weeks I've just wrapped it straight back up again and it can wait until the move before I do anything with it.
I also received a mirrored backglass and plastic set, I've not even opened the backglass yet as I wanted to keep the packaging intact, that can wait until we get set up in the new place and I can resume the restore.
 
Back
Top Bottom