What's new
Pinball info

Register a free account today to become a member! Once signed in, you'll be able to participate on this site by adding your own topics and posts, as well as connect with other members through your own private inbox!

Wanted AfterGlow GI

I have some bare boards if that helps (and you fancy brushing up your SMD skills)
 
I have some bare boards if that helps (and you fancy brushing up your SMD skills)
I may take you up on this. Before I go digging again, do you already have the cable specs for hooking one of these up? I don't see it in GitHub.
 
Two cables mate, assuming your existing GI cables can reach wherever you are mounting the board.

1. Ribbon cable - The small ribbon cable that usually goes from the MPU to the driver board is extended. I can help you make one of these up.

1600963597113.png


2. Power cable - 12V. Power can either be taken from a 12V power supply mounted inside your cab, or the easier option (from v1.1 of the board onwards) is to power the board via J6, with an extension cable from the power board J115 (J115 no longer needs to be connected on the driver board). More info on that here, including a fun moment when I realised I shouldn't have been using a version that wasn't open to the public yet!! https://www.flippermarkt.de/community/forum/threads/afterglow-gi.203114/post-1765934

1600964006903.png


Here's the page that discusses the cabling on github. Be aware that the 1.1 stuff hasn't been added yet as it's only a few months old.

https://github.com/bitfieldlabs/aggi/wiki/Instructions

Feel like you're through the looking glass yet? 🙃
 
I can't seem to download the BOM. I didn't think I needed a GitHub account to do this. I don't think I do.
afterglow_gi_nano/afterglow_gi_nano_bom.ods

The GI is really bothering me. Without an OCD board the LEDs flicker quit a bit on Creech. The PF LEDs I can handle (although it's still harsh on the eyes), but the GI is just too much to take.

I may have to bite the bullet and order the OCD GI. It'll be close to $250CAD but I don't think I can wait for another run of AGGI to happen.
 
Has anyone actually tested the latest afterglow GI Nano PS version, and if so which BOM did they use ?

There is a CSV file with BOM details, but unlike the afterglow BOM which has links to multiple part (manufacturer and part numbers), this afterglow GI CSV BOM file only list component values, and there are some uncertainties, for example:
- No value for the Trim potentiometer (part 10)
- C1 (part 14) is a capacitor listed as C_Smallbut no Farad value ?
- LED (part 17) does not have any specification (voltage/amp).
- Same for part 18, which is I assume a diode

I'm trying to build a clean BOM file which I could use to submit to PCBWay for a turnkey assembly, so would welcome any feedback here

Thanks
 
Yes I've built a couple and they work great. You're welcome to use my Mouser project as the basis for your BOM.

- Trim pot is 1k
- C1 is 0.1uf
- LEDs are just standard 3.5mm SMD (I colour coded these to match the colour of the GI line)
- D6 is a diode, yes.
 

Attachments

  • Project_Nov10_0802AM.xls
    17.5 KB · Views: 17
Also if you're planning on doing a PCBWay group buy build I have been collecting a list of people here that are interested! :)
 
I am indeed, but since I'm located in France I'm not sure whether this would be practical. That said if you do have a list please send it over.

Sidenote: looks like the PS version has an additionnal connector (next the Arduino, // to it, on the edge). What is it used for ? It does not seem to be present in the original 1.0 design
 
This is so the AGGI can be powered directly from J115 (WPC power board). Since that connector is no longer used on the power board, it is used instead to power the AGGI and removes the need for another 12V power source.

There is also a new power section on the AGGI that deals with using this input. If power is not being pulled from J115, that section does not need to be populated. See the schematic for the specifics of which components relates to that.

1605019043978.png
 
Afterglow Gi Interest list

AndyPC x22
Tony x 22
M4carp x 33
broomstick x 22
MajesticPinball x 22
Rick87 x 11
Paul x 33
Fifty x 11
Stumblor x 22
 
Attached my tentative BOM

Missing a few components, it's always a pain to find using Mouser search engine, these are specifically (they were not present in your BOM file from what I could see):
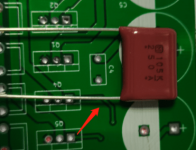
- Terminal block : probably a JST XHP 2pin connector, not needed if I'm pulling power from J115
- Diode D6
- IDC Header straight 34 pins : granted, this one is a classic and I can probably find it if I search a little bit harder :)
- Connector for Arduino. In similar cases I use straight single row female header sockets (15 pins each), as I have a bunch, but it would be nice if there was a ready to use DIP connector for an Arduino. Not sure how PCBWay can handle two connector sockets with just one stencil (A1).

Can you please check if everything is accurate, and provide suggestions if any

With regards to the list, could anyone from the list above interested ping me.

Originally I was planning to build 10 units for my usage (and some friends), with the number above this will increase to 30 units. I'm assuming a $40 cost per unit (rough estimation, I don't have yet PCBWay quote back), so that's a hefty sum. I do hope units will be functional...

As such I would rather build 10 units, test them to ensure PCBWay did manufacture them correctly, and if works we can proceed with a higher number of units.

[EDIT] Found the Sparkfun stackable header for the Arduino

Just missing the diode, and for the life of me I can't find the 2x17 pins straight header, especially since I don't know the step (I'm assuming it's a 2mm based on the gerber), can you please confirm ?

Thanks
 

Attachments

  • Afterglow GI Nano PS BOM - Feuille 1.pdf
    56.3 KB · Views: 14
Last edited:
1. Lots of different things can be used here, screw in terminal block (annoying) or the JST ones as you mention, however because I've got so many 3.96mm molex around I tend to just keep this standard with the other connectors these days.

2. Diode - I used a 1N4004
https://www.mouser.co.uk/ProductDetail/750-1N4004T-G

3. IDC header - Can't seem to find the exact one I purchase, but i think it's something like this
https://www.mouser.co.uk/ProductDetail/TE-Connectivity/1-1761606-1?qs=uca6Mvd9X%2BLAUao//CgTDw==

4. For the Nano socket, usually we use a 28 way DIP dual wipe socket aligned to the top, since they don't seem to come in 30 way and usually the bottom two pins aren't used anyway, I believe this is the case for the GI also but if you could confirm as I don't have the PCB design to hand.
https://www.mouser.co.uk/ProductDetail/517-4828-6004-CP

With regards to the list of interested parties, probably the best thing to do is to get your quote back for the various quantities and then do you calculations, postage, duties, taxes etc and then do a post outlining the various tiers of interest and what they might cost. Have a look at my post for the AG Nano group buy for an example.

https://www.pinballinfo.com/community/threads/afterglow-nano-group-buy-££-payment-time-££.46305/

Great that you're doing this also. It's a fair bit of work, so happy to help in any way I can! :)
 
Thanks

I'm a little bit surprised at the IDC header, looking at the Gerber file it looks to me this is a 2mm pitch (compared to 2.54mm pitch used for the Arduino). The link you sent is a 2.54mm pitch. I'll have to check the CAD file.

[EDIT] Funny how eye perception can be biased, both are indeed 2.54mm according to the gerber file. I'll use your recommendation.

Likewise, the header for the 12V seems also bigger than 0.396. In any case, is this an input (in which case it's not required since I'm using J118), or an output (in which case it could be used for powering other HW).

[EDIT] According to the gerber, it's a 5mm pitch. Definitely not a JST plug. Based on the schematics not needed if I use J118, I'll still add a screw in connector, just in case.

With regards to your suggestion for the bulk order I'll do so.

Just one note, so you used PCBWay to build Afterglow, can you share your BOM file ? Was this the 1.3 version ?
 
Last edited:
Afterglow Nano - sure, this was our final BOM as supplied/updated from PCBWay, 1.3 version.
 

Attachments

  • W296438ASY32-40sets-bom-pcbway-Shiny-2020-7-4-updated ML.xls
    261 KB · Views: 21
@Paul b/w only I'm afraid. The AGGI intercepts communications between the b/w CPU and the power driver board in order to drive the GI fading, and the architecture for sam/whitestar is completely different in that respect.
 
I am sorry if the BOMs in my project are quite messy. I never thought anyone would use it for a real populated board production order 😅 Are there still some components which are unclear? I can check my Mouser order from when I populated the board manually.
 
For the pin headers and Molex connectors: They should all be default 2.54 and 3.96mm pitch. I always use cheap lots from Ali.
 
From the BOM quote I received, the following parts account for $20 out of the $53 total component cost:
- LT4320IN8#PBF ($10 each)
- FQP30N06L ($1.4 each, and there are 9 of them)

I also found out that TE connectors are in general more expensive than Molex, but fortunately there are not that many

Are there cheaper alternatives we could use ?

Oddly enough, Afterglow Nano is half the BOM cost compared to Afterglow GI, I'm still trying to wrap my head around "why".

Also, while I'm planning for my cabling, which gauge are you using for the outputs on AGGI ?
 
Last edited:
I did connect the original connectors to the output of AGGI directly. But as there shouldn't flow too much current per string I'd say AWG 20 should be ok. 18 AWG to be on the safe side. I would suggest to connect more than just two wires on J115 as there might be up to 10A flowing.
 
Last edited:
I did connect the original connectors to the output of AGGI directly. But as there shouldn't flow too much current per string I'd say AWG 20 should be ok. AWG to be on the safe side. I would suggest to connect more than just two wires on J115 as there might be up to 10A flowing.
Thanks

Finding the correct cables and connectors on mouser for both AGGI and afterglow is a massive pain...

So... for AGGI, it's primarily the 34 ribbon cable and associated flat connectors, and power through J115: any specification for the 34 ribbon cable ?
For Afterglow Nano, it's two 9 pin cables with MTA type connector, and one 2 pin for power. I'm assuming the 2pin should be 18AWG, what about the 9pin ? Did you use "floating" cable instead of ribbon cable ?

@stumblor, I'm thinking of including connectors and cable in the AGGI kit (not assembled), as otherwise it can be costly for the end user to source them, as opposed to a bulk order of 2m cable. Thoughts ?
 
@caponian,

I received the following questions from PCBWay on my Afterglow order (not AGGI, it hasn't reached that stage yet), would appreciate some guidance, see the last column


LRMAP2512-R20FT4Resistor SMD 25120.22R26120the component is 0.2,is it correct?
RC0805FR-07200RLResistor SMD 805220R43,R45,R47,R49,R51,R53,R55,R578160RC0805FR-07200RLthe component is 200R,is it correct?
09-65-2098Molex_KK 9 Pins 3.96mmJ1,J5,J7360We recommend componnets made in china that in stock $0.21/pcs,do you need ?--Yes it's okthe component is A3961WV-9P,is it correct?

I checked and I believe that for all questions the answer is yes, but I'd like to be sure before responding to PCBWay

Regards
 
Yes, that sounds good to me. I usually used 220 Ohm resistors for R43 etc. But I don't think it matters. Was probably 200 Ohms in the flippermarkt order too.
 
@caponian , just received a feedback from PCBWay on my AGGI order with several BOM and PCB related issues (not sure where they came from, I might have made a mistake for C4 and RV1, but for the other it seems this is a layout issue).

Below is the link to the Google sheet which I imported with all issues:
https://docs.google.com/spreadsheets/d/1RWMZy6TDV5osf1IQX17r2YSkxAN7cxpCKiZGXwU7MJk/edit?usp=sharing

Most concerning is U1, footprint seems to small.

Also, can you please take a picture of the board fuse holders, without the fuses ? They seem not to get that there are two holders per fuse.

Thanks
 
@stumblor,

Thanks, that's what I use. The issue is that PCBWay does not seem to get that you need two of these holder for one fuse. On the layout the component reference is one for each fuse, so they get this request for 6 fuses, but 12 holders, and they are lost... Hence why a picture would be helpful.
 
@caponian , thanks for the picture
Can you please check the spreadsheet on the link above, specifically for the footprint of a few components ?

Thanks

[EDIT] Just enabled broader access, I had forgot I needed to manually add each account. @caponian , I believe you were the one requesting access yesterday to the spreadhseet ?
 
Last edited:
@caponian , thanks for the picture
Can you please check the spreadsheet on the link above, specifically for the footprint of a few components ?

Thanks

[EDIT] Just enabled broader access, I had forgot I needed to manually add each account. @caponian , I believe you were the one requesting access yesterday to the spreadhseet ?

There are definitely some BOM errors (potentiometer and LEDs) that slipped through, but more concerning is that there are two issues that could be of importance:
U1 footprint is slightly wider compared to the actual component
C4 capacitor is definitely wrong, but what concerns me is that it seems to be at the exact same location as what you referred to as "wrong C4 location causing short" (see other thread about C4 not soldered on the pictures you provided).

1607433500802.png
1607433500683.png
1607433521162.png
1607433538654.png
1607433561839.png
 

Attachments

  • 1607433481203.png
    1607433481203.png
    30.3 KB · Views: 4
Back
Top Bottom