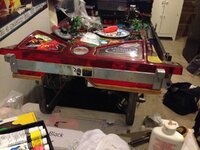
Just about finished my RFM thought I’d post up a bit of a shop log, I’ve done a few machines before but never really documented it so here goes.
I bought this from one of the internet sites, it was poorly described and it only had three pictures; two of the pictures of the machine were in bright sunlight where you couldn’t really tell if it worked or not and the other was a stock picture from the internet, but it was described as “fully working” But aren’t they all? I’m in Sheffield and the RFM was in the south of England, so there wasn’t really any option of having a look before purchase, so I did the deal paid the money and sat fingers crossed (this approach isn’t my preferred method of purchase, and isn’t for the faint hearted) In fairness I didn’t really know what I was getting myself into.
I tasked Martin “the Deliveryman” with the collection and it turned out to be one of “those” collections! I think he said that the house had been altered since the machine was first installed and the only way out, was to manhandle the machine through the entire house and then out up the exterior steps! luckily the seller was able to assist Martin and between the two of them this was completed. Big thanks go out to Martin who went beyond the call of duty! He really is the Man!
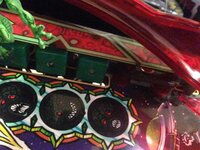
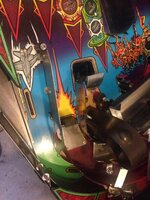
Once the RFM was delivered, I was really chuffed it’s in excellent condition! Bit of back ground to the machine “You don’t normally get this!” the machine was all set up in French, and has a euro coin mech. Fitted so I can only assume that it started its life in France? It has never had any additional security fitted and by its condition, could well have been home use? But I’ll never know. It has an old card inside it from 5play-Lesisure who is @BallyWilliams suck on here!! I have asked him about this game and he’s an interesting chap, but has had so many come and go over the years he’d never remember, the last owner had had it in their home for the last eight years.
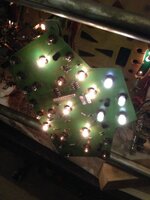
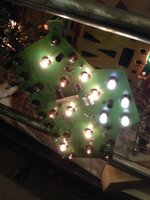
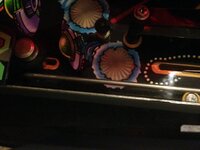
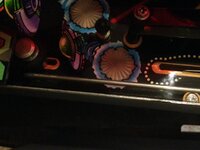
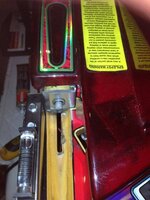
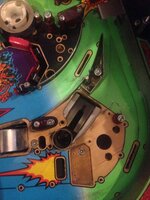
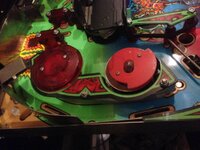
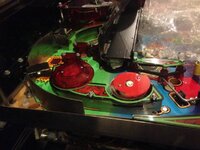
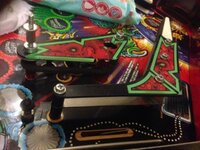
On closer inspection it has hardly any wear to the out holes and the playfield is in fantastic condition! The rubbers are all ok and not perished. There is only one plastic with a crack in it the rest all look great!

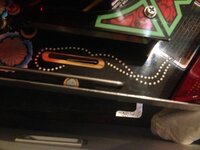
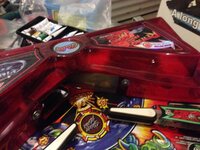
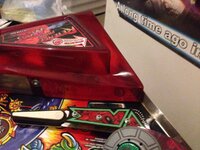
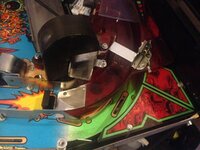
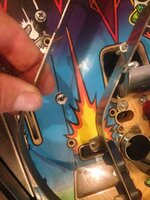
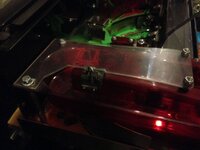
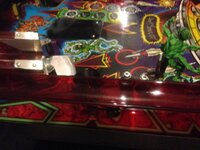
The skip ramp although fully functional has started to crack (Those domed rivets are a nightmare but more about that later!) The cabinet is almost unmarked apart from a scratch about 250mm to the LHS head I really couldn’t believe the condition!
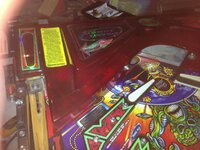
On setting it up and starting a game it all seems to work fine and plays great, although it had a ball missing? (i found this during the strip down!) the monitor all works and as this is my first time with a Pinball 2000, I’m very impressed with the concept and the interaction with the animation and the pinball, so all in all I’m well chuffed!!!
On-going into the memory and having a look around it could almost have been in a time warp! The game software was still at version 1.1, the build date was May 21 1999, and the total plays say it’s only played 1462?? (I don’t know if this is correct or has been reset at some point? The last factory reset was 2/4/2010, its audits and totals haven’t been cleared since 1999 so who knows?
 it’s certainly not seen much hammer and is in fantastic condition) its total earnings was in “F” francs? Its test report requires a couple of switch’s looking at and it has 10 bulbs out but that’s it!
On inspection of the power board it’s covered in dust but looks like it hasn’t been touched, no bodge repairs here always a bonus.

So in a nutshell it’s a unmolested original game in fantastic condition Result!.
The plan after doing a bit of research on the net and following a few refurb’s (shout out to AAARPinball.com & @PeteB @retrorefurbs & @Jonwolf on here) was to do a clean-up & re-rubber, update the software, fit the Ultimarc’s video amplifier, change both battery’s in the computer, replace the fans to the computer and power supply, adjust and or replace the couple of switch’s, replace the cracked plastic and the skip ramp, put new flipper coil sleeves in and fit LED’s throughout! (I really didn’t think the list was as long as that, maybe it got bigger as the refurb went on?) and then play some pinball!!!!!
It is worth noting that the game is fully playable and isn’t one of those that needs bringing back to life, (Not that there’s anything up with that, if anything that should always be encouraged!) so it could be argued that none of the above really needs doing? But it’s all about trying to make the game as good as it can be and to hopefully secure it for the next generation to enjoy! Gotta keep the pinball dream alive!
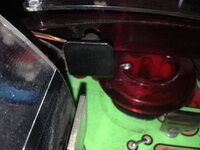
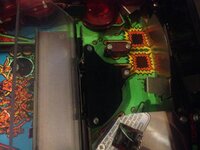
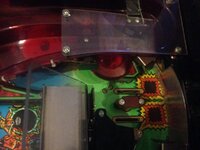
Heres the fans to the computer and power supply as they were


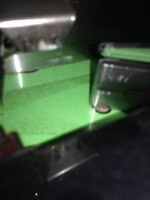
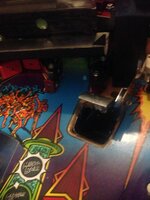
And the batterys


That Prism card battery is a little awkward to get too!
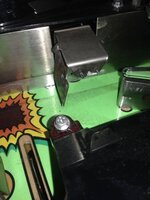
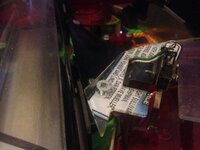
I had to trim down the VGA cable to fit it in the Ultimarc’s video amplifier


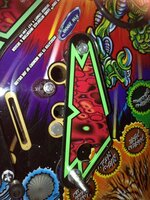
But it did'nt need a separate power supply the results are spectacular and i'd recommend anyone to install this
Before

and after, its hard to show in the photo's but its like night and day it really does bring it to life!!

Its nearly finished so i'll post some more over the next week
Ta tony
I bought this from one of the internet sites, it was poorly described and it only had three pictures; two of the pictures of the machine were in bright sunlight where you couldn’t really tell if it worked or not and the other was a stock picture from the internet, but it was described as “fully working” But aren’t they all? I’m in Sheffield and the RFM was in the south of England, so there wasn’t really any option of having a look before purchase, so I did the deal paid the money and sat fingers crossed (this approach isn’t my preferred method of purchase, and isn’t for the faint hearted) In fairness I didn’t really know what I was getting myself into.
I tasked Martin “the Deliveryman” with the collection and it turned out to be one of “those” collections! I think he said that the house had been altered since the machine was first installed and the only way out, was to manhandle the machine through the entire house and then out up the exterior steps! luckily the seller was able to assist Martin and between the two of them this was completed. Big thanks go out to Martin who went beyond the call of duty! He really is the Man!
Once the RFM was delivered, I was really chuffed it’s in excellent condition! Bit of back ground to the machine “You don’t normally get this!” the machine was all set up in French, and has a euro coin mech. Fitted so I can only assume that it started its life in France? It has never had any additional security fitted and by its condition, could well have been home use? But I’ll never know. It has an old card inside it from 5play-Lesisure who is @BallyWilliams suck on here!! I have asked him about this game and he’s an interesting chap, but has had so many come and go over the years he’d never remember, the last owner had had it in their home for the last eight years.
On closer inspection it has hardly any wear to the out holes and the playfield is in fantastic condition! The rubbers are all ok and not perished. There is only one plastic with a crack in it the rest all look great!
The skip ramp although fully functional has started to crack (Those domed rivets are a nightmare but more about that later!)
The cabinet is almost unmarked apart from a scratch about 250mm to the LHS head I really couldn’t believe the condition!On setting it up and starting a game it all seems to work fine and plays great, although it had a ball missing? (i found this during the strip down!) the monitor all works and as this is my first time with a Pinball 2000, I’m very impressed with the concept and the interaction with the animation and the pinball, so all in all I’m well chuffed!!!
On-going into the memory and having a look around it could almost have been in a time warp! The game software was still at version 1.1, the build date was May 21 1999,
and the total plays say it’s only played 1462?? (I don’t know if this is correct or has been reset at some point? The last factory reset was 2/4/2010, its audits and totals haven’t been cleared since 1999 so who knows? it’s certainly not seen much hammer and is in fantastic condition) its total earnings was in “F” francs? Its test report requires a couple of switch’s looking at and it has 10 bulbs out but that’s it!On inspection of the power board it’s covered in dust but looks like it hasn’t been touched, no bodge repairs here always a bonus.
So in a nutshell it’s a unmolested original game in fantastic condition Result!.
The plan after doing a bit of research on the net and following a few refurb’s (shout out to AAARPinball.com & @PeteB @retrorefurbs & @Jonwolf on here) was to do a clean-up & re-rubber, update the software, fit the Ultimarc’s video amplifier, change both battery’s in the computer, replace the fans to the computer and power supply, adjust and or replace the couple of switch’s, replace the cracked plastic and the skip ramp, put new flipper coil sleeves in and fit LED’s throughout! (I really didn’t think the list was as long as that, maybe it got bigger as the refurb went on?) and then play some pinball!!!!!
It is worth noting that the game is fully playable and isn’t one of those that needs bringing back to life, (Not that there’s anything up with that, if anything that should always be encouraged!) so it could be argued that none of the above really needs doing? But it’s all about trying to make the game as good as it can be and to hopefully secure it for the next generation to enjoy! Gotta keep the pinball dream alive!
Heres the fans to the computer and power supply as they were
And the batterys
That Prism card battery is a little awkward to get too!
I had to trim down the VGA cable to fit it in the Ultimarc’s video amplifier
But it did'nt need a separate power supply the results are spectacular and i'd recommend anyone to install this
Before
and after, its hard to show in the photo's but its like night and day it really does bring it to life!!
Its nearly finished so i'll post some more over the next week
Ta tony
Last edited:


")