What's new
Pinball info

Register a free account today to become a member! Once signed in, you'll be able to participate on this site by adding your own topics and posts, as well as connect with other members through your own private inbox!

In Progress Tron mini shop

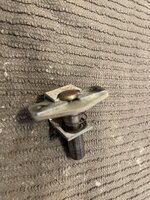
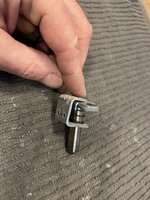
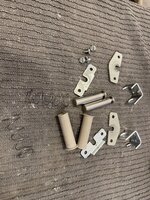
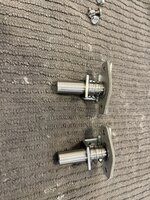
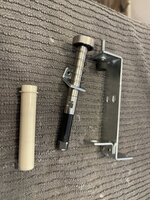
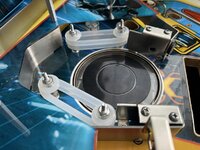
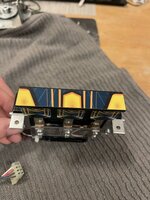
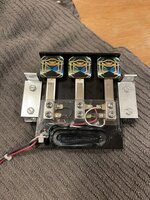
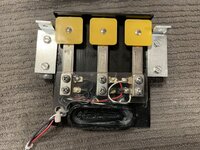
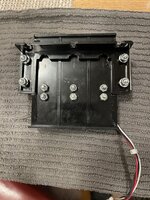
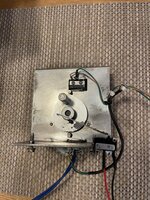
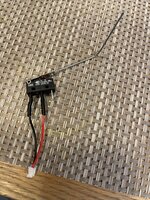
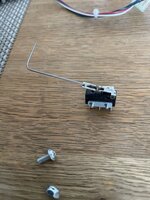
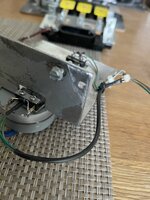
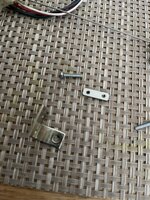
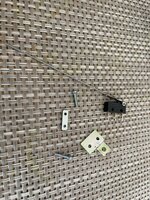
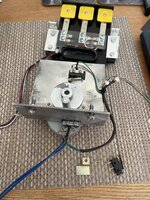
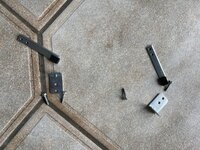
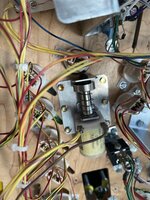
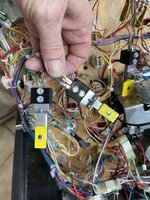
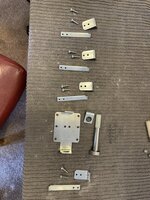
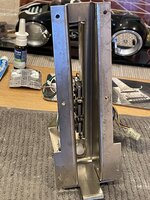
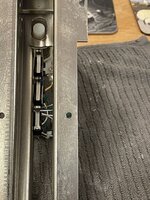
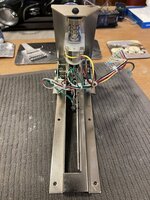
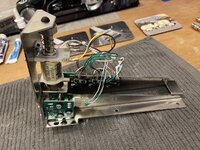
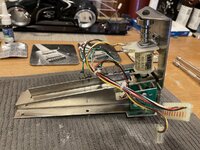
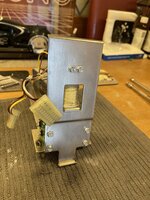
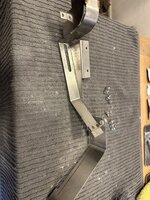
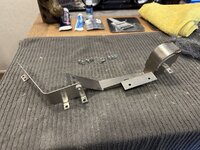
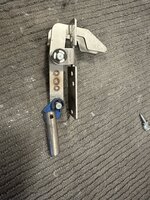
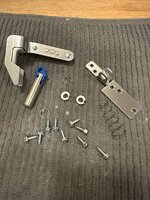
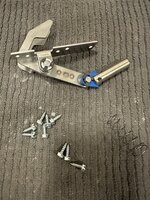
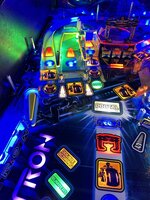
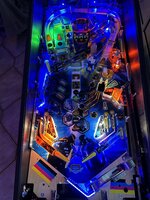
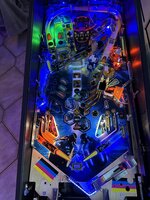
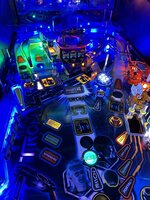
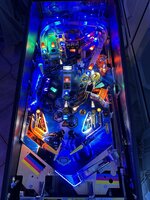
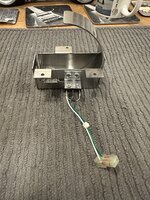
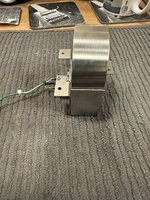
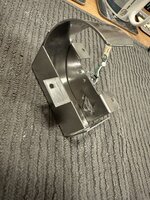
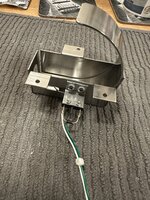
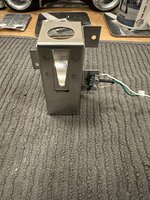
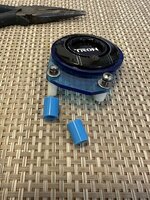
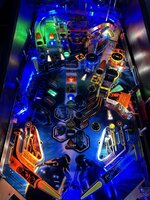
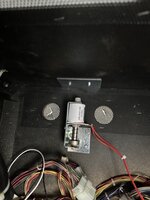
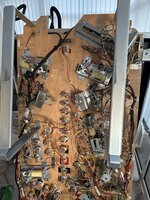
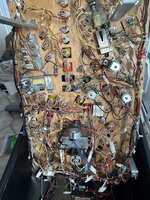
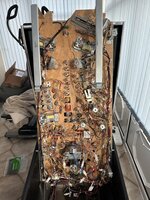
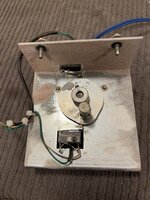
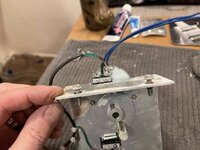
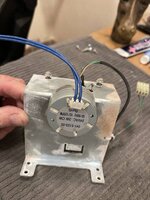
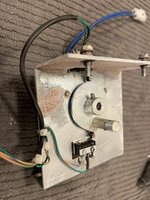
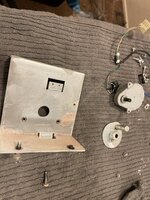
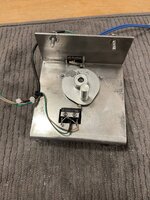
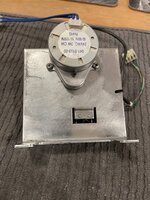
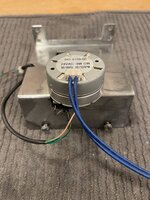
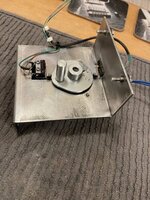
Finally, at least for this weekend, stripped the drop bank target motor assembly, cleaned as best I could and reassembled.
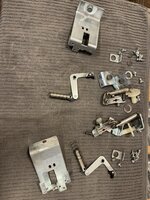
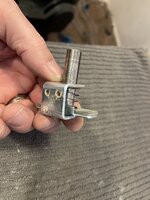
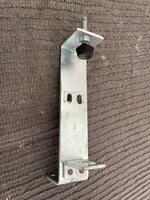
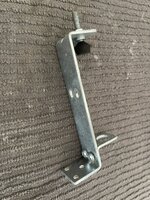
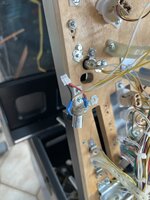
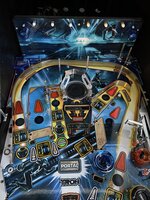
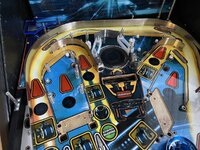
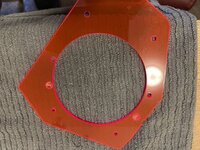
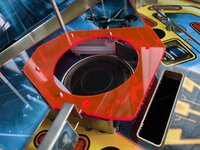
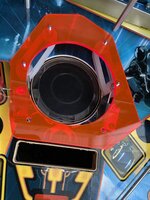
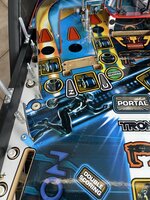
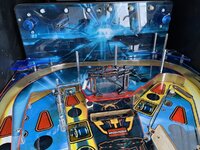
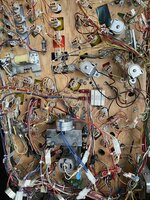
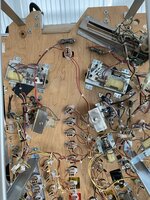
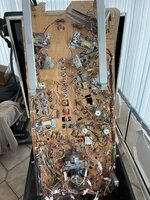
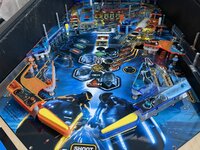
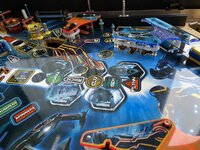
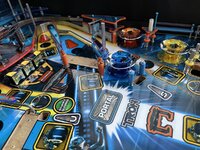
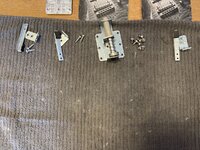
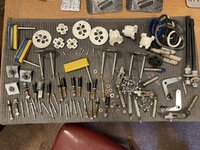
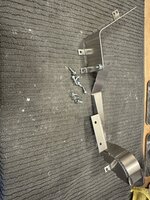
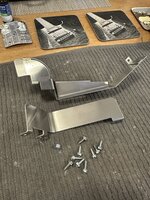
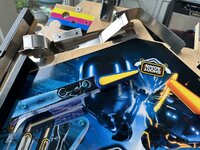
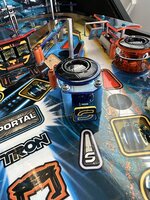
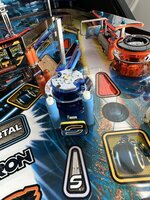
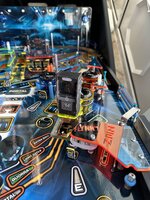
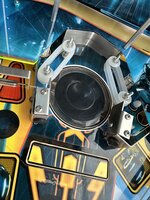
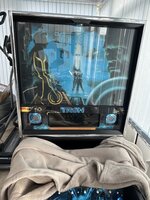
The end of heavy cleaning is almost in sight, 2 more flipper rebuilds to do, both slings, trough and auto kicker, and finally the scoop which is actually very good !!
 

Attachments

  • CBCF944B-705F-47FC-992C-D199515D24DA.jpeg
    CBCF944B-705F-47FC-992C-D199515D24DA.jpeg
    152.5 KB · Views: 10
  • 0E316D4D-9782-4B9F-B5B6-01A96D8976AF.jpeg
    0E316D4D-9782-4B9F-B5B6-01A96D8976AF.jpeg
    118.7 KB · Views: 9
  • FDF0EF40-3444-44C3-B0B9-267B715B5E7A.jpeg
    FDF0EF40-3444-44C3-B0B9-267B715B5E7A.jpeg
    90.9 KB · Views: 10
  • D8EE0A8A-FCF6-450F-9B99-5AC1CC174D57.jpeg
    D8EE0A8A-FCF6-450F-9B99-5AC1CC174D57.jpeg
    126.7 KB · Views: 10
  • 4868B0B3-F6A6-4D4A-B377-5445A758B6A7.jpeg
    4868B0B3-F6A6-4D4A-B377-5445A758B6A7.jpeg
    182.2 KB · Views: 10
  • 0E336016-BACD-4A19-A492-E585FD3D3F77.jpeg
    0E336016-BACD-4A19-A492-E585FD3D3F77.jpeg
    157.8 KB · Views: 10
  • 5AAD43A7-4C9C-4DAE-A082-55F2EDAFBE36.jpeg
    5AAD43A7-4C9C-4DAE-A082-55F2EDAFBE36.jpeg
    146.5 KB · Views: 10
  • 90AB3F32-CF61-4C9F-9204-26B2E7A46E92.jpeg
    90AB3F32-CF61-4C9F-9204-26B2E7A46E92.jpeg
    98.9 KB · Views: 10
  • 3C7F087F-10B2-4538-82E2-7A27A374DB00.jpeg
    3C7F087F-10B2-4538-82E2-7A27A374DB00.jpeg
    157.9 KB · Views: 10
Was hoping to have a pin to play over Xmas but wasn’t to be !
Have used the time off so far to continue cleaning.
Both slings now done, coloured pop bumpers fitted and pop mechs removed, stripped and cleaned.
Both bottom flippers rebuilt and finished cleaning the flasher sockets and replaced one. All bulb sockets now done just new bulbs to fit in the inserts
 

Attachments

  • B0FED9AB-C584-4D69-9F66-3E94A2E72BFB.jpeg
    B0FED9AB-C584-4D69-9F66-3E94A2E72BFB.jpeg
    216.1 KB · Views: 5
  • B8E75CB6-1F4C-4BA1-89B5-4DA91E535BAC.jpeg
    B8E75CB6-1F4C-4BA1-89B5-4DA91E535BAC.jpeg
    141.1 KB · Views: 5
  • 5F7CEDAE-A851-46FE-A640-46EDDC748F4B.jpeg
    5F7CEDAE-A851-46FE-A640-46EDDC748F4B.jpeg
    278.1 KB · Views: 5
  • 784BD391-4112-4923-AF74-DE8C93F68D4F.jpeg
    784BD391-4112-4923-AF74-DE8C93F68D4F.jpeg
    102 KB · Views: 5
  • 8C550B83-286E-477F-AF6A-3C63E8FBA3C0.jpeg
    8C550B83-286E-477F-AF6A-3C63E8FBA3C0.jpeg
    261.2 KB · Views: 5
  • B8933BB2-7CD4-4EA7-8CE9-E046DBD2F1A1.jpeg
    B8933BB2-7CD4-4EA7-8CE9-E046DBD2F1A1.jpeg
    230.5 KB · Views: 5
Up post stripped and cleaned
Added a couple of matrix connections for a scoop light and trough light
Under playfield nearly finished.
 

Attachments

  • AE8CF66D-1C38-4AA7-BB2E-9D36F85DCC56.jpeg
    AE8CF66D-1C38-4AA7-BB2E-9D36F85DCC56.jpeg
    181.4 KB · Views: 5
  • B919C6EB-0012-4C70-8200-9A2F5AE2686C.jpeg
    B919C6EB-0012-4C70-8200-9A2F5AE2686C.jpeg
    183.6 KB · Views: 5
  • AA3C5889-F858-4DFB-BBC7-C640B7F7119B.jpeg
    AA3C5889-F858-4DFB-BBC7-C640B7F7119B.jpeg
    212.7 KB · Views: 5
  • A64F7102-C73E-46D9-B18E-DDAD9DA5246D.jpeg
    A64F7102-C73E-46D9-B18E-DDAD9DA5246D.jpeg
    97.4 KB · Views: 5
Back of playfield starting to come together with protectors and new plastics starting to go on
Spinning disc with new pads fitted reinstalled and adjusted, 4 new flashers fitted and positions adjusted underneath.
 

Attachments

  • 36B13F5F-E9C1-4F47-9177-869B04FB0F19.jpeg
    36B13F5F-E9C1-4F47-9177-869B04FB0F19.jpeg
    181.4 KB · Views: 19
  • 69C81D65-FCDF-44E3-8846-B2424F2E5D33.jpeg
    69C81D65-FCDF-44E3-8846-B2424F2E5D33.jpeg
    244.5 KB · Views: 19
Fitted protector and central plastic but the protector was rocking at the front and not enough thread for nuts.
Realised that the Opto brackets are sloped and it’s sitting on the first screw each side so I countersunk the protector, replaced the 2 large metal washers with acrylic ones but realised now that with protector they aren’t necessary so removed them.
 

Attachments

  • E05E9C96-D9C3-434C-AF7D-9167EF87C1ED.jpeg
    E05E9C96-D9C3-434C-AF7D-9167EF87C1ED.jpeg
    176.6 KB · Views: 5
  • 50082A30-2F7C-46DF-9B10-D2C60473342E.jpeg
    50082A30-2F7C-46DF-9B10-D2C60473342E.jpeg
    297.6 KB · Views: 6
  • 12D4D20A-A849-4585-8FBB-93E5A0EA4C1D.jpeg
    12D4D20A-A849-4585-8FBB-93E5A0EA4C1D.jpeg
    175 KB · Views: 6
  • 21105F3B-A35B-4A41-8CE9-19996E82411E.jpeg
    21105F3B-A35B-4A41-8CE9-19996E82411E.jpeg
    137.3 KB · Views: 5
  • 7136CCDA-2289-49FA-8972-CD68A9754E12.jpeg
    7136CCDA-2289-49FA-8972-CD68A9754E12.jpeg
    188.2 KB · Views: 5
  • 22C3BCF1-03C7-47C6-A83A-5885976AAAEA.jpeg
    22C3BCF1-03C7-47C6-A83A-5885976AAAEA.jpeg
    151.2 KB · Views: 5
Had to remove rear right corner as protector didn’t have the right hand hole for the screw that goes into the wooden rail.
Simple job of drilling protector and refitting.
 

Attachments

  • B46F10BA-C373-4346-BF8F-2F80F4F7E84D.jpeg
    B46F10BA-C373-4346-BF8F-2F80F4F7E84D.jpeg
    182.5 KB · Views: 3
Fitted the new illuminated recogniser and put new posts on left hand side.
Tried both orange and blue protectors using clear and frosted bulbs.
I quite like the orange, the blue seems a bit washed out.
Will try the blue with blue bulbs there and then compare again to the orange.
 

Attachments

  • C47E2791-E3AB-40E2-B2BC-B98032F415C5.jpeg
    C47E2791-E3AB-40E2-B2BC-B98032F415C5.jpeg
    184 KB · Views: 13
  • DF73ED34-1DFE-409C-8B02-9681ADB7BC72.jpeg
    DF73ED34-1DFE-409C-8B02-9681ADB7BC72.jpeg
    188.8 KB · Views: 12
  • B6B4B0BC-66F4-402A-B1FC-EACBA55B3380.jpeg
    B6B4B0BC-66F4-402A-B1FC-EACBA55B3380.jpeg
    184.2 KB · Views: 12
  • E150CC0C-1F2B-47A6-A62C-7C5CFD47B3CC.jpeg
    E150CC0C-1F2B-47A6-A62C-7C5CFD47B3CC.jpeg
    234.7 KB · Views: 12
Project for today was to finish the 3 target drop bank which included adding a microswitch to register when the targets were lowered.
Thanks to Phil Palmer for microswitch and switch screws and plate.
Found a small bracket in my odds and sods drawer and drilled it so microswitch will fit.
Straightened out the bottom with a vice to make it L shaped.
Drilled the motor bracket, soldered a connector to the microswitch and fitted switch to bracket and bracket to motor bracket.
Bent the microswitch arm to suit and shortened.
Perfect 😊
Stripped the target assembly and removed rust etc, cleaned and rebuilt.
Fitted premium target decals and the wicked top decal so that it matches the playfield when lowered.
Really enjoyed that after doing all the **** for the last 7 weeks, finally doing what I should have been in the first place !
 

Attachments

  • 1601466D-06EC-41C3-9BB9-B10B4FFA41F4.jpeg
    1601466D-06EC-41C3-9BB9-B10B4FFA41F4.jpeg
    106.5 KB · Views: 12
  • 3CF6458E-5ABE-4439-BD65-26F3D596CFB8.jpeg
    3CF6458E-5ABE-4439-BD65-26F3D596CFB8.jpeg
    196 KB · Views: 12
  • D33F62F3-158E-45ED-B1BC-7E24926D4451.jpeg
    D33F62F3-158E-45ED-B1BC-7E24926D4451.jpeg
    244.6 KB · Views: 12
  • B9BF206A-7413-4EC6-BD33-80A4FC1830F4.jpeg
    B9BF206A-7413-4EC6-BD33-80A4FC1830F4.jpeg
    214.9 KB · Views: 11
  • 9BE400AE-DA1B-4158-929F-322727D0D297.jpeg
    9BE400AE-DA1B-4158-929F-322727D0D297.jpeg
    209.5 KB · Views: 12
  • 4DAA0029-A848-427C-8E1E-EAD25A96CDFD.jpeg
    4DAA0029-A848-427C-8E1E-EAD25A96CDFD.jpeg
    213.8 KB · Views: 12
  • 1BC2E42F-DF9D-48D2-B723-E0CD92121DAF.jpeg
    1BC2E42F-DF9D-48D2-B723-E0CD92121DAF.jpeg
    237.1 KB · Views: 12
  • 0110096A-FC46-4958-BA84-2CD294431A2E.jpeg
    0110096A-FC46-4958-BA84-2CD294431A2E.jpeg
    128 KB · Views: 11
  • 2D38C3FA-0682-4BC8-B47D-FB3A767A846D.jpeg
    2D38C3FA-0682-4BC8-B47D-FB3A767A846D.jpeg
    154.1 KB · Views: 11
  • BC3806F4-1C26-45C3-A985-D2B2B8B00787.jpeg
    BC3806F4-1C26-45C3-A985-D2B2B8B00787.jpeg
    121.2 KB · Views: 11
  • 64651B88-116B-4612-B4F8-E45EC558B963.jpeg
    64651B88-116B-4612-B4F8-E45EC558B963.jpeg
    175.3 KB · Views: 10
  • 606AB1C3-1A70-42BF-9DF1-52F82322A9CA.jpeg
    606AB1C3-1A70-42BF-9DF1-52F82322A9CA.jpeg
    224 KB · Views: 10
  • 6C5CAE12-8C45-4021-A36B-B6706A959994.jpeg
    6C5CAE12-8C45-4021-A36B-B6706A959994.jpeg
    194 KB · Views: 11
  • Like
Reactions: Jib
Tron standup targets cleaned, new target pads and refitted.
Underside of playfield almost finsihed having removed all insert bulbs and holders, cleaned inserts, holders and wiring and fitted new comet leds throughout.
Just the scoop coil and trough to do then the bottom is finished.
 

Attachments

  • 042F0A32-8554-4A36-BF5F-799DE656FB09.jpeg
    042F0A32-8554-4A36-BF5F-799DE656FB09.jpeg
    263.8 KB · Views: 5
  • 1DEA156B-B0EC-4F38-AC13-A433676EE148.jpeg
    1DEA156B-B0EC-4F38-AC13-A433676EE148.jpeg
    211.5 KB · Views: 5
  • 52EE9521-46D3-4D4A-A985-06A5FB2D5AD6.jpeg
    52EE9521-46D3-4D4A-A985-06A5FB2D5AD6.jpeg
    214.3 KB · Views: 5
  • C3237325-DB58-49D9-A588-2BFBB80C5078.jpeg
    C3237325-DB58-49D9-A588-2BFBB80C5078.jpeg
    405.9 KB · Views: 5
Top of playfield not far off now, last of the Titan rubbers fitted, new plastics and protectors.
Drop bank adjusted.
4 zuse standup targets to do, finish the pops and then it’s the ramps and apron.
Light at the end of the tunnel
 

Attachments

  • D9408D50-0178-495F-807F-69E7A08A3A11.jpeg
    D9408D50-0178-495F-807F-69E7A08A3A11.jpeg
    244.6 KB · Views: 14
  • 7C2BA92B-AB77-46BB-B33B-B1FADEDE0EF4.jpeg
    7C2BA92B-AB77-46BB-B33B-B1FADEDE0EF4.jpeg
    212.8 KB · Views: 13
  • FFF7BFAF-CB72-4E02-9710-2B2708E08C3F.jpeg
    FFF7BFAF-CB72-4E02-9710-2B2708E08C3F.jpeg
    222.9 KB · Views: 12
  • 5CD2EF59-1E74-4701-B773-36754384B29A.jpeg
    5CD2EF59-1E74-4701-B773-36754384B29A.jpeg
    226.8 KB · Views: 12
  • 5D50B922-21F0-48D8-BFD6-EF2C46FEFCF7.jpeg
    5D50B922-21F0-48D8-BFD6-EF2C46FEFCF7.jpeg
    252.1 KB · Views: 12
  • A22B5013-183B-49D1-A696-65A8191D13BD.jpeg
    A22B5013-183B-49D1-A696-65A8191D13BD.jpeg
    222 KB · Views: 11
  • 97854FA0-7BC7-4306-8CDD-2E254E1A17D9.jpeg
    97854FA0-7BC7-4306-8CDD-2E254E1A17D9.jpeg
    235.3 KB · Views: 11
  • 275D2128-FCCC-4677-B21A-AFE6886A3F45.jpeg
    275D2128-FCCC-4677-B21A-AFE6886A3F45.jpeg
    206.3 KB · Views: 13
Cleaned the 4 Zuse targets and fitted support blocks to stop them going sideways when hit.
Fitted new zuse target decals.
Removed the scoop coil assembly, cleaned and refitted.
Have the trough and auto kicker left to do but need to take a break while I wait for a few other bits to arrive.
 

Attachments

  • D2F17B3D-F3BC-4AD1-AA03-04953A663401.jpeg
    D2F17B3D-F3BC-4AD1-AA03-04953A663401.jpeg
    221.3 KB · Views: 7
  • 2FC2F428-2543-46D5-8D1F-E9214DD3194C.jpeg
    2FC2F428-2543-46D5-8D1F-E9214DD3194C.jpeg
    138.9 KB · Views: 8
  • BCECD2BB-8BC1-46CD-9B93-EA449452FA3F.jpeg
    BCECD2BB-8BC1-46CD-9B93-EA449452FA3F.jpeg
    144.3 KB · Views: 7
  • 8967B85C-2970-4D5C-8666-16A584E70A56.jpeg
    8967B85C-2970-4D5C-8666-16A584E70A56.jpeg
    260 KB · Views: 7
  • 9C254494-8F8F-4F48-8440-AF853D9FEAC9.jpeg
    9C254494-8F8F-4F48-8440-AF853D9FEAC9.jpeg
    407.5 KB · Views: 7
I gathered together all the parts that were either too badly corroded to clean or wouldn’t come up very well when I tried eg the flipper bats had faded etc.
As you can see, it’s a lot of parts I have changed bearing in mind I have spent weeks cleaning stuff that has gone back on the machine.
I hate saying anything bad about people, but I need to point this out so that people don’t make the same mistake I did with this machine.
Firstly, the seller is a really nice guy, and I don’t believe he intended to deceive me.
I also have to accept part of the blame as even though the description didn’t mention anything about corrosion, there weren’t any pics of the underside of the playfield.
I should have asked for one and then I would have seen the corrosion to the flipper mechs, disc motor and possibly some light sockets, although the posts would have been more difficult to see from a single picture.
When I started this thread the seller did say that he knew it had some oxidation but didn’t know it was that bad, which I wish he had mentioned in the sale description as I would have definitely asked for more pictures.
I’m not on a witch hunt here, it was probably a genuine mistake by omitting that.
When I received the machine I was happy with it, as the corrosion was not apparent from the top of the playfield and it did play well.
I was genuinely shocked just how bad it was and if I had known I would I definitely have offered £500 less for it to cover what it needed.
I was prepared to mod it, do armour, plastic protectors, bulbs, rubbers etc, that’s my choice but wasn’t prepared for all the extra stuff that for the price I paid I wouldn’t expect anyone to have to do unless they bought it knowing it needed it.
I needed to get that off my chest and at the same time, not P*** anyone off and to also warn others, including sellers to ask / provide all info about the machine, no matter how small, especially if it’s so far away that it isn’t practical to view it yourself.
The upside is that although I won’t be able to recover the money I’ve spent, especially with all the extras I’m fitting by my own choice, that the next recipient will get one of the nicest Tron’s around.
Pinball is an expensive hobby, in both time and money !
Peace ☮️
 

Attachments

  • 62C3B847-5C6F-4E0E-8BC5-417D4B510CE5.jpeg
    62C3B847-5C6F-4E0E-8BC5-417D4B510CE5.jpeg
    320 KB · Views: 15
Last edited:
Trough removed, stripped, cleaned, rebuilt and refitted.
Came up very nice.
Underside of playfield done.
Just the top part of scoop, auto kicker and out hole guides to do
 

Attachments

  • 1A9917FD-40C2-4998-AADD-6779827D7DFE.jpeg
    1A9917FD-40C2-4998-AADD-6779827D7DFE.jpeg
    179.3 KB · Views: 4
  • 5DDF7736-11C4-49AB-8D44-7C544D62406A.jpeg
    5DDF7736-11C4-49AB-8D44-7C544D62406A.jpeg
    169.5 KB · Views: 4
  • A507149F-88BD-4954-8699-F5A0CFCB7443.jpeg
    A507149F-88BD-4954-8699-F5A0CFCB7443.jpeg
    192.8 KB · Views: 4
  • CE1F74E5-647A-4BE6-8112-A510B9FFE203.jpeg
    CE1F74E5-647A-4BE6-8112-A510B9FFE203.jpeg
    192.7 KB · Views: 3
  • 0F37D4C6-522C-4B54-9AC5-692C3698D452.jpeg
    0F37D4C6-522C-4B54-9AC5-692C3698D452.jpeg
    251.2 KB · Views: 3
  • D4F901CB-6741-4AE2-AA0D-8980BA265FA4.jpeg
    D4F901CB-6741-4AE2-AA0D-8980BA265FA4.jpeg
    251.3 KB · Views: 3
  • 2F335F97-B156-4F46-8899-4D7D1C9B7F7F.jpeg
    2F335F97-B156-4F46-8899-4D7D1C9B7F7F.jpeg
    159.3 KB · Views: 3
  • B3B73C5D-FAF1-43B9-ADAE-98ED6EF22ADF.jpeg
    B3B73C5D-FAF1-43B9-ADAE-98ED6EF22ADF.jpeg
    202.2 KB · Views: 4
Out hole ball guide stripped and cleaned
 

Attachments

  • 5D87CCAE-3893-48C4-AE1E-272408D20A69.jpeg
    5D87CCAE-3893-48C4-AE1E-272408D20A69.jpeg
    234.3 KB · Views: 1
  • 5E88AF30-709A-4318-A5F4-7E2194B67AD0.jpeg
    5E88AF30-709A-4318-A5F4-7E2194B67AD0.jpeg
    190.7 KB · Views: 1
  • C7228DBE-DD35-48FB-88CF-5ECB6FCEB3F7.jpeg
    C7228DBE-DD35-48FB-88CF-5ECB6FCEB3F7.jpeg
    206.8 KB · Views: 1
  • 6C75E5B1-F97B-40C6-8747-B6177C5ABFCD.jpeg
    6C75E5B1-F97B-40C6-8747-B6177C5ABFCD.jpeg
    269.6 KB · Views: 1
Auto kicker dismantled, cleaned and rebuilt
 

Attachments

  • E4A42AE4-E43F-4E56-A2D2-9D9001DA2C41.jpeg
    E4A42AE4-E43F-4E56-A2D2-9D9001DA2C41.jpeg
    232.2 KB · Views: 1
  • EFD1BFAD-D8B6-4BA5-ADB6-9B34A68AC640.jpeg
    EFD1BFAD-D8B6-4BA5-ADB6-9B34A68AC640.jpeg
    222.9 KB · Views: 1
  • A6478227-EEF8-46F1-A313-D658B3C4C9C9.jpeg
    A6478227-EEF8-46F1-A313-D658B3C4C9C9.jpeg
    201.2 KB · Views: 1
  • 0022D82C-DC52-412A-9BA7-7D5CA400751B.jpeg
    0022D82C-DC52-412A-9BA7-7D5CA400751B.jpeg
    226.8 KB · Views: 1
Cliffys finally arrived.
Fitted 2 new switch protectors.
Outhole protector.
Shooter Lane protector and Flynn’s scoop protector.
Fitted trough ball guide.
 

Attachments

  • 3C235411-366A-448A-A09E-A9D261282C17.jpeg
    3C235411-366A-448A-A09E-A9D261282C17.jpeg
    210.5 KB · Views: 6
  • BA5A8490-2B1B-415C-A509-91EB429E5DC9.jpeg
    BA5A8490-2B1B-415C-A509-91EB429E5DC9.jpeg
    148.9 KB · Views: 6
  • A8762D65-4D53-49C8-9CA1-16680A2FEF4C.jpeg
    A8762D65-4D53-49C8-9CA1-16680A2FEF4C.jpeg
    168.1 KB · Views: 6
  • 23ABEAB8-188A-4A68-B7E4-F32B1DEF8D00.jpeg
    23ABEAB8-188A-4A68-B7E4-F32B1DEF8D00.jpeg
    178.9 KB · Views: 6
  • 4A07C867-B9A3-4BC8-8F70-99C11C4AAA44.jpeg
    4A07C867-B9A3-4BC8-8F70-99C11C4AAA44.jpeg
    176.2 KB · Views: 6
  • 7A06ABE6-CE7B-48ED-B436-9D422EBCDA0D.png
    7A06ABE6-CE7B-48ED-B436-9D422EBCDA0D.png
    935.2 KB · Views: 6
Fitted trough led strip with dc converter to prevent flickering.
Fitted some more of colin’s modified protectors to provide a green area for quorra shot, may not be to everyone’s taste, but it’s my pin and I love it.
Tron lends itself to area colours more than any other pin I’ve had and after a lot of changing from clears, frosted and different colours, including different combinations of coloured protectors I’m almost there, just 3 bulbs that I’m not happy with and will change tomorrow.
The playfield is much brighter and easier to see than when I got it, and that’s without the ramps which add more light.
The inserts absolutely pop now too.
What was supposed to be a mini shop turned into a full shop but I have to say that for me it’s been worth the effort.
 

Attachments

  • 8DFE6718-BC51-436E-9E32-30C8FA6E4FB9.jpeg
    8DFE6718-BC51-436E-9E32-30C8FA6E4FB9.jpeg
    164 KB · Views: 9
  • AD5D30A0-94C6-49B5-8D14-AB7D4DB4AFD5.jpeg
    AD5D30A0-94C6-49B5-8D14-AB7D4DB4AFD5.jpeg
    162 KB · Views: 8
  • 6ED13DF5-4550-461B-8413-7C4E2FFB3CA2.jpeg
    6ED13DF5-4550-461B-8413-7C4E2FFB3CA2.jpeg
    172.7 KB · Views: 8
  • 66804DCC-4CDF-4614-B905-C1EAB56A426C.jpeg
    66804DCC-4CDF-4614-B905-C1EAB56A426C.jpeg
    175.7 KB · Views: 8
  • 9894BCD1-4382-4155-B6B4-D823978F09B5.jpeg
    9894BCD1-4382-4155-B6B4-D823978F09B5.jpeg
    165 KB · Views: 9
  • D6477D99-B52B-4EBF-8725-A63B9B4429FD.jpeg
    D6477D99-B52B-4EBF-8725-A63B9B4429FD.jpeg
    165.3 KB · Views: 10
Scoop cleaned and ready to go on tomorrow.
Hopefully just the ramps left to clean now
 

Attachments

  • 07D06B87-B626-46E4-9CB5-D3F8DCCBC7C9.jpeg
    07D06B87-B626-46E4-9CB5-D3F8DCCBC7C9.jpeg
    210.3 KB · Views: 0
  • 42C7E208-908F-4296-AB7B-2E7A0BA9AC1A.jpeg
    42C7E208-908F-4296-AB7B-2E7A0BA9AC1A.jpeg
    218.5 KB · Views: 0
  • B8CEE9EF-01DA-49CD-B5AF-D362C8C1C964.jpeg
    B8CEE9EF-01DA-49CD-B5AF-D362C8C1C964.jpeg
    200.8 KB · Views: 0
  • F6DE3D5E-A58F-4347-9656-DD5DC01F3CE9.jpeg
    F6DE3D5E-A58F-4347-9656-DD5DC01F3CE9.jpeg
    215 KB · Views: 0
  • D0716067-C4F9-4EFE-82C1-A8F55C680F7A.jpeg
    D0716067-C4F9-4EFE-82C1-A8F55C680F7A.jpeg
    199.1 KB · Views: 0
Finishing the pop bumpers off today and nothing straightforward -
The blue pop bumper cover floats above it, so to use new blue post sleeves means they won’t support it.
Found some nylon tube, cut it and threaded it with a screw.
Fitted new post sleeve rubber cut in half over the top and worked out well in the end.
 

Attachments

  • DAFBCF80-1DB0-4FFA-B706-DF92C105F6ED.jpeg
    DAFBCF80-1DB0-4FFA-B706-DF92C105F6ED.jpeg
    201.4 KB · Views: 11
  • C2AF59A5-A4F5-43D4-BD1F-0F3DC8851A59.jpeg
    C2AF59A5-A4F5-43D4-BD1F-0F3DC8851A59.jpeg
    224.1 KB · Views: 11
  • 6088ED55-01EC-4B22-92A9-913BBC7F45F4.jpeg
    6088ED55-01EC-4B22-92A9-913BBC7F45F4.jpeg
    215 KB · Views: 8
  • 65891E92-D60F-488E-AD22-803232F26BE1.jpeg
    65891E92-D60F-488E-AD22-803232F26BE1.jpeg
    234.6 KB · Views: 8
  • D5E2FAA9-E058-4ED5-9062-9DF29FBCF39E.jpeg
    D5E2FAA9-E058-4ED5-9062-9DF29FBCF39E.jpeg
    194.8 KB · Views: 10
All 3 pop bumpers now finished.
Arcade machine which has the lcd screen inside was stripped as the screen wasn’t straight and now fixed correctly.
Fitted to yellow custom protectors supplied by Col.
Fitted 8 way splitter board to tidy up the 12v / 5v supply for the mods.
Plugged arcade in and working fine.
Fitted the scoop and auto plunger so should be all the cleaning on the playfield finished leaving the ramps and some mods to do.
I’m really pleased with the transparent pop bumpers with the lighting controlled by the machines total light show, was worth the effort.
 

Attachments

  • EC1C874B-D225-479F-870E-43E9B613B4E0.jpeg
    EC1C874B-D225-479F-870E-43E9B613B4E0.jpeg
    164.6 KB · Views: 19
  • 9D4EFB70-47D1-4CD3-9380-1D7BCAE90018.jpeg
    9D4EFB70-47D1-4CD3-9380-1D7BCAE90018.jpeg
    235 KB · Views: 19
  • 1E5C3E7D-068A-4666-A3B6-4EB8DDA36142.jpeg
    1E5C3E7D-068A-4666-A3B6-4EB8DDA36142.jpeg
    188.4 KB · Views: 19
Today I removed the speaker panel.
In a bit of state and the usual awful rough paint job on it so removed colourdmd, speakers and brackets.
 

Attachments

  • DF41716C-C20F-4E71-B6D1-C491BDB27BE9.jpeg
    DF41716C-C20F-4E71-B6D1-C491BDB27BE9.jpeg
    190.7 KB · Views: 3
  • 9637036C-C5FB-4D04-9A91-3BB987B4306C.jpeg
    9637036C-C5FB-4D04-9A91-3BB987B4306C.jpeg
    260.5 KB · Views: 3
Sanded smooth and a few coats of paint.
Looks like new 😊
 

Attachments

  • 349789BF-661C-4818-B830-B655A596DE25.jpeg
    349789BF-661C-4818-B830-B655A596DE25.jpeg
    194 KB · Views: 3
  • 62D4EE22-D94B-4284-B182-4B5AFA496316.jpeg
    62D4EE22-D94B-4284-B182-4B5AFA496316.jpeg
    188.4 KB · Views: 3
Cleaned the brackets and screws.
Cleaned the plastic which thankfully is scratch free.
Refitted colourdmd, the back of it is a bit tatty but screen is perfect.
 

Attachments

  • E20BAE86-087E-480B-B870-3E5DE1F98CBD.jpeg
    E20BAE86-087E-480B-B870-3E5DE1F98CBD.jpeg
    183.8 KB · Views: 4
  • 30BC3396-D61D-489A-9757-E43CBB8A3D6D.jpeg
    30BC3396-D61D-489A-9757-E43CBB8A3D6D.jpeg
    164.2 KB · Views: 4
Fitted new speaker panel.
Really pleased and makes a huge difference.
 

Attachments

  • E9831E88-EC28-411F-A9EF-328F22D54922.jpeg
    E9831E88-EC28-411F-A9EF-328F22D54922.jpeg
    197.8 KB · Views: 3
  • F7DEB385-0C48-409D-B934-97A05CA3F94A.jpeg
    F7DEB385-0C48-409D-B934-97A05CA3F94A.jpeg
    190.1 KB · Views: 3
Refitted speakers and added new acrylic inserts and speaker lights.
Speaker panel totally transformed and for not much effort.
 

Attachments

  • DEE192B4-8D91-4B8F-BD5C-826F500CCB2A.jpeg
    DEE192B4-8D91-4B8F-BD5C-826F500CCB2A.jpeg
    258.8 KB · Views: 9
  • 7D2BA84B-73AB-4744-8220-0228B83CE205.jpeg
    7D2BA84B-73AB-4744-8220-0228B83CE205.jpeg
    190.5 KB · Views: 9
During a switch test last week the spinning disc Opto was going nuts.
Removed both and reflowed solder and was better but still playing up so rather than muck about I fitted 2 new Opto and looms from Phil at Pinball Heaven.
Needless to say the problem has gone !
Fitted the speaker light controller board to speaker panel and tidied up as well as securing the IR Sensor to the top above the panel.
 

Attachments

  • 452B2EAA-5D65-463D-A64B-42E516684508.jpeg
    452B2EAA-5D65-463D-A64B-42E516684508.jpeg
    169.8 KB · Views: 5
  • 51F3C830-DB41-4B75-99CC-72A9AEF4EF3C.jpeg
    51F3C830-DB41-4B75-99CC-72A9AEF4EF3C.jpeg
    157.8 KB · Views: 5
  • 2A81AADB-357F-4E67-AD48-555D4C5F9303.jpeg
    2A81AADB-357F-4E67-AD48-555D4C5F9303.jpeg
    155.7 KB · Views: 5
Next job was to tidy up the mess of cables I inherited in the backbox and cabinet, especially as I’m adding other cables etc.
Removed some redundant cables which I believe were for mods no longer fitted.
Installed the new knocker loom, power for speaker lights and a 7 core cable for the topper as it will have 3 separate feeds, one for main part staying on when machine on, then the 2 discs coming on during disc mode and finally the bike lighting during light cycle, so with that cable in I can wire the topper and inside the cabinet at my leisure without having to run any more cables through the backbox.
I also rerun the power for colourdmd and the Tron arcade and installed the new apron flasher loom.
All the cables now go through the 2 main flexible trunking sections so raising and lowering the backbox is a stress free affair.
Then tidied the cabinet wiring and it’s a massive improvement.
Fitted real knocker kit.
Run apron flasher loom under playfield and secured.
 

Attachments

  • 38E8E0FD-CD40-4881-9F76-3BD7734D6D1E.jpeg
    38E8E0FD-CD40-4881-9F76-3BD7734D6D1E.jpeg
    193.1 KB · Views: 5
  • D27D1DF0-AFD7-48BE-9FA2-EE07AA3FCEA2.jpeg
    D27D1DF0-AFD7-48BE-9FA2-EE07AA3FCEA2.jpeg
    90.7 KB · Views: 5
  • 55D668EA-FB03-4CC4-9564-30631E7D343A.jpeg
    55D668EA-FB03-4CC4-9564-30631E7D343A.jpeg
    118.7 KB · Views: 5
  • C360B5A1-E550-42BA-B981-CF48CBF1E0C9.jpeg
    C360B5A1-E550-42BA-B981-CF48CBF1E0C9.jpeg
    236.4 KB · Views: 5
  • DDD5749F-B65D-49B0-9F17-4F6F441D7B68.jpeg
    DDD5749F-B65D-49B0-9F17-4F6F441D7B68.jpeg
    158.4 KB · Views: 5
  • 35CB23A0-52A4-41A1-9944-6A5202D74D2C.jpeg
    35CB23A0-52A4-41A1-9944-6A5202D74D2C.jpeg
    199.1 KB · Views: 5
  • 03F3A39F-5EFE-4FF4-BC8A-4276E39A2924.jpeg
    03F3A39F-5EFE-4FF4-BC8A-4276E39A2924.jpeg
    230.4 KB · Views: 5
  • C111A24C-6078-41A0-BDD2-F97AE348B419.jpeg
    C111A24C-6078-41A0-BDD2-F97AE348B419.jpeg
    203.2 KB · Views: 5
Fitted speaker panel and put translite back in, backbox done
 

Attachments

  • 1E085567-77F0-4C6F-8C58-E87BB369B687.jpeg
    1E085567-77F0-4C6F-8C58-E87BB369B687.jpeg
    202.1 KB · Views: 7
  • 05002BDA-4CFE-4E55-9979-11749BF323A4.jpeg
    05002BDA-4CFE-4E55-9979-11749BF323A4.jpeg
    169.8 KB · Views: 7
Back
Top Bottom