So this shop log was set to a budget as I needed to keep myself from going overboard. (Haha see what I did there)
The game arrived with the following missing:
- Back Box boards (all boards missing)

- Shooter Lane Coil Bracket Assembly

- Roll over switch assemblies for Outlanes x2
- Tortuga Disc Decal
- Tortuga Disc area Posts and Rubbers

- Coin door control buttons assembly
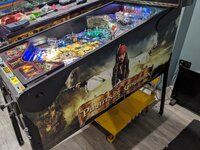
Cabinet suffers from the usual on location and lock bar holes


The playfield was actually in pretty good condition.

My first main goal was to get it operational.
The game arrived with the following missing:
- Back Box boards (all boards missing)
- Shooter Lane Coil Bracket Assembly
- Roll over switch assemblies for Outlanes x2
- Tortuga Disc Decal
- Tortuga Disc area Posts and Rubbers
- Coin door control buttons assembly
Cabinet suffers from the usual on location and lock bar holes
The playfield was actually in pretty good condition.
My first main goal was to get it operational.


 with beer too!


 . Look what dad got you, no he's not interested in playing with it at all