What's new
Pinball info

Register a free account today to become a member! Once signed in, you'll be able to participate on this site by adding your own topics and posts, as well as connect with other members through your own private inbox!

Complete Shadow - Backbox Decal

DRD

Registered
Joined
Oct 26, 2014
Messages
5,444
Location
Newark
First action for the trolley i bought from @cooldan at NLP

Makes moving the games SO much easier
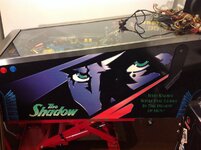
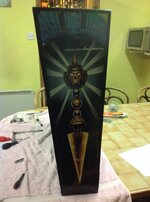
image.jpg The machine came with this set of head decals the previous owner bought, but did not fit

I measured them and placed alongside the originals, they are fine. Shadow has very different art on the backbox and sides so merely doing the head seems pragmatic as the cabinet sides are in much better shape and are unfaded

I tested that the glue still works by cutting a small corner off the unprinted bit. It seemed fine.image.jpg
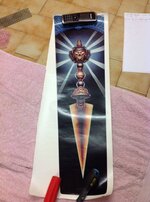
I can live with the game the way it is, but i wanted to cut my teeth on a small job before attacking funhouse with a full 5 panel endeavour.

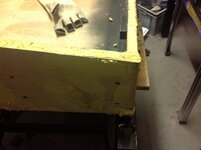
Starting point ...
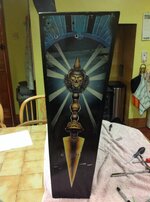
image.jpg

image.jpg

But generally the head is fine. No delamination. No serious knocks.

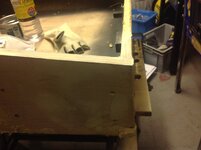
Stripped down to this level ...
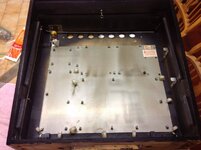
image.jpg

I might need to take a few more bits out, but don't want to spend too long on the invisible inside bits.

Lots of debate about using heat, scrapers etc to remove decals. I used 40 grit on my makita orbital sander and it seems to be coming off no problem. This took about 5 minutes as I wanted a quick idea as to how long the whole job would take
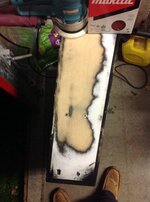
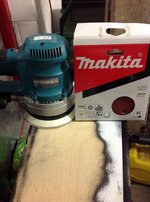
image.jpg

image.jpg

It is gumming up the disc, but genuine ones cost about £5 for a pack of 10. It may be that i can scrape this off with a wire brush. For the head, it is a non-issue though. Might be more relevant on a full cabinet refurb
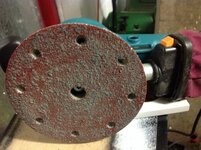
image.jpg
 

Attachments

  • image.jpg
    image.jpg
    91 KB · Views: 9
The shadow has been revealing its dirty secrets ....

image.jpg

Two different types of filler are to be found in the backbox, together with the customary chewing gum residue on the underside of the backbox.

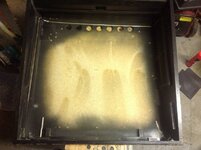
I cracked and stripped more stuff out of the backbox. So much dust is being produced it seemed the lesser evil to remove everything given that hidey holes would just be sawdust traps. I still can't bring myself to remove the grounding strip and all of its wretched staples though
image.jpg
 
Good work. I've seen old decals removed with a heat gun before sanding. Did you consider that ? Would do away with the gumming up I should imagine.
 
I thought about using a heat gun, and guys out there must use them for a reason.

I did not want to warm up the old glue unless I really had to though. Removing sticky glue residue is not a task I enjoy !!. I only used 2x 40 grit pads on my sander to remove all of the external paint and decals from the three main surfaces, i did not bother trying to remove the gunk from the sanding discs as my wire brush has gone awol. At about 50p a sheet, prematurely ruining 2 of them did not matter.

When I do my funhouse, there will be about 5x the amount of total sanding required so I will try the heat gun first on a face of the backbox. I can then compare with sanding alone on the other face and I will see which works out the better technique and will then roll with this.
 
Hold fire carl !!! I am obviously past the point of no return now

Let me see how this turns out and I will put the pics on the forum. I am waiting for some sanding consumables that I ordered online to do the inside, but I should be done in a week or so if it stops raining so I can sand it outside

D
 
I know you are skilled with joinery. Am i ok to put new filler on top of the old. The game has previously had a few spots of filler

I was hoping that there was no need to grind it out
 
Hi DRD, I know you wasn't asking me but as long as the filler you are going over is not lifting/flaking you will be fine.;)
 
  • Like
Reactions: DRD
Thanks @Rob70 . I am breaking new ground here for me. Not a job I want to do twice. Any advice very gratefully received
 
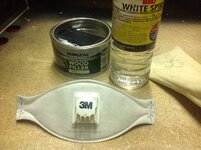
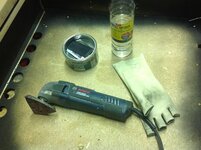
Essential tools for the sanding and filling job ......

image.jpg

These disposable 3m dust masks are the best I have found, and I have tried plenty over the years. The ventilator really works well with your glasses if you are unfortunate enough to need them.

White spirit to remove the horrible filler from your scraper

The filler is really unpleasant stuff, lots of ventilation required - or a proper vapour mask (not mine) for the job. I have not used this filler before. It was thicker and set much more quickly than i expected. It was meant to set in 20 minutes, but it seemed faster to me. As a novice, I went for more rather than less as it will all sand down easily enough with the tools I have

image.jpg

The filler that was already in the game sanded down so easily - indeed I keyed it with my dremel to give the new stuff a better surface to stick to. Using too much filler will obviously take longer to sand, produce more dust ... But the reality is that I am better with the sanders than I am with the filler

This first pass on the rebuilt corner took about a minute to sand down using my bosch from the mess above ...

image.jpg

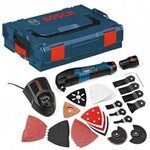
This bosch thing is a great addition to your tools. As a sander, cutting through plasterboard in situ, neatly cutting mdf and plywood in situ etc. the makita is too bulky and aggressive for the inner surfaces so the bosch is needed to sand the areas of painted wood that surround the translite (left hand side of the picture below)

image.jpg

There are a variety of attachments but these are surprisingly expensive, so consider getting a package ..
.image.jpg

It is very good on the edges as it has variable speed and is very controllable, so you can use it whilst looking along the line of the wood to ensure your corners are sharp
 
I have one of those of the lidl aldi variety only ever used it as a sander but it's great and the battery lasts ages, must try the cutter bit out, sure it has a scraper too.

The secret with the filler is not too much hardener so it's pliable longer
 
  • Like
Reactions: DRD
Thanks guys.

The instructions say a pea sized bit hardener to a golf ball sized blob of filler

I will go for a petit pois sized one next time !!
 
My dad had a chippy so marrow fat is bang on the money.
 
I grew up on em cuz I never used to like proper peas but I've since learnt it was because my mum over cooks them so I love em now lol sorry mum
 
Thanks guys.

The instructions say a pea sized bit hardener to a golf ball sized blob of filler

I will go for a petit pois sized one next time !!
Hi @DRD its better to use a little much much than too little. I put a petit pois size blob in the same stuff and the blumming stuff didn't harden right doh :rofl::mad:

Great job it's looking good ;)
 
  • Like
Reactions: DRD
Well my filler is rock hard. And it sands to a really fine finish too.

Given the replacement cost of the decals - extra filler, extra sanding consumables etc ... all inconsequential. I do not want to do this job twice !!!??
 
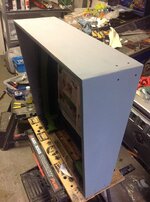
Sanded it all down. Second round of two part filler. Then fine sanding down to 240 grit which gave a really glassy feel.

Spray acrylic primer on the head ...

image.jpg

I masked up the earth braid and unpainted middle of the backbox

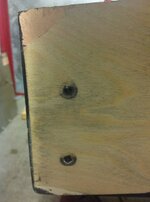
I then took an idea from @Matt Adams ' youtube video to treat the backbox bolts to a respray. Took of the rust with my sisal buffing wheel first...

image.jpg

Then to my absolute horror I noticed that the primer is lifting the grain that i had so painstakingly sanded down.

Looking at the net this is what happens, indeed one article I read stated that the purpose of primerwas to raise and seal the grain in the wood. So I now need to sand it all down, again

Chainsaw, old cricket bat and petrol being readied for a traditional nottinghamshire burning ceremony if this does not work
 
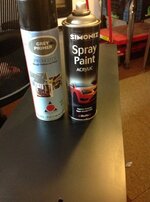
So. Three coats of primer with hand sanding down to 400 grit. The acrylic primer that I already had on the shelf was disappointing (from tool station), do not use this. I will try simoniz primer next time

4 coats of simoniz satin black, again hand lightly sanding down in between coats with 400 grit.

image.jpg

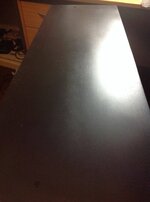
Literally every coat applied of each paint raised some grain. I might look into grain sealer when i do funhouse. But this slight graining actually looks right

The final finish is simply if another dimension to what came out of the factory.

image.jpg

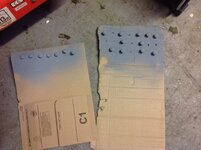
I tried placing a piece of surplus decal edging on the head to see if this fine graining was visible. The graining is imperceptible to the touch, and it does not show through the new art

I tidied up the inside too. Earth braid is underneath masking tape ...

image.jpg

The tin says three hours drying time on the final coat, but i will give this overnight before applying the decals.

Just did a modest job on the back ...
image.jpg
 
Last edited:
Back
Top Bottom