Yep they look great
May i ask where you bought these from? did you have to order from the us?
Regards
Russell
Yep they look great


Will this be 3d printed or sent to a metal shop to create?Needed to make an opto bracket today that was missing after the previous owner used coffee tins to make custom opto mounts on the disaster drop ramp.
So had a try out with fusion 360 as my current 3d modeller is abit clunky. I like it. Made this
View attachment 82446
Will this be 3d printed or sent to a metal shop to create?
3d printed. Bracket is only for opto support and hidden away under stuff. Will br prototyped at home then sent to shapways for a quality print later. and i can choose my own colour to.
")


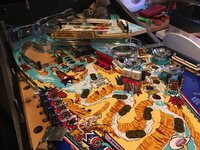
Man Wh20 looks so good with new ramps and those clear pop bumper bodies. Thinking my one needs the same treatment.
I read once upon a time that someone on pinside was making a latex rubber style unbreakable boulder set. That would be damn handy.
The repro boulders are now with @RudeDogg1 for some magic to be applied!! Looking forward to seeing how they turn out.


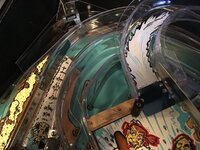
Jim, after the outlay on the the new set of ramps, might be a good idea to invest in a set of cliffys for the ramp edges as they do get smashed easily.
Jim, after the outlay on the the new set of ramps, might be a good idea to invest in a set of cliffys for the ramp edges as they do get smashed easily.
Cheers
kev
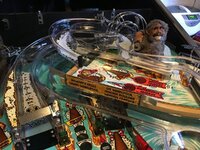
Those new ramps
Would be a shame to use them !!!
Definitely looks amazing with new ramps and worth the outlay, transforms it a lot.