What's new
Pinball info

Register a free account today to become a member! Once signed in, you'll be able to participate on this site by adding your own topics and posts, as well as connect with other members through your own private inbox!

In Progress Homebrew DIY - 10 years in making

Very productive weekend but was stumped for a couple of hours this evening. Issues with the SW-16 boards and nothing coming back at all from them.

It wasn't until I rolled back to a different connection for the serial wires I got some feedback from the board. When you face all the boards the correct way the wiring is opposite which is pretty confusing and I knew this gotcha from months ago, maybe it's got me on my custom serial cables I made and I just did it blind.

Even though there is a CPU there which is booted and running the 12v & 5v I don't have a display attached so the USB is running into my PC while I tested the service menus. You can setup a build so it will publish the game over SSH to linux but haven't set that up yet so I build a windows 32bit (they are the same). Only linux doesn't do memory mapping but that is only for simulators like VP, FP.

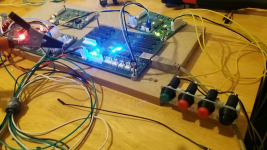
Buttons are good and very happy with that little setup screwed there for now and works great when game running and going in service.
1694383099342.png

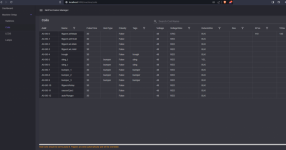
Those switches are in BankA so it's using SW0-3. In this default game that I've developed as the base template the coin switches were low down here 0-3, but I've added a web manager to edit the database quickly.

It is client server app, so when it comes to the point where I am running off the machine all the time then it's going to be handy to just host that app on the machine to administrate it. The other good thing with this is you shouldn't be making any mistakes when it comes to adding duplicates numbers and names for example by hand in file.
1694383719932.png

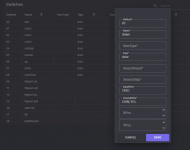
Quick click row and edit, update. TODO: be able to add new items from these views
1694383737492.png

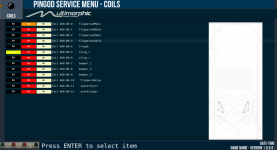
Added a coils test menu which should pulse the coil. Untested.
1694383906321.png
 
Last edited:
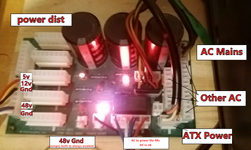
Power Entry LLD: (multimorphic)

Need to redo the mains cables so it's not a great example of wiring, but a bare example of it running with all the power needed. Clearer picture of the board is in earlier post with the host CPU.

*Missed labelling the ATX (5v, 12v IN) next to AC connections.

1694467297703.png

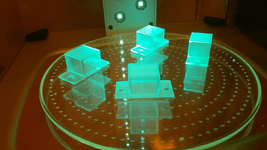
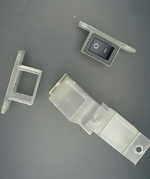
To enable the 48v then we have to use the ground jumper (which is wired in photo). I haven't used my 3D printer in a while now so it was a good time to test some clear resin to make a holder for a switch for this ground.

Took me less than 5 minutes to search on 3D printables to find one and a quick measure was about right, but it's actually a perfect fit so bit of a fluke there but it's just temporary for this. (3d printables light switch)

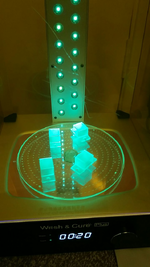
I don't think I have had the chance to test this wash & cure machine properly either, so I used the wash and the cure on these. Water washable resin, cheap stuff.

1694467772799.png

1694467789940.png

They took 1hr 40mins. I had pretty high exposure time on each layer 6 seconds. If in a rush can be done half of that and should still have been good enough for this job.

1694467844586.png


Video of me switching the 48v ground on and my first reaction to that was I want a fanless supply. 48v PROC Ground Switch (Youtube)

------------------------------------------------------------

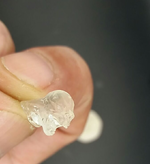
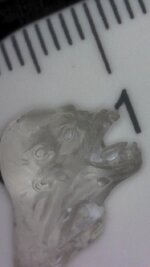
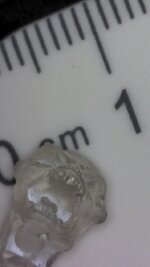
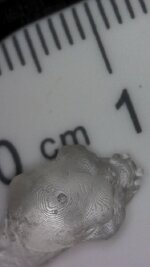
After doing the printing I had to test some more. A little smaller than I wanted to test with though on the first run but it's great detail for that size and this was 3 seconds exposure.

Everything printed so far has been 0.05mm it is possible to go to 0.01mm. You could try even higher for quick jobs, prototypes.

1694475299261.png

1694475323565.pngWIN_20230912_00_29_29_Pro.jpgWIN_20230912_00_29_40_Pro.jpgWIN_20230912_00_31_20_Pro.jpg

And a bigger one...


1694481255618.png1694481288902.jpegWIN_20230912_02_02_48_Pro.jpg

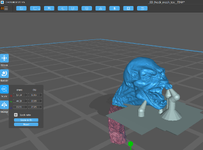
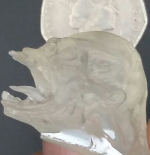
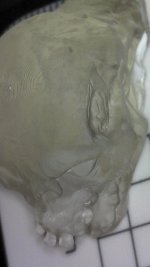
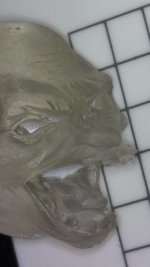
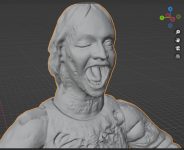
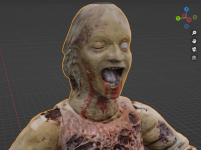
And that is better than ever hoped for. It was a 3D scan from the figure but then outsourced (Bosnia) through Fiverr for $30 sculpting clean up (Fiverr). He would do a couple of revisions if you wanted but I just took the first one as it was clean, so we're both happy there.

A final would be a bit bigger and done with some rubber resin or resin that shouldn't break. I wouldn't be surprised if teeth go missing but with some unbreakable or rubber they could just bend.
 
Last edited:
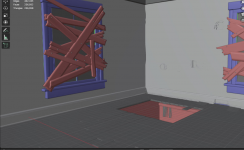
Cellar - ToM Trap Door - Part 1 - The plan:

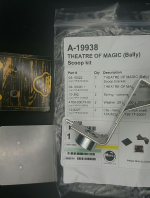
Shipping in from Marco in under 14 days, pleasant surprised but the sticker is on the door already, even on the label it's shows that is separate so someone couldn't help themselves or sent it back with the sticker on. I had the one without a sticker before that for like 20 euro or something silly.

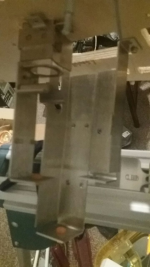
I think just missing one part now and that is whatever is tied to the main lift shaft to lift it.

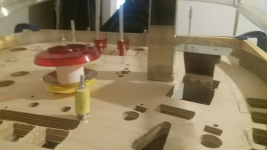
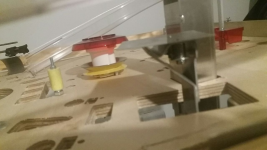
More than likely the work on this is going to be done off the playfield and into some acrylic like JJP have setup in their bumper demos. That way you can see through the acrylic and probably easier to work on because it's going to work different to ToM.

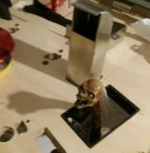
Not only has a toy got to pop up in place of the ball popper that usually is there it's got to take the ball as well so it's very tight for room and highly likely the ball will get stuck on the way down but it will need some hacks.

Hoping to roll into what would be a coffin popper on a BSD.
1694544122456.png
1694544279656.png

Coffin Popper would need to be fitted lower than the main hole, that comes with a little metal subway tray, if can get the ball into that then should be ok.

1694545095266.png

Early days faking it, I 3D print hatches with baby hinges but it would last all of 2 seconds in a game.

1694544715094.png

Eyeing it up. Much smaller than expected but that hole was already there way before ToM came to mind. I was playing ToM on Pinball FX quite a bit and it came to me there. Love the sound of it opening as well and with a bit of squeak to it.

1694546376795.png1694546397768.png1694546415176.png


1694556952387.png

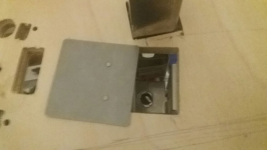
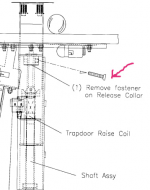
Bodged with screwdriver as missing this fastener. No idea on that one for now...

1694559201154.png

Visual Pinball rough story board, hatch is different now but want it the same.

1694551855647.png1694551870462.png1694551885921.png1694551900933.png

Conclusion / Sacrifices:

Trying to integrate the coffin scoop with it's tray to trap door. BSD is just a hole as it drops into with a small run to the Coffin. It fits behind this trap door but there will be a static ramp (no lift) there. Won't get the tray in the trap door without cutting a slice

1. Make custom subway in trap door. If the toy pulls down to a certain height and the ball can roll into subway and then into popper, a bit further down than usual with a bit more run to it.

2. Adjust (cut) the trap door assembly so the tray is inside. Tray would also need hole for toy underneath but should roll in better. Make sit a little further down and the coffin. Will make assembly a bit weaker maybe.

1694564273290.png1694564404067.png

3. Subway (lower drop than 1) to a different scoop, removing the coffin popper.

4. Use a hole like BSD and ramp lift, still keeping the cellar but no balls enter that way and only used in multiball.

Still "plenty" of room for a ball. The tray could be cut also to fit around and in the assembly but for a 5th option I could 3D print the tray so it subways to the coffin popper but so it fits in the trapdoor assembly.

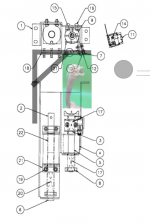
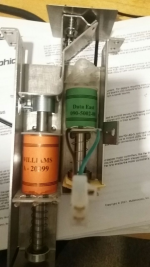
Where this 2nd coil sits (which is green VUK in image) could be adjusted to go lower because it doesn't have to pop a ball there like does in ToM and I want a bit of neck to the toy. If the door was up and that in final position how it is that maybe enough anyway. If jack in the box the neck a bit the door will keep it down and a ball should push it down when lowered.

1694569794773.png
 
Last edited:
Final Battle Henrietta - Part 1 - The plan:

This one I have put on the back burner for a while, it's just one of those things in this game that I just not wanted to worry about until I get there.

Fairly simple I suppose really but it's making it fit, seems it maybe a little too big at the moment down the the actuator length. I don't have all the parts to really nail it down or have done it fully in 3D yet to know if will need major changes, but as always for me when it comes to this kind of thing I have to wing it as far as possible.

It's just an under the playfield feature which you have to get to the end to open it up. How it is designed here and going forward is 90mm hole with 100mm acrylic cylinder surrounding it, then with a toy on a spin disc. There is this clear acrylic on top which I think will have a rod through the 3D print version of the toy. Not 100% sure all of it will work yet but it will work if even if it's just static lift and no spin after hitting it. Wiring a switch be as well is tricky but worry about that later.

1694636346493.png 1694636783955.png

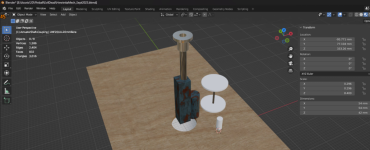
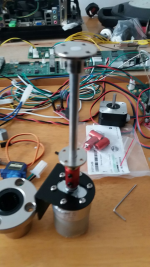
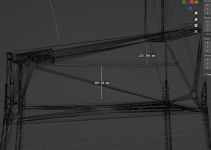
Just a quick go at recreating the parts with the sizes should help in coming weeks. There is a coupling on top of the actuator shaft which should fit the motor but will need to print something or another part for that. The actuator shaft is off center as well.

1694636921571.png

Amazon was able to just get the acrylic bits for the correct sizes. 2 x 5mm discs to get it off the ground to start with but would prefer metal if it does spin on the bottom.

The motor is 550rpm which seems quick enough and it's not going all the time, only when you hit it that it should spin for a couple of seconds. It could even work like below with the motor fitted to the lift.

1694637401589.png

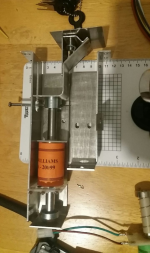
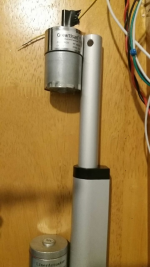
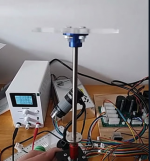
I have had this actuator since I started buying parts but this is the first time I put power to it today. I was going to wire it into the PROC PD-16 under 12v but remembered I had a power supply I never used either which is just handy for these as it's quick to reverse polarity. In the netprocgame you can reconfigure the polarity so on a switch somewhere it can do that.


Testing the motor.

 
Trough Wiring:

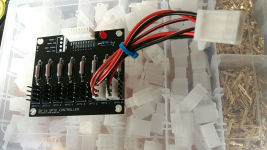
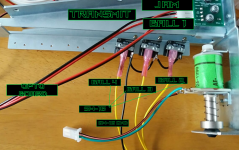
Had the SW-16 Opto Controller (PL) turn up this morning so decided to prepare the wiring for the trough.

The trough is a 4-ball but you can get 8-ball for $10 more (PL), I just didn't need them. I would've preferred to go full opto though now really I think because those switches could've stayed together but it's no problem as the trough will still work in software regardless of where it is or how it's named.

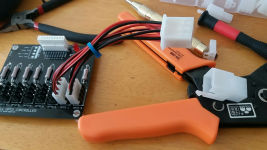
Where this board goes isn't set in stone at all and I have no idea yet so I think it's a good idea just to make connectors up. One opto connection here is for the first ball and the other for the trough jam both sides. I fed them both into a 9 pin connector to keep together. From that block to the trough I would probably use different coloured wire then adjust database for each switch wire color. This still needs a bank connected from a SW-16 and takes the 12v from that.

1694714162601.png1694714810151.png

Created 4 x 2 pin connectors, 2 for each side.

1694714638680.png 1694714731975.png

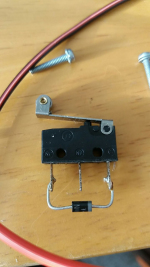
Removed the diodes. (Quick reminder which side is what, I can never remember)

1694714917477.png

Tried some terminals and heatsink tubing on this one and daisy chained ground for the SW-16 ground which is wired incorrect here (see above for another reminder)

1694715561990.png

And to add a good video from Pinball Room on these PL ball troughs running with MPF.

 
Last edited:
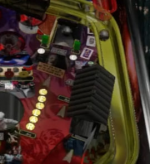
Henrietta prototype:

Spent too long this weekend trying to get stepper motors working with the PD-LED with no joy while I waited for these extra bits. Gonna end up just going to MPF and making sense of it there. It's a godsend really in this position they have so much stuff already done and what I have seen is working as well.

1694881964532.png

This is pretty solid but need to attach the discs. Added a bracket to the motor which I will try bolting to the actuator to lift it. Some wider flanges maybe better but there's still not much weight there. The rod is 100mm aluminium but I have 5 1/2 inch hex spacer that I think still fits but much more weight..

Way too big for the figure and a printed version should fit between the discs with the top one being transparent. Don't know how well that would work over time and how many scratches will end up there being plastic.

1694882762255.png
 
Housework:

I've had to add stuff to netproc like steppers etc and there's still much more to do there as far as the extra is concerned but the way I am looking at that is when I need it. YAGNI = "you ain't going to need it".

I don't think many of us have picked up and used netprocgame and it's not something that I would recommend unless you like C#, MPF is the Daddy of catering universally for all. I've actually been quite a bit of the source code for first time this weekend and it is quite impressive feat to support so much. That's not something I am targeting to do I just need enough to do this one.

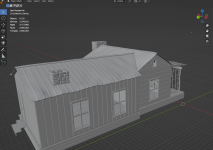
Another sort of feature is the cellar ramp or house ramp where the BSD coffin scoop is the chimney from the house. None of this will go perfectly to plan either but a house should fit around the cellar / bumpers area and a ramp goes through the house (in VP anyway). In BSD the coffin ramp goes around to the left flipper this one returns to the right. Subject to change though because it's going to be tricky with another ramp already there but will make something of it.

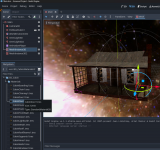
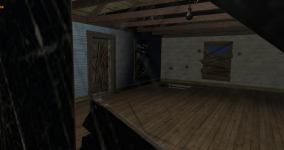
I found a half decent one for $9 so put that into Godot but all textures missing. If a model has non standard material shaders if you check in Blender then they won't automatically come over.

1694995799793.png

Each .tres is a material from the model but every one was a manual process of setting each texture for `Colour, Normal and Ambient Occlusion`. Quite painful, but what is good in Godot4 is it can use a .blend file and import that so you can do your scenes in blender and bring straight over with not much trouble aside from if you used non standard (principled BSDF).

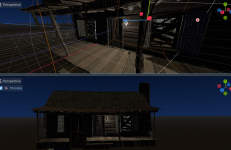
This is game scene running with some volumetric fog. That is just assigned to an animation player which loops the density of the fog. The other good thing with Godot is it's movie maker, enable that before running the game and it will record it to .avi. Mountains of use for this for making scenes and bouncing down but I want to try and get away with not having to render to video and use these scenes like this for example for a score background or whatever.

1694995995190.png 1694996358626.png

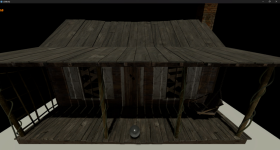
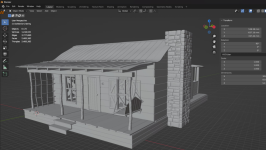
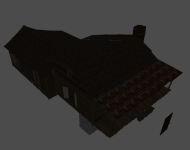
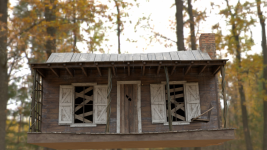
With some more searching today I found a very good printable cabin which was done around 2021.

1694996435818.png

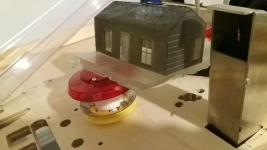
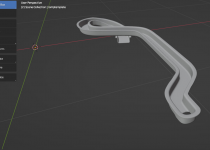
Small test run. I can't really do this properly until that cellar area is done and whatever ramp is there eventually but going through old files today I found the ramp that was modelled for VP which I think will print the first entry and bend to see how that comes out. I've tried at least 5 other ramps off old games that aren't quite the same as that. If the entry and the first loop hidden anyway by the house then it doesn't matter if comes back on a wire.

1694996484357.png 1694996921251.png

This 3D printable cabin is a lot more detailed than the previous and probably better to use this one in game after adding textures to it.

1694997062472.png1694997078600.png

This blender file I found from around the time I was getting a Stern cabinet together. Couldn't help myself but add sideart. I need to find that scene I render which I think will be good for animation.

1694997155672.png

I don't know how long it's been in Blender but the asset library is very handy. I started building my own a while ago around the time I made this.

So at any point you create a new scene you can just pull up the Stern cabinet and drop it in the same with some other parts.

1694997487823.png1694997558489.png

1694997652490.png
 
Work in the evenings hasn't stopped on this game yet but at points you have to take a break from it. I have done regular anyway and started buying parts towards it in 2021 so it's a long old process.

Models / House

Loads of work has gone into doing these models and piecing together graphics for the game display, learning shaders, testing out lighting options and how much I can push in realtime rather than bounce to video. I think I bought 1 to 2gb fanless gfx card for the PC and that would do a fair bit anyway in 2D lands but I think by the time I've finished it will struggle. I have spare PCs that eat that current one for breakfast along with GFX cards that would do it easily which aren't being used so I will probably swap it out.

At this point where it swallows a fair bit of money it's always going to be the case of push the boat out a little more, it's not made to sell so don't have to cut back on power or CPU or whatever else goes in there to be Frank. I cut back on one of the modes which used more drop targets like CC but it's no way near as fun without it so they will come back, but because the size has been downsized to a stern playfield I don't have room for all of them.

Current PC should be able to render this easy as it is but it needs dialling up on the shadows and the lighting and when start adding fog it will know it and the cabin is unfurnished at the moment.

1695320642820.png1695320725311.png1695320778589.png 1695321052468.png 1695322592705.png1695320982876.png

Henrietta prototype 2:

This is a similar mode where it won't be the same if it doesn't work how it was "designed" to work.

All good on rotation and even when hit it's pretty good I think Stern spin disc assembly is much more RPM but this should be ok for now.

1695321529940.png

As always when I get a bit closer I have a double check on my ideas and I don't think the current actuator I was intending to use is going to work somehow as it's 27mm off the bottom of the cab, above the sub, so it's out of the question really.

1695322055922.png

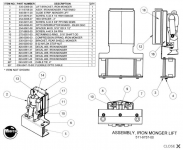
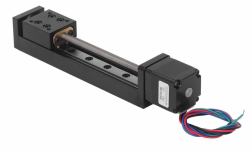
First stop for a reference was the Iron Monger from IM and that using linear slide or similar. So onto Amazon and found a linear motion slide with stepper. That will be another wait for parts but I don't even have the steppers running at the moment so they need to be sorted in the wait.

1695321790088.png1695321891273.png

Still have the issue of being able to put a switch on the toy, that was beyond me still as I stared at it, so off to the physics forums.

1695322251126.png

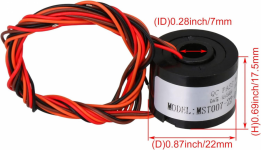
Hollow shaft out of question but there was mention of Hole Slip Rings. So this one could do it and maybe not impossible after all, after that is fixed to the motor and the shaft rotates inside 7mm the top wire can spin.

1695322393999.png

The sanding the bottom side to make it level after I drilled the holes in. When the motor was running without the sanding not level some serious wobble unlevel. I would have these pieces done by machine in final with countersink or similar.

1695322683337.png
 
Henrietta prototype 3 - Spin Wizard:

Spin ring testing. She shouldn't weigh too much on the print but I think it will have to be as even weight either side to prevent any potential wobbles. Maybe a target at the back of her or a ring of targets (sounding like 80 quid though) so she's constantly going.

It is a fairly long (minute or 2) timed multiball, if she takes balls off you (draining) then she takes the time down and making shots adds to your time. Whether that's going the whole time I think will come down after flipping it, it's good chance the disc kills the balls anyway on a spin.

You can smack the top and sides and it's good I did record hitting but the phone went on the deck 😅.


Playfield Changes:

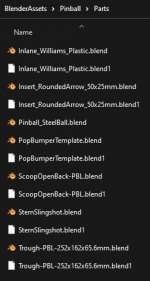
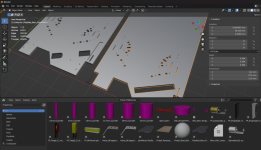
I started to build a bit more organized library for blender for pinball stuff. There's a couple of playfields, one from JohnMarsh which is Wolfmarsh who did a version of a cabinet as well and one from the pinball room on YT.

I don't use Fusion360 and not interested to learn it and the same goes for solidworks, I think you can stick with tools you're familiar with and can still do the same job but these two I had converted from Fusion360.

1695401472549.png

Will put these up in a shared directory then in blender you can point to the asset library path and you would get the same drag and drop.

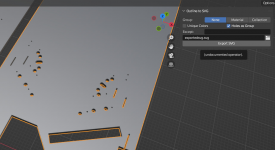
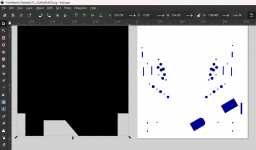
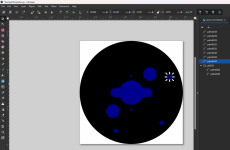
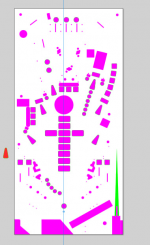
You can export shapes, holes to SVG with OutlineToSVG. If you are in this current view then it will export like that but for playfields, objects you will want to be in top down then export. Examples with the Marsh PF and a 3D bumper template top down.

1695402955809.png 1695403085859.png 1695403101649.png

----------------------------------------------------------

When I brought my playfield in again it's just too short in comparison to lower playfield area. I had sacrificed 4" off the game just to model down to whatever one of sterns was using to 42".

These are 45" and I think the special on BSD is that one is 45", a standard williams was 46". Downsizing all the way to 42" was a bad decision really I managed to squeeze it all in but when it comes to ramps it's a bit too tight. I have tried 4 or 5 ramps from other games and one of them would probably do it with some extra.

* Gaining 3" makes the longer ramp fit to the lane.
* The mode hole won't be so tight and bricked.
* More room for extra drop targets
* Left ramp difficulty raised
* Possible 3rd flipper / magnet

42" and the 45". Still a fair bit to do on the new one but once it's done I can go for another cut. Also worth quickly making flippable in VP before that point just to look for anything to weird or too tight.

1695403283196.png 1695403307712.png

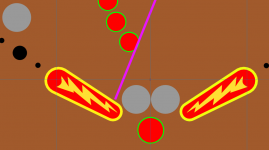
These flippers are not perfectly set but they should be right size. Nearly 2 balls, be my guest at nudging it you will have to.

1695403684860.png
 
Last edited:
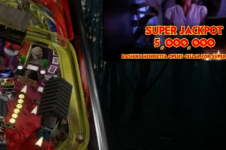
Add your playfield to new Visual Pinball Table:

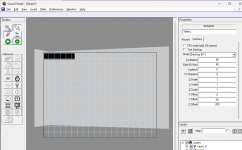
I remember when I first saw a table in the editor maybe around 2009 which looked very complicated. Back then it was just about being able to play an emulation at least of the games used to play in arcades. Hopefully this is dummies guide without any script and have the game flipping.

- Inkscape Download (Chocolatey) (Official Site)
- Visual Pinball Download (GitHub) - Releases VP10.7.3

Inkscape Document Size in inches.

Somehow the game gained an extra inch without me looking and I blame this on the file name :). Basically back to a BSD but the width is std Stern. 20.25x46"

1695420178146.png

Inkscape Export:

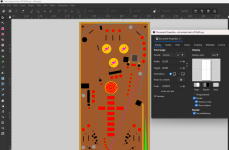
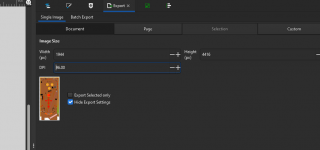
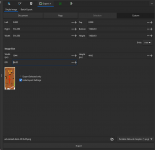
Change DPI for print but not needed for VP. Changing DPI won't effect the document size just a bigger output resolution

1695420387320.png

You want to click page before export button to do your whole page, so don't leave things overhanging your wood. Showing the size in mm.

Export as PNG but I think Inkscape now allows JPG if you want a smaller output.

1695420470207.png

Visual Pinball Table:

Create a new Blank table

1695420564456.png

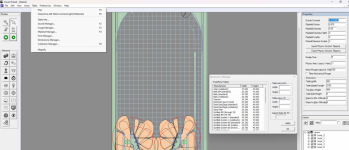
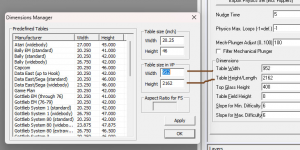
VP has it's own units. You can convert your table inches to units by opening the dimensions manager and filling out the two fields.

1695420627828.png

This won't update the size for you, enter the fields and don't push enter. Enter the values into the tables dimension. 20.25x46" is default VP 952x2162

1695420702438.png

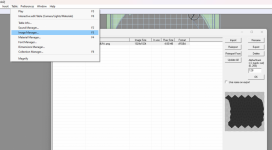
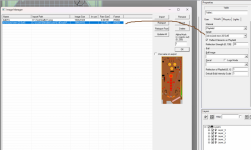
Import the image with image manager (F3). Can be any type, JPG, Webp is better for keeping sizes down.

1695420847654.png

After you've added the image set it to the playfield in the Table > Visuals

1695420916062.png

Activate viewing it live in editor.

1695420978997.png

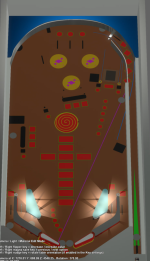
Push F5 to run the game. Enter to plunge, shift flippers.

1695420997036.png

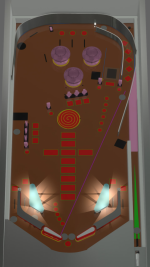
Testing the full screen view (a better look at full playfield). Go into the backdrop translite view and uncheck test button to view a top down cabinet view when you run it F5.

1695421070688.png

F6 launching can be used to adjust view which will be saved on exit. You have to read instructions to not get egg shaped ball in that view but it's out of scope of this.

1695421229308.png

- You don't need to make fully playable here with scripting, it's just going to be handy for testing shots. This is just a single image default table so it's instant to boot and flip.

- If you want to add some extra objects like posts load up the default table and copy any of the primitives there into your game.

- Any time you would want any scripting done is for kickers. If you load your game to flip and have kickers then I think that's the only point you would really need some extra scripting to kick it. When you hit the drain kicker it will pop a new ball to the plunger lane, so there is an example in this default blank table to show that

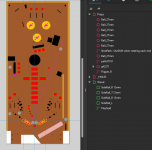
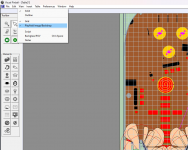
- You can export a blueprint from VP. After you have added objects, rubbers, ramps etc which you could overlay inside Inkscape.

- Can export to .obj and import in blender

1695423200118.png
 
Last edited:
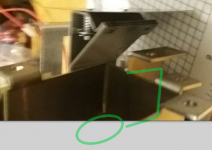
I've slept on VP for a little while now and was using 10.7.2. Even with a single image and a few objects (primitives) it would crash the game.

You could flip, then go back to the editor, relaunch the game it would just disappear, so I wouldn't recommend it and actually just go for the latest beta 10.8.

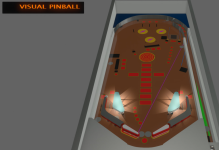
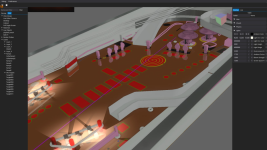
Below is a new view they've added which is pretty handy which you can get to from the pause or F11 menu.

It's a little clunky on viewing around the table but very good still they've been busy, it's very handy Just to be able to simply "live" move the camera here to get a better view at things. It is graphically better and physically better out of the box too.

1695665139186.png

Extra Flipper / Magnet:

Possible added flipper in the "mist hole" which can make the ramp and other shots. The trouble with it is there's only "hacky" feeds to it. It would rely on you bricking the scoop shot or hitting that target directly above it.

The only return from the ramps that are set in stone is the large left ramp. I have been toying with the idea that a wire can drop a ball to roll onto that flipper above.

I have a magnet coming but I couldn't tell you without physically having the magnet or finding a drawing the size and if it will fit there with everything.

To be able to get a flipper there will be tight with it's base there anyway, targets and inserts but there's a couple of things that I think are possible there, like the obvious one being able to hold and feed the flipper, or make it spring up and into the hole or some kind of magna save control over it.

Once flipping and when we can see how bad this Jagov shot is for difficulty, a magnet could be useful in that area so you can prevent it coming back at you, but maybe not powerful enough for that. That shot should direct it to the right flipper for a volley but it might need some walls either side to help guide it. If a ball flails from the bumpers it could go anywhere being that open and has to be at least 50% chance that does happen after you launched the ball coming from the first lane.

New cut:
An extra flipper or a magnet isn't a big worry as the hole sizes are small enough to be able to do here so they can be left off this new drawing. A new cut is on the cards after this has been adjusted enough. New one should be flippable with all assemblies fitted and hoping that just one more after is enough.

Resources:

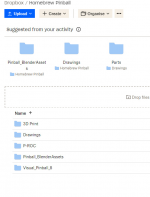
I dumped some files online to dropbox over the weekend that some may get use from. I will update the first post with Resources to include links to resources and software used like this.

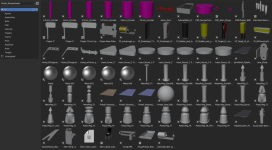
Mission Pinball have pretty much everything in the way of drawings for parts so they were not included in the downloads here but a fair few of them I have converted and created blender assets from which are in here. You can add that as an asset library and be able to drag and drop objects in a scene. The VPX 10.8 table is setup for a stern standard with higher walls that's extra stuff you have to outside of VP to get that in there so it's a good starter template for height to glass. Not having a Stern was fairly difficult for me to get that height and was unsure for a while how high I could put the ramp.

Any more resource that goes in will be added by MonthYear.

🔗 DropBox

1695668646179.png

1695669336684.png
 
Fair dos- I only did a Ramones retheme so know how long just that takes, let alone this.
Impressive and great theme
 
Fair dos- I only did a Ramones retheme so know how long just that takes, let alone this.
Impressive and great theme

I have seen your game somewhere which must have been here at some point or at a show.

Admittedly it is nuts but once all parts have been sourced and playfield is flipping then hopefully it should be a bit more downhill.

Best advice is to make something a bit simpler first but I can't see myself wanting to make more anyway at the moment so I am jumping in the deep end.

I would always be up for writing game rules in this system though, aside from the assets and scene creations that's quick.

If you like the theme you should have fun with it. Just the title alone will put a lot of people off it. I wouldn't want it looking too mad from the sides either, walking dead artwork must be enough to frighten some kids or maybe not in this day and age.

Open invitation to play it when it's done anyway, so when you're in the area pop in.
 
Henrietta Model:

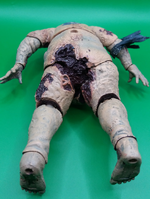
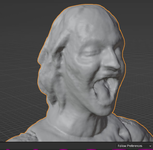
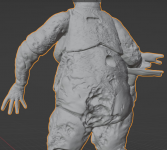
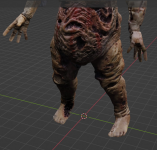
I have lost count the amount of times I have scanned this in with a scanner. I've also attempted it many times indoor and outdoor with a good camera and photogrammetry software and I have tried sculpting by hand to no avail that totally happy with.

When you look at the scans they are very good but this one in particular for detail in the face and hands just can't do it that well. With this scanner you can do almost anything, full body scans, small figures, car parts etc but when comes to smaller figures it struggles to get the detail.

The other model printed fine and you won't get it better unless you spent a few more hours sculpting it for detail but it's not really necessary here, a good paint job should help bring some of the detail back and those 3D printed layers are invisible to the naked eye.

This is going to get outsourced for about £25 to clean up and he should put some detail back in. When you look at other scans there's usually a lot more work to do, a lot of smoothing out but these don't come out that bad and his job should be just detail.

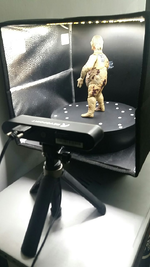
Little scan booth:

1696166622192.png

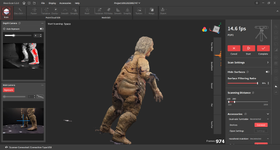
RevoScan 5.3:

The darker areas like the backside won't scan unless you drive up the exposure or spray it with sublimination spray. If you wanted to do metal or reflective parts they can be sprayed before hand.


1696166677062.png

1696167956060.png

As you can see that is pretty good and saves you doing it manually for a base mesh. I could draw around that and finish that up but I would rather outsource. My sculpting skills not at amazing levels and when you do so little of it it can be a learning process all over again, more time.

1696166861526.png

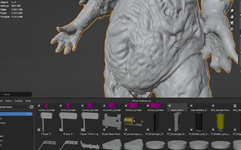
I ran an auto fill and fill holes on this. Her left hand had a huge hole and software had done it's best to fill it. Easy job for a sculptor.

1696166996098.png

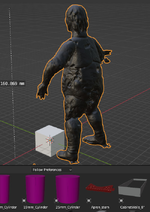
I haven't doubled checked the measurement but I think that's about right, it doesn't matter anyway because it will be scaled down. Only thing adjusted here is just the rotation everything with the size comes from the scanner.

1696167091027.png

Hopefully we get as close to this as possible.

I just noticed she has a white tongue, that's from sublimination spray which is supposed to disappear / disintegrate.

1696167305157.png 1696167412795.png
 
Last edited:
Extra Cabinet Options:
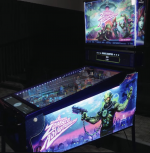
I've come across RAZA again, totally forgot about this one and I'm sure they put a playfield out for this going back 2015 or maybe earlier.

I don't have much interest in going through what's happened here but looks like it's going through courts as some kind of ponzi scheme, like I said I don't care for the drama but how did they make it this far and fall over is puzzling to say the least. Controversy follows JPOP around like a bad smell.

This PinBar certainly is innovating but it's too big really. I have a preference for a visible apron but it's giving me some ideas.

I want to go fairly deep on player profiles and it won't be limited to 4 players, I don't see why I would have to have a player limit, only that you can't do more than 4-8 player visible scores at the same time on a smaller display.

My way around that is if you had 16 players in one game then only the top would be shown. When it's your go your score will be big and always able to bring up player table in a status report.

If there's one thing I learned from staring at stern displays all weekend the general consensus seems to be it's just too small and only for the player. For example it's hard for a commentator and pretty difficult for most to see scores.

When you're not limited to players then it's worth to put in a tournament structure, leagues, all in the software with API and not using external 3rd party score systems or a pen and paper which are always there and won't ever disappear unless you wipe the database.

1696359391134.png

I'm not a phone guy so I don't like idea of scanning QR codes but with a smaller wide touch screen panel which you will be able to create and login with a pin number, that's all it would need. My PinBar would be players and probably volume which saves opening the door.

In game it would just show who's playing and up next, nothing fancy, no real graphics like this but just a half decent looking UI.

I wouldn't go as far as to do the backbox lit but it does pretty good, it's different but very tempted to do the side art lit.

1696360728349.png

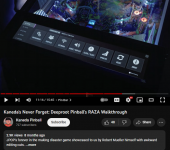
RAZA Walkthrough


RAZA Shipping containers

 
Elwin getting 10 billion on BSD mentions his dream theme, I wonder what that is.

 
1696435603979.png

Not sure how true this is when they're hinting at TCM but could be linking chainsaws.

It should sell well because of the theme but I don't have confidence in Spooky games.

If Elwin did do it at Stern that is the better option but none of that would never stop me as I made this game back in 2013 and I've on a mission since to get it done.

A very similar example is ThePinballRooms Led Zepplin game. As he getting through the game Stern released one, but his has a better contraption in the way of ball lock on stairs and my assets, sound and gfx will annihilate anything spooky can do.
 
Long time no updates :). I need to get stepper motors working still but have been building up to that. They've been added to code and should work same as MPF but couldn't get one to do anything the other day. I have the motor for the main lift so that's the next hurdle to wire and get that working.

Building up to it is pretty much a good milestone today though and glad to get it done. A lot has gone into just the plumbing here but now it's a continuous build. All of the libraries I've moved out of NetProcGame moved into NetPinProc and modules. These build and publish nuget packages which makes it easy from anywhere to create a program for the P or P3-ROC on any platform in dotnet.

I've made builds for LibPinProc which has 32/64bit windows, mac + linux. I include these in the nuget packages because that saves time having to fetch those extra binaries by hand. I have wanted a 64bit windows for years ,I just could never really be bothered to do it but was forced into that now but it was stupid easy in the end.

Compy was surprised when I picked this up anyway so I don't expect many here to use these but even still you can run a game or a ProcDevice simulated so it's always possible to get started without having boards.

The examples that are in their own repository could do with a pre built download. Easy, download a single example program, connect a P3 or PROC and run it or run simulated for quick tests. PinGod is separate from this but it will use all everything built here (apart from dmd, P-ROC only)

LibPinProc (2.1 dev) - Main C++ P-ROC:
LibPinProc https://github.com/FlippingFlips/libpinproc/releases

NetPinProc - LibPinProc wrapper, game controllers etc:
NetPinProc Packages Packages - https://github.com/orgs/FlippingFlips/packages
NetPinProc Server Examples -https://github.com/FlippingFlips/NetPinProc.Examples

Small admin web page for managing machine database:
NetPinProc Server - https://github.com/FlippingFlips/NetPinProc.Game.Server


1697327882693.png
 
Henrietta Scan:
1698496798471.png

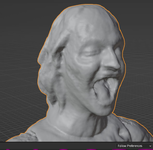
When compare this clean up to the actual scan this is a nice enough job of bringing the detail back. Smoothing it in places is easy enough now but it would take me way too long to do what he's done here and not as good. It doesn't really look like Ted Raimi though but it's more than good enough for this game. He's done a really good job of keeping the textures as well, I don't even need those but opens up for some reuse in the display.

1698496942677.png1698497171957.png

He'll do two revisions for the £25. The first neck model he did I just took it on the first pass, but the hands were dodgy from the back and they looked like mickey mouse gloves. You couldn't notice it from the front. Something like that I could fix but I sent that back for a 2nd revision. She does have a blouse but that's an easy scan and clean up.

1698497327541.png1698497504546.png

🔗 I will clean your scans and models for 3d printing (Fiverr)
 
PinGod tools, framework, demos:

Big refactor and move to Godot 4.1.1. I don't expect 4.2 or 4.1.2 to be as much change as they did from 3.5 but even still I am going to stick with that version for now as it adds too much work.

All this because I can't be bothered to work on stepper motors really but had to be sorted.

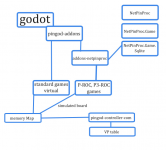
Here's a crude diagram of how it works. For a standard game then these are so quick to make and test. With the base `pingod-addons` I try to split off into as many plugins as made sense. With the `pingod-machine` plugin though this contains the Trough and things related to the machine in that scene. Rather than split that off into `pingod-trough` I think best to keep it with the machine plugin. With NetPinProc though a Trough is a mode there, they are different but it does reuse the addons to build on from it.

1698499638796.png

- pingod-addons (github)
- pingod-addons-basicgame (github)
- pingod-controller-com (Simulations)
- pingod-addons-netpinproc (p-roc, p3-roc)

In the releases for netpinproc is packaged download from a build on github. That runs an export with Godot and publishes it there. This is just windows atm, all need to do now for that is add in those extra builds for other platform. No install it runs out of the box. A proc.cfg will be generated when you run it. In there are some dev options like deleting database on launch and not using the database display settings. Edit the sql file to add more machine items. This build includes those JJP like service menus.

Lot of work to do still but this is plumbing nicely setup, continuous builds if need it them. When this is on the machines PC (linux) then more than likely I will get that to build the game when you push code or create tags.
 
Back
Top Bottom