What's new
Pinball info

Register a free account today to become a member! Once signed in, you'll be able to participate on this site by adding your own topics and posts, as well as connect with other members through your own private inbox!

In Progress High Speed II The Getaway - The journey continues

Ashbo

Site Supporter
Joined
Apr 9, 2021
Messages
1,811
Location
Lincolnshire
Alias
Ash
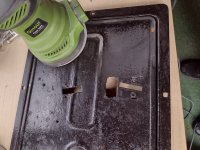
I'm sure this won't be that interesting, but just keeping a track of what I'm doing on this machine.

A bit of fettling after the solid work done here: https://www.pinballinfo.com/community/threads/getaway-hs2-roger-504-apprehend-him.56163/

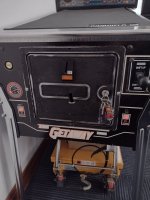
Some minor cosmetic work and a bit of modding planned. Maybe a re-decal if I get clearance....

A few new ones for me being a newer breed, never cleaned a translite, much easier than the Krylon tasks needed on earlier machines.

IMG_20230808_161949275_HDR.jpg

And 3D printing day and night is making me very popular at home....not 😜

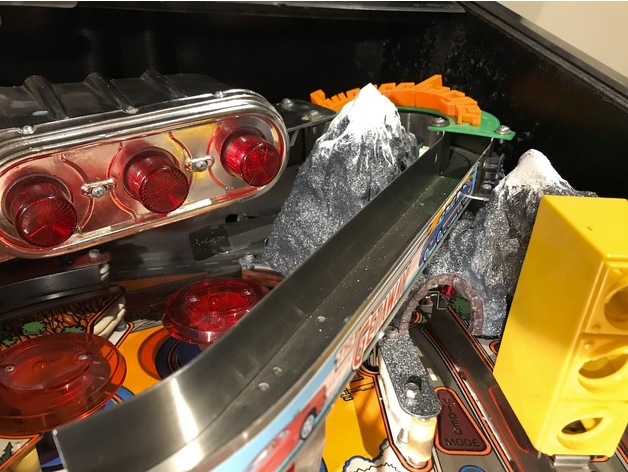
I'll link the files I'm using later on when I get organised, but going 3D mountain, new traffic light and donut heaven. If it looks rubbish, I will revert to stock.

IMG_20230817_202209951_HDR.jpg
IMG_20230818_074600057_HDR.jpg

16924346753491615160170060244134.jpg
 
Mountain....

Donut Heaven....

Traffic Light....
 
It won't replace new decals, but a tiny tiny paint brush and some gloss black acrylic and going very very slowly....

You can go from this....
IMG_4279.JPG
To this...
IMG_20230819_104308797_HDR.jpg
16924390484466039520781006752238.jpg
 
Last edited:
New supercharger cover and u-turn plastic fitted today. They came with the machine so why not ;)

IMG_20230819_210531427_HDR.jpg

Also started the primer coat on the mountain

IMG_20230819_195712192_HDR.jpg
Looking forward to getting some colour on tomorrow. Man, the small airbrush is so much nicer to use than rattle cans. More refined, easier to use.
 
Have to say I'm very underwhelmed with my first attempt at the traffic light. Seems paint and clear make any imperfections stand out. I'll keep this attempt up but already started printing again, tweaking to try and get a better surface.

IMG_20230821_190748553_HDR.jpg
 
Have to say I'm very underwhelmed with my first attempt at the traffic light. Seems paint and clear make any imperfections stand out. I'll keep this attempt up but already started printing again, tweaking to try and get a better surface.

View attachment 229182
You tried a putty paint? It's great at covering imperfections.
 
Another traffic light print starting today, this time I've ordered some metallic yellow airbrush paint and plan to use primer as before then a tiny pallet knife and thicker acrilic (like putty paint) to level before a final coat of yellow.

I'll also build a small paint booth. It's amazing the amount of overspray the poor traffic light got from the mountain.

16926875460946656164824242010573.jpg
 
Slightly longer update, I reprinted the front of the traffic light and then used a pallet knife to apply acrylic. After it became tacky, rubbed it of with kitchen towel. Much less of a problem with print lines.
IMG_20230826_093325412_HDR.jpg
IMG_20230826_095019090_HDR.jpg
IMG_20230826_095554406_HDR.jpg

Then set about hand painting the donut heaven mod. Not entirely happy but it's ok...

IMG_20230826_120031633_HDR.jpg

I've pinched the led strip from the Mezel Mod that came with it and jumped it off the lock ball insert led. Donut now flashes when ball lock is lit.

Also lined it with theatre gels, red for windows, double thickness cyan over the LEDs.

IMG-20230827-WA0005.jpeg
After two coats of primer on the traffic light and 24 hrs between, I finally got to try out the metallic yellow.

IMG_20230828_133254489_HDR.jpg
Hopefully it will dry well.

IMG_20230828_140311405_HDR.jpg
 
As updates go this one is really boring but may help someone somewhere....

Hot glue gun glue didn't cut it on the traffic light, shook apart slightly today. Gone with some super glue this evening, will see how that works.
 
Grr gah arrrrgh!!!!! Why won't you just glue and stay stuck.

Hats of to mod makers everywhere, it's not as easy as it looks

IMG_20231031_171338954_HDR.jpg
 
What to do on a cold weekend in January? Why not remove the mylar on this little lady.

There is something so satisfying about peeling mylar off. Could do it every weekend 😁😁😁

IMG_20240128_153149061_HDR.jpg
It's not 100% mint under there, a couple of inserts with a bit of peel, but with a lot of work with microfiber cloths and Goo Gone, it starts to clean up well.

IMG_20240128_170451513_HDR.jpg

IMG_20240128_170444044_HDR.jpg

For a birthday treat for myself, ordered some new screws, star posts and pop skirts and caps.

Having injured my back November 2022 and pretty much hibernated all winter so far(on medical advice), it was really great to spend some time at a pinball doing some work.

I have really missed the smells, the sore scratched fingers and the head banged under the playfield. Had to call it a day and not finished removing glue residue yet, but good to be back. Let's hope I can move tomorrow.

IMG_20240128_193936664_HDR.jpg
 
Last edited:
IMG_20240130_185917352_HDR.jpg
Several hours last night and a quick fix this evening and that's the gummy residue gone.

In better light will close up areas I need to touch up, but all in unseen sections that will be covered up.

There is some small damage near the left stand-ups so will likely put a small bit of mylar down to protect from further issues.

Some of the upper playfield inserts needed leveling so got that done too.

Delivery from @David retro arrived today, very swift delivery and very well packed, thanks very much.

Next, pops off and new skirts in...but that's another evening.....
 
The photos of the playfield areas for attention / protection as promised....

IMG_20240131_192800193_HDR.jpg
IMG_20240131_192807077_HDR.jpg
IMG_20240131_192813807_HDR.jpg
IMG_20240131_192817627_HDR.jpg
IMG_20240131_192900395_HDR.jpg
IMG_20240131_192823071_HDR.jpg
IMG_20240131_192831485_HDR.jpg
IMG_20240131_192843534_HDR.jpg
IMG_20240131_192847399_HDR.jpg
Spotted a few bits of gum remaining in these pics....noted.
 
I know I said I loved removing mylar, but just how satisfying is it waxing a playfield.... brilliant therapy at the end of the day.

IMG_20240205_200735450_HDR.jpg
Talked myself out of getting the paint out, just some small patches of mylar to protect....after many coats of wax first to help removal in the future.

IMG_20240205_200711109_HDR.jpg
IMG_20240205_200719367_HDR.jpg
 
IMG_20240216_160101817_HDR.jpg
Massive thanks to my dad for making me a new ramp flap. Had a game for the first time in weeks, either I'm really slow or this girl has gone up a notch speed wise....

Need to adjust the pops as they are a bit too eager to trigger and the ball lock switch 2 is snagging on the balls so needs a fettle. Other than that I'm well chuffed.

Discovered I was missing the u turn metal. They are unobtainable so made a replacement.

17081037539151620638924036016472.jpg
 
If it's an early example, it may never have had one. Works' first Getaway had a ball hop into the cabinet a couple of times, before Deith Leisure supplied the metal deflector. That one was shipped with software edition P-C, which gave an on/off report (it could appear repeatedly during a game) saying "Diverter Error" - the reporting part still thought every shot up the fixed ramp was meant to go around the Supercharger, even if only once.
 
Last edited:
As the coin door isn't going to stay the distance, thought I'd sand it back, but my random orbital sander broke so just chucked it back in for now.

I think it called a distressed look. Only one in the world like this 😂😂
 

Attachments

  • IMG_20240412_171632239_HDR.jpg
    IMG_20240412_171632239_HDR.jpg
    191.4 KB · Views: 17
  • IMG_20240412_184729455_HDR.jpg
    IMG_20240412_184729455_HDR.jpg
    95.9 KB · Views: 17
So from this thread here,thanks to Jay, I know this wasn't right.


Coin mech removed for now .....
 

Attachments

  • IMG_20240412_163626176_HDR.jpg
    IMG_20240412_163626176_HDR.jpg
    139.5 KB · Views: 10
  • IMG_20240412_164815683_HDR.jpg
    IMG_20240412_164815683_HDR.jpg
    115.2 KB · Views: 10
  • IMG_20240412_164825950.jpg
    IMG_20240412_164825950.jpg
    163.1 KB · Views: 10
Back
Top Bottom