What's new
Pinball info

Register a free account today to become a member! Once signed in, you'll be able to participate on this site by adding your own topics and posts, as well as connect with other members through your own private inbox!

In Progress Gottlieb Rock Star Full Restoration

DAW6205

Site Supporter
Joined
Apr 28, 2020
Messages
80
Location
London
Alias
pinball magic
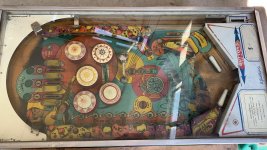
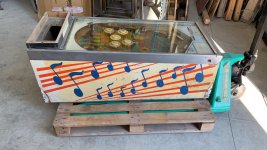
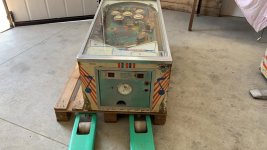
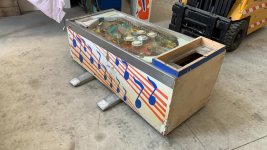
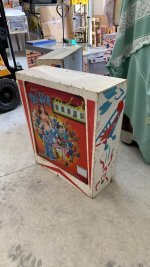
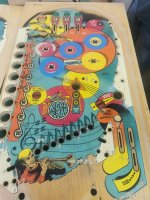
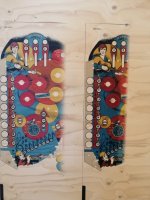
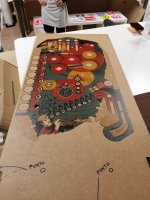
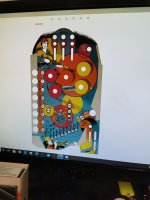
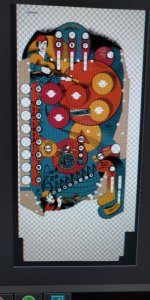
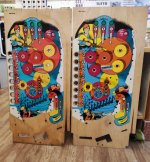
We have come into possession of a rare EM Gottlieb Rock Star, made only 269 units, unfortunately in terrible condition.
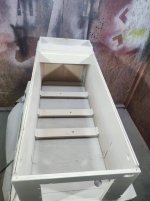
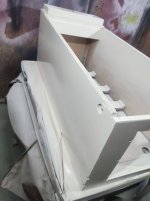
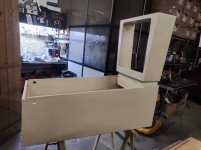
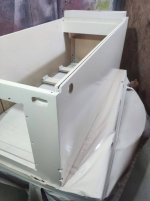
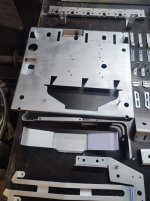
The cabinet needs to be redone and the backcabinet was even from another pinball machine originally.
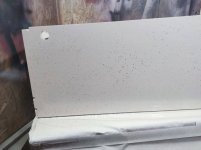
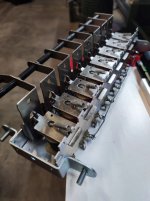
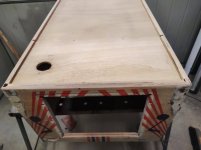
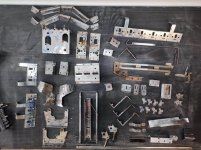
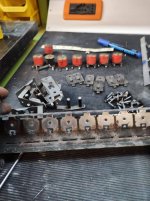
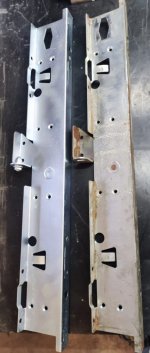
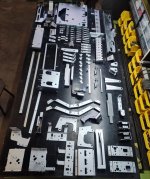
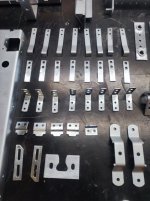
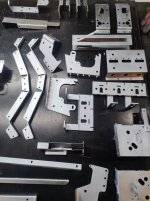
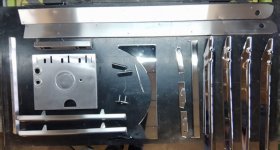
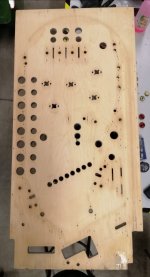
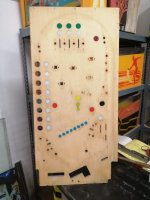
The playfield is worn from gameplay, all the metal parts, both external ones like legs and the coin door, and internal components ,are all rusted , the backglass is also gone, it will have to be redone.
 

Attachments

  • IMG-20200427-WA0006.jpg
    IMG-20200427-WA0006.jpg
    172.9 KB · Views: 18
  • IMG-20200427-WA0005.jpg
    IMG-20200427-WA0005.jpg
    150.5 KB · Views: 14
  • IMG-20200427-WA0008.jpg
    IMG-20200427-WA0008.jpg
    117.6 KB · Views: 12
  • IMG-20200427-WA0009.jpg
    IMG-20200427-WA0009.jpg
    144.9 KB · Views: 18
  • IMG-20200427-WA0016.jpg
    IMG-20200427-WA0016.jpg
    110.1 KB · Views: 20
The first step is to strip down the pinball completely to begin its restoration . The empty cabinet and back cabinet , the entire playfield exposed from every angle, wiring and mechanics, all metal parts removed from their mechanisms, the coin door disassembled, all metal prepared to restore its original shine.
 

Attachments

  • IMG-20220118-WA0005.jpg
    IMG-20220118-WA0005.jpg
    114.9 KB · Views: 8
  • IMG-20220128-WA0028.jpg
    IMG-20220128-WA0028.jpg
    82.6 KB · Views: 7
  • IMG-20220118-WA0027.jpg
    IMG-20220118-WA0027.jpg
    90.3 KB · Views: 7
  • IMG-20220118-WA0003.jpg
    IMG-20220118-WA0003.jpg
    212.1 KB · Views: 7
  • IMG-20220119-WA0015.jpg
    IMG-20220119-WA0015.jpg
    118.2 KB · Views: 8
All metal parts have been processed through electrolysis and sandblasting, and the result was amazing.
 

Attachments

  • IMG-20220128-WA0018.jpg
    IMG-20220128-WA0018.jpg
    59.5 KB · Views: 12
  • IMG-20220128-WA0019.jpg
    IMG-20220128-WA0019.jpg
    152.6 KB · Views: 12
  • IMG-20220128-WA0022.jpg
    IMG-20220128-WA0022.jpg
    99 KB · Views: 11
  • IMG-20220128-WA0020.jpg
    IMG-20220128-WA0020.jpg
    97.1 KB · Views: 10
  • IMG-20220128-WA0021.jpg
    IMG-20220128-WA0021.jpg
    82.5 KB · Views: 11
The treatment is different for some metal parts that need to be very shiny
 

Attachments

  • IMG-20220128-WA0017.jpg
    IMG-20220128-WA0017.jpg
    102.7 KB · Views: 10
  • IMG-20220128-WA0016.jpg
    IMG-20220128-WA0016.jpg
    91.6 KB · Views: 9
Bank Reset assembled
 

Attachments

  • IMG-20220128-WA0031.jpg
    IMG-20220128-WA0031.jpg
    119.2 KB · Views: 7
  • IMG-20220128-WA0032.jpg
    IMG-20220128-WA0032.jpg
    99 KB · Views: 6
  • IMG-20220128-WA0030.jpg
    IMG-20220128-WA0030.jpg
    96.2 KB · Views: 5
  • IMG-20220128-WA0033.jpg
    IMG-20220128-WA0033.jpg
    140.3 KB · Views: 5
  • IMG-20220128-WA0034.jpg
    IMG-20220128-WA0034.jpg
    185.2 KB · Views: 7
The next step is its playfield. Stripped of all its parts,
 

Attachments

  • IMG-20200817-WA0015.jpg
    IMG-20200817-WA0015.jpg
    143.3 KB · Views: 7
Work done on the playfield for its restoration:
- Scanning
- Digital touch-ups and creating a file.
- Testing on a board to see if the colors match the original artwork, and most importantly, if all the holes are centered.
 

Attachments

  • IMG-20201231-WA0004.jpg
    IMG-20201231-WA0004.jpg
    102.1 KB · Views: 11
  • IMG_20210729_113327.jpg
    IMG_20210729_113327.jpg
    115.9 KB · Views: 11
  • IMG_20210729_112638.jpg
    IMG_20210729_112638.jpg
    96.3 KB · Views: 11
  • IMG-20201120-WA0008.jpg
    IMG-20201120-WA0008.jpg
    102.1 KB · Views: 10
  • IMG-20201120-WA0007.jpg
    IMG-20201120-WA0007.jpg
    95.2 KB · Views: 12
When everything is ready, the artwork is digitally printed onto the playfield.
Where the playfield was stripped down to bare wood and all its old inserts were replaced.
And the result has been excellent. On the left, the old refurbished playfield, and on the right, a new old stock (NOS).
 

Attachments

  • IMG-20201016-WA0000.jpg
    IMG-20201016-WA0000.jpg
    57.6 KB · Views: 12
  • IMG-20201016-WA0016.jpg
    IMG-20201016-WA0016.jpg
    76.7 KB · Views: 11
  • IMG-20220401-WA0028.jpg
    IMG-20220401-WA0028.jpg
    165.5 KB · Views: 12
Last edited:
All metal parts have been processed through electrolysis and sandblasting, and the result was amazing.
How do you do the electrolysis and sandblasting? I have an ultrasonic bath and a walnut tumbler for metal parts (not competing with you folks, I'm a hobbyist... :) ).
 
Now it's the turn of the cabinet and back cabinet. Strip them of their old color, touch up and putty where needed, given the background color.
After the background has been given its color, and on top of it, the dots as in the original.
 

Attachments

  • IMG-20220127-WA0011.jpg
    IMG-20220127-WA0011.jpg
    83.7 KB · Views: 13
  • IMG-20220127-WA0010.jpg
    IMG-20220127-WA0010.jpg
    58.8 KB · Views: 12
  • IMG-20220127-WA0008.jpg
    IMG-20220127-WA0008.jpg
    100.6 KB · Views: 10
  • IMG-20220127-WA0013.jpg
    IMG-20220127-WA0013.jpg
    75.8 KB · Views: 9
  • IMG-20220127-WA0023.jpg
    IMG-20220127-WA0023.jpg
    115.8 KB · Views: 9
  • IMG-20220127-WA0009.jpg
    IMG-20220127-WA0009.jpg
    57.1 KB · Views: 9
  • IMG-20220127-WA0018.jpg
    IMG-20220127-WA0018.jpg
    127.1 KB · Views: 10
  • IMG-20220127-WA0033.jpg
    IMG-20220127-WA0033.jpg
    112.1 KB · Views: 10
  • IMG-20220127-WA0034.jpg
    IMG-20220127-WA0034.jpg
    83.5 KB · Views: 9
  • IMG-20220127-WA0021.jpg
    IMG-20220127-WA0021.jpg
    119 KB · Views: 8
  • IMG-20220127-WA0017.jpg
    IMG-20220127-WA0017.jpg
    113 KB · Views: 8
  • IMG-20220127-WA0022.jpg
    IMG-20220127-WA0022.jpg
    93.3 KB · Views: 9
  • IMG-20220127-WA0015.jpg
    IMG-20220127-WA0015.jpg
    118.5 KB · Views: 14
How do you do the electrolysis and sandblasting? I have an ultrasonic bath and a walnut tumbler for metal parts (not competing with you folks, I'm a hobbyist... :) ).
I brought all the metal parts to a company that specializes in electrolysis and sandblasting.
 
Back
Top Bottom