What's new
Pinball info

Register a free account today to become a member! Once signed in, you'll be able to participate on this site by adding your own topics and posts, as well as connect with other members through your own private inbox!

In Progress Fathom

DRD

Registered
Joined
Oct 26, 2014
Messages
5,434
Location
Newark
Never done a shop log before. Here goes. Bought this yesterday. My grail pin. There was no way on god's earth that I would have bought any other game in this condition. Much more skilled folk than me have done these.

I am not after perfection, or better than new. About as good as new is my target

The good news - it is a fathom. I never thought I would actually get to own one. Everything works. Underside of playfield is fine.

The bad news - dog rough. Filthy. Nasty wear to top of playfield that someone foolishly put Mylar on.

image.jpg


Looks encouraging ... Not too bad actually
image.jpg

The oh my god moments .....

Insect graveyard

image.jpg

Lock down bar rust fest

image.jpg

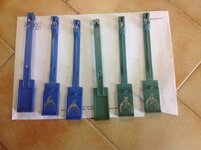
Most solenoid plungers look rusted too

Never thought I would use a wire brush on a power drill on a pinball, but in for a penny ......
 
What a find! AWESOME! FATHOM certainly is a beauty and a fine game to have as a grail pin!

Overall condition looks great. Certainly no worse than my GOLD BALL and look where I've got with that - mostly it's all just time and elbow grease. I certainly haven't spent £££ on it, most stuff just needs dismantling, cleaning, polishing and putting back together. There are things that should be replaced, like coil sleeves, but these are very cheap. Inside of the cabinet will look a million times better after a good vacuum with the brush attachment! Plungers polish up really well too, even well rusted ones! Underside of playfield looks pretty clean generally which is another good sign. I think you've landed a real winner here.

That lockdown bar will look a million dollars soon. Here's a few before and after photos to give you some encouragement ;) I'm a teensy bit jealous but extremely happy for you!

c1.staticflickr.com_9_8588_16402356648_094cc55855_m.jpg > c4.staticflickr.com_8_7353_16588376151_dce617c521_m.jpg

c4.staticflickr.com_8_7451_15937598034_70f21a272f_m.jpg > c4.staticflickr.com_8_7696_17607624078_16253be2c5_m.jpg

c4.staticflickr.com_8_7608_16638753087_a377bbc8b4_m.jpg > c4.staticflickr.com_8_7285_16844925592_ea16d38e22_m.jpg

c4.staticflickr.com_8_7310_16372506328_02d99cc7f9_m.jpg > c4.staticflickr.com_8_7286_16743939030_559acca452_m.jpg

c4.staticflickr.com_8_7301_16374257787_467b0bc9fd_m.jpg > c4.staticflickr.com_8_7648_16386295174_e32f483f26_m.jpg
 
Yes Fathom is a nice pin, glad I found mine too. All grail pins crossed off now
 
Congratulations on finding your Fathom!!!

One day I'll have one of my own......if anyone hears of any leads on one please say! :)
 
Seeing the @ronsplooter Fathom at 8 bit flip also finalised it in my mind, as my favourite of the early Bally SS era.

But I still enjoy my lowly rated vector. How much better is a fathom to look at and play ? If you imagine a room with no pinball in it. Then a lowly vector appears . Now that is a massive Improvement on no pinball. Then a fathom appears. How much better is fathom in these terms ?

I will never get mine to the @ronsplooter standard, unless I can find a playfield. It is going to be a long haul to get this game up and running as it should be.

I think I ought to do the outside first. But as a starter for 10 I dealt with the disgusting lock down bar. The first thing I saw and touched when I did anything was this. For the uninitiated, it is truly remarkable what a Dremel can do. But it is so slow. I have today bought every grade of wet and dry paper to see if I can find a faster way. I already had a Bosch vibrating tool thing, an orbital wood sander, a rectangular vibrating sander, a Dremel, a tumbler ......

I hope to find out which is most practical. The game did not leave the factory with a mirror finish. I can see why people go that far, but I want a 20 percent of the graft for 80 percent of the outcome type job. And if you mirror finish one thing that was previously matt, where do you stop?

But here is the first step in quite a journey for a relative noob... From this disgusting mess

image.jpg

To this, which now puts the lockdown bars in my paragon and vector to shame.

image.jpg
 
I did a quick start on the rusty metalwork today. Bought one of the poly abrasive wheels that @PeteB recommended for the job from Toolstation
cdn.toolstation.com_images_141020_UK_388_10332.jpg

Here's half way through the lock down bar
wp_20150510_16_42_59_pro-jpg.16487

I'm using one of these perhaps that would be effective on manky lockdown receiver bars - only a few pound from toolstation to find out. I'm enjoying your log, looks a great machine.
 
  • Like
Reactions: DRD
last lockdown bar i did was already a black one.... Wanted to re-finish it. Used an orbital sander and ever decreasing Grits..... Did a really good job - i was surprised!
 
A bit off topic for the Fathom but were you then repainting it @Paul ? Whilst I've cleared the paint and rust off the lockdown bar I've decided to hone my skills on less noticeable back legs first.
 
@astyy - I was, although it's not too difficult to regrain a metal Lockdown - however you have to be careful you dont sand too much else you'll get rivets showing through.....
 
So what did you use to get rid of the rust? Just a dremel?
 
image.jpg I used this motley crew of gear .....

The spinning wire brush to get rid of the truly disgusting corrosion only
I tried hand sanding then, but it was too laboursome
Next the bosch-gop-250-ce-multi-cutter. First with 120 grit then with 240 grit. I nearly stopped here.
For stubborn little areas the dremel with the red plastic wool thing above (excellent but wears out quickly)
Then I manually wet and dried using the sanding block and 240 then 400
I tried buffing using the drill and cotton wheel but gave up. As the 400 still left too many minor scratches

I could have gone on forever. No point in my opinion. I wanted to remove all corrosion, and give it a semi shiny finish (like when new) and this did it

I am now going to get some more types of sandpaper for the Bosch. As @Paul says above, I think this is probably the best way if you are going to stop short of a mirror finish. I want some coarser grade for it (so I don't need to use the wire brush') and some finer too. Even the 240 grit I had in was giving it a bit of a shine. So I think 400 could be the winner

I had the 6 bank drop target's metal bits tumbling overnight. Before and after for the plastic drops. I used isopropyl alcohol to clean these. You must be VERY careful around the ink though, as it will fetch it off very quickly indeed. A lesson I learnt on my vector When I cleaned up the first of the old yellowed drop targets (now all replaced with new ones). Then less than a minute each by hand with novus 2 fine scratch remover on part of the targets that stands proud of the playfield. These targets are fine and will not get swapped out as thankfully they are not white. The white ones really do show their age when 35 yrs old

image.jpg

image.jpg
 

Attachments

  • image.jpg
    image.jpg
    112.8 KB · Views: 6
CONCLUSION - following trial and error I used 600 grit wet and dry on a power tool to deal with light corrosion like this drop target assembly. Less than 30 seconds per dismantled face us all you need. It does not remove deep pitting, but my life is too short to sand it down first. And the resultant finish is smooth, shiny, but not mirrored. It is close enough to original to me. And quick to do. Small items overnight in the tumbler- walnut shells and solvol autosol

You should use an air powered sander NOT an electric one. Or just use elbow grease. The wet aspect of the wet and dry makes a dangerous mixture with an electric tool. I will plead the fifth if anyone asks what tool I used. You can get dry 600 grit, to use in a dry sanding scenario

Before and after. No more than 2 minutes of Dremel were used in total on spot issues.

image.jpg image.jpg image.jpg image.jpg image.jpg image.jpg
 
Wanted a few games on her today. So prioritised some gameplay issues.

Ball trough did not always recognise balls - used leaf spring adjuster to bend the microswitch wire slightly to fix this. Noticed that the normally open "ball on the move switch) the rightmost one in the photo below was closed all the time so leaf spring adjustment tool time again to fix it.

Ball ejected miserably slowly into the shooter lane. Thorough clean up job, and slight bending of the steel assembly ...

3 Crap flippers, no power. Hard to lock balls. Brief spin in the battery drill whilst I held 600 wet and dry against the linear plunger. Can actually play proper games now. But needs 3 pretty full flipper rebuilds. One of them had a brass coil liner ! Not exactly factory.

Before ....

image.jpg

image.jpg

image.jpg

After
image.jpg

Steam punk bench polisher. Luckily this drill had a button that kept the trigger on, and has adjustable speed ...

image.jpg

All three linear plungers looked like this horror

image.jpg

A quick spin in the drill with wet and dry paper gave them all a rapid tune ahead of new parts being ordered. Also, replaced the brass coil liner and cleaned the two nylon ones with isopropyl alcohol.

image.jpg
 
My bench polisher looks exactly the same! ;)

Great work here. So nice to see these old Bally's being brought back to life.

My only advice would be when polishing the plungers is to work up and down the shaft (phnarr, phnarr!) and not spin them, so that the "grain" you've created is in the direction of travel so less friction. You should be able to get them back to a mirror finish even from that rusty start. I know you're not mirror polishing everything on this but the plungers are worth the extra effort.

I totally rebuilt the linear flippers on GOLD BALL - new bushings, new coil sleeves, new EOS switches, new Nyliners and home-made Nylon-6,6 "buttons" along with mirror polishing the plungers, cleaning up the coil stops and using machine bolts with Nyloc nuts to hold the brackets on to the baseplate. My only experience is Bally pinballs but the flippers are always working loose so the Nylocs and decent bolts are a must. Also, there are 6 holes in the baseplate but only 4 screws holding them onto the playfield - seems like a no-brainer to me to pop in two extra screws!
 
Oh, just an FYI. I have the same "linear" ball eject with plastic arm on GOLD BALL and it's rubbish! I totally went to town on mine but it still seems really feeble. I wonder if it's programmed with a really short fire duration that it just enough to get the ball up the ramp and into the shooter lane? So, just don't be surprised that the ball doesn't fly up the little ramp. Only problem is that if the mechanism isn't running freely the ball won't make it at all - my GOLD BALL would sit there trying to fire the ball again and again and again...
 
Dismantled and rebuilt the inline drops. A really time consuming job. I had to desolder 5 connections to drop target switches to get the assembly out. I normally try to avoid desoldering things

Was a dirty mess, but at least it worked, but slowly compared to my vector ....

image.jpg
image.jpg

I was hoping a good clean and polish might speed the whole "raise em all together, drop em all individually cycle" when it powers up

This inline individually controlled drop assembly is far more complex and sensitive than the individually controlled side by side ones in vector. When re-installed it did not work reliably. I can see from the before picture of the springs, that I put the damned things back in the wrong place. This assembly takes a lot of dismantling unfortunately. Tomorrow's job.

That will teach me to mess with something that already worked. I can hear my father ... "If it works, leave well alone" .....
image.jpg
 
The brass sleeve prob was factory if you look in the manual firepower had one on one of the coils.

Also them plungers come up lovey if u whack em in the tumbler no need to faff around sanding
 
Spotted that my game has different serial numbers on the cab and backbox (does that make it a bastard ? Or mongrel ?) and has a stern MPU board

The biggest issue is the playfield. The former owner mylared over flaking paint at the top, I really, really, really wish he hadn't. Removing it could devastate the top of the playfield which has loose paint. I think it will need a significant overlay unfortunately. But that is a long way off before I get involved with that. Luckily it is at the top, so far less of an issue than it might have been lower down as the top is quite busy

image.jpg


Luckily you can access the springs by removing 4 screws that hold the drop solenoid assembly, so an irritating job, but not a long one

image.jpg

As ever, the linear flipper question causes controversy, so I will give them a fair chance. Cleaning up all the high voltage switches. Maybe this "factory fresh" flipper cab switch wasn't helping ... Installing the better of the 2 recycled ones from my mini paragon tune-up where I bought (and they are surprisingly expensive) 2 new flipper cab switches.

image.jpg

Pop bumpers on old ballys are so much easier to dissemble and refurb than on wpc games. This foul bunch of dirt, rust and corrosion to deal with now

image.jpg
 
Wanted a few games on her today. So prioritised some gameplay issues.


3 Crap flippers, no power. Hard to lock balls. Brief spin in the battery drill whilst I held 600 wet and dry against the linear plunger. Can actually play proper games now. But needs 3 pretty full flipper rebuilds. One of them had a brass coil liner ! Not exactly factory.

A quick spin in the drill with wet and dry paper gave them all a rapid tune ahead of new parts being ordered. Also, replaced the brass coil liner and cleaned the two nylon ones with isopropyl alcohol.

I've never liked brass coil sleeves. I was once called out to a High Speed with weak upper flipper. Dreading to change the Eos switch (the flipper is right against the cabinet wall, and doesn't appear above the top with the playfield raised) I got started, and found that a brass sleeve was fitted. Simply replacing that with a nylon one solved the problem.
 
Pops all done. As ever I could have fine more, but no point in my view given the playfield and the fact that I will do something radical to it in the future and have to strip it all down again. After the first one ...

image.jpg

Then to an easy job, so I imagined. The LINEAR slingshots. Now I am not going to criticise the LINEAR slingshots.

But both were a bit loose. One had a rather long screw and bloody glue on the remaining hex heads. Both had one screw head snapped off on the coil stop. So using the dremel I cut a flat head screw into the stub and it came out easy enough. On the glued one, the glue was shot but I did drill an extra hole in the baseplate....

Judicious use of glue ...

image.jpg

And a long screw that pierced the playfield underneath the slingshot plastic. This also shows the screw head I cut into the snapped screw to get it out ...
image.jpg

The dremel is becoming my tool of choice for this workshopping, it made light work of this nuisance ......

image.jpg

A bit of bling for @Nedreud

image.jpg

I am now exclusively using my steam punk polisher, as above. With tiny amount of dremel afterwards. Washing off the wax polishing compound with my old favourite of isopropyl alcohol.
 
This shiny bar at the back of the playfield took a lot of cleaning to remove deep pitting. This is part way through.

image.jpg

It was too much for my buffer wheels. The most aggressive is sisal, then stitched, the unstitched. So I used a power sander on it before progressing through the buffing wheels.

The wheel on the drill is the sisal. Beneath it is the stitched with the polishing compound resting on it. The stitched is generally the right one as you don't need a mirror finish, though you can of course keep polishing until you get one. With polishing wheels you use wax compounds, a different one god each wheel as they vary in polishing versus abrasiveness

image.jpg


One of the more offensive parts of my game was this drop target bank.
image.jpg

Truly disgusting targets compared to the repros with the correct graphics....
image.jpg

Usual filth below the playfield ..

image.jpg

Cleaned, polished on the stitched wheel. Reinstalled. Looks a little better now ...

image.jpg
 
  • Like
Reactions: JT.
image.jpg The cleaned up rear bar. This still has minor pitting. But grinding this out would have taken ages, and can't be seen when the glass is in and you are playing the game.


The cleaned up 1,2,3 drop target bank .....

image.jpg


And then another depressing job. The top playfield inline drops. The filthiest of all of them. With full blown rust spots, not just pitting. The only ones that were not working properly. And the least accessible. Looked like a playfield out job, but I managed to see how to do it. The nasty bit is the leaf switch assembly .......

image.jpg


image.jpg

These leaf switches are bolted to L shaped brackets inside the assembly. When you remove the two screws you can see here on each switch, the brackets fall loose. This is a daft system. These brackets in turn support the springs that pull the drop targets down. So replacement will be a right faff, but at least I did not need to desolder the switches as that would have been playfield out time when resoldering them

There is some spooky, weird sh1t hack here where some genius, perhaps the same one who glued the slingshots in, spliced a wire in parallel with the feed to this leaf switch bank with crimp connectors. This parallel wire runs for about two feet. The traditional rule of unknown cabling is that you don't cut or remove what is there. My game works. So I will remove the crimps and solder the spooky wire in place and heat shrink the join. I can't believe that someone went to this much trouble if there was no reason. It is easier to clean and adjust the leaf switches than put this batsh1t crazy hack in.

I dunno why, loose bolts I would think, but all three inner brackets were bent. This was causing minor issues with the drops ....

image.jpg

My little anvil and little hammer sorted them out, returning the bend to 90 degrees. I reset the gap with a gentle manipulation using a flat blade screwdriver. Snapping one would have really spoiled my evening...


image.jpg

Can't face polishing this lot now. And maybe if I wait overnight, the pixies (or should that be sea nymphs ?) will have cleaned it all for me
 
Well I now understand the hack on the wiring. And the damage to the right angle brackets that hang the return springs on the drops. A previous mechanic must have struggled to put the top drops back together. Lost patience, bodged it. It was a frustrating job. One I do not want to do again. It would have been quicker to remove the playfield and use a rotisserie, but I do not have one. Anyway all back, looking and working much better

Now onto the mini lane guides. These plastics were riveted on. Both had corners missing as these are hopelessly vulnerable to damage, so I replaced with my new CPR ones.

Thanks to @backbox for the advice. This was the starting point ...

image.jpg


image.jpg


I used my soldering iron to heat the top of the rivet and push it out of the plastic. If you think old bally plastics smell dreadful, wait until you melt them ..... Very easy to remove without destroying the old plastics, but obviously the hole is widened

image.jpg

I the ground down the top of the rivets slowly with my dremel, one grinding tool literally exploded into my face, so being a square and wearing goggles saved me some trouble here. I then polished the 4 supports.

image.jpg

Completed installation with light bulb underneath. Looking and playing so much better now. But I fear that these will snap before long as the Bally design is very poor in this impact position. The old one is above and shows that the CPR plastics do blend in well.


image.jpg

Then onto the lock down bar. With some horsepower to deal with the rust.
image.jpg
 
Last edited:
Bought some beer strip from pinball mania, and the lockdown bar is sorted now ...

image.jpg

Replaced this death lead and cracked plug (13 amp fuse, natch) with fresh cabling and a plug without cracks. Checked and replaced as necessary the 5 fuses on the cabinet floor, 2 of which were the wrong ones.
image.jpg

Then moved it in the house. Finally having fun on it, changing the dip settings etc

Hours of play and standby. Just needed to clean the pins on the driver board due to intermittent right flipper. Re flowed solder on all the pins of the driver board. Still intermittent. It was a bad connection in the plug, so I reseated it.

Was a bit dumb really. My paragon and vector have a 6th fuse underneath the playfield. As does fathom, wish I had spotted it was 4 amp instead of 1 amp before the pyrotechnics began.

I was trying to avoid drowning and being attacked by mermaids and sea nymphs. I didn't expect trial by fire ....

Smoke. Melted coil. Terrorist attack driver board ....
image.jpg
image.jpg

Received great advice from the forum and from Andy at mania. Somewhat incredibly to me, the board was ok. Just needed a clean. A tip102 and a 330 ohm resistor to replace the atomised one. Other transistors had been replaced before, one resistor associated with a new transistor looked a bit cooked so I replaced that too.

Incoming coil from Andy due tomorrow. But I just used a similar one to test the board. It worked !!

But I had horrendous problems with one coil firing erroneously when other coils correctly fired. Swapped over the solenoid expander board with my vector, it was fine.

The problem was that the original cooked coil had two diodes on it. I replaced with a one diode coil (like in my vector) and assumed it would be ok. Drove me nuts for a while. Then I just hacked another diode in as a temp fix whilst I await the correct coil. Fixed.

LINEAR flipper rebuild kits due to arrive soon. Having played vector for a while, I decided to go linear in fathom as per original spec. I prefer the responsiveness of link flippers, but the linear offers greater accuracy and control - the designers of fathom put two very tight shots in it (top loop from either flipper on the right). So linear seemed the better option. Hoping bits arrive before the weekend as new bats and superbands are ready for installation to replace the grotty current ones.

It is a great game to play. But cheaper vector gives it a run for (far less of) its money in my opinion. And vector has never tried to gas or incinerate me - note smoke detector at the ready.
image.jpg
 
Really impressed with your progress on this and the classic games in their location look awesome.

Aren't you putting a topper on Fathom or just selling it?
 
@Nedreud is taking the topper. I think that CPR include it so that they can charge a fortune for the plastic set. These old ballys don't actually have that many playfield plastics in them

My fathom, paragon and vector never came with toppers, so I am leaving the three of them "topless"

To be honest, fathom is flattered in this photo, I think this is why you need to see them in the flesh. It is now playing right, and just awaiting flipper rebuilds. The cabinet will either get airbrush touch up or stencilled. My game is such a "cut and shut"

Different serial numbers on main cab and backbox
Stern boards in it
I will either replace or heavily repair the upper playfield ...

I don't see much point in keeping it "original" and want it to look and play right

Paragon and vector are original, so I am leaving their patina
 
Back
Top Bottom