What's new
Pinball info

Register a free account today to become a member! Once signed in, you'll be able to participate on this site by adding your own topics and posts, as well as connect with other members through your own private inbox!

In Progress Congo restoration

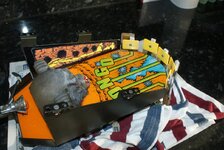
While waiting for the plastics to arrive I decided to proceed with some other tasks. First up was repairing the volcano. I found a great guide online and followed the procedure. First up, pack out the volcano hole with tin foil:
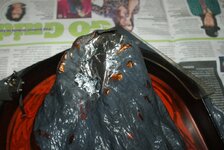
DSC03957.JPG

Next, mix up some clear silicone with some orange paint and apply it to the damaged area, use a paint brush to create the desired look. The clear silicone will show light through just like other areas of the volcano:
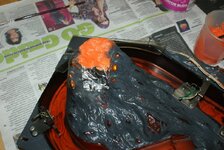
DSC03958.JPG

Next, I waited for the silicone to dry (I left it 24 hours) and then removed the foil from the inside. Finally I mixed some paint in order to re-create the grey finish to the repaired area:
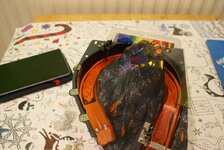
DSC03962.JPG

and there we have it, one repaired volcano!
 
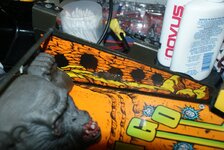
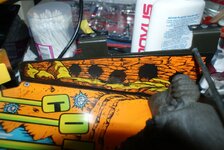
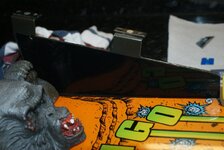
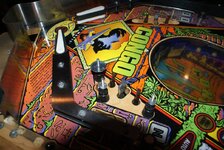
I then turned my attention to the lower playfield, there is some wear to the side decals where the ball has struck it, the wear is similar on both sides:
DSC03981.JPG

DSC03982.JPG

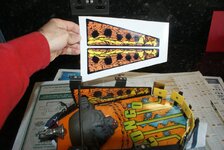
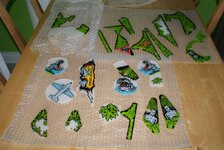
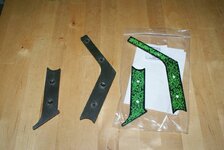
It was back to the computer to create replacement images using the waterslide decal paper again, I managed to find a scan generously posted on a forum site and printed it out:

DSC03986.JPG

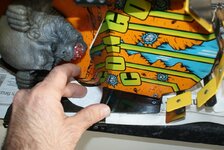
The re-production is very good but it is slightly shorter than the original which would leave some of the metal exposed. I decided to use a black gloss vinyl background prior to fitting the new decals in order to give a deep shine to the areas not covered by the replacement decal:

DSC03990.JPG

Here's my gloss black background applied, ready for the new side decals:

DSC03991.JPG

I then applied the new decal and added mylar over the whole area to protect it from becoming damaged like the original. I also cleaned the mini playfield, the targets and replaced all the target sponge, it's looking much better!

Before (I forgot to take a specific image but hopefully you can get an idea of how dirty it was from this image):
DSC03794.JPG

After:
DSC04005.JPG
 
We have plastics!

DSC04009.JPG

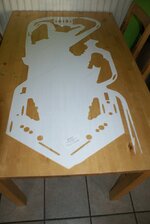
The additional ramps also arrived so now I have the full set of new ramps, I'm glad it all turned up as during the wait I started shopping again! I purchased a playfield protector from Germany:

DSC04007.JPG

and after searching a large number of pinball stores on line I finally found a set of cliffys from PSPA in Australia (great service), they are not really required to be honest but I thought why not!

DSC04038.JPG

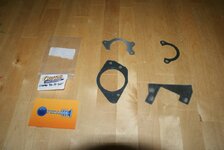
Finally I purchased some outlane plastics to replace the standard metal items:
DSC04011.JPG
 
Well, I say finally but I was also thinking about an aircraft mod while I was waiting for the plastics to arrive. The plane in the movie is a DC-3 so I hunted around for a suitable model kit I could mod, it had to be the right scale though, I wanted 1:200 or smaller as anything larger (even 1:144) would have looked to big for where I wanted to mount it. After some more time on the PC I finally found a kit, sprayed it up in chrome silver to match the colour of the movie version and started modifying it.

First up was two 3mm white LEDs to provide illumination for the cockpit and fuselage windows:

DSC04040.JPG

Once they were in and a suitable exit for the cables created I turned my attention to adding a navigation light to each wing. Now this was a bit of a challenge as the model was so small there was no way a 'normal' LED was going do the job - it would be far to big.

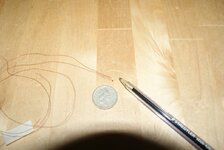
So I ordered some micro LEDs - these things are tiny (they actually make a size smaller than the one's I purchased), take a look at this:

DSC04044.JPG

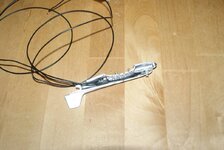
Yep - it's that tiny dot by the biro tip - measures 1.6mm x 08mm! There was no way my soldering iron was going to be able to solder wires to the LED (the tip is far too big), fortunately @Nedreud agreed to help out with his soldering station and excellent soldering skills - he even had an old coil lying around which was used for the wire - perfect!

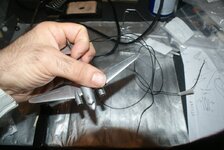
Once they were soldered, I mounted them to the model, after much time and swearing I ended up with this (I am pointing to one of the LEDs with my thumb):

DSC04084.JPG

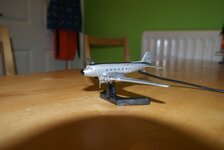
After some finishing touches I ended up with this:
DSC04092.JPG

We'll see how it looks in the machine later!
 
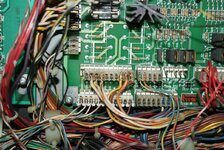
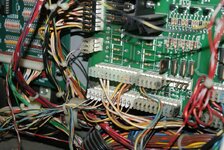
There were a couple of other jobs to perform before re-populating the playfield. The wires for one of the IDC connectors had been soldered in place and the wrong size plug used - this was giving some intermittent issues with half of the GI:

DSC04023.JPG

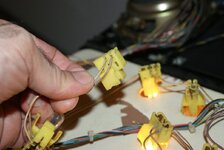
After fitting a new plug the issues have gone - GI is now perfect (but I did discover my expensive IDC tool is the wrong size for these plugs so the insertion of the wires needs to be tidied before I finish the restoration, looks a lot better though):

DSC04026.JPG
 
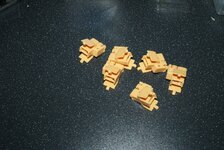
There were a number of broken plugs in the backbox (a plastic cover was used similar to the one used on CV rather than the traditional wooden board - I prefer the wooden board personally):
DSC04027.JPG

These were replaced with nice shiny new ones!

DSC04029.JPG

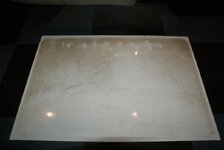
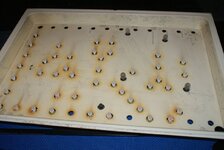
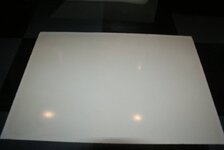
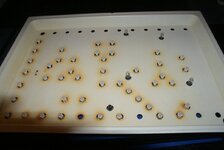
While working on this area of the machine I cleaned the translite and the inside of the plastic cover - both were filthy!

Before
DSC04030.JPG

DSC04032.JPG

and after - much better:
DSC04037.JPG

Discolouration marks are still there (as expected) but all the dirt has gone:
DSC04036.JPG
 
One last job before getting on with the playfield re-population. There is one plastic on this machine which I have discovered is always broken (just as it was on mine when I picked the machine up) - it is in a vulnerable area so I decided to make my own protector so as not to damage my lovely new plastic!

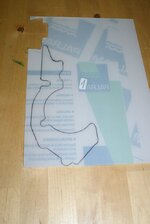
I used some spare Lexan I had and created a template which was 1 mm larger round the outer perimeter than the original plastic, I then used the template to draw a cutting guide onto the Lexan - here's what I had at this stage:

DSC04014.JPG

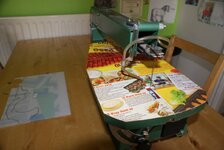
I then used a scroll saw (generously loaned to me by @Nedreud ) to create my protector (you can guess what I had for dinner the previous evening! The cardboard prevents the Lexan being scratched by the metal table of the saw - the Lexan has a plastic cover but better to be safe):

DSC04016.JPG

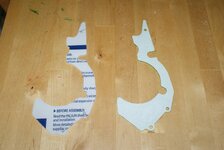
The end result next to the plastic:
DSC04017.JPG

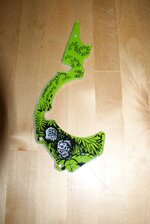
Placed under the plastic - you can see how the protector will provide protection to the outer edge of the actual plastic.
DSC04019.JPG

Now all that is done, the next job is re-populating the playfield at last - more details to follow!
 
I am hoping not too leave them as the rest of the machine is looking perfect but I haven't been able to get them to budge @cooldan . They seem to have ingrained themselves into the plastic over the years - I am open to suggestions as to how to remove them, even though you can't see them when the game is set up and they do not affect the illumination of the translite - they still bug me!

I wish they didn't switch to that plastic holder for Congo, I much prefer the (far easier to clean!) traditional wooden light board.
 
Because I was reading it on my phone I couldn't quite see what the backbox lightboard was. I now understand it's just a big white plastic tray. What did you clean it with? I'm wondering if a combination of Magic Eraser, bleach and Bar Keepers Friend would removed more of those stains? Plastic can be so tricky with discolouration like this where it has been caused by heat as it can be a change in chemical composition (release of bromides) that causing the staining.

You could try the "retr0bright" method. This is a way reversing the discolouration of plastics using hydrogen peroxide and UV. Works really, really well on those yellowed old computers!

http://www.retr0bright.com/
 
I used the above method to whiten my Snes. Works great, wife wasn't to happy with me nicking her hydrogen peroxide though!
 
Before using the water slide paper you need to seal the ink in otherwise you can have issues when putting the paper in water (this paper is the same as the decals you use on model kits so you put the decal in water to remove it from the backing paper before applying it to the target surface). In order to seal the paper you use a clear spray laquer (I used three coats, 20 minutes between each coat and then left the decal sheet for 24 hours before using it).

The water slide decal paper is available in both white and transparent. Transparent makes cutting easier of course but I chose to use white as transparent would have shown too much light through when the insert flashed where as white background would give the original look. The only issue with white is that you have to cut right up to the edge of the printed part and cannot leave any gaps around the perimeter - this took a while!

Finally I had cut the decal out, placed it in warm water for 30 seconds to remove the backing paper and then applied it to the playfield using tweezers which I found enabled me to get precise positioning.

Once I had mounted the decal on the playfield I waited for the backing paper to dry (the bit which had been in the water) and then used that as a template for a piece of mylar. I then protected my applied water decal with the mylar.

One of the great things about this approach is that the water decal is very thin and with the mylar added to protect it, it is now at the same level as the original insert finish so the end result is fantastic (at least in my biased opinion!):View attachment 12797
Cracking job on that decal Kev - well impressed!!!!
 
Before using the water slide paper you need to seal the ink in otherwise you can have issues when putting the paper in water (this paper is the same as the decals you use on model kits so you put the decal in water to remove it from the backing paper before applying it to the target surface). In order to seal the paper you use a clear spray laquer (I used three coats, 20 minutes between each coat and then left the decal sheet for 24 hours before using it).

The water slide decal paper is available in both white and transparent. Transparent makes cutting easier of course but I chose to use white as transparent would have shown too much light through when the insert flashed where as white background would give the original look. The only issue with white is that you have to cut right up to the edge of the printed part and cannot leave any gaps around the perimeter - this took a while!

Finally I had cut the decal out, placed it in warm water for 30 seconds to remove the backing paper and then applied it to the playfield using tweezers which I found enabled me to get precise positioning.

Once I had mounted the decal on the playfield I waited for the backing paper to dry (the bit which had been in the water) and then used that as a template for a piece of mylar. I then protected my applied water decal with the mylar.

One of the great things about this approach is that the water decal is very thin and with the mylar added to protect it, it is now at the same level as the original insert finish so the end result is fantastic (at least in my biased opinion!):View attachment 12797
Genius Kev!!! what softwarer did you use for this - photoshop ? I always find the printed decal is a different size to the original how do you manage this ?

Cheers Kev
 
Hi @newdos, yes I used photoshop. I kept the scale the same and used the maximum DPI of the hand scanner (900 DPI). Printed 1:1 and it came out perfect size!
 
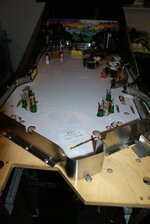
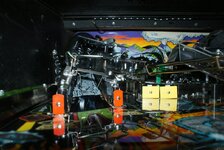
Picking up from where I left off, I placed the playfield protector in position (with the protective film still in place) to see what I could install before fitting it properly. I wanted to install as many parts as possible to reduce the risk of dust getting under the playfield protector.

DSC04013.JPG
 
Most items fitted and the protective film removed:DSC04058.JPG

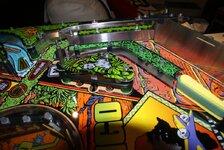
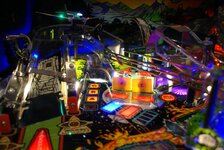
Here you can see one of the nice new shiny cliffys fitted under the protector:

DSC04067.JPG

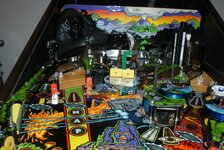
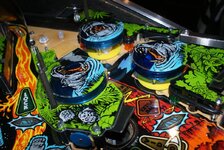
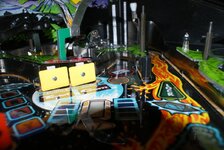
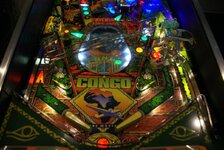
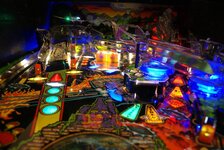
The playfield protector adds a great finish:

DSC04074.JPG

DSC04076.JPG
 
I forgot to mention in the second image of the above post you can see the plastic protector I made sitting under the vulnerable plastic, I am pleased with the way it has turned out!
 
Back
Top Bottom