What's new
Pinball info

Register a free account today to become a member! Once signed in, you'll be able to participate on this site by adding your own topics and posts, as well as connect with other members through your own private inbox!

Complete Chalk Up! Eight Ball Deluxe restoration

Mfresh

Site Supporter
Joined
Oct 7, 2012
Messages
2,216
Location
Marlow on Thames, Bucks
Alias
Paul
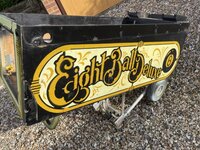
So I picked up a slightly knackered but largely working Eight Ball Deluxe last May via Mark Squires on Facebook, and decided it needed a complete face lift.

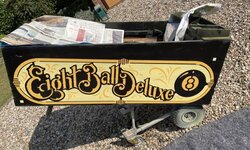
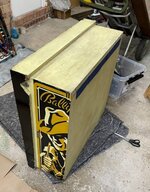
The cab was mainly OK but had plenty of dents and scratches, and some numpty had painted the backbox gloss black at the front.

The playfield was pretty well worn, down to the wood in parts, the plastics yellow and warped.

All in all pretty good for a popular game from 1981, but some t and c was in order. The plan was to get it completed in time for Christmas 2021. Not quite the frenetic pace of @AlanJ, but there we are.
IMG_8676.JPG

IMG_8733.jpg

IMG_7455.jpg


IMG_7466.jpg

IMG_7464.jpg
 
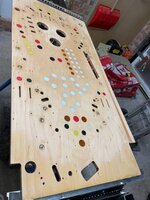
The masterplan called for a new hardtop so the first job was to strip the playfield.

IMG_8025.jpg

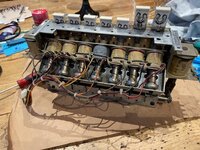
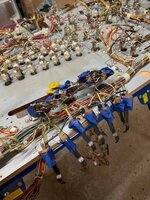
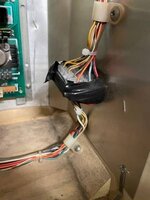
All pretty straightforward except a few horrorshows. One was removing the 7 drop target bank, which was incredibily fiddly and included adding blue painters tape to all the switches and targets to stop all the screws coming out. The other was just where someone in the past cut 18 wires and reconnected them with terminal blocks and insulating tape. Effective, but crude.

Here's the drop target bank, which got throughly cleaned and new drop targets fitted
IMG_8069.jpg

and all the painter's tape. Noone likes having the painters in.

IMG_7889.jpg

plus lovely piece of electrical engineering:

IMG_7629.jpg

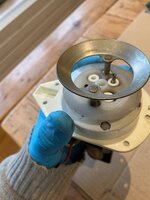
The highlight, on the other hand, was discovering the Bally pop bumper modules. So much easier to remove and renovate than the ones of a few years later.

Just unscrew them and out they come!

IMG_8137.jpg
 
Now here's where it got ugly.

I sanded the playfield down (I love sanding!) and polished the inserts to within an inch of their lives, and put the hardtop on. Simples.

IMG_8027.jpg

IMG_8033.jpg

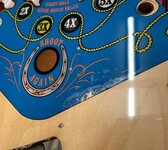
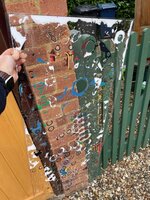
All looked good until I spied a problem Some of the artwork right by the apron stuck to the backing paper instead of the playfield, resulting in this:

IMG_8063.jpg

Aggggghhhhhhhh. All that work to get a perfect playfield and it was fatally flawed.

At this point I decided to contact Bruce, the hard top guy, to find out what could be done. As I understood it the adhesive on hardtops is so hard that once down you can never remove them without ripping up some wood as well. So what to do?

Bruce was actually very helpful, and admitted that there had been a batch of bad hardtops which had this problem. So he promised to send me a new one free of charge, and said just to pull the old one off. Some would come off, and some would stick. So that's what I did...
 
Last edited:
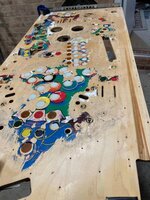
So it turns out that you can pull a hardtop off, and this is what you are left with: a very sticky and half arted playfield

IMG_8068.jpg

and a half arted piece of hardtop. And a very ****ed off Pavlov.

IMG_8084.jpg


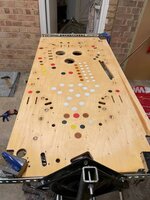
Then what you do is spend a day with scrapers, sanders and glue solvent, and after the day is out you are back to this:

IMG_8085.jpg

In other words back to where I was a few days ago, but minus one hard top.

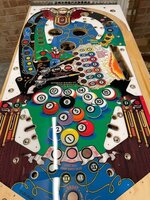
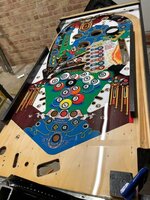
Anyway, Bruce was as good as his word and in just a few days a new hardtop arrived, and this time the results were as beautiful as a hatful of Claudia Schiffers:

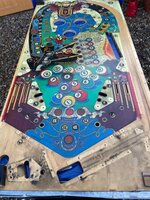
IMG_8130.jpg
 
So after cleaning or replacing multiple mechs, components, and switches and rebuilding all three flippers, I though I might as well stick the playfield back in the cab to see if it still worked. Fat chance.

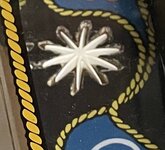
Firstly, I realised that I hadn't read the instuctions for the hardtop. Basically they tell you that star inserts are a bit of a problem, and that it is essential that you remove them before putting down the hardtop. Then you can make a hole in the hardtop for them and then reinsert them. Which I didn't do.

So if you are a sillybilly like me and don't read the instructions you get this:

star bad 2.JPG

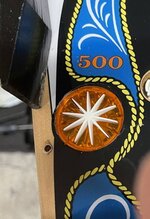
And if you like you can add a star to make this:

star bad.JPG

Definately horrible. So I contacted Bruce again and asked him what other people who didn't read the instructions had done. He told me that noone had ever done it before. Basically I am the most stupid person on earth.

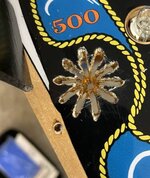
Anyway, the good news is that by drilling the **** out of the insert and then heating it with a heat gun from beneath I managed to get it out, and then with a dremel and iron resolve I enlarged the hole in the hardtop and popped a new insert in as it was suppoed to be:

star good.JPG
Moral: always read the instructions.
 
Last edited:
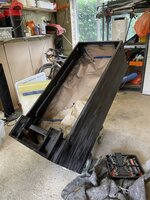
OK, so now it's time to deal with the cab and the head with the black glossy paint.

So, lots of sanding. Did I say that I love sanding?
IMG_8680.JPG

IMG_8735.JPG

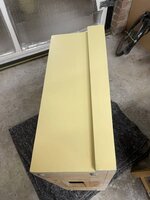
and then this time get the colours right. So black for the cab, and a kind of tobaccoey yellowy ivory for the backbox. I found a place online that makes spray cans to any pantone colour, so with a bit of colour matching I think I got pretty damn close to the original

IMG_8887.JPG

IMG_8906.JPG

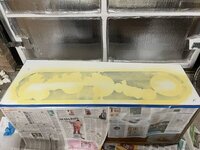
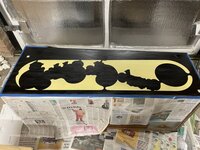
And then on to the frankly terrifying process of stencilling. The thing about stencils is that if you get some good ones from Pinball Pimp they cost abot $160 plus delivery, and there is huge potential to f%*k things up if you apply too much or too little paint, or let the paint dry to long, or not long enough, etc etc etc.

So my little secret. I put way too much paint on the side of the backbox and completely screwed it up. So much so that I refused to take any pictures. Fortunately the Pinball Pimp was pretty understanding and sent me a new side stencil. So after a quick phone consultation with @AlanJ I learned that less is more when it comes to applying paint, and whip the stencils off after about 5 minutes.

That meant sanding the side back to bare wood again (I really really like sanding!) and then having a crack at the cab.

First layer was tobaccoey yellow, which was pretty good. And the second layer was darker yellow, also good.

IMG_9008.JPG

IMG_9011.JPG


IMG_9055.JPG

Same with the backbox, and all looking good. So time to put on new side rails and get reassembling!
 
Last edited:
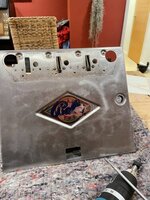
First a bit of coin door cleaning

IMG_8865.JPG

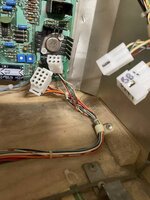
and replacing that horrid nasty terminal block with some decent connectors. Connectors do my head in what with housings and pins and sockets and which housings are for pins and which for sockets and getting the crimps just right but in the end I got this:

IMG_8492.jpg

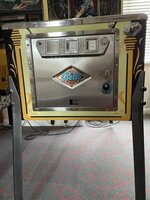
and then reassembling, and as a very final touch, a new Bally sticker which I bought from @new forest pinball back last summer and somehow still managed to find!

IMG_9164.JPG

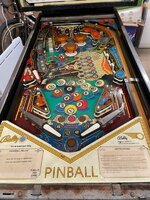
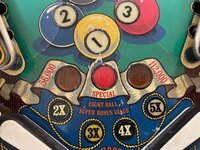
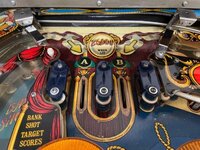
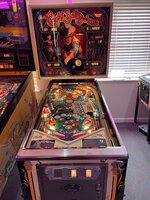
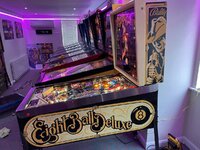
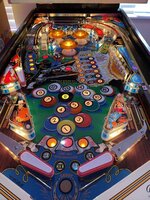
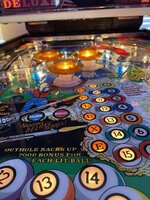
And that's how I have come to the finished article. It's a beaut, and really good fun to play:

IMG_9166.JPG

IMG_9167.JPG

IMG_9168.JPG

IMG_9169.JPG

Thanks for reading - and come round any time to play it!
 
Great work Paul! Real test of patience that hardtop kerfuffle. Glad to hear they sent out a replacement. From our experience they do take keeping a good reputation seriously. We love the hardtops. (Only real worthwile alternative these days when a new playfield is unavailable).
EBD is one of my favourites. Fond memories of playing it new in poole quay amusements (and spinning a 10p in the 50p slot for 5 games 😎).
Enjoy it. Hopefully visit Soon sometime.
Keef…..
Oh glad you found the decal! I totally get losing stuff!……..
 
What a wonderful restoration 😍

And makes me feel better about making mistakes (and solving them admirably)… :)
 
Wow that play field 😍😍😍😍
Absolutely beautiful job you got round your mistakes like a boss, massive well done.
Don’t think I’ve ever played one of these but do remember them.
Iconic back glass 👌🏻
 
Had the pleasure of playing this recently. Great job as always Paul.
 
Back
Top Bottom