What's new
Pinball info

Register a free account today to become a member! Once signed in, you'll be able to participate on this site by adding your own topics and posts, as well as connect with other members through your own private inbox!

Complete Bram Stoker's Dracula - (yes I'm doing another one)

s000m

Site Supporter
Joined
Apr 12, 2021
Messages
3,364
Location
Swindon
Alias
Scott
Here we go.

Hold on here comes the speed hare:

🐇


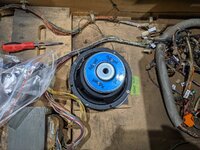
Received this morning, unfortunately it arrived DOA. Diagnostic errors and no display on the DMD. Have agreed to look at it post cabinet work.

Project details:

  • Cabinet Prep
  • New Cabine Decals
  • Powder Coated Rails, Legs, Hinges, Coin door frame and Lock Bar
  • Installation of new parts (Pinsound Plus etc.)
  • Custom Speaker Panel Artwork
  • Custom Backglass Artwork

Expanded Scope of works so far:

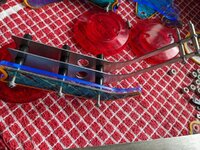
Playfield Strip and general restoration of ramps and playfield. Treat existing plastics etc.
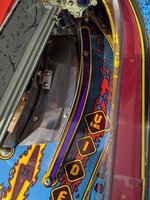
Diagnose and hopefully resolve DMD issue/errors.


Here she is:

PXL_20220915_072837758.jpg


After trying to test it and relaying the DMD issue etc I wasted no time stripping it down and patching holes/repairing cuts and dents.

Back box had Latch damage to the bottom, pretty severe.

PXL_20220915_072842817.jpg

Guides on the back looked 'OK' but i'm going to patch them up and make them look better:

PXL_20220915_072846923.jpg

PXL_20220915_072849209.jpg

Began the wood filling journey:

PXL_20220915_075525939.jpg

PXL_20220915_075528330.jpg

PXL_20220915_075531612.jpg

PXL_20220915_075533466.jpg

PXL_20220915_075540203.jpg

PXL_20220915_075542115.jpg


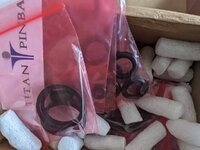
Packed up the new rails, legs and lock bar. Along with the existing Hinges and Coin door frame. Took my lock bar as client wants the same powder coat as mine.

PXL_20220915_090851137.jpg

Sanded down area's and built up another layer when I got back:

PXL_20220915_135057773.jpg

PXL_20220915_135100860.jpg

PXL_20220915_135103285.jpg

PXL_20220915_142050519.jpg

PXL_20220915_142103595.jpg
 
Next up labelling the back box headers:

I've stepped up to a lable maker!

PXL_20220915_150013930.jpg

PXL_20220915_150015559.jpg

PXL_20220915_154850697.jpg

PXL_20220915_154859690.jpg

H Channel is a big buggered, will need to replace it.

PXL_20220915_175515797.jpg


Man this was rusty! I couldn't leave it like that.

PXL_20220915_180205704.jpg

Magma rust remover to the rescue:

PXL_20220915_180436376.jpg

PXL_20220915_180800474.jpg

Cleaned up the inside of the cabinet with cloths and my shop vacuum

PXL_20220915_180803847.jpg

Cabinet walls are a bit knocked up:

PXL_20220915_182154357.jpg

Cleaned them up, sanded them down a bit and applied new paint:

PXL_20220915_182158732.jpg

PXL_20220915_184034318.jpg


Legs have some pretty major damage done to the cabinet corners, will need to sort those at the workshop tomorrow

IMG-20220915-WA0093.jpeg

Playfield out. God I hate remove this bugger he's so heavy compared to say Addams Family.

PXL_20220915_190101186.jpg

Just need to remove the buttons and flipper boards etc. Ready for tomorrow:

PXL_20220915_190140895.jpg

Job done.

Tomorrow I pickup the van, put both pins in and jet off to @jagman for a fun filled day :D

PXL_20220915_191208460.jpg
 

Attachments

  • PXL_20220915_154852293.jpg
    PXL_20220915_154852293.jpg
    191.4 KB · Views: 6
What cab paint did you use inside? I have a few days off next week and plan to move on my BSD a little.
Oddly, my machine to work on after is my TAF which has had a long time since I stripped it and cleaned topside. Good it hear the playfield is lighter to remove.
 
What cab paint did you use inside? I have a few days off next week and plan to move on my BSD a little.
Oddly, my machine to work on after is my TAF which has had a long time since I stripped it and cleaned topside. Good it hear the playfield is lighter to remove.
Hey Mate, I use Plastikote Satin Black. It provides a decent spread, and nice finish.

You can pick it up from Hobby Craft / Wickes.

I burn through them. I've gone through 3 cans already and expect to use another 3 more between both pins.

Was speaking with Ant on the subjet of rattle cans. He's going to invest into a proper paint system. Space isn't on my side so I'm going to stick with rattle cans for now.
 
Been at the workshop all day. Addams was first on the cutting line but all the prep work for BSD is done. Ready for sanding and paint prime.

PXL_20220916_133345006.jpg

PXL_20220916_145453500.jpg

PXL_20220916_145455919.jpg
 
Last edited:
Unfortunately the decals haven't arrived so work is halted until they arrive.

🤔

PXL_20220917_122625941.jpg
 
Decals arrived in the week but I couldn't start BSD again until the weekend.


Stripped off the decals, sanded down, wood filled, and sanded again.

Burnt through many pads!

PXL_20220924_105329291.jpg

IMG-20220924-WA0010.jpeg
PXL_20220924_160456133.jpg

PXL_20220924_160505349.jpg

PXL_20220924_160510771.jpg

PXL_20220924_174320484.jpg
 
Leg protectors on.

Just showing to show I do cut around the protector!

I hate doing it, especially when it's not my cab!

Shot of cut halfway through:

PXL_20220925_181704516.jpg

All protectors sorted:

PXL_20220925_185316049.jpg

PXL_20220925_185320633.jpg
 
Parts are back from the powder coaters.

PXL_20220930_124805420.jpg

PXL_20220930_124808227.jpg

Began assembly of the parts back into the cab.

The left channel guide is in bad shape so it's been agreed I should replace it.

The glass channel at the back was equally bad so I've used my Addams one as I'm going metal in mine.

PXL_20220930_140528729.jpg

PXL_20220930_143003684.jpg

Bolts were thrown into the tumbler

PXL_20220930_164744075.jpg

PXL_20220930_164751460.jpg

Ultrasonic bath I have is tiny but fine for small plasticsPXL_20220930_164916087.jpg

Installed new flipper buttons as originals had burn marks!

PXL_20220930_165640228.jpg

The back box metal looked grimy and grim. Client didn't ask me to clean it. But I just couldn't leave it like it.

PXL_20220915_170609929.jpg

PXL_20220930_202856774.jpg

Wire holders are in for a soak overnight.

PXL_20220930_203924030.jpg
Coin door now installed, cleaned and mounted with the powder coated frame.

PXL_20220930_210448610.jpg

Tomorrow the playfield goes back in!
 
Playfield was halted due to glass channel being replaced 😑.

Decided to focus my efforts on the interior cab prep.

Cleaned the clips:

PXL_20220930_215846340.jpg

Attached on side rail:

PXL_20221001_173123636.jpg

Backbox polish completed; looks dark due to the reflections of the black and me!


PXL_20220930_221043090.jpg

Sanded the top of the back box. Price paid was only for applying decals not a cabinet restoration. But then I see Ants work and I can't let these decals be mired by some knackered wood work.

Original top:

Had planking 🫤

PXL_20220915_190140895.jpg

Sanded and painted:

PXL_20220930_222305680.jpg

Dry:
PXL_20221001_091543301.jpg

We agreed to replace the old latch, it was originally off centre and showed evidence of it being moved 4 times!

IMG-20221001-WA0004.jpeg

Sanded and painted, new latch fitted:

Added a sticker for the lolz
PXL_20221001_114627578.jpg

Replaced the old sub, this one is caked in rust:

PXL_20221001_193345660.jpg

Pinsound sub fitted:

PXL_20221001_194804479.jpg

Machine is getting closer to completion:

PXL_20221001_194801373.jpg
 

Attachments

  • PXL_20221001_194708274.jpg
    PXL_20221001_194708274.jpg
    216.1 KB · Views: 2
Again wasn't asked or agreed but I cleaned the harness anyway.

Ultrasonic on the clips too.

PXL_20221002_141525375.jpg

PXL_20221002_143633200.jpg
 
Last edited:
Glass channel has finally arrived.

Also received the Backglass and speaker panel.

Looks like I can finally get some progress done!

IMG-20221006-WA0005.jpeg

PXL_20221006_084009688.jpg

PXL_20221006_084006602.jpg
 
Lots of progress today, playfield back in the cab!

PXL_20221006_145517060.jpg

Powder coat really brings it together

PXL_20221006_142655286.jpg

Added some nylon washers to protect the powder coat

PXL_20221006_142659828.jpg

Apron is knackered, agreed to sell my old one as this one looks naff

PXL_20221006_145518853.jpg

PXL_20221006_145520260.jpg

Playfield looks grim and dull, agreed to do a basic playfield strip, clean and polish

PXL_20221006_145522807.jpg

PXL_20221006_145524485.jpg

PXL_20221006_145526322.jpg

PXL_20221006_145528364.jpg

PXL_20221006_145530053.jpg

PXL_20221006_145531438.jpg

PXL_20221006_145533564.jpg

PXL_20221006_145535144.jpg

PXL_20221006_145536848.jpg

PXL_20221006_145546286.jpg

Time to strip down

PXL_20221006_164650129.jpg

Many screws, many bolts

PXL_20221006_175229252.jpg

PXL_20221006_175654344.jpg

Cleaning time

PXL_20221006_180246222.jpg

PXL_20221006_180248763.jpg


Deionised water, looks grim it's after doing all the plastics

PXL_20221006_195437401.jpg

Example of one set of plastics after cleaning


PXL_20221006_195503004.jpg

Mylar time playfield has signs of planking and wear.

PXL_20221006_211102277.jpg

PXL_20221006_211106082.jpg

PXL_20221006_211218298.jpg

PXL_20221006_211219686.jpg

PXL_20221006_211222894.jpg
 

Attachments

  • PXL_20221006_145539751.jpg
    PXL_20221006_145539751.jpg
    219.4 KB · Views: 2
More pictures

More mylar application

PXL_20221006_211230095.jpg

PXL_20221006_211333891.jpg

PXL_20221006_211450774.jpg

PXL_20221006_211820259.jpg

PXL_20221006_211904080.jpg

Leaving the metalwork to tumble overnight.

Ordered some titans as agreed old rubbers were falling apart.

PXL_20221006_213506278.jpg
 
Backbox board was dirty, tried to clean it up with White vinegar, no dice. Agreed to put on a new coat. Can't have my wifes backglass being lit up by this.

IMG-20221007-WA0003.jpeg

1st coat down

IMG-20221007-WA0010.jpeg

Final coat done

PXL_20221007_151137792.jpg

Next up played bob the apple with all the metal parts from the tumbler. Man I need to use my sieve I literally forgot I had it ><

IMG-20221007-WA0025.jpeg

All the old rubbers, shame to throw them in the bin but I don't know what else to do with them

PXL_20221007_120552063.jpg

Made a judgement call to use @Colywobbles plastic protectors he did for me a while back, before I did my custom BSD. Looks like they finally get some use!

PXL_20221007_134321643.jpg

IMG-20221007-WA0028.jpeg

IMG-20221007-WA0030.jpeg

PXL_20221007_141847967.jpg


PXL_20221007_145648415.jpg

Titan rubbers arrived this morning, thanks again to @David retro for the fast and efficient service as always

PXL_20221007_145913175.jpg

PXL_20221007_145915063.jpg
 

Attachments

  • PXL_20221007_110321643.jpg
    PXL_20221007_110321643.jpg
    123.5 KB · Views: 1
  • PXL_20221007_103704445.jpg
    PXL_20221007_103704445.jpg
    103 KB · Views: 1
  • PXL_20221007_083042181.jpg
    PXL_20221007_083042181.jpg
    79.7 KB · Views: 1
  • PXL_20221007_141851702.jpg
    PXL_20221007_141851702.jpg
    206.5 KB · Views: 1
  • PXL_20221007_141850263.jpg
    PXL_20221007_141850263.jpg
    253 KB · Views: 1
Wasted no time installing the rubbers.

Previous owner didn't screw in the opto mounts instead they used the Opto PCB'S to secure them. 🤷‍♂️

New screws added should make the castle lock area more reliable.

PXL_20221007_164727744.jpg

Titan black rubbers installed. Got nearly all of em done.

PXL_20221007_182528203.jpg

PXL_20221007_182529607.jpg

PXL_20221007_182532370.jpg

PXL_20221007_184049619.jpg
 
Titan Rubbers installed, all plastics back in place. Nearly all ramps done but I need to sort the pop bumpers. Will see if I have any lamp holders with legs left as some bright spark jury rigged a bayonet in one....

Scopes been expanded to fit out comet LEDs I know people like incandescents, especially on this game. But come on seriously look at the damage they've done to the ramp.

IMG-20221008-WA0017.jpeg
He's got a LED OCD board so we've got a compromise in my book.

IMG-20221008-WA0021.jpeg

IMG-20221008-WA0023.jpeg

Had to make own insulation card as it was missing on this game.

IMG-20221008-WA0041.jpeg

Yup I know clip is on backwards I noticed after I took the shot🤣
PXL_20221008_144900478.jpg

PXL_20221008_142416411.jpg

Morpheus mod installed.

IMG-20221008-WA0048.jpeg

PXL_20221008_100109794.jpg

PXL_20221008_095131984.jpg
 

Attachments

  • PXL_20221008_095039348.jpg
    PXL_20221008_095039348.jpg
    76.8 KB · Views: 1
Next up I need to clean the underside. It's pretty grim...
 
Lots of progress today, playfield back in the cab!

View attachment 183121

Powder coat really brings it together

View attachment 183122

Added some nylon washers to protect the powder coat

View attachment 183123

Apron is knackered, agreed to sell my old one as this one looks naff

View attachment 183124

View attachment 183125

Playfield looks grim and dull, agreed to do a basic playfield strip, clean and polish

View attachment 183126

View attachment 183127

View attachment 183128

View attachment 183129

View attachment 183130

View attachment 183131

View attachment 183132

View attachment 183133

View attachment 183134

View attachment 183138

Time to strip down

View attachment 183139

Many screws, many bolts

View attachment 183140

View attachment 183141

Cleaning time

View attachment 183142

View attachment 183143


Deionised water, looks grim it's after doing all the plastics

View attachment 183144

Example of one set of plastics after cleaning


View attachment 183145

Mylar time playfield has signs of planking and wear.

View attachment 183146

View attachment 183147

View attachment 183148

View attachment 183149

View attachment 183150
Powder coating looks fab especially on coindoor surround but a quick tip re-paint all of your black bolts - here's some before and afters i did. really finishes the job off!!


IMG_5018.JPGIMG_5019.JPGIMG_5020.JPG
 
New hinges I spoke of:

Any load bearing elements I've gone new coin door is just a personal choice.

IMG-20221008-WA0063.jpeg

Underside was gross. I did what I could but this could end up turning into a restoration at this rate. It was only supposed to be decals.

PXL_20221008_152542165.jpg

PXL_20221008_152544031.jpg

PXL_20221008_154253020.jpg

IMG-20221008-WA0056.jpg

IMG-20221008-WA0057.jpg


Informed Col he's going to want a new cover. It will do for now.
IMG-20221008-WA0058.jpg

PXL_20221008_172313155.jpg

PXL_20221008_172554251.jpg

PXL_20221008_175252492.jpg

PXL_20221008_180557041.jpg


PXL_20221008_182756986.jpg
 

Attachments

  • PXL_20221008_162352647.jpg
    PXL_20221008_162352647.jpg
    159 KB · Views: 1
So when this machine arrived it had no working display.

Was hoping it was just poorly wired or loose connections.

Tried a known working DMD driver board, known working DMD.

No display. I check voltages to the DMD. It looks like it's getting power OK.

Even tried another Power Driver Board.

Tried a different set of ribbon cables.

Last thing to try is the MPU?

Couple of things to note.

I hear no sound, attract mode seems to be working, same with GI.

Sometimes I can observe the machine boot cycling.

The VUKs and magnet motor keep firing.
 
Ok so got the display working. Sound and VUKS still firing.

DMD came back by:
Changing the ribbon cables for new ones.
Cleaning the pin contacts.


I used my BSD MPU board, still random firing VUKs.

So it's not the boards, it's either the connectors or the opto board underneath.
 
Back
Top Bottom