What's new
Pinball info

Register a free account today to become a member! Once signed in, you'll be able to participate on this site by adding your own topics and posts, as well as connect with other members through your own private inbox!

Complete (Yet another) Cosmic Gunfight

HomerRamone

Site Supporter
Joined
Mar 20, 2013
Messages
1,223
Location
Newcastle
Alias
HomerRamone
Thought id have a go at doing a log of my adventures in cosmic gunfighting. (I was going to do this with Elektra but never did. I was remotely happy at managing to get it from "it lights up and that's about it" to something that, whilst I might not have restored to the level some people are do it worked, and played just fine - which is a lot more than it did when I got it . (And think looked nice with those LEDs - even if its not everyone's cup of tea).

So, having sold the aforementioned Elektra I wanted something new to tinker with (before the space that Elektra was living in previously was filled up with "stuff").
@Tilt_Birmingham had a Cosmic Gunfighter up for grabs (which although I knew nothing about - I figured its a SS Williams machine from the 80s - be fine !)
Caution was therefore lobbed in the general direction of the wind. Conversations were had, pictures and videos were sent and deals were reached.
This was a wee while back. Martin collected it not long after and it was delivered here Monday. (The delay is the price I pay for living in the semi-deep north !)

Overall its in pretty good shape I think. (Which is probably just as well - if it was 1/2 as bad as the one @AlanJ has I think I would give up now :) )
It's had all the boards replaced with a set of Rottendog ones.
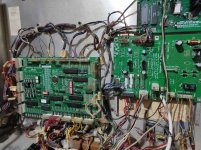
log1a.jpg

(But the originals came with it \o/).
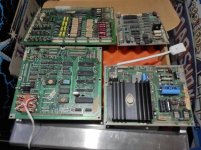
BOARDS.jpg

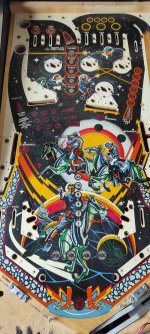
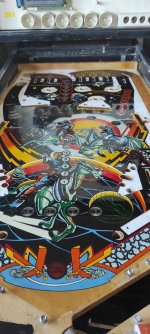
Powers up and plays. Playfield is in decent shape. Cabinet is pretty good too.
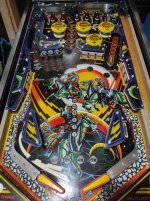
log1d.jpg

There's a whole bunch of cosmetic stuff I can likely do... The drop targets are as good as bare. Few minor scratches and scrapes in the cabinet. Legs are looking a bit depressed. I'm sure there will be more.
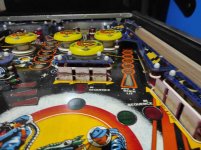
log1c.jpg

Probably the worse part about it overall is the back glass. I mean at a glance its ok.
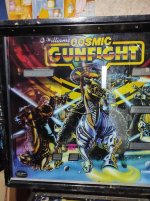
BACK1.jpg

But a bunch of the paint has peeled off and a sort of plastic overlay has been applied. I kinda works - and its surely better than an empty space where once there was image. But maybe a new backglass is in order.
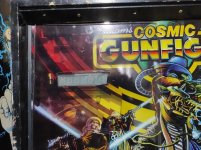
BACK2.jpg

However, first and foremost the other thing that's amiss is its resetting itself. Flip the left or right flipper as much as you like and all is fine. Flip 'em together and its reset city.

I've been given some pointers - I gather the 5v line is the place to look. Course its not got the original boards so "simply look here on the PSU board" isn't going to work here.
I'm sort of tempted to put all the original boards back and see what happens...
 
First port of call then. Try and stop it resetting when you double flip so I can have a bit of a play.
Opinion sways towards either an issue with the PSU or a dodgy connector.
Since its got a replacement PSU board and the basis of faulty PSU seems possibly be based on assumption they are 30+ year old boards and such I thought connectors are the likely candidate. Certainly easier to check those. So the connectors it is. Starting with some intense wiggling, followed by inspection of the Molex connectors.
After said intense wiggling I can flip both flippers a little more furiously - but it still resets. Oh and now I seem to have lost all the displays. Another bit of jiggling and they came back.. and nope, they've gone again.
A closer look and the multi-meter is required I think.
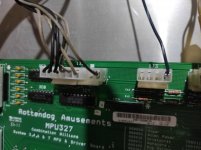
Started with the obvious - the main connector that sends the power out of the power board. There's a bunch of 5v and ground wires and a 12v there too. On inspection it wasn't great. Looks like the wires have been in and out of the Molex connecter a few times and a few of pins have missing.. er.. whatever those things are that slice into the wire are called. Voltages seem OK - but decided replacing the connector couldn't hurt. I have a couple of spare ones lying around. So I chopped the dubious looking bits out of the wiring and soldered them together again and popped a bit of heat shrink tubing over the joints.
1 replaced Molex connector later and ... its exactly the same. Furious flipping causes a reset (and still no displays).

Decided I at least need to get my displays back - and I think its got to be an issue with wiring since jiggling made 'em go off (and brought 'em back and go off again).
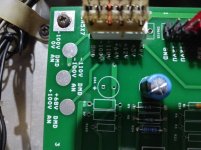
Started by checking the voltages. Voltages are there. Although the power out carrying these the 100v line is connected to a pin labelled 64v. However, the meter says that its 100v not 64.And pin 4 is where it was on the original boards say the 100v line should be so that must be correct. (There's a pin labelled -100v which has no wire attached).
power.jpg
The voltages are correct at the master display board too - so its not a power issue causing the missing displays. Back to the CPU wiring connectors that were previously jiggled furiously. Since all displays are missing, I'm guessing that its one of the more critical lines that feeds the display. So the blanking feed seems a good place to start. CPU connector on this wasn't brilliant either - so replaced that. Not sure about the display end - but I have none of those so that will have to stay.
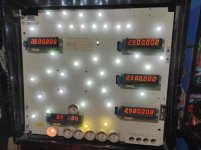
And finally some progress (even though its only fixing what was working prior to jiggling) Displays are back.
displays back.jpg
I'm thinking I might invest in some new Molex connectors (and some of the ones on the master display board) and replace some of them...We shall see. Decided to leave it there for the evening. Quit whilst I'm sort of ahead.
 
Scrutinized the boards this morning - pondering the option of replacing the rotten dog PSU board with the original one. I mean they are a direct swop. Though I have to assume the PSU board was replaced for a reason. (Probably a stupid thing to do.. assuming things is always never a good idea).
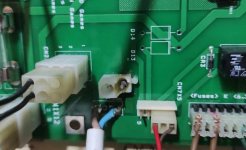
Even the replacement board is certainly showing signs of stress - at least the GI power section is. The "real" connector is broken and wires have been soldered direct to the board.
rotten-psu.jpg

A connector has been fitted to the other end of the cable.
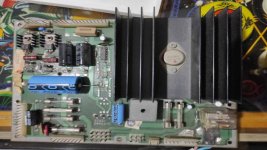
The original board looks ok - a little dusty.

real psu.jpg
But this has been fitted to the original board also - which has also had the wires soldered to the board. But it too has had wires soldered to the board. And the same style inline connector on the other end. So I *COULD* just try swopping. But the original board has had issues with the GI power too.
real close.jpg
Or of course I could just wait and replace the Molex connectors first. Since poking around the 5v/gnd connectors seems to have some effect on how frequently it resets. Possibly there's a ground issue lurking somewhere.
 
If you do swap it, then dont plug in the MPU, driver and displays connectors to start with, then you can test all the voltages are ok first.
 
As these things often do - impatience got the better of me early this afternoon. Headed back to the gunfight and decided I would check the voltages to the CPU board when flippers are furiously flipped.
I tried getting the probes to stay in the connectors to free my hands for furious flippage, but despite my best efforts they refused. I therefore summoned the help of my better half.
Poised with my probes and meter I issued instructions to flip both flippers real quick. Flip...Flip...Flip... No, no no, real quick. Flip..Flip..Flip "that's as fast as I can flip"
"Like this... FlipFlipFlipFlipFlipFlip"
Hang on.. why hasn't it reset. More furious flipping.. and it still hasn't.
<several games pass>
Well - I guess its deffo the connectors then. 5-6 games and no reset !
I shall await the arrival of new ones with baited breath.. But I might just have one more go... I think I like this... a lot :)
 
Not done much this week. But something is better than nothing.

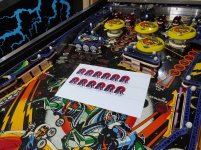
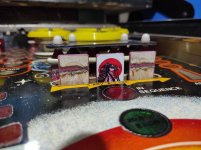
First I created myself some new decals for the drop targets.
new decals.jpg

Did a real rough test install of one. Obviously I'm going to remove the targets to install them "for real" - and clean the targets up when I do (And yeah ill trim them properly too :)). But I chucked one on a target just to see they looked ok. Quite happy with that.
test install.jpg

New crimpy Molex connectors arrived yesterday too. So I replaced the connectors on the display and one of the power connectors on the MPU to check it resolved the randomly missing displays and reset issues.
new molex.jpg

And indeed it does. Of course I had to play a bunch more to test this - and will have to do so again today I think just to be sure.

Last but not least I swopped out some of the bulbs for some LED ones I had. There seemed to be a random mix of incandescent, and LEDs. And even the LEDs are mixed.
So there is more consistency now.. which looks a little better.
light.jpg

Progress.
 
Having replaced some of the missing bulbs from the backbox I quickly realised why they were missing. Because of the temporary repair to the peeled back-glass bulbs in there shine straight thru. What it needs is a new back-glass of course, but in the meantime...I thought I would just fabricate myself a diffuser to help a bit. Tried a small square of thin plastic and it seemed to do the job so I created a larger one.
diffuse.jpg
Thought I had nothing better to do day than pop that on and then maybe whip out the drop targets, clean them and bang the new decals on. So I popped the thing on.. and it certainly helped. I need to shave a wee bit off the left edge so it doesnt impede the door opening, but will do until I get a new back-glass. I better have a quick go just to check.
First ball, started doing OK and boom. Reset.

I guess its not the Molex connectors then. At least its not *just* those. Pah. (Still new ones wont hurt).
At least with the new connectors I can get the probe to stay put in the connectors to free my hands to flip and check the voltage. Which certainly drops when you flip furiously (Course its a digital meter so its kinda hard to see much exactly how much prior to reset - it looks like it drops from 4.95 to around 4.9 - as I type this I realise I should have checked what the 12v does at that point).
However, having poked and prodded a bit more - its stopped resetting again. So I thought I need to take bolder steps. Out with the board !

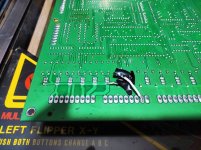
And out it came. flipped it over to see if maybe there was some dry joints on the connector pins.. No they look ok.. Hang on though - what's this down here !!
rear of board.jpg
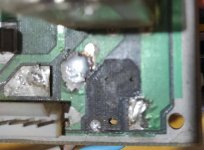
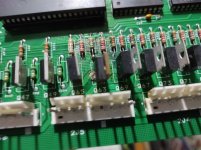
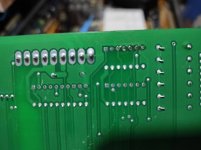
Seems this board has been repaired before... Let me just see what Q63 is. Oh, its a lamp driver. So its not that. Hmm. I mean whatever's going on there with that repair isn't ideal - but its presumably not the issue here - though out of interest im going to have to look up what lamp that is. Component side of the board is showing signs of stress too:
transistor.jpg
OK, lets come back to that another day. Back to the top of the board where the connector lives. It seems there have been issues here before too - looks like that IC has been re-soldered at some stage. Pretty sure those ICs are related to the "special solenoids" - which I guess includes the flippers.
resoldered.jpg
Joints look OK though. (Why isn't there a socket there :( )
I'm resisting the urge to try the original MPU and Driver board in at this point. This might not last however.
For now I shall resign myself to putting this board back and coming back to it later.
(Wanders off feeling slightly gloomy)
 
Since the postie was so kind to me today I thought it be rude not to do something Cosmic. (I guess my tasks are somewhat minor compared to the cabinet rebuilds @AlanJ and @AndyB have been doing - rebuilding cabinets and the like. But that's probably just as well. Whilst id love to be able to do all that cool cabinet repair stuff... well a man has to know his limitations).
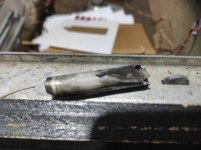
Anyhoo - having started installing the flipper rebuild kit that arrived earlier in the week one of the coil sleeves decided that it was just far too attached to the coil and would rather kill itself than leave. So that's exactly what it did:
busted.jpg

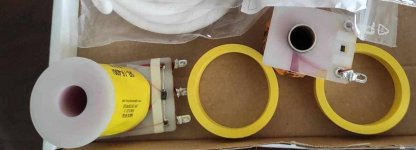
This wouldn't have been a problem if not for the fact that apparently it would seem this was a "one sleeve flipper coil". New sleeve wasn't going in there. (I guess I could have left the old sleeve but I thought no I'm not being defeated by a mere flipper coil nor sleeve- besides it was too late for that :)

I say not defeated.. I don't consider replacing the flipper defeat. More of an draw. However now that I was armed with a new coil I shall not be so meek.
presents.jpg

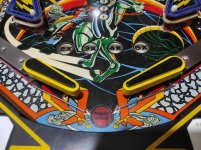
Something else I had decided I was gonna do was fit some blue translucent flippers I just happened to have lying around - whilst the original gunfight flippers were perfectly serviceable I figured blue ones would look pretty sweet and in tune with the rest of the colours on the playfield. So I popped those on too along with the yellow rubbers that arrived today.
Quite pleased with how it looks.
blooo.jpg
 
In contrast the the leaps and bounds other people are making ive done nothing with this for ages.
Well I say nothing... its getting way more play than Roadshow and Addams currently :)

I have rubbers to install - and im gonna strip the playfield down to do it. Sort out the mixture of bulbs, and rebuild the drop target banks. But once I start I wont be playing it for a while so...
 
Well I say nothing... its getting way more play than Roadshow and Addams currently :)

Which isn't bad, considering that Cosmic Gunfight was positioned as the budget '25c alternative' to its contemporary, the 'fully loaded' Barracora

Edit - in fact it was 'the 25c solution.. Affordable to buy.. and to play'. I'm surprised at the production figure of barely over 1,000. A good number must've come to Britain, because it seemed to be everywhere at the time.
 
Last edited:
At least you are playing yours, mine still in the garage awaiting work......... it has been overlooked by the 8 Ball Deluxe project. I'll get back to it in a month or 2.
 
Which isn't bad, considering that Cosmic Gunfight was positioned as the budget '25c alternative' to its contemporary, the 'fully loaded' Barracora
Used to have a Barracora. Was pretty good. Loved the SFX. (Mind you the CG ones are pretty sweet too)
At least you are playing yours, mine still in the garage awaiting work......... it has been overlooked by the 8 Ball Deluxe project. I'll get back to it in a month or 2.
(Maybe im stalling to see how you fix yours up ;) )

Truth is I have too many irons in the fire. Not just pins. Just stuff.
 
Madness :)

Your making a grand job of them though. And you'll still probably finish CG before me.
 
Well I finally bit the bullet and started stripping the playfield down...
Not least because it kicked my ass yet again...it was becoming quite frustrating so here goes nothing
playfield topdown.jpg
 
Nearly stripped. Only the pesky pop bumpers to remove.
stripped.jpg
Reckon I'm going to put some kind of connector on the wire to make it simpler should it ever need to come out again. Ive been pondering a simialr plan for the wiring to the drop target banks too..
 
Removed the last few stragglers of stuff on the playfield today. With the exception of the ball kicker at the bottom.
Theres a number of wires for the drop target banks and so I was going to put 8 way connectors on to make them easier to re-attach. But I only had 6.
Then I fell out with the crimping tool I needed to use so instead remove the switches from the bottom and taped them together after labeling them.
Then remove the target assemblies too. I also made a start trying to effect some kind of repair to the damaged area on the playfield. Bit of primer then some black then rubbed it down with several sandpapers.
Will maybe try another coat of black tomorrow see how it looks

IMG_20210704_170940.png
 
Did a whole bunch of touching up on the playfield in general last couple of days. (I still have the horses head to sort out.. I have [yet] another plan.. Which I can possibly try out next day or so. And I have an "if all else fails plan" if that doesnt work.

Probably hard to see the differences with my touchups but once I cleaned it down the was a ton of places with wee dots of paint missing.
I also redid the black outline around the lamps. The touched up areas are a decent match colour wise they are just flat not shiny. Gonna coat the whole playfield when im done.

I'm also thinking I might redo the white areas where all the GI goes - which will brighten it up I think once its all back together.

IMG_20210707_194550.jpg
Course if it looks grand when its all lacquered im going to be tempted to do the cabinet too - believe stencils are available.
 
ps if ordering stencils give me a shout before as it’s always worth joining orders with someone else to save on postage.
 
Will do, thanks.

I can always do the box down the line once its all back together I guess - you could take the playfield out complete ?
 
Coated the playfield now. Rather pleased with the result
IMG_20210714_144316.jpg

Looking pretty shiny. Looks great in the flesh imho.
IMG_20210714_144322.jpg
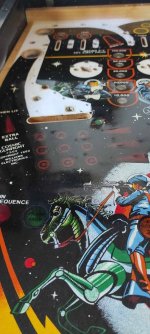
Mr Horse with his new coat so to speak :)
IMG_20210714_144309.jpg
Just need to put it all back together now.
Might need to do the cabinet now - really pleased with how this has turned out.
 
Thought I would clean the drop target banks today. Not that you really see much of them but I wasnt going to let that stop me.
IMG_20210718_142119.jpg
The coils are still attached to the playfield - will refit when I refit.
Which I will do just as soon as ive finished putting all the switches and such back and replacing all the bulbs since there was a random assortment of regular bulbs, coloured LEDs and white LEDS dotted around the playfield. Think I have them all replaced now and most of the rollover switches are refitted.
 
Reinstalled most of the bits underside of the playfield. Lamps, switches, targets, slingshots etc.
2 of the 4 pop bumpers to go... Then onto the topside !!
(OK this is a photo of the topside, but theres still more to see than the flip side :) )
IMG_20210720_221213.jpg
 
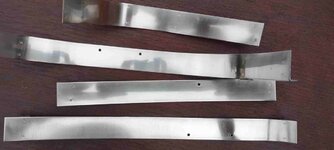
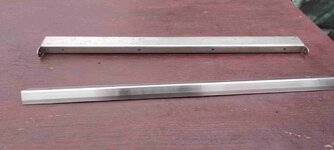
Polished some more metal bits. Just need to fit them again..

These were not too bad. Though its easy to see where the ball runs
IMG_20210722_184447.jpg

This is from the back. This isnt in great shape. Somewhat pitted. Still I guess you dont see most of it.
IMG_20210722_190215.jpg

Rails came up canny.
IMG_20210722_203208.jpg

These are still not great - but better
IMG_20210722_200735.jpg
 
I've started repopulating the playfield. (pics to follow)
Some what disturbingly the solenoid fuse was dead when I flicked it back on having put the GI bulbs back to check they were all ok.
Then I discovered one of the pop bumpers its stuck on (possibly the reason the fuse went ?).
Switches seem OK so I'm guessing its the driver transistor (not sure if you can check them in situ)
Id like to think the numbers in the CG manual for the transistor number (Q10) match the ones on the rotten dog board...

Might try tracing the wires back to check though...IMG_20210727_182521.png
 
Finally finished rebuilding the playfield. All seemed well. Refitted the apron. Turned it on.. Pop went the solenoid fuse :(
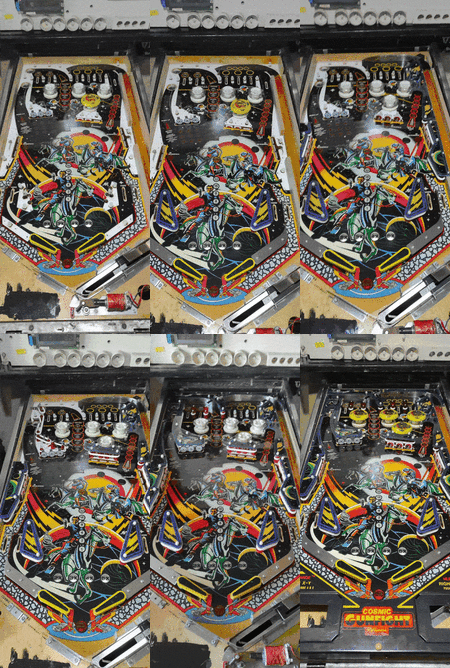
I've sussed out the cause - and the reason is visible in the rebuild anim..
cosmic rebuild.gif
 
Back
Top Bottom