What's new
Pinball info

Register a free account today to become a member! Once signed in, you'll be able to participate on this site by adding your own topics and posts, as well as connect with other members through your own private inbox!

WPC melted coil

Fubar

Site Supporter
5Years
Joined
Feb 5, 2020
Messages
1,934
Location
Cambridge, UK
Just my luck - get a shiny new toy and it breaks down after only a few days 😭

So last night I was playing CV and suddenly I notice smoke coming out of the right slingshot. That's some really neat theme integration I says to myself before hastily cutting the game's power. At this point I didn't notice if the sling's arm was stuck in the "out" position, but I guess it may have been.

The slingshot bracket was quite warm, and the coil very hot. No signs of frayed wires or other nasties. Took the coil out and there was a small amount of liquid goop on the stop which I assume is due to the sleeve melting.

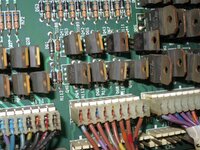
Unsolder the coil, check with ohm meter and it reads 0.5 ohms - not good. Turn the game back on, things are fine except a bunch of solenoids don't work (other sling, pops, trough eject, saucers). Quickly traced down to a blown fuse (couldn't it have blown sooner? Grrrr!) Of course I only have standard fuses and not the 20mm WPC ones...

So this is my shopping list so far:
  • New coil & sleeve
  • Fuses (lots) going to check all for correct ratings
  • New TIP102
Once I put those bits in, what is the best course of action? I've kind of assumed that the TIP102 is shorted, however it could very well be an upstream component. Should I perhaps connect a flashlamp to the coil wires to avoid melting my new one?

Any advice gratefully received - this is my first WPC game so not super familiar with their electronics :) Thanks
 
Last edited:
I'd probably test this before connecting up the new solenoid. Please be careful as there are high voltages in this area.

Select the DC volts range on your test meter (we're going to be looking for low voltages - around 5V or less). With the solenoid disconnected, connect the black lead of your test meter to ground (0V) and red lead to the point where the base of the TIP102 meet its two resistors (you should be able to see by looking on the tracks on the PCB). The test meter should show 0V when the machine is doing nothing. With the meter still connected, press one of the switches on the right slingshot - the meter should now show a little under 5V.

If this works, then the upstream components are probably OK. Assuming you have a new TIP102 fitted, I'd turn the machine off, connect up the solenoid and give it a try - being ready to turn it off again if anything seems amiss.

The only thing I'm unsure about here is the component IDs. I had a look at the WPC95 schematics and the CV manual. Page 3-5 (solenoid/flasher table) of the CV manual says that the right slingshot (solenoid 11) is driven by Q43 connected to J114/4. However, looking at the WPC 95 manual, it shows Q43 connecting to to J113/4 - not J114. I'm hoping this is a typo. If it is, then the base of Q43 should connect to the junction of R105 and R110. You should be able to confirm all this using your test meter.

Good luck. Yell if you need help.
 
Thanks @Ragnar1057, that's helpful. I'm not sure a DMM is fast enough to register the pulse driving the TIP102 but I can use my scope for that. In any case if an upstream component is locking it on it should read a steady 5V.

I'll double check the wiring to ensure I'm dealing with the correct transistor! Good point about second-guessing the manual 👍

Got a shipment notification from @pinballmania this morning so hopefully the parts will get here tomorrow.
 
That's a good point - the slingshot is momentary action. My poor brain has apologised to me and promises to do better next time;).
Using a scope should be even easier. Many people seem to have a DMM or logic probe - but I'm guessing not many have a scope.

Let us know how you go on.
 
A Wpc, 'S' or '-95' game will identify the driver component, and its connecting pins, by asking for the details, i.e. pressing the Start button while the device is selected in the solenoid test. I'd check the tie-back diode for the circuit, too.
 
Thanks @Jay Walker, I didn't know that - very useful feature! I can confirm that it's J113-3 (BRN-ORG), so the CV manual has a typo (J114 is unused).

A bit more investigation whilst waiting for parts to arrive... Seems like this particular FET has been replaced previously, as well as its neighbours Q44 (trough eject) and Q65 (jet release - I guess the boom bumper mech?). Anyway it needs a good clean to get rid of all that leftover flux 🧐

Replacements don't carry the TIP102 marking, not sure what they are - ML702 BDX 33C - I'm guessing Onsemi BDX33C? Edit: which looks like it's got pretty much all the same specs give or take a bit.
 

Attachments

  • IMG_4031.JPG
    IMG_4031.JPG
    188.1 KB · Views: 20
  • IMG_4030.JPG
    IMG_4030.JPG
    220.7 KB · Views: 19
Last edited:
Agreed - the BCX33C spec is not quite as meaty as the TIP102 - but I doubt this will matter too much. If they were being driven that hard, I guess they would need heatsinks to dissipate the heat generated by switching the coils.
You can still get TIP102s - is that what you have ordered?

Given that 3 devices (Q43, Q44, Q65) have been replaced previously, it might be worth inspecting the other 2 coils in case they are getting near their end-of-life. We already know the right slingshot coil went bad - and the others may be of a similar age.

Looks like some pretty sloppy soldering/cleanup by the guy that worked on it previously.

@Jay Walker - good call on checking out the 1N4004 diodes too👍
 
Replaced the fuse; the game played fine albeit no right slingshot (coil's in the bin). In the meanwhile parts have arrived, and I've an evening when I'm sober enough for board work...

From the underside of the board it's clear which components were replaced. I've tried to clean it up as best I can.

Before/after -- on the left you can see where I replaced the TIP102 (Q43). Checked the diode it was fine.
IMG_4068.JPGIMG_4070.JPG

Back in the machine power on - upstream looked ok (no signal on DMM) and no voltage at coil leads. Resoldered a brand new coil and everything works fine 🥳

While I was at it I fixed a broken earthing wire to a speaker and checked all the fuse ratings (all good). Tried to keep things tidy but the backbox in this game is pretty full!!

IMG_4060.JPG

Wasn't impressed by the power tap for the Afterglow board :-/ Need to peruse the schematics for a better place!

IMG_4065.JPG
 
The earlier version of the afterglow Nano had to be connected like that. The next and later versions take power from the col/rows and only require the ground connector. There's probably a better way to do it if you can find it.
 
The earlier version of the afterglow Nano had to be connected like that. The next and later versions take power from the col/rows and only require the ground connector. There's probably a better way to do it if you can find it.
It's just really hacky. The ground wire "clip" (zoom in on my pic) also doesn't provide a good connection at all - I had issues with the lamps flickering after I put the board back in which were solved by tightening that contact.

Will try to find a better tap, at least GND should be easy to grab off one of the free connectors.
 
I have the original afterglow in RS and the newer ones in my other pins. I think ground can easily be tapped in or a connector made as often there's a free ground pin.

I'd be interested if you find somewhere for power that doesn't require tapping.
 
It's just really hacky. The ground wire "clip" (zoom in on my pic) also doesn't provide a good connection at all - I had issues with the lamps flickering after I put the board back in which were solved by tightening that contact.

Will try to find a better tap, at least GND should be easy to grab off one of the free connectors.
You can also hook it up to the braid, not sure if you know but if the GND disconnects while running it can blow the Afterglow board.
Yes those clips are pretty naff.
 
Last edited:
Ground is the easier part as you can use a connector to put it on one of the board standoffs or find an empty header. The power is the tricky one
 
Ground is the easier part as you can use a connector to put it on one of the board standoffs or find an empty header. The power is the tricky one
I’ve had about 15 Afterglow boards now, always just attached them with the clips. Not ideal but never had any problems with them, touch wood🤞🍀😂
 
Back
Top Bottom