What's new
Pinball info

Register a free account today to become a member! Once signed in, you'll be able to participate on this site by adding your own topics and posts, as well as connect with other members through your own private inbox!

Was completed, then not, now definitely completed and for sale! A new 4K VP Build

On the subject of monitors, I saw a review of an off the shelf purchased virtual pin that had a custom panel from LG that fitted edge to edge in a pin…

Almost like a flat version of their 40” ultrawide, which is 5K2K. I’d be interested in seeing what a curved monitor would look like in a setup?


It’s such a shame that all new ultrawide monitors tend to be curved. I found this brand though that makes a flat 1440p 144hz ultrawide monitor which might be a nice monitor to base a build around if you wanted one to fill out the space in the cabinet as a priority over 4k

Yep. I was looking at the ultra wide gaming monitors for the mayfield and found same - all curved - which I think will look daft.

I think you definitely have to go 4k with a vpin build.

I tried HD before and then someone said “You need to go 4k”. Never looked back.
 
Yep. I was looking at the ultra wide gaming monitors for the mayfield and found same - all curved - which I think will look daft.

I think you definitely have to go 4k with a vpin build.

I tried HD before and then someone said “You need to go 4k”. Never looked back.

I would tend to agree! That kind of monitor though is not standard 1440p it’s ultra wide quad hd. It would be a significant bump up from standard or ultrawide HD (double the pixel count).

HD = 1920 x 1080 = 2.07 mp
UWHD = 2560 × 1080 = 2.76 mp
UWQHD = 3440 x 1440 = 4.95 mp
4K = 3840 x 2160 = 8.29 mp
5K2K = 5120 x 2160 = 11.06 mp

If I didn’t have a spare 4K monitor and was starting on a new build to go inside an existing cab it’s probably what I’d go for. Especially considering the price

The ultimate would be a flat 5K2K or a custom playfield sized panel from LG like that virtual pin company. If I find out more details or pull the video out of my history I’ll post it as the cabinet in question had all the bells and whistles you could ever want for a virtual machine build
 
The ultimate would be a flat 5K2K or a custom playfield sized panel from LG like that virtual pin company. If I find out more details or pull the video out of my history I’ll post it as the cabinet in question had all the bells and whistles you could ever want for a virtual machine build

Was it this one, by any chance?

 
Had a few spare hours across the last couple of days so sorted out a bezel for the back glass screen and a panel for the space at the back of the cab between playfield AKA TV and glass.

Temporarily installed the bespoke Virtual Pinball panel to bottom space between bottom of TV and lockdown bar. Will install LED strip under that next week.

Swapped out ipac for Pinscape board which has built in accelerometer so I have proper, physical nudging now.

Have now loaded up 29 tables accessible via PinballX front end which I have set to start up when PC is switched on. Also fitted a new button to outside of cabinet to switch pc on with.

Now it’s set up to play games I hope to find some time next week when I’m on holiday to move on to the feedback devices which is a new thing for me.
 

Attachments

  • IMG_1637.jpeg
    IMG_1637.jpeg
    134.1 KB · Views: 22
  • IMG_1638.jpeg
    IMG_1638.jpeg
    147.7 KB · Views: 21
  • IMG_1641.jpeg
    IMG_1641.jpeg
    144.9 KB · Views: 22
  • IMG_1640.jpeg
    IMG_1640.jpeg
    212.3 KB · Views: 21
No updates for a long long while but after Christmas, New Year and arrival of new grandchild I've managed to have a good go at the machine after work on a night and last few weekends so I'm calling it done - albeit I intend to add more tables as and when I remember I like them and haven't already got them :)

Since my last post on Christmas eve I have:

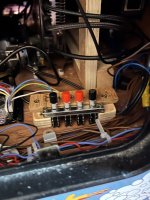
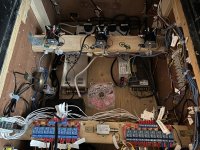
- Installed a pac drive and 2 x relay boards for feedback devices
- Took out all of the mini 12v solenoids that were in the machine and replaced with much more robust, far better sounding/feeling car starter motor solenoids
- Taught myself how to set up the feedback devices
- Installed new PC on/off button to base of cab
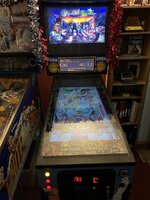
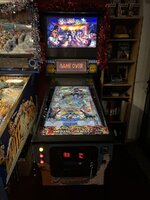
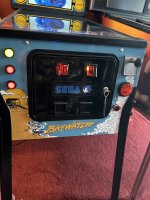
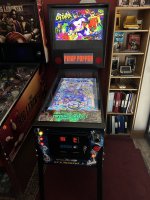
- Replaced the originally installed square launch button with a real plunger connected to a 10K sliding potentiometer for an authentic plunge effect
- Installed a new, circular, launch button (that lights up when it's time to launch a ball) beneath the plunger for an authentic launch effect on those games that have a button rather than a plunger
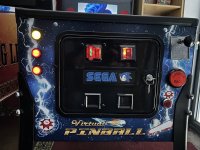
- Installed a set of coin door buttons (the coin door did not have a bracket on so I mounted the buttons to the base of the cabinet directly behind coin door (need to tidy the mounting up at some point - only did it last night so I could get some coin door buttons working))
- Fitted a new lockdown bar locking mechanism - it originally just had a lockdown bar which was locked in place by reaching under playfield and rotating a couple of bits of angle iron
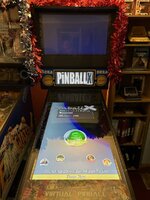
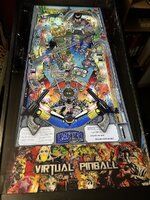
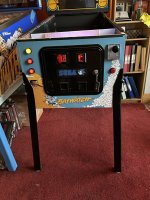
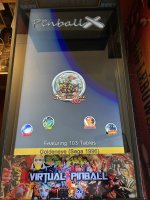
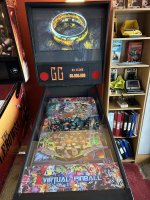
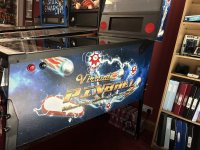
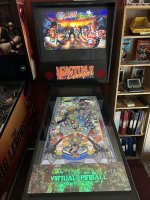
- Fixed in the printed perspex "Visual Pinball" panel with colour changing LED bar underneath
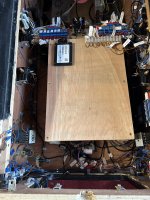
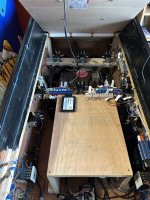
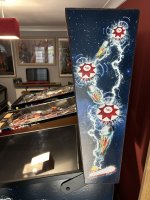
- Painting all visible parts of inside of cabinet and black parts of backbox in...black
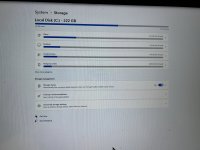
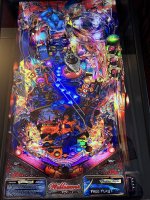
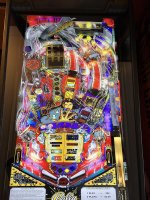
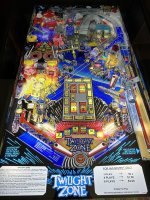
- Installed and configured 103 tables

Like I say, other than loading up more tables and sorting out the shabby mounting for the coin door buttons I'm done.

I've had some great support on here as I did last time so thanks one and all for your tips and advice - you know who you are.

My total build cost on this one has been around £1,900. I'm sure I could have done it cheaper if I had bought an empty cabinet, especially since as I ended up taking out and/or replacing a lot of the stuff that was in there (ipac replaced with pac-drive, new relays fitted, backglass monitor replaced with bigger model, cheap 12v solenoids replased with car starter motor solenoids, independent PSUs fitted for everything, old PC and graphics card swapped out) but the machine is fully working and 4K when before it was non-working and only HD and far better build quality (IMO!)

I really do like the machine and the feedback devices make a hell of a difference. It's not real pinball of course, but it's pretty darn close , look, feel, sound wise.

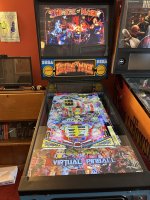
The only thing I'm not entirely happy with is the placement of the TV. As with the last one I did I mounted the TV towards the back of the cabinet playfield. I did this mainly to avoid the real plunger. However, although I fitted a panel to the gap between the lockdown bar and the TV, it does look a bit off and I can see why others mount the TV closer to the front of the cab.

The tables have come on a long way since 2020 and I have nothing but admiration for the people that put all the time and effort to program the tables. Although no one sells their table creations comercially I'm sure plenty of them could and I intend to make more than a few "Buy Me a Beer" contributions to table creators on VPUniverse.

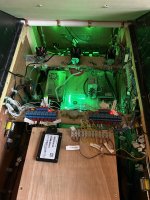
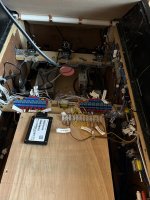
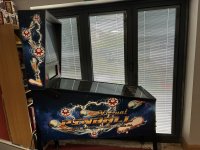
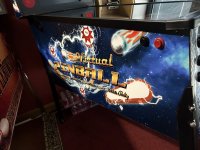
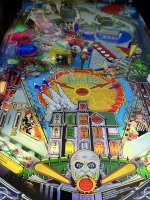
I've attached some photos of the latter stages of the build (not in any order - sorry!).

This build was just as painful and brain aching as the last one. I'm sure if you do them on a regular basis it does get easier but to have to re-learn stuff I last did 3 years ago and, in the case of the feedback devices, learn new stuff takes a lot of time and effort. But a great challenge so on to the next one...


Oh and if someone is interested in buying a ready made 4k virtual pinball machine with feedback devices, I'm open to offers on this one :)


Some links that others might fund useful:

12v car starter motor solenoids I used: https://www.amazon.co.uk/dp/B08GSR4LTL?psc=1&ref=ppx_yo2ov_dt_b_product_details

Relay boards I used: https://www.amazon.co.uk/dp/B07Q28PH5Y?psc=1&ref=ppx_yo2ov_dt_b_product_details

Pac-Drive (special version where relays do not fire upon start up): https://www.ultimarc.com/output/led-and-output-controllers/pac-drive/?variation_id=381
 

Attachments

  • IMG_2074.JPG
    IMG_2074.JPG
    110.5 KB · Views: 33
  • IMG_2060.JPG
    IMG_2060.JPG
    175.8 KB · Views: 34
  • IMG_2059.JPG
    IMG_2059.JPG
    137.7 KB · Views: 32
  • IMG_1874.JPG
    IMG_1874.JPG
    161.8 KB · Views: 29
  • IMG_1873.JPG
    IMG_1873.JPG
    159.5 KB · Views: 32
  • IMG_1801.JPG
    IMG_1801.JPG
    178 KB · Views: 32
  • IMG_1799.JPG
    IMG_1799.JPG
    139.4 KB · Views: 35
  • IMG_1798.JPG
    IMG_1798.JPG
    238.8 KB · Views: 32
  • IMG_1796.JPG
    IMG_1796.JPG
    130.2 KB · Views: 32
  • IMG_2084.JPG
    IMG_2084.JPG
    159.3 KB · Views: 20
  • IMG_2085.JPG
    IMG_2085.JPG
    133.2 KB · Views: 21
  • IMG_2091.JPG
    IMG_2091.JPG
    243.5 KB · Views: 24
  • IMG_2092.JPG
    IMG_2092.JPG
    213.8 KB · Views: 26
  • IMG_2093.JPG
    IMG_2093.JPG
    169.7 KB · Views: 27
  • IMG_2094.MOV
    34.5 MB
  • IMG_2096.mov
    17.4 MB
Last edited:
Update 12/3/2024:

So after saying I was happy that this was done, I bought a new graphics card (Geforce 3060) which meant I could get PUP Packs working properly. I also installed PinUp Popper and the custom artwork arrived.

Will upload some photos of finished article once cabinet decals have been applied.

In the meantime I don't suppose anyone has a good source for Popper Media do they? I know I can download it table by table from Vpinuverse but if someone has done that already and I can buy it form somehwere that would be great - have already put hundreds of hours in so if I can save a few hundred more by just buying the media I'd be delighted :)
 

Attachments

  • IMG_2254.JPG
    IMG_2254.JPG
    225.3 KB · Views: 21
  • IMG_2255.JPG
    IMG_2255.JPG
    163.3 KB · Views: 21
  • IMG_2257.JPG
    IMG_2257.JPG
    179.4 KB · Views: 21
Last edited:
Now it definitely is done.

I made a cock up with the measurements for the cabinet side art and bought too short so had to re-order at a cost of £50 - expensive mistake :-(

Anyways had some spare time last few days so Sega Bay Watch artwork off (peeled off really easily) and new artwork on.

Not happy with the finished result. It looks good from a distance but up close there's loads of bubbles. Not air bubbles but bumps where dust and residue from the glue off the old artwork has been caught underneath. I gave the cab a real good wipe down with sugar soap but did not sand down. Schoolboy error.

Anyways project is finished so on to next challenge.

Will be up for sale later today.
 

Attachments

  • IMG_2380(1).JPG
    IMG_2380(1).JPG
    195.8 KB · Views: 21
  • IMG_2387(1).JPG
    IMG_2387(1).JPG
    165.3 KB · Views: 20
  • IMG_2389(1).JPG
    IMG_2389(1).JPG
    162.6 KB · Views: 19
  • IMG_2394(1).JPG
    IMG_2394(1).JPG
    136.5 KB · Views: 18
  • IMG_2392(1).JPG
    IMG_2392(1).JPG
    249.5 KB · Views: 18
  • IMG_2385(2).JPG
    IMG_2385(2).JPG
    198.5 KB · Views: 17
  • IMG_2384(1).JPG
    IMG_2384(1).JPG
    124.9 KB · Views: 15
  • IMG_2404.JPG
    IMG_2404.JPG
    226.3 KB · Views: 16
  • IMG_2401(1).JPG
    IMG_2401(1).JPG
    225.7 KB · Views: 14
  • IMG_2399.JPG
    IMG_2399.JPG
    161.1 KB · Views: 15
Back
Top Bottom