What's new
Pinball info

Register a free account today to become a member! Once signed in, you'll be able to participate on this site by adding your own topics and posts, as well as connect with other members through your own private inbox!

TZ - Changing bulbs on Start Button and Extra Ball

Durzel

Registered
5Years
Joined
Oct 1, 2017
Messages
2,041
Location
Bath, UK
I'm aiming to install my LED and GI OCD boards tomorrow, but have hit a snag... I've noticed that the Start Button and Extra Ball button seem to be using incandescents. Everything else in the game with the exception of the clock, and a flasher underneath the mini-playfield are LEDs. I'm anxious about blowing a fuse on the OCD board with these bulbs in situ.

I've had a quick look but can't seem to work out how to get access to the bulbs inside these buttons. A Google search suggests brute force is necessary, but I don't really know what I should be pulling on and don't want to break anything.

Any help gratefully received. :)
 
Ok thanks. Do I just pull on it? Twist it? Need any tools? Is it just the white part that needs to come out?

Sorry for the noob questions :(
 
Ok cheers. From speaking to herg (the maker of the boards) on Pinside I might have a bigger issue to deal with... I was going to install the GI OCD board too, and I am guessing from the fact my start/extra ball buttons are not LED that this is going to be a problem too, because I don't think the coin door bulbs - that I hadn't even considered - and definitely not the clock (original) are LED either. Bah!

I've got a white Ingo clock board so maybe I should get on and do that first.
 
I don't have any of the rev5 (surface mount) WPC LED OCD boards so never had this issue - All rev4 here. It can cope with a good few old bulbs still. I've had to replace 2 transistors on them too, when i was being stupid.

The Coin Door is GI (you could just remove the bulb!). As is the Clock. Plus the entire backbox transilite lighting!
 
Backbox is all LED, so no probs there. I've been putting off doing the clock because I'm scared of taking it apart/out of the game, and I have a piano mod that I'm not sure how to remove, but I really ought to do it given that it's a known point of failure so will fail at some point.
 
Ok cheers. From speaking to herg (the maker of the boards) on Pinside I might have a bigger issue to deal with... I was going to install the GI OCD board too, and I am guessing from the fact my start/extra ball buttons are not LED that this is going to be a problem too, because I don't think the coin door bulbs - that I hadn't even considered - and definitely not the clock (original) are LED either. Bah!

I've got a white Ingo clock board so maybe I should get on and do that first.
Why don’t you put LEDs in the coin door lights ?
 
Sorry I wasn't clear - I'm going to replace those with LEDs too (I don't suppose you know what type they are? I know the start/buy in buttons are 555 wedge)
 
Leave 'em . They are the frikkin start and extra ball buttons and are invisible when playing.
 
It's not so much for aesthetics, rather I don't want to risk blowing those 20mm fuses on the OCD boards.
 
I replaced the start button on my TZ with LED. Then put incandescent back in. Leave em. The glowing pulse of an incandescent start button in a darkened room is much sexier than LED


Sent from my iPad using Tapatalk
 
We replaced our clock with an LED board recently as the original bulbs had burnt out, was surprisingly easy following this guide: http://www.flippers.be/tz_clock.html
Thanks. I have that and a few other pages bookmarked. I can't quite work out where it unscrews from the playfield, but haven't looked too closely yet. I've got a piano mod that appears to be screwed down which I need to work out how to remove first too.

Dunno what board you have in the clock but IMHO these are the best. You can swap out the LEDS - Blue is cool.
http://www.german-pinball-modular.de/final-tz-clock-pcb-english.html
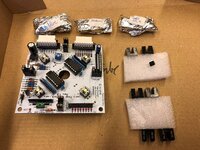
Have got exactly that ready to go, along with a clear clock housing. Just need to source a prototype clock decal and I'm good to go.


IMG_2629.jpg
 
Back
Top Bottom