What's new
Pinball info

Register a free account today to become a member! Once signed in, you'll be able to participate on this site by adding your own topics and posts, as well as connect with other members through your own private inbox!

In Progress Transfomers! Pinball in disguise..

GezTheHealer

Registered
Joined
Apr 20, 2018
Messages
513
Location
Trowbridge
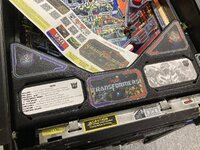
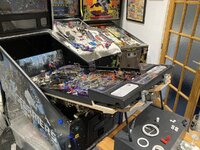
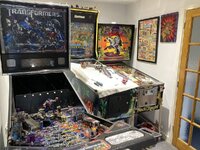
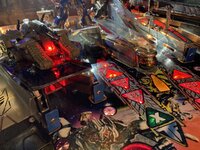
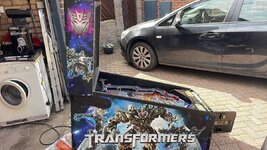
So I got a Transformers Pro, it looked good in the pictures, but in need of a little love. Here's some pictures when I went to see it, and then setting it up at home.

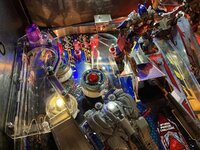
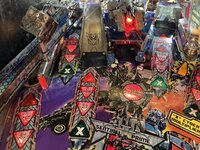
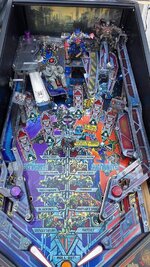
Pro's on pick-up: It plays, it's a modern stern to practice on, it's complete. It had the Megatron lock on instant kick-out & virtual lock, and it doesn't look like much had been done with it in its life, so I expect little wear on the lock mech.
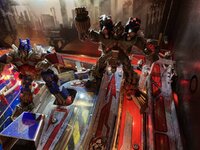
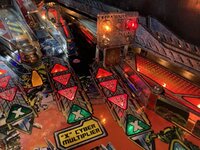
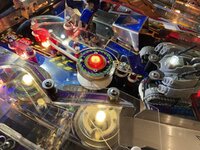
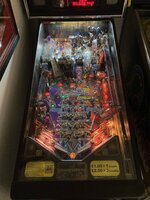
Very standard. All the switches and coils working. Cab's alright, slight scratch on the head on one side, otherwise looking sharp.
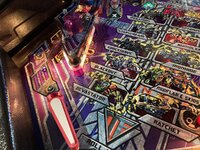
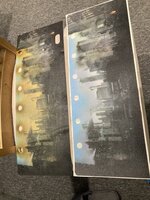
Con's: Need's a good clean, dropped flipper, (flippers a bit sloppy on play), Decals are faded. Crinkle in the DMD Cover plastic. It's been polished, and the polish is wedged up on the posts/corners etc. Plungers a bit stiff but works.
 

Attachments

  • 6.JPG
    6.JPG
    136.3 KB · Views: 50
  • 5.JPG
    5.JPG
    225.9 KB · Views: 46
  • 4.JPG
    4.JPG
    137.6 KB · Views: 45
  • 3.JPG
    3.JPG
    116.2 KB · Views: 39
  • 2.JPG
    2.JPG
    189.9 KB · Views: 40
  • 1 before.JPG
    1 before.JPG
    162.1 KB · Views: 45
Last edited:
First we rebuilt the flipper mechs, so they're playing nice and sharp, also got rubbers, decals & new flipper bats in the post from One stop pinball. Also checked all bulbs/replaced a few/added the translucent rubber on the slingshots.

Then went on to photoshop up some new apron cards as I wasn't keen on the yellow ones. Replaced the apron decal's as well, maybe doesn't look massively different in the photo, but the new ones look like new and the old ones are sun bleached and yellowing. Much nice area to look at while cursing a drain now. Look how filthy the ramps are, that left ramp is supposed to be see through...
 

Attachments

  • 7 decals.JPG
    7 decals.JPG
    270.1 KB · Views: 28
  • 8 rubber.JPG
    8 rubber.JPG
    164.2 KB · Views: 28
  • 9 dirty.JPG
    9 dirty.JPG
    166.4 KB · Views: 29
  • 10 so dirty.JPG
    10 so dirty.JPG
    143.7 KB · Views: 30
  • 13a ramp dirty.JPG
    13a ramp dirty.JPG
    174.1 KB · Views: 30
So, after getting it playing alright, next job was to strip the top of the playfield, add in playfield decals, (large one at the back, world of difference) replace all the rubbers, replace a few broken posts, clean and wax the playfield, polish the metal work (ramp and shooter lane thing). Then clean and wash all the plastics. This took a while as the ramps are all bolted together flat bits of plastic, with the odd switch or flash bulb wired to them, I do like how the loom has simple connectors on sterns to released these under the playfield. Now I've taken it all apart I've got a much better idea of how it'd go back together. This seems like a simple playfield (compared to say JD which was the last top playfield I stripped and re-rubbered) but it still took a fair bit of time.
 

Attachments

  • 19 plastics clean.JPG
    19 plastics clean.JPG
    224.5 KB · Views: 32
  • 18 polished ramp.JPG
    18 polished ramp.JPG
    238.1 KB · Views: 29
  • 17 waxed.JPG
    17 waxed.JPG
    269.1 KB · Views: 30
  • 16 decal in.JPG
    16 decal in.JPG
    218.1 KB · Views: 30
  • 15 decal swap.JPG
    15 decal swap.JPG
    164.5 KB · Views: 31
  • 14 all out.JPG
    14 all out.JPG
    210.8 KB · Views: 34
And here it is now. The plastics came up great and are nice and transparent again, the playfield all seemed alot brighter and I think I've probably wiped away 10 years of dirt and grim. The pop bumpers skirts haven't got a chip in them, which I'm pleased to see. There is some slight hazing from where the ball rounds at the back on the playfield, but a little polish cleaned most of this up. I think if I were to do it again, I would order some new washers to replace the dirty ones as I went, I did put in new bolt heads which look nicer for sure.

Final thing to do was jack it up at the back and put in place. though having it Special When Lit Steep (aka, jacked all the way up) causes some bother with the Megatron lock (it's gravity fed toward the back of the playfield) so after a little adjustment I've found where it's happy, and still beyond where it suggests on the bubble level.

Thanks to @Moonraker for help with the electronics on the ramp, replacing a little surge protector lamp on the DC motor.
Thanks @robotgreg for courier services.
Thanks @new forest pinball for fuses and expert tips.
Thanks Mel from One Stop Pinball for parts.
& Thanks to Andy from Pinball Mania for other parts.

The little I've played of it, I've quite enjoyed it. The right ramp is a tighter shot than that on the LE, it's fast and fun, the modes still all seem very similar but having gone back over the films (the films are bad, not Johnny Menomic or The Shadow bad, but pretty cringy) I like the call outs and the sounds are great. Yet to get to the wizard mode (like most modern-ish Sterns).

Next things I'm thinking for it:

Mirror Blades.
A Shaker motor.
LED's in the GI.. perhaps also in the inserts.

I've also got some red/blue flipper bats, but the flipper rubber I've got is pinky/red, so not sure if I could get maybe, white or translucent flipper rubbers for it to match them.
 

Attachments

  • 20 plastics clean ramp.JPG
    20 plastics clean ramp.JPG
    183.2 KB · Views: 32
  • 21 plastics let light through.JPG
    21 plastics let light through.JPG
    192.8 KB · Views: 29
  • 22 all bulbs going.JPG
    22 all bulbs going.JPG
    190.7 KB · Views: 29
  • 23 look how clear.JPG
    23 look how clear.JPG
    199.3 KB · Views: 32
  • 24 after.JPG
    24 after.JPG
    177 KB · Views: 32
Nice job, I would definitely get some comets in there, it just looks so dull and low light.
 
Back
Top Bottom