OP
OP


")


Depends on the angle of the photos......these are "eBay" photosLooking fabulous. Was going to post pics of my effort - 2nd thoughts now!! (I probably will, it's good to have a laugh!!)
I have got it back to playable condition, but it's never going to look as lovely as yours is.. great work mate.


Yes, I think if you make a machine work when it was broken when you got it, it holds a place in your heart, regardless of whether anyone else likes it.Fabulous! I just fetched mine back (was a project in my partner's garage) and then realised I had no room for it, alongside other machines I want to work on. Sadly going to move it on - but been a fabulous game to work on and play.
Is it normal to fall in love with each and every game!!
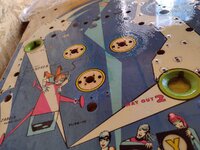
My one question - that I never got to the bottom of.. the rollover button next to GROOVY 'Y'.. what does it do?! Never worked that out!
Groovy indeed.. enjoy - one of the best 'family' games IMHO - the skill shot's quite easy and the three kickers mean it half plays itself - but still a real challenge to get all the spotlights lit.
Have a good one! Look forward to seeing it in it's full glory.