What's new
Pinball info

Register a free account today to become a member! Once signed in, you'll be able to participate on this site by adding your own topics and posts, as well as connect with other members through your own private inbox!

Sunk inserts help (Sorted thank you )

FinalFight

Site Supporter
5Years
Joined
Nov 5, 2015
Messages
947
Location
Merseyside
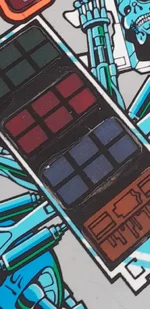
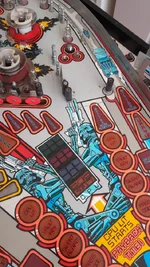
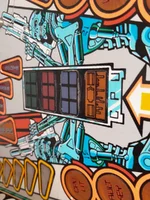
I have 2 sunk inserts on the cpu section of my T2 and I'm wondering if anyone on here has any good advice on how to repair this.
I currently have the playfield out the machine to do some jobs anyway

(I have looked at alot of Vids guides before on removing inserts/raised and cupped but just would like to know what others have tried here)
Thank you
 
Heat them up from the underneath with a hairdryer and gently tap them up from below until they are just proud of the playfield. Then using something flat that covers the whole insert, knock them flat to the playfield from the top. Once you're happy they're level then re-glue from below to keep them in position. Just don't go too crazy with the heat and the tapping and you'll be fine :thumbs:
 
Heat them up from the underneath with a hairdryer and gently tap them up from below until they are just proud of the playfield. Then using something flat that covers the whole insert, knock them flat to the playfield from the top. Once you're happy they're level then re-glue from below to keep them in position. Just don't go too crazy with the heat and the tapping and you'll be fine :thumbs:

Thanks for the reply :) .. can I ask what glue you use ?
 
Steve,

My Blackout had loads of badly cupped inserts.
I put a playfield protector on it and it plays lovely now, it was the one in the classics competition at Pinfest.
You have to take some bots off the playfield to fit it, took me about an hour to do.
I have some of the clear Mylar inserts if you want to try them.
I was going to give them a go, but went with the protector instead.
Some people have complained that the protectors can be problematic with star roliovers.
I can't confirm asBlackout does have any.
 
I've seen a few restorers in the US use this stuff. It's supposed to be good as it's clear like glass or plastic when dry. Plus it's tough as nails.


I should clarify that I was only suggesting using this as glue to restick the insert from underneath. If you were going to use resin to level the insert top side like some poeple do you'd be better with a thinner resin with a longer setting time.
 
Last edited:
Thanks for all the replys guys really appreciate it..
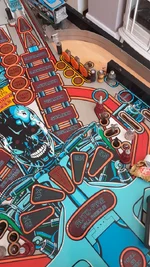
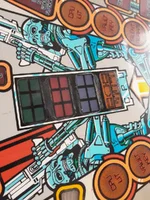
Here's a pic the 2 middle inserts have dropped (I actually thought it had chipped the wood away but it's the paint.. I was thinking if I can get them back into position I could have a go at sorting the paint back out.
(The picture makes it look alot worse)
I was thinking of a new pf at first but part of me wants to try and save it .. and save money 😆
Screenshot_20250925_183042_Gallery.webp
IMG-20250925-WA0020.webp
IMG-20250925-WA0018.webp


@Widnesbernie Thanks for the reply andy I've actually been thinking about fitting a protector when I sort it out as I have the top stripped down (I need to do some touch ups around the pops)
 
Last edited:
I think I'm going to have a go with the hairdryer and tap them up

Here's a copy paste from a post on pinside

RAISING INSERTS:
Sometimes you find that inserts have sunk below the playfield surface. Not cupped, but actually fallen in.
Cupped inserts can simply be filled with clear coat, but if you can see the wood beneath the playfield around the edges, you need to raise it up.
Heat the insert from above and below with a hair dryer.
Keep one hand on the face of the playfield to control the insert, as you push the insert from behind with the largest socket from a wrench set that will fit in the hole.
You may have to reheat while you work.
If the insert is really loose, and you can easily remove it, do so (rough up the side edges with coarse sandpaper, prime with plastic primer and re-glue with epoxy).
If the insert is really tight, then just level it with the face of the playfield and re-glue the entire insert perimeter from the back of the playfield with epoxy.
Don't spare the epoxy, better to have a heavy coat that no ones sees from the back, than to have the insert move around in the future.

Heres a link to the page with lots of other good info about dealing with inserts. check the first post for a list of links to the info
 
Cheers kev I actually have the decal here for the whole section but I'm going to attempt to touch it up first and worst case I will fit the decal

Ah yeah makes sense, all solid black so no worries about colour matching, reckon it will look fine when your done.
 
Back
Top Bottom