What's new
Pinball info

Register a free account today to become a member! Once signed in, you'll be able to participate on this site by adding your own topics and posts, as well as connect with other members through your own private inbox!

Complete STTNG

Andy B

Site Supporter
Joined
Oct 6, 2014
Messages
1,350
Location
Hull. England.
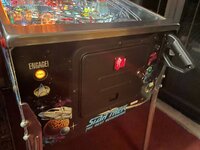
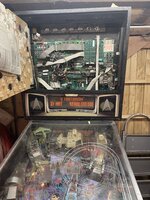
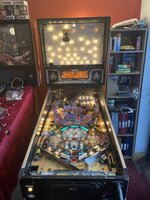
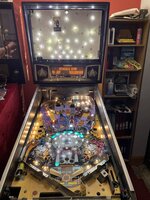
Picked up a STTNG off FaceBook Marketplace.

It had been knocked down from £6K (hah!) to £3,750. It was in Northumberland - a 3 hour drive from where I live in Hull so didn't really have the opportunity (or desire) to go look at it in person so I had the guy that was selling it facetime me and give me a guided tour of the machine.

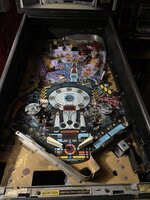
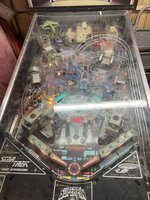
It had been left for some time in a cold damp warehouse and it was showing. Dust and muck and rust everywhere and the mpu board was clearly shot from acid leakage. The guy was nice enough but knew nothing about pinball machines or what he had. I'm certain he would have taken less but I offered him £3K for it and went and collected it that afternoon.

I've had it at home a couple of weeks now. Initially down the shed as I was working on a BoP for somoene so no space for it in my gamesroom. BoP was collected at the weekend so STTNG came in to the house and I started working on it Sunday and for a couple of hours after work each night this week.

Thus far I have:

- Removed power driver board and tested all transistors - amazingly all tested good - and resinstalled
- Checked all fuses - again, all good
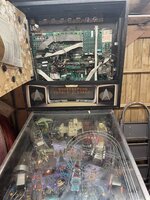
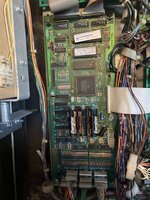
- Taken out old mpu board and thoroughly cleaned with white vinegar, wire wool and isopropyl the mounting brackets that mpu was on in backbox
- Installed a Rocket CPU board from Pinsound
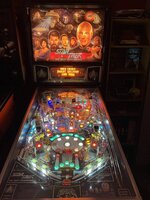
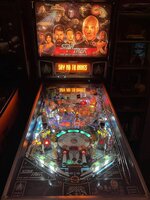
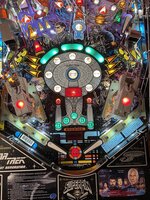
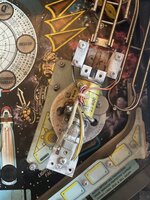
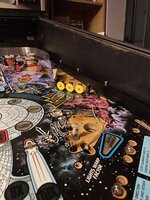
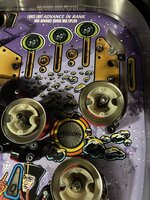
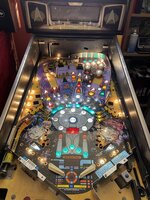
- Tested machine and it is fully functional with the exception of one opto switch not working above the Borg Ship and the lower left flipper sensor not working (though flipper was working)

So now, I know it works, I have:

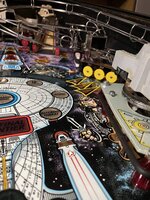
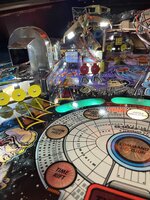
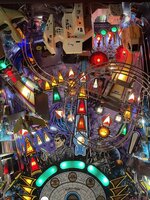
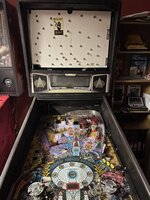
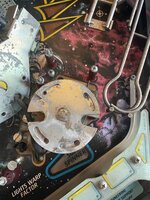
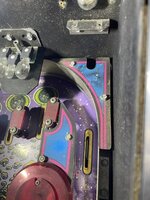
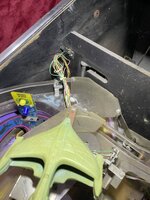
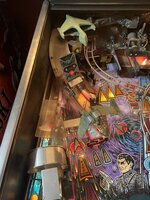
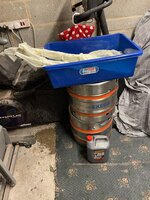
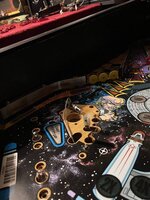
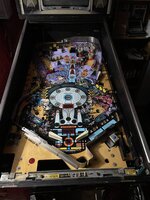
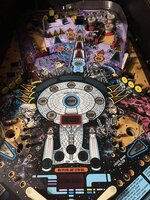
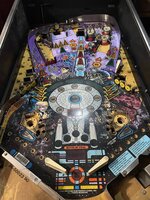
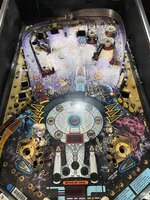
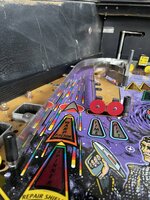
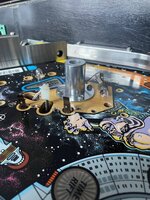
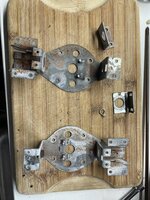
- Vacuumed under playfield and in back-box - the grossest part of the job so far with dead spiders and cobwebs everywhere. Mice had even nibbled away the cloth sheafing around the transformer wires.
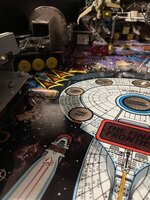
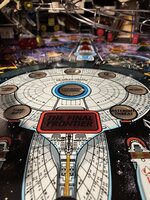
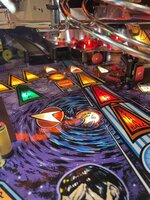
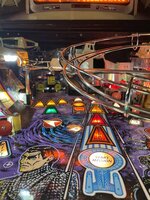
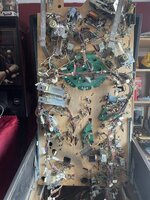
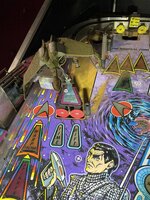
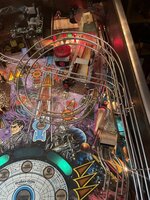
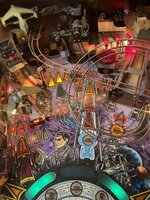
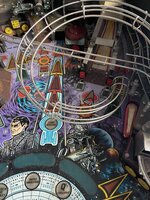
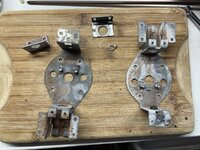
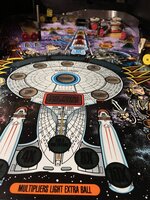
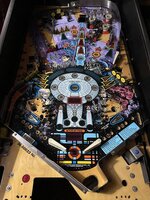
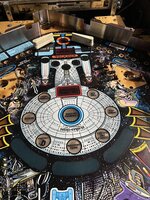
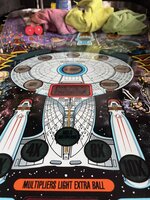
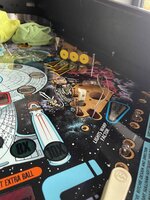
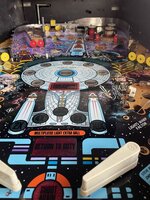
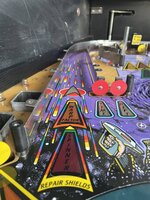
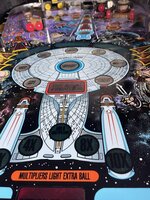
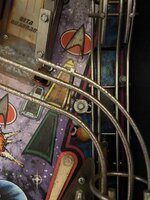
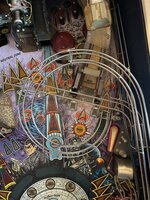
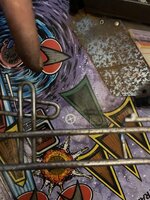
- Totally stripped playfield
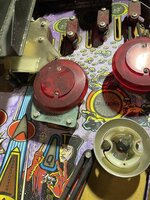
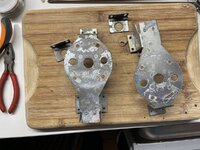
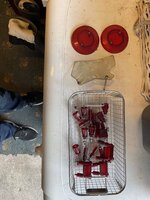
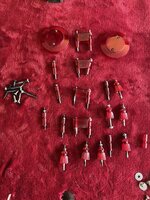
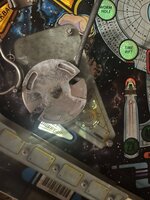
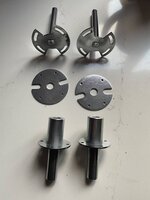
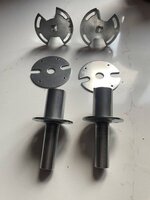
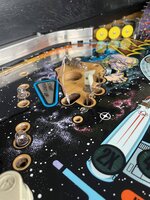
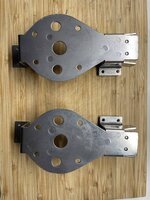
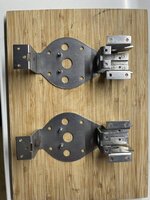
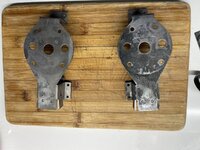
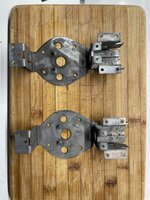
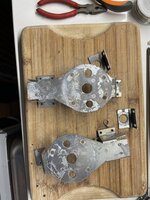
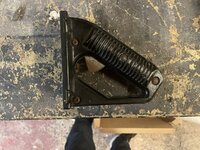
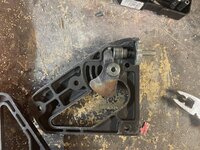
- Taken the opportunity to buy myself a new toy in the form of an ultrasonic cleaner and cleaned the metal parts of the cannon turrets
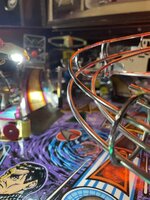
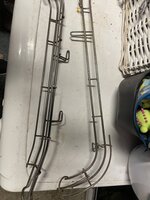
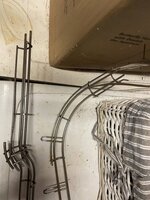
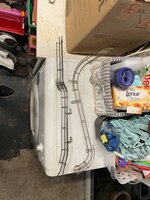
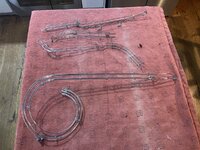
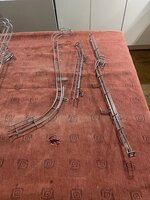
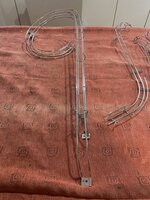
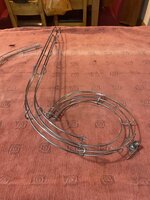
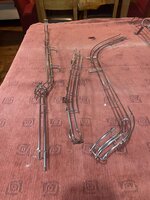
- Put the wireforms in a bath of Evaporust
- Put the metal parts of the cannon turrets in my tumbler since as I wasn't overly impressed with how they came out of the ultrasonic cleaner :-(
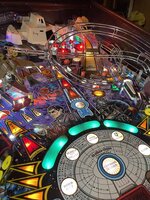
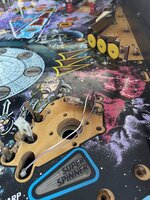
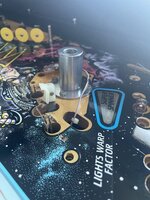
- Removed the subway ramp to get access to some of the under playfield lamps (for LEDs) ready to clean

Ordered:

- New rubber kit
- Pinball Heaven wire looms
- 6 new pinballs (the old ones were rusted to F)
- Full LED Kit
- One (yes, just 1!) broken plastic
- Flipper optic board
- 3 new flipper bats
- Replacement opto transmitter and receiver for the one not working
- One replacement target
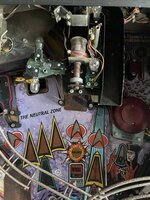
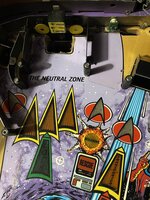
- One Neutral Zone hole protector

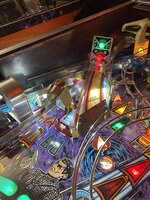
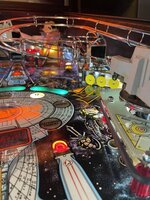
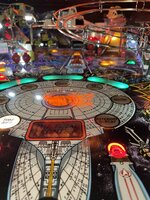
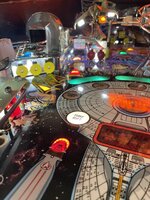
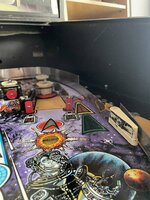
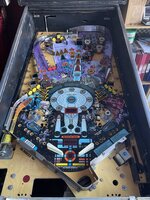
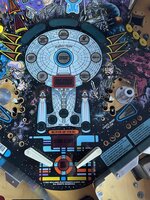
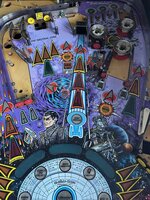
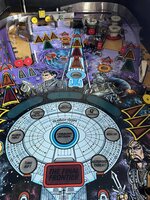
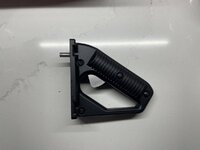
Have posted a few photos of before and after strip down but have taken dozens more ready for the rebuild (and if anyone needs some in the future)

To be continued...
 
Last edited:
Some before and during strip down photos.
 

Attachments

  • IMG_4598.JPG
    IMG_4598.JPG
    173.2 KB · Views: 27
  • IMG_4892.JPG
    IMG_4892.JPG
    133.3 KB · Views: 29
  • IMG_4757.JPG
    IMG_4757.JPG
    137.3 KB · Views: 25
  • IMG_4758.JPG
    IMG_4758.JPG
    153.3 KB · Views: 24
  • IMG_4791.JPG
    IMG_4791.JPG
    140.7 KB · Views: 23
  • IMG_4807.JPG
    IMG_4807.JPG
    105 KB · Views: 22
  • IMG_4892.JPG
    IMG_4892.JPG
    133.3 KB · Views: 22
  • IMG_4899.JPG
    IMG_4899.JPG
    121.6 KB · Views: 22
  • IMG_4904.JPG
    IMG_4904.JPG
    166 KB · Views: 23
  • IMG_4891.JPG
    IMG_4891.JPG
    136.6 KB · Views: 24
  • IMG_4826(1).JPG
    IMG_4826(1).JPG
    176.3 KB · Views: 23
  • IMG_4792.JPG
    IMG_4792.JPG
    155.7 KB · Views: 21
  • IMG_4599.JPG
    IMG_4599.JPG
    168.5 KB · Views: 20
  • IMG_4600.JPG
    IMG_4600.JPG
    146.7 KB · Views: 19
  • IMG_4604.JPG
    IMG_4604.JPG
    166.4 KB · Views: 18
  • IMG_4711.JPG
    IMG_4711.JPG
    170.1 KB · Views: 19
  • IMG_4712.JPG
    IMG_4712.JPG
    158.5 KB · Views: 19
  • IMG_4713(1).JPG
    IMG_4713(1).JPG
    147 KB · Views: 19
  • IMG_4727.JPG
    IMG_4727.JPG
    195.6 KB · Views: 19
  • IMG_4730.JPG
    IMG_4730.JPG
    145.6 KB · Views: 29
Cannon turrets before ultrasonic cleaning and after. Will post some more photos after I have run them through the tumbler.
 

Attachments

  • IMG_4935.JPG
    IMG_4935.JPG
    225.7 KB · Views: 14
  • IMG_4934.JPG
    IMG_4934.JPG
    193.6 KB · Views: 13
  • IMG_4933.JPG
    IMG_4933.JPG
    242.5 KB · Views: 13
  • IMG_4936.JPG
    IMG_4936.JPG
    186.4 KB · Views: 13
Wireforms in the bath!
 

Attachments

  • IMG_4940.JPG
    IMG_4940.JPG
    110.6 KB · Views: 12
  • IMG_4941.JPG
    IMG_4941.JPG
    126.6 KB · Views: 10
  • IMG_4942.JPG
    IMG_4942.JPG
    132.9 KB · Views: 12
  • IMG_4943.JPG
    IMG_4943.JPG
    168.6 KB · Views: 12
Thinking those whacking great screws in the slingshot area are non original!

Why oh why?

I’m going to have to reinstall after cleaning them up otherwise I’ll have some fiddly little holes to try and fill and paint 🙁
 

Attachments

  • 365B078E-C811-4C3F-8CAC-6845B7181B4B.jpeg
    365B078E-C811-4C3F-8CAC-6845B7181B4B.jpeg
    172.1 KB · Views: 19
Dirty plastics!

3 x 20 min sessions in the ultrasonic cleaner. Not at all impressed with results so complete set of new posts and caps ordered.

Also not sure why the cleaner is turning the screws and bolts black. May be I’m putting too much cleaner in. Will need to run everything through the tumbler.
 

Attachments

  • 97CFCB8C-8A4B-4958-BA32-F07AA90ED047.jpeg
    97CFCB8C-8A4B-4958-BA32-F07AA90ED047.jpeg
    119.7 KB · Views: 8
  • 5053FF0D-EC18-4F3E-B1B6-F92BDC37E86F.jpeg
    5053FF0D-EC18-4F3E-B1B6-F92BDC37E86F.jpeg
    206.9 KB · Views: 8
Thinking those whacking great screws in the slingshot area are non original!

Why oh why?

I’m going to have to reinstall after cleaning them up otherwise I’ll have some fiddly little holes to try and fill and paint 🙁
I'm guessing an onsite quick fix to ball hangups behind slack sling rubbers. Get rid!
 
Time to get the Ambersil out.

Went through 3 magic erasers and picked up 5 grazed knuckles in the cleaning process.

Wax tomorrow.
 

Attachments

  • E29C947D-4A4B-4348-9A88-0732230B9BF5.jpeg
    E29C947D-4A4B-4348-9A88-0732230B9BF5.jpeg
    147.2 KB · Views: 16
  • 129E2CFB-55AA-40C4-BC4B-8B5C47FA86A6.jpeg
    129E2CFB-55AA-40C4-BC4B-8B5C47FA86A6.jpeg
    115.5 KB · Views: 14
  • FBF63FE4-2969-4A8E-B335-94CF818E1004.jpeg
    FBF63FE4-2969-4A8E-B335-94CF818E1004.jpeg
    157.9 KB · Views: 14
  • B47F4121-53CE-4069-B930-CE982017E951.jpeg
    B47F4121-53CE-4069-B930-CE982017E951.jpeg
    169.5 KB · Views: 14
  • 945F7FF7-E185-4E73-A803-52411C7A2857.jpeg
    945F7FF7-E185-4E73-A803-52411C7A2857.jpeg
    132.5 KB · Views: 13
  • 58731F64-0B83-45DD-B010-BB8D050267D3.jpeg
    58731F64-0B83-45DD-B010-BB8D050267D3.jpeg
    197.7 KB · Views: 10
  • A5918FF3-3A41-49C1-A1B3-15D9FAF4577D.jpeg
    A5918FF3-3A41-49C1-A1B3-15D9FAF4577D.jpeg
    185 KB · Views: 11
  • F98FE4FD-72CE-4623-BFC1-12F69CD107E1.jpeg
    F98FE4FD-72CE-4623-BFC1-12F69CD107E1.jpeg
    206.2 KB · Views: 11
  • 93ABDA23-57BD-4396-8D56-76B0C1021E99.jpeg
    93ABDA23-57BD-4396-8D56-76B0C1021E99.jpeg
    135.5 KB · Views: 12
  • E98FFEA0-3489-42C3-BAD2-6A8E9AACC921.jpeg
    E98FFEA0-3489-42C3-BAD2-6A8E9AACC921.jpeg
    149.9 KB · Views: 12
  • CFC86126-9412-4ADE-BD8B-AD7BF06C97D7.jpeg
    CFC86126-9412-4ADE-BD8B-AD7BF06C97D7.jpeg
    158.9 KB · Views: 12
  • E84FCC47-FFBF-4963-9EC4-284951438E2E.jpeg
    E84FCC47-FFBF-4963-9EC4-284951438E2E.jpeg
    208 KB · Views: 15
So glad I took all the advice and dismantled those cannon towers.

3 days in the tumbler later…
 

Attachments

  • D5ACA599-8A70-4474-B2D8-4376479925F3.jpeg
    D5ACA599-8A70-4474-B2D8-4376479925F3.jpeg
    153.3 KB · Views: 16
  • 3C744E4F-BF51-4705-9184-D8C1F7679FEC.jpeg
    3C744E4F-BF51-4705-9184-D8C1F7679FEC.jpeg
    143.9 KB · Views: 14
  • 38239EAE-E82E-469D-AACD-3996E69CB379.jpeg
    38239EAE-E82E-469D-AACD-3996E69CB379.jpeg
    99.8 KB · Views: 17
  • B4703020-35FB-4119-966F-38DEC915B161.jpeg
    B4703020-35FB-4119-966F-38DEC915B161.jpeg
    66.5 KB · Views: 17
  • CA395922-9F33-4D11-A20E-5A5FA8055685.jpeg
    CA395922-9F33-4D11-A20E-5A5FA8055685.jpeg
    59.3 KB · Views: 16
Turtle Wax Heavy Duty then Light to Medium Polishing Compound followed by Turtle Wax Carnauba Wax.

Reinstalled the cannon towers also (topside only just now).
 

Attachments

  • IMG_4975.JPG
    IMG_4975.JPG
    148.6 KB · Views: 17
  • IMG_4976.JPG
    IMG_4976.JPG
    127.7 KB · Views: 16
  • IMG_4977.JPG
    IMG_4977.JPG
    142.9 KB · Views: 16
  • IMG_4978.JPG
    IMG_4978.JPG
    141.8 KB · Views: 16
  • IMG_4979.JPG
    IMG_4979.JPG
    124.5 KB · Views: 15
  • IMG_4981.JPG
    IMG_4981.JPG
    142.2 KB · Views: 15
  • IMG_4983.JPG
    IMG_4983.JPG
    131.3 KB · Views: 14
  • IMG_4987.JPG
    IMG_4987.JPG
    148.6 KB · Views: 16
  • IMG_4988.JPG
    IMG_4988.JPG
    162.5 KB · Views: 16
  • IMG_4992.JPG
    IMG_4992.JPG
    199.7 KB · Views: 17
  • IMG_4993.JPG
    IMG_4993.JPG
    143 KB · Views: 13
  • IMG_4994.JPG
    IMG_4994.JPG
    114.1 KB · Views: 10
  • IMG_4974.JPG
    IMG_4974.JPG
    137.4 KB · Views: 11
  • 67FF3F29-230A-4B5D-A5AD-3BF3FAD39198.jpeg
    67FF3F29-230A-4B5D-A5AD-3BF3FAD39198.jpeg
    170.5 KB · Views: 7
  • 58DACC38-DCA8-48D5-834A-E8A9E0CF626D.jpeg
    58DACC38-DCA8-48D5-834A-E8A9E0CF626D.jpeg
    205.9 KB · Views: 7
  • 4E016346-B00D-4F50-B5D8-94A2079F5573.jpeg
    4E016346-B00D-4F50-B5D8-94A2079F5573.jpeg
    210.8 KB · Views: 8
  • C6FE54ED-42E3-4AF5-A45B-66C8F0C26CC1.jpeg
    C6FE54ED-42E3-4AF5-A45B-66C8F0C26CC1.jpeg
    206.9 KB · Views: 14
Last edited:
Evaporust came up trumps again
 

Attachments

  • 74BE449F-90B8-4F71-BAF2-97DBF67051E5.jpeg
    74BE449F-90B8-4F71-BAF2-97DBF67051E5.jpeg
    201.1 KB · Views: 12
  • 47984816-D79F-46C2-A40A-4BC5B2553D84.jpeg
    47984816-D79F-46C2-A40A-4BC5B2553D84.jpeg
    100.5 KB · Views: 12
  • 84C2C706-257E-4C55-895D-26A61A138A94.jpeg
    84C2C706-257E-4C55-895D-26A61A138A94.jpeg
    184.2 KB · Views: 12
  • 340C845C-78E9-4369-BCF9-88B03130C6AD.jpeg
    340C845C-78E9-4369-BCF9-88B03130C6AD.jpeg
    146.8 KB · Views: 12
  • 270DBF5D-FA46-4A94-98F0-6DCD62BB38ED.jpeg
    270DBF5D-FA46-4A94-98F0-6DCD62BB38ED.jpeg
    256.9 KB · Views: 12
  • 4A4D232B-9717-4886-A114-6B6E7D0F51D4.jpeg
    4A4D232B-9717-4886-A114-6B6E7D0F51D4.jpeg
    181.5 KB · Views: 13
  • E48E4015-E9B6-4C5A-A70B-42764A1E1387.jpeg
    E48E4015-E9B6-4C5A-A70B-42764A1E1387.jpeg
    181.8 KB · Views: 13
  • E1B9218E-9A1A-4662-ADED-ED2AA4DFD6FC.jpeg
    E1B9218E-9A1A-4662-ADED-ED2AA4DFD6FC.jpeg
    164.8 KB · Views: 12
  • 80F6D84A-9361-4E3F-9B55-20292032C887.jpeg
    80F6D84A-9361-4E3F-9B55-20292032C887.jpeg
    160.8 KB · Views: 12
Mainly working on shiney bright things last night.
 

Attachments

  • DE689ABD-F393-4451-9E14-9517DB70AC86.jpeg
    DE689ABD-F393-4451-9E14-9517DB70AC86.jpeg
    110.7 KB · Views: 14
  • C35918B9-17CF-4BA8-9CD3-8773AD972AFE.jpeg
    C35918B9-17CF-4BA8-9CD3-8773AD972AFE.jpeg
    122.1 KB · Views: 12
  • 616675D5-28A9-4E7A-83CE-66D6ED52203A.jpeg
    616675D5-28A9-4E7A-83CE-66D6ED52203A.jpeg
    186.4 KB · Views: 12
  • CC022EB0-8E77-46EC-B14F-842614B97A36.jpeg
    CC022EB0-8E77-46EC-B14F-842614B97A36.jpeg
    158.3 KB · Views: 11
  • 1E3E07DB-6861-47E3-8DE0-E1CEAF08C91E.jpeg
    1E3E07DB-6861-47E3-8DE0-E1CEAF08C91E.jpeg
    137 KB · Views: 10
  • BF5A4E9C-8BAE-4C80-B177-A79CC6F719F2.jpeg
    BF5A4E9C-8BAE-4C80-B177-A79CC6F719F2.jpeg
    169.9 KB · Views: 10
  • 9B6DD58E-6532-4260-B98D-9EB232510577.jpeg
    9B6DD58E-6532-4260-B98D-9EB232510577.jpeg
    129.9 KB · Views: 12
  • E164EC0D-5968-4A90-A8AC-A0295FE78551.jpeg
    E164EC0D-5968-4A90-A8AC-A0295FE78551.jpeg
    161.4 KB · Views: 13
  • CDB30EF8-A2C1-4D0C-8EF4-1631B6306F59.jpeg
    CDB30EF8-A2C1-4D0C-8EF4-1631B6306F59.jpeg
    140.2 KB · Views: 13
Wasn’t happy with the LEDs in the backbox. Spots of light all over the translite so swapped all the LEDs back to translucent for a much better look.

When I cleaned all the muck off the backglass and translite I saw that the white backing had come off in one long strip (already off, did not come off in cleaning process).

New translite on order.
 

Attachments

  • 24102634-F524-4085-A295-6A4F00C6D632.jpeg
    24102634-F524-4085-A295-6A4F00C6D632.jpeg
    57 KB · Views: 8
  • 7F32E07E-630D-4EB0-80C3-FF9F0A741215.jpeg
    7F32E07E-630D-4EB0-80C3-FF9F0A741215.jpeg
    104.4 KB · Views: 8
Just paid the customs charges (£55 on £258 of purchases!) on new led display so hopefully that will arrive tomorrow and it will be fully up and running. Game plays excellent blind, though am getting the error bongs on start up so will be great to see what that’s all about when new display is in.

Tonight, fitted new flipper opto interrupters - flippers seem snappier as a result - and sorted the tatty shooter.
 

Attachments

  • 44449248-8EB1-4A85-9B20-9CF8B084848A.jpeg
    44449248-8EB1-4A85-9B20-9CF8B084848A.jpeg
    235.2 KB · Views: 9
  • 9ADD2D59-5F5C-4EEC-9397-20FADE1B1BFC.jpeg
    9ADD2D59-5F5C-4EEC-9397-20FADE1B1BFC.jpeg
    259.3 KB · Views: 9
  • 39C36CDE-F7DB-4610-A03B-7300CB0D6D4C.jpeg
    39C36CDE-F7DB-4610-A03B-7300CB0D6D4C.jpeg
    64.3 KB · Views: 9
No updates for over a week...been busy,

Installed LED display. Really happy with it as I am with all the PinSound products I've bought over the years. Really bright, sharp and crisp. Also installed a DMDLux DMD controller board from PinSound. Wasn't really necessary but wanted to make 100% sure that the old display was truly dead and buried. In any case, the DMDLux board has a 12v connector on it specifically for LED displays so I don't have to piggyback one of the 12v power connectors on the driver board.

Rebulit upper right flipper because I wasn't making the Delta Quadrant ramp shot that often. Flipper is a lot snappier as a result but I'm still not making the shot very often so I've decided I'm just not very good :)

Installed translite - really happy that I decided to take out the LEDs in the backbox and put incandesent bulbs back in. Looks so much better,

Was having an intermittent problem with the cannon motors. Diagnosed that down to a flaky ribbon cable and some corrosion on the Power Driver Board connector. All cleaned up and new ribbon cable on order. Been playing it to death last couple of nights and no issues at all with it now.

I am calling this one done and well and truly resurrected from the dead.

If I was keeping it then I would work on the cabinet which is a bit of a pig and I would polish the lockdown bar, fit mirror blades and replace the glass which has scratches but Christmas is coming so, once ribbon cable comes and I can get some photos of the cabinet in daylight, this will be up in the For Sale forum.
 

Attachments

  • IMG_5165.JPG
    IMG_5165.JPG
    173.6 KB · Views: 17
  • IMG_5161.JPG
    IMG_5161.JPG
    138.6 KB · Views: 15
  • IMG_5160.JPG
    IMG_5160.JPG
    147.6 KB · Views: 14
  • IMG_5159(1).JPG
    IMG_5159(1).JPG
    136 KB · Views: 14
  • IMG_5158.JPG
    IMG_5158.JPG
    101.4 KB · Views: 16
  • IMG_5157.JPG
    IMG_5157.JPG
    154.3 KB · Views: 16
  • IMG_5156.JPG
    IMG_5156.JPG
    126.8 KB · Views: 16
  • IMG_5155.JPG
    IMG_5155.JPG
    144 KB · Views: 16
  • IMG_5166.JPG
    IMG_5166.JPG
    192.5 KB · Views: 15
  • IMG_5169.JPG
    IMG_5169.JPG
    157.2 KB · Views: 15
  • IMG_5170.JPG
    IMG_5170.JPG
    109.1 KB · Views: 15
  • IMG_5182(1).JPG
    IMG_5182(1).JPG
    125.6 KB · Views: 14
  • IMG_5180.JPG
    IMG_5180.JPG
    125.1 KB · Views: 15
  • IMG_5178.JPG
    IMG_5178.JPG
    141.6 KB · Views: 15
  • IMG_5163.JPG
    IMG_5163.JPG
    227.5 KB · Views: 13
  • IMG_5177.JPG
    IMG_5177.JPG
    224.8 KB · Views: 14
  • IMG_5175(1).JPG
    IMG_5175(1).JPG
    208.7 KB · Views: 11
  • IMG_5173.JPG
    IMG_5173.JPG
    142.5 KB · Views: 10
  • IMG_5171.JPG
    IMG_5171.JPG
    149.4 KB · Views: 13
  • IMG_5153.JPG
    IMG_5153.JPG
    135 KB · Views: 19
Great results @Andy B will be looking at this thread when I do my one
I’ve just picked up a STTNG, it is in bad shape.
100% needs a new playfield and a damn good clean
 
Great results @Andy B will be looking at this thread when I do my one
I’ve just picked up a STTNG, it is in bad shape.
100% needs a new playfield and a damn good clean
Thanks Dave.

Had a few technical issues during the restoration that I posted in the Technical Questions forum in case you have similar and of course tons of reference photos should you need any that you miss (I always miss one or two).

Good luck!
 
Back
Top Bottom