What's new
Pinball info

Register a free account today to become a member! Once signed in, you'll be able to participate on this site by adding your own topics and posts, as well as connect with other members through your own private inbox!

In Progress Star Wars (Data East)

BomberHQ

Site Supporter
Joined
Aug 25, 2013
Messages
44
Location
West Sussex, UK
Alias
Bomber
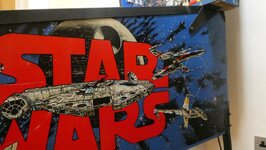
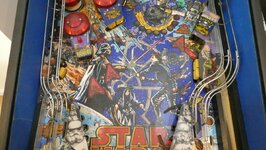
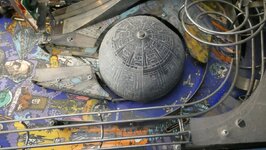
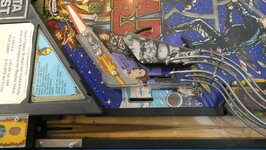
I was contacted a few months ago by a friend of a friend who knew I was into pinball. He'd just retrieved a 'Star Wars' pinball from the back of his garage that had been abandoned there in the early 00's after it stopped working. He said there was no obvious signs of damage and it started up OK, so things looked fairly straightforward! I work full time, and dont have much spare, so I offered to clean it up and get it fully functional for the cost of any parts and a small fee.

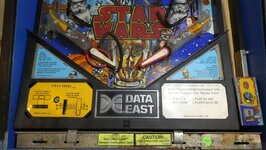
Discovering it was a Data East from 1992 was a bonus, as my only other solid state machine is a Last Action Hero from 1993, which I bought on eBay a couple of years ago and bought back from the dead.

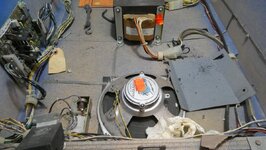
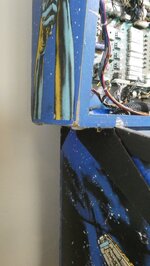
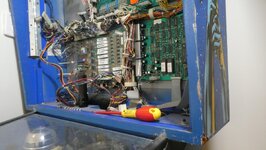
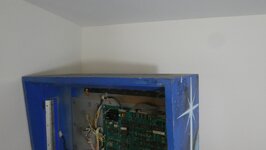
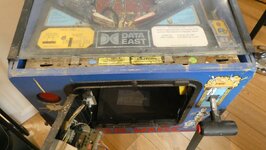
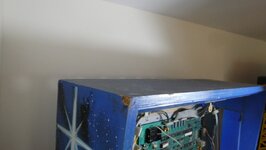
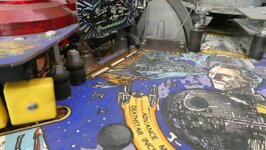
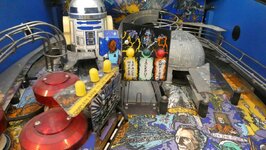
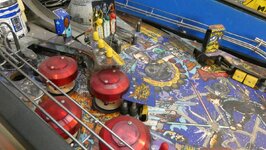
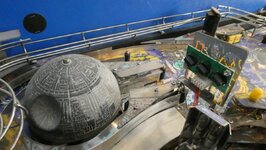
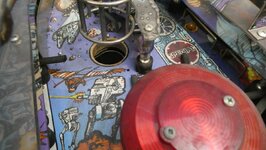
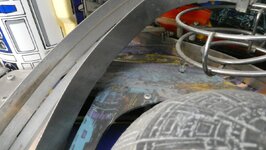
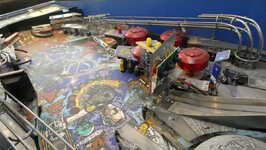
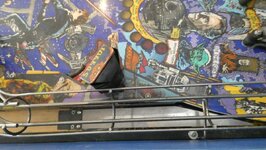
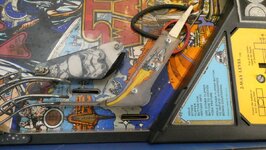
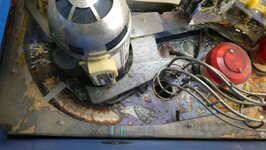
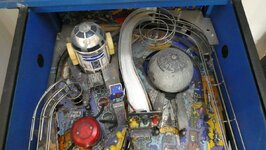
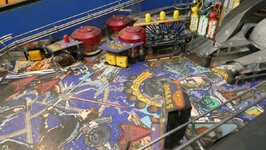
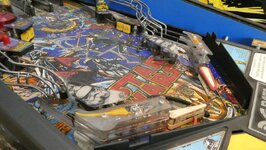
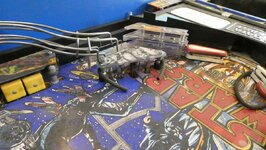
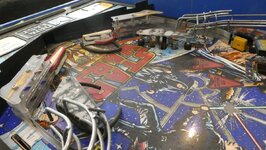
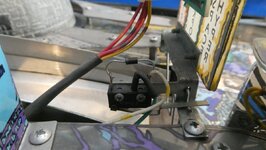
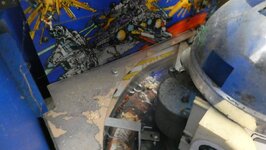
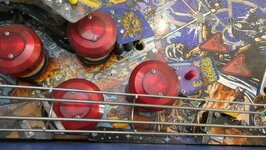
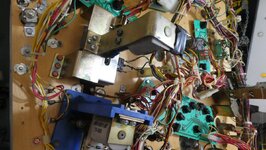
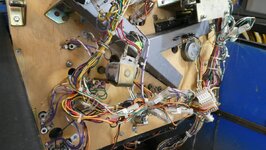
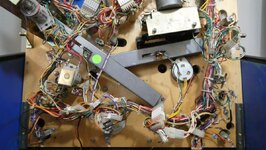
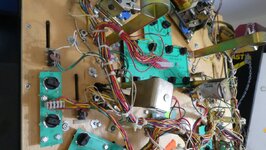
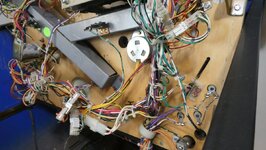
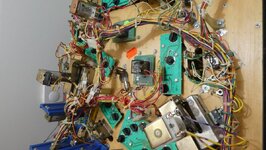
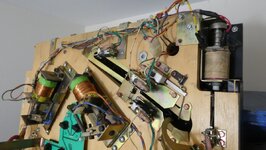
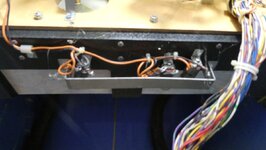
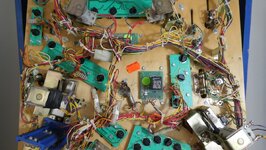
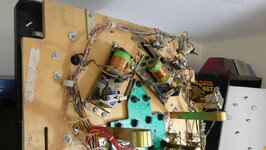
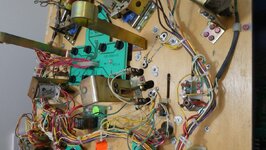
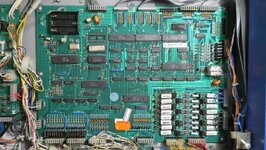
The machine was dead though. Just a few dim GI and the buzz of the transformer. If it had worked when he first switched it on, it didnt now! It was also really filthy. A torch under the playfield revealed a quantity of wood shavings and mouse poo! Behind the translite revealed Duracell batteries that expired in 2004 but hadnt leaked ... phew!

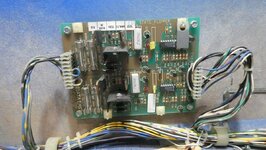
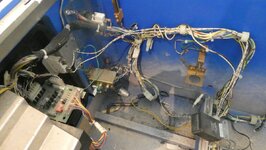
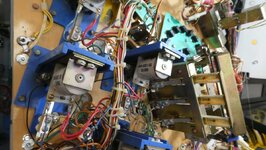
There were also plenty of blown fuses, so we agreed to transport it back to my house so I could get to work on it ...
 
An embarrassing 6 months later (work, family, house refurbishment ...) I finally have time to start on it ...
Before pics ...
Cabinet
 

Attachments

  • P1220699 (Medium).JPG
    P1220699 (Medium).JPG
    81.6 KB · Views: 15
  • P1220700 (Medium).JPG
    P1220700 (Medium).JPG
    150.8 KB · Views: 15
  • P1220761 (Medium).JPG
    P1220761 (Medium).JPG
    116.3 KB · Views: 13
  • P1220762 (Medium).JPG
    P1220762 (Medium).JPG
    145 KB · Views: 15
  • P1220763 (Medium).JPG
    P1220763 (Medium).JPG
    152.1 KB · Views: 12
  • P1220764 (Medium).JPG
    P1220764 (Medium).JPG
    171.1 KB · Views: 12
  • P1220765 (Medium).JPG
    P1220765 (Medium).JPG
    134.8 KB · Views: 12
  • P1220760 (Medium).JPG
    P1220760 (Medium).JPG
    120.3 KB · Views: 11
  • P1220701 (Medium).JPG
    P1220701 (Medium).JPG
    131 KB · Views: 11
  • P1220702 (Medium).JPG
    P1220702 (Medium).JPG
    84 KB · Views: 11
  • P1220704 (Medium).JPG
    P1220704 (Medium).JPG
    75.7 KB · Views: 10
  • P1220706 (Medium).JPG
    P1220706 (Medium).JPG
    131.1 KB · Views: 10
  • P1220707 (Medium).JPG
    P1220707 (Medium).JPG
    140.4 KB · Views: 11
  • P1220708 (Medium).JPG
    P1220708 (Medium).JPG
    56.5 KB · Views: 11
  • P1220709 (Medium).JPG
    P1220709 (Medium).JPG
    127.3 KB · Views: 11
  • P1220759 (Medium).JPG
    P1220759 (Medium).JPG
    130.4 KB · Views: 12
  • P1220703 (Medium).JPG
    P1220703 (Medium).JPG
    69.2 KB · Views: 11
  • P1220705 (Medium).JPG
    P1220705 (Medium).JPG
    145.1 KB · Views: 11
  • P1220710 (Medium).JPG
    P1220710 (Medium).JPG
    143.1 KB · Views: 10
  • P1220711 (Medium).JPG
    P1220711 (Medium).JPG
    92.2 KB · Views: 16
Top of Playfield
 

Attachments

  • P1220735 (Medium).JPG
    P1220735 (Medium).JPG
    139.7 KB · Views: 9
  • P1220736 (Medium).JPG
    P1220736 (Medium).JPG
    123.7 KB · Views: 9
  • P1220738 (Medium).JPG
    P1220738 (Medium).JPG
    145 KB · Views: 9
  • P1220740 (Medium).JPG
    P1220740 (Medium).JPG
    74.1 KB · Views: 8
  • P1220743 (Medium).JPG
    P1220743 (Medium).JPG
    105.4 KB · Views: 8
  • P1220737 (Medium).JPG
    P1220737 (Medium).JPG
    134.7 KB · Views: 9
  • P1220713 (Medium).JPG
    P1220713 (Medium).JPG
    182.6 KB · Views: 9
  • P1220715 (Medium).JPG
    P1220715 (Medium).JPG
    180.5 KB · Views: 9
  • P1220717 (Medium).JPG
    P1220717 (Medium).JPG
    154.3 KB · Views: 10
  • P1220719 (Medium).JPG
    P1220719 (Medium).JPG
    174.2 KB · Views: 10
  • P1220721 (Medium).JPG
    P1220721 (Medium).JPG
    182.1 KB · Views: 11
  • P1220723 (Medium).JPG
    P1220723 (Medium).JPG
    144.9 KB · Views: 10
  • P1220733 (Medium).JPG
    P1220733 (Medium).JPG
    139.1 KB · Views: 9
  • P1220739 (Medium).JPG
    P1220739 (Medium).JPG
    117.1 KB · Views: 8
  • P1220742 (Medium).JPG
    P1220742 (Medium).JPG
    97.6 KB · Views: 9
  • P1220775 (Medium).JPG
    P1220775 (Medium).JPG
    111.9 KB · Views: 9
  • P1220776 (Medium).JPG
    P1220776 (Medium).JPG
    94.9 KB · Views: 10
  • P1220725 (Medium).JPG
    P1220725 (Medium).JPG
    159.7 KB · Views: 10
  • P1220727 (Medium).JPG
    P1220727 (Medium).JPG
    149.5 KB · Views: 9
  • P1220729 (Medium).JPG
    P1220729 (Medium).JPG
    164 KB · Views: 7
  • P1220731 (Medium).JPG
    P1220731 (Medium).JPG
    139.7 KB · Views: 7
  • P1220712 (Medium).JPG
    P1220712 (Medium).JPG
    168.7 KB · Views: 5
  • P1220714 (Medium).JPG
    P1220714 (Medium).JPG
    151.7 KB · Views: 6
  • P1220716 (Medium).JPG
    P1220716 (Medium).JPG
    147.7 KB · Views: 6
  • P1220718 (Medium).JPG
    P1220718 (Medium).JPG
    181.2 KB · Views: 5
  • P1220720 (Medium).JPG
    P1220720 (Medium).JPG
    168.7 KB · Views: 4
  • P1220722 (Medium).JPG
    P1220722 (Medium).JPG
    168.8 KB · Views: 4
  • P1220724 (Medium).JPG
    P1220724 (Medium).JPG
    175.1 KB · Views: 4
  • P1220734 (Medium).JPG
    P1220734 (Medium).JPG
    112.5 KB · Views: 4
  • P1220732 (Medium).JPG
    P1220732 (Medium).JPG
    110.5 KB · Views: 9
Top of Playfield, cont'd
 

Attachments

  • P1220726 (Medium).JPG
    P1220726 (Medium).JPG
    167.2 KB · Views: 7
  • P1220728 (Medium).JPG
    P1220728 (Medium).JPG
    164.9 KB · Views: 7
  • P1220730 (Medium).JPG
    P1220730 (Medium).JPG
    171.7 KB · Views: 7
Under Playfield
 

Attachments

  • P1220751 (Medium).JPG
    P1220751 (Medium).JPG
    155.4 KB · Views: 2
  • P1220752 (Medium).JPG
    P1220752 (Medium).JPG
    141 KB · Views: 2
  • P1220753 (Medium).JPG
    P1220753 (Medium).JPG
    146.7 KB · Views: 2
  • P1220745 (Medium).JPG
    P1220745 (Medium).JPG
    155.5 KB · Views: 2
  • P1220746 (Medium).JPG
    P1220746 (Medium).JPG
    166.3 KB · Views: 2
  • P1220748 (Medium).JPG
    P1220748 (Medium).JPG
    149.8 KB · Views: 2
  • P1220750 (Medium).JPG
    P1220750 (Medium).JPG
    149.2 KB · Views: 2
  • P1220754 (Medium).JPG
    P1220754 (Medium).JPG
    140.1 KB · Views: 2
  • P1220755 (Medium).JPG
    P1220755 (Medium).JPG
    151.1 KB · Views: 2
  • P1220756 (Medium).JPG
    P1220756 (Medium).JPG
    159.7 KB · Views: 2
  • P1220758 (Medium).JPG
    P1220758 (Medium).JPG
    126.7 KB · Views: 2
  • P1220766 (Medium).JPG
    P1220766 (Medium).JPG
    88.9 KB · Views: 2
  • P1220747 (Medium).JPG
    P1220747 (Medium).JPG
    172.5 KB · Views: 2
  • P1220749 (Medium).JPG
    P1220749 (Medium).JPG
    122.2 KB · Views: 2
  • P1220757 (Medium).JPG
    P1220757 (Medium).JPG
    149.2 KB · Views: 2
Backbox
 

Attachments

  • P1220685 (Medium).JPG
    P1220685 (Medium).JPG
    221.6 KB · Views: 3
  • P1220689 (Medium).JPG
    P1220689 (Medium).JPG
    123.3 KB · Views: 4
  • P1220690 (Medium).JPG
    P1220690 (Medium).JPG
    156.8 KB · Views: 4
  • P1220691 (Medium).JPG
    P1220691 (Medium).JPG
    156.2 KB · Views: 4
  • P1220692 (Medium).JPG
    P1220692 (Medium).JPG
    181.7 KB · Views: 4
  • P1220698 (Medium).JPG
    P1220698 (Medium).JPG
    149.7 KB · Views: 3
Had a good weekend pulling the machine apart! Lots of little problems to fix ...
1681858688986.png
Classic Data East issue with fuse holders snapping at the base. Most of the time the holder looks intact (held by dirt/corrosion), but it doesnt make a good (or any) connection. Here you can see F1 has come away one side. Thankfully there were only a few of these, as they are a pain to remove without damaging the PCB.
I had to change every fuse holder on my Last Action Hero! Around 5 of the fuses were blown, which gives a hint where to look for problems further down the circuit ...

1681858689030.png
May need a new coil here.

1681858689077.png
Operator repair at some point?! You only need to shove in one side to make it work!

1681858689118.png
[Underside of playfield] This solenoid/mechanism fires the ball out of a 'scoop'. The coil plunger is supposed to be fully extended, but theres so much grease on the mechanism its stuck in this position.
None of the mechanisms should need any oil or grease - it hardens/thickens and traps dust over time. There are a couple of exceptions where a little modern Teflon/PTFE lube is OK.
Most of the mechanisms in the Star Wars have been greased, so it will all have to be cleaned off - this was part of the original plan anyway.

1681858689152.png
Another rushed repair. The purple wire is completely 'dry' and isnt making any electrical contact with the solder tag.

1681858689200.png
New rubbers?!!!

1681858689236.png
Bit more cleaning to do (bonus mouse poo to remove!)... Ill replace all the post rubbers too, as they are hard and perished like the bands.

1681858689270.png
R2D2 will probably get a respray ...

1681858689308.png
His arms have yellowed too. Theres a great technique for restoring yellowed plastic using hair-dressers hydrogen peroxide cream (in a plastic bag in sunlight for a few days). It worked wonders on my 50 year old EM machines and doesnt make the plastic brittle.
The rest of that filth is just removal and careful / gentle elbow grease to avoid damaging the transfers! The corroded wireforms come up a treat using Autosol chrome cleaner!
 
Looks like a huge mammoth task you have undertaken there. Definitely will be worth it in the end.
 
So, before I get into the big cleaning job, and as the machine is dead, I thought I'd check if anything expensive needs replacing.

First, I disconnected all connectors from the main boards (including the flipper board in the cabinet) and started checking voltages at the transformer connectors and at the Power Supply. The transformer can be wired for a few different mains voltages, so its worth checking its set to 230V. Our mains is currently sitting at 251VAC (checked on two RMS meters, as I was a bit surprised, even given the 10% tolerance), so the voltages on the secondary windings are well above nominal. But theyre all there at least. The thing hums like a Welsh Choir as well, but it runs cold, so Ill maybe have a look at the hum later.


Transformer connector / PinNominal voltageMeasured VoltagePSU Function
3 to 59V AC11V AC+12V DC Unreg' & +5V DC
4 to 59V AC11V AC+12V DC Unreg' & +5V DC
Separate connector between 3 and 418V AC22V ACFlipper board
2 to 190V AC100V AC-98V DC and +68V DC for display
8 to 1100V AC124V AC-110V DC for display
9 to 1013V AC15V AC+18V DC via BR1 & C1 (playfield lamps) and +12VDC for display
6 to 725V AC34V AC+34 V AC & DC via BR2 (solenoids)
11 & 1248V AC58 VACFlippers via PPB board
Separate connector6V AC7V AC7VAC via relay to GI lamps

Unregulated voltages at the bridge rectifiers and large barrel/storage capacitor (C1) in the backbox all look sensible. I checked how well the capacitor is smoothing on my trusty £10 handheld scope I built from a kit a couple of years ago ...
Star Wars C1 (Small).jpg So the waveform at C1 is around 18 volts DC with 0.2 volts of ripple at 10ms or 100Hz (fully rectified mains). Astonishingly good, assuming its the original capacitor. The capacitor in my LAH was dry as a bone (really light) which is one way of telling if its had it.

Next, I removed the PSU board for a visual and changed a few fuse holders which had broken (see above). I also did a diode-check on transistor TR5 for the +5v supply, and a few others which all looked OK.
As with my LAH, an innocent looking 100uF capacitor, C2 was completely dry. This will stop the +5v and +12v from working. It looked OK from the top, but unsoldering there were tell-tale deposits on the PCB.

Everything else buzzed out OK on the multimeter, so I put in all the fuses, reconnected the cable looms from the transformer to CN1, CN2, CN9 and CN10 and powered up ... all the correct voltages were present at the output connectors. Happy days!

Next to try out the GI lamps, which means connecting up part of the PPB board ...
 
Oh my word, the schematics for these machines are awful! Ive been reading schematics for 30+ years and these have me scratching my head trying to trace power and signal paths. I suppose should be grateful they are available at least!

So, GI power is 6V AC from the transformer to CN9 on the PSU. The lamp feed goes through the PSU GI relay and out via CN8 to the lamps. The return goes to fuses F1-4 on the PPB board via J5 and then back to the PSU via CN8 again. Nothing else to do but connect it up. Success ... lots of GI lights and fuses intact!

Next, check the display and CPU boards for obvious faults, then connect up CPU connectors CN17 (power) and CN22 (data cable), PSU connectors CN6 (power to CPU) and CN5, which splits to provide power to both the Dot Matrix Controller and Display Driver boards in the front panel.
Leaving all the other CPU connectors floating should be fine at this point.

... power up and we have Blank and +5v LEDs on the CPU (PIA LED goes out) and a working dot-matrix!!! Connecting up CN14 on the PSU also gives you access to the diagnostics buttons inside the coin door.

Sound card next ... CN2 (power to PSU CN6), CN5 (data cable to CPU CN21) and speaker/volume connectors CN3 and CN4 ... and we have sound!

Playfield switches next ... CPU connectors CN8 and CN10, then use the diagnostics to test each switch. All but a couple working!

Finally for today, playfield lamps ... first, do a diode check on all the driver transistors - takes 2 minutes. Multimeter on diode test:
TIP122 - red lead probe on the metal heatsink, then black lead on either of the other 2 - should read around 0.5v
TIP42 - black lead on the metal heatsink, then red lead on either of the other 2 - should read around 0.5v
Amazingly, all the transistors seem to be OK. Then a visual on all the lamp holders, which also look OK.

Connect up CPU connectors CN6 and CN7 for the rows and columns drivers of the lamp matrix, CPU connectors CN4 and CN5 for the lamp power, and PSU connector CN4 for the 18V DC supply to the lamps.

And here it is so far ... a few lamps out, but the TIP122/TIP42 drive transistors for the lamps are all working!

View attachment Pinball.mp4

Tomorrow - Flashers and coils, and problems I imagine!
 
Last edited:
Home stretch on the electrics ...

Thought Id try testing the flashers first, so PPB connector J6 (lamp power via A/B Relay), J9 (lamp returns to PPB), PSU connector CN3 (+34V DC for A/B Relay, bumper and sling power, and PSU GI relay power via CN7) and CPU connector CN11 (lamp sinks) and CN12 (activate A/B relay).

Connecting CPU CN11 and CN12 means bringing a load more TIP122s in-circuit, so out with the diode tester again ... and do CN19 transistors at the same time. Its possible to do a basic check with the board in the cabinet - just measure the resistance from the heat sink to ground - should be >1M Ohm.

CPU CN11&12 Top (Small).jpg CPU CN19 Top (Small).jpg

This is only part of the story, so best remove the board and measure on the other side. Also an opportunity to re-solder the relay and connectors, which is a known issue.

CPU Faulty TIP122 - CN11&12 .jpg (Small).jpg CPU Faulty TIP122 - CN19  (Small).jpg

So, six faulty transistors in total. Time to get an order in! Incidentally, TIP122 should be changed for the higher power TIP102G (~£0.50 each these days from CPC).

Im lucky enough to have a spare CPU board I bought from a guy here on pinballinfo.com so I plugged that in and fired up ... flashers all OK in diagnostics mode.

Now the A/B relay is working I connected up the flipper board - PPB connectors J3 & J4 (50v DC power), J7 (+50V DC to flipper board and 50V coils), CPU connector CN19 (flipper ground and returns for bumpers and slings).

Before switching on, had another look around the coils (measured resistance), cleaned up the stuck mech' for the scoops and replaced a couple of missing screws.

20230423_130209 (Small).jpg 20230423_130050 (Small).jpg Ball launch needs a bit of attention! This will all be cleaned, rewired and sleeved.

20230423_171719 (Small).jpg The drop target reset seems to rely on gravity - it flaps around when the targets are up. I'd expect a spring on the plunger, but theres none on the drawing. Theres also a problem here - when adjusted so the targets are just below the playfield, the blue plunger link locks the plunger solid. Seems to be related to slop in the coil sleeve. It'll all be stripped for cleaning and new sleeves anyway.

20230419_201851 (Small).jpg There's definitely something missing from the VUK. Ah, looking at the drawings its a cap ... 545-5227-00 50427.jpg
How on earth did this thing function without it? It was nowhere in the cabinet!

I havent photo'd it, but R2D2 needs a complete strip down before I activate the coil - its really stiff. Ill just disconnect it for now.

Also, the bracket that holds the moving Death Star target is broken ... 545-5351-00 Noone sells it, so Ill have to repair it or make a replacement :-(

OK, all that done I can confirm everything [else!] is now working! Time to start the strip-down ...
 

Attachments

  • 20230419_201851.jpg
    20230419_201851.jpg
    85.9 KB · Views: 2
Back
Top Bottom