saladman
Registered
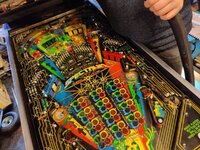
Bit of a Marmite machine this one but I really, really like the look of it and the challenge of the ruleset. And the weirdness. Also feels like one worth saving given the relative scarcity of them. Was on the 'want' list for a while and finally managed to get this one which is in dire need of some TLC. Sold as 'lights up but does not boot' (ha, ha) I wasn't expecting to get anything too special. Some playfield / mylar damage, but still... plastics seem good and all present, and everything else is workable. Cabinet seems ok following a cursory inspection, just a few scrapes and knocks here and there.
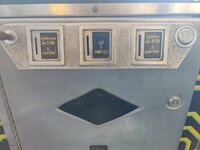
After receiving the machine and getting round to starting the project, a friend and I hoovered all (most) of the dust, dead bugs and other detritus out. Found an old candle (!) in the cabinet along with what looks like some mouse-shredded paper and and old 10p. Not bad. Coin door looks to have French Franc mechs in (if I remember rightly) so I imagine this machine spent some part of it's life across the channel.
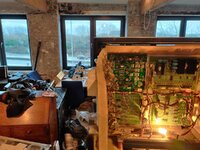
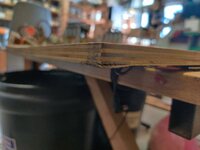
First odd thing that I noticed is the lightboard / board inside the head is slightly curved or warped. Not sure if this has come with age and generally surviving poor conditions or is standard?
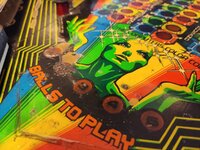
Looks like this machine was spitting the balls out to the left a lot more than to the right - I think this is a known issue with the machines. Check out the wear right through the mylar and paint!
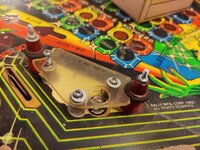
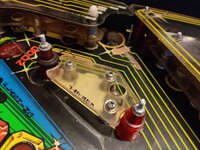
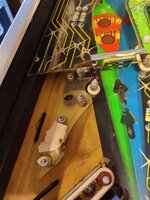
A couple of broken hidden plastics that should be easy enough to re-make. Interesting to note that the 'not-slingshot' hidden plastics use the same part on either side - just upside down on the right.
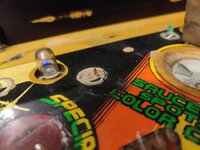
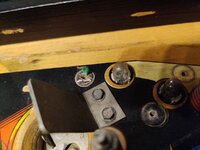
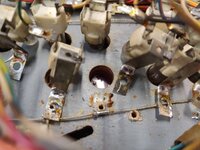
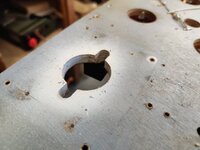
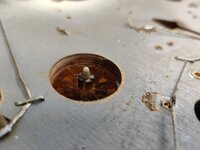
While stripping the top of the playfield I noticed something interesting - again not sure if this is factory spec or added later - some of the holes for posts have a piece of copper wire inside presumably to improve the bite of the self tappers into the holes. Some other holes have some plastic that looks a bit like rawl plug pieces.
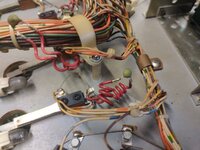
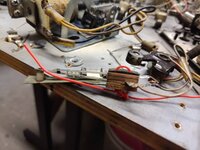
Meanwhile underneath the playfield I have seen these caps (?) on coiled wire across all of the switches. Anybody got any insight or idea why this coiled wire is there? To reduce vibration of the caps? Also note that on each switch, one of the red wires has been cut with wire cutters effectively removing the caps from the circuit. Is this a known 'mod'?
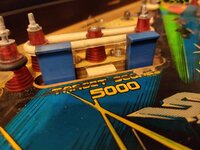
A lot of drop targets on these machines - all present but unfortunately the blue bank has had one of the drops replaced with a white one at some point. The plan is to replace all of the drops with a new set from Marco Specialities. Problem as always when ordering from the US is when to know that an order is 'complete' - it will be just my luck that I miss something or have a need for something else just after an order is placed! Currently spreadsheeting what is needed and holding off an order for now...
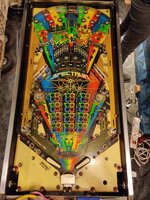
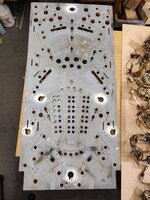
A lot of the playfield is covered in large plastics - looks so different with them all removed!
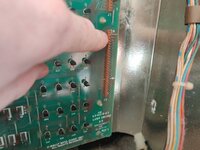
Given the huge quantity of bulbs in this machine there are two lamp driver boards. While removing the connectors from boards in the backbox I noticed that one of the pins on J3 on the right side lamp driver board was bent out of place and therefore wasn't in the connector. Not sure if this was an intentional 'mod' or just careless re-seating of the connector, but not something I have looked into yet. Excuse the finger - it's not a judgement of your inability to see the aforementioned pin - it's more to help me see this again later! I try to take as many photos as possible when taking things apart in some hope that things will all go back in the right place without too many screws or parts being left over afterwards... Much easier taking things apart than putting back together.
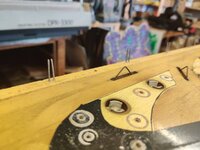
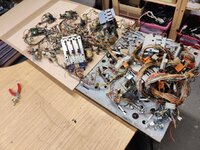
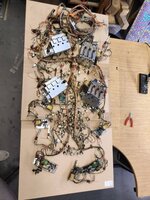
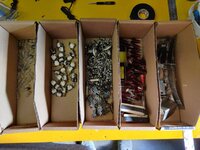
Since the playfield will hopefully be going to Chris at some point, it needed to come out and get fully stripped. Once on the desk, I was removing the black wood pieces that frame the sides and top of the playfield. I found it interesting to note that while there are many holes (6-8) drilled in the playfield for self tapping screws to go into these wooden parts, in fact only one self tapper at either end held each wooden piece in place, with long staples being used for the remainder of the length of the wooden parts. Cost cutting on the line perhaps. The wooden pieces are not pre-drilled in line with the other holes that are present in the playfield. Staples were removed by gently tapping with a small hammer until almost flush with the top of the playfield, then pulled out from underneath with pliers.
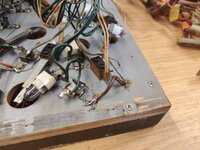
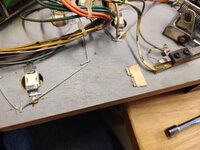
I spotted what looks like a DIY fix to the common wire that runs to the bulb holders on the playfield. Can just about make out where the original wire used to run - presumably it got damaged during playfield lifting / lowering at some point, catching on the cabinet. Not pretty but certainly looks functional.
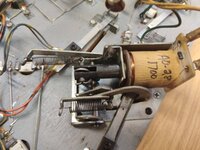
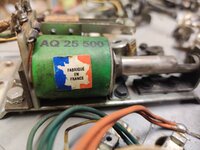
I enjoyed seeing these coils with hand-written part numbers. Not sure if these are factory standard, replacements or even DIY coils. Anybody seen these before or know?
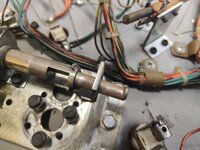
It really looks like this machine has seen a lot of action in the past. Check out the wear on the rod for left flipper mechanism here, I assume due to failure / displacement of the plastic sleeve. You can just about still see the plastic sleeve where it has shifted up onto the rod. Gnarly. Happily I have managed to find a replacement mechanism but this will still need a thorough clean and refresh with service parts. I'm reasonably surprised to see how worn this machine is given that many people consider this too strange a machine.
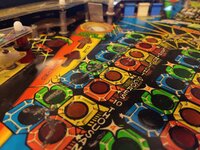
Most obvious of the damage to the playfield apart from the wear at the bottom is this terrifyingly creased mylar across the left side of the light grid! I'm not sure if this mylar is factory, just-out-of-factory or later applied, but it looks like it slipped or moved at some point (note where the holes do not line up with the rollover stars, in the next photo). If only machines could talk...
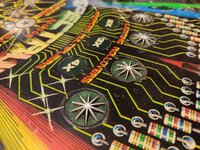
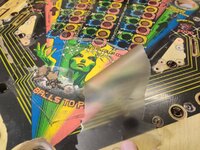
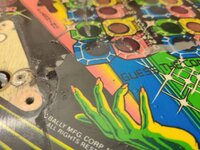
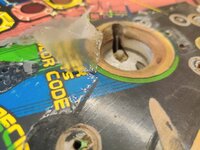
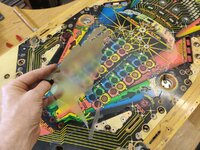
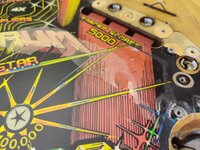
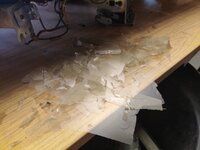
While stripping the top of the playfield I picked at a little piece of the mylar, which came away from the playfield quite easily. Oh dear.... now with all the temptation of a nice crusty scab, I couldn't help myself but continue gently peeling / picking away at it! There was some very slight paint lifting towards the edges, in some places, but mostly it seemed liked the mylar came away from the adhesive very easily. I say this as after lifting the mylar, there is a matte, very slightly tacky finish remaining on the playfield. I was surprised to find that removing this mylar revealed a playfield in much better condition than expected. Most inserts seem to have stayed level with very little cupping or sinking. Not as bad as it could have been. I have resisted any temptation to remove this adhesive or go any further with cleaning or prep given that I don't want to introduce any unwanted contaminants or residue before sending to Chris.
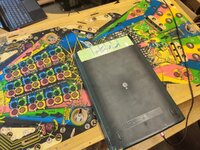
Similar to my night moves restoration, I wanted to scan in the playfield using the modified flatbed scanner. This is mostly to get a nice record and image of the playfield, but may also come in handy later - for example sharing with others for artwork, or maybe using as a guide to design other things. While doing this, I also got an idea to try scanning the sides of pin cabinets - and making my own stencils for re-painting later. I know that stencil kits are available, but I have a laser cutter, and want to do as much of the restoration as possible myself.
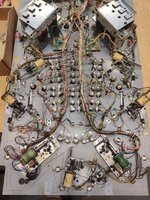
I didn't have time to completely strip the playfield yet but have at least started undoing screws ready for shifting everything on to an MDF board. More to come.

