What's new
Pinball info

Register a free account today to become a member! Once signed in, you'll be able to participate on this site by adding your own topics and posts, as well as connect with other members through your own private inbox!

In Progress Rollergames

Jetsetron

Registered
Joined
Jun 18, 2018
Messages
124
Location
Lincolnshire
Here’s a quick mini-log of my return to pinball after 8 years away, and after a virtua-pin I built didn’t scratch the itch.

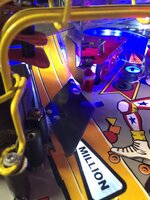
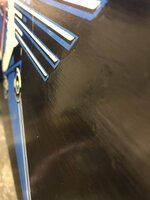
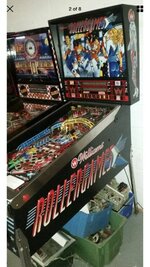
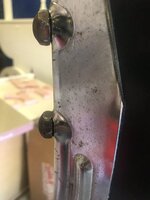
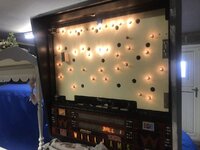
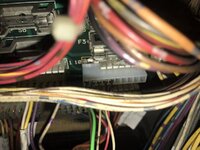
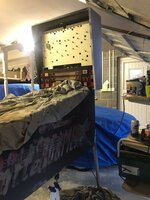
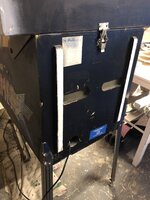
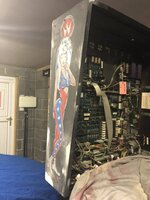
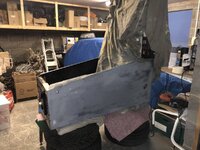
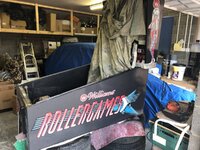
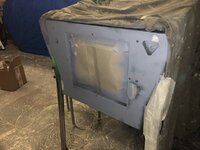
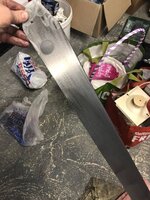
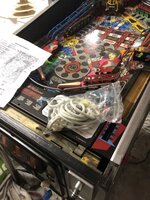
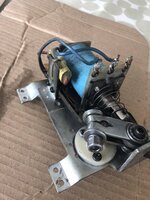
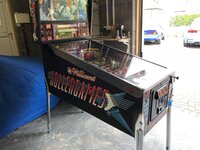
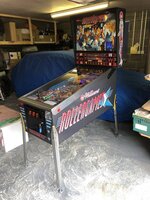
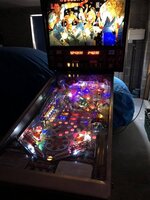
Purchased a Rollergames off eBay, generally quite solid without much damage to the cabinet. However the backbox lighting didn’t work, the 3rd flipper was lazy, some rubbers and plastics were worn, and a previous previous owner had hand painted the cabinet. Legs were pitted as usual.
 

Attachments

  • F52CF4AF-FF6C-4074-8626-A42638464FBA.jpeg
    F52CF4AF-FF6C-4074-8626-A42638464FBA.jpeg
    50.3 KB · Views: 26
  • A4ECD5FF-4666-4F42-9067-2B977920ACC3.jpeg
    A4ECD5FF-4666-4F42-9067-2B977920ACC3.jpeg
    93.2 KB · Views: 28
  • D1F23D38-C4BA-402B-BB07-1788748A54B6.jpeg
    D1F23D38-C4BA-402B-BB07-1788748A54B6.jpeg
    59.8 KB · Views: 25
  • F0ADE398-3E56-4306-8147-45505A8BD751.jpeg
    F0ADE398-3E56-4306-8147-45505A8BD751.jpeg
    80.2 KB · Views: 20
Started with the backlighting. Found a burnt connector and damaged header. Replaced the connector and still no joy. Then noticed the loose connectors on the backboard. This forum came to my rescue, a relay was missing. The seller sent me a nice one.

All worked briefly but with uneven illumination. Replaced the connection header and upgraded to LED’s. There was another connection getting v hot to the main playfield GI, which cooled after the LED. The seller sent me a decent 11C board from a different game which is being altered to work. For now the existing is holding on LED’s.
 

Attachments

  • 0DCE1940-90ED-43F5-9247-312B697AFAEA.jpeg
    0DCE1940-90ED-43F5-9247-312B697AFAEA.jpeg
    87.5 KB · Views: 7
  • 45A3EAAE-2276-4D75-A261-2DCAD9514B26.jpeg
    45A3EAAE-2276-4D75-A261-2DCAD9514B26.jpeg
    60.7 KB · Views: 8
  • E9510096-42D3-4285-8601-1C7D3A2A5DC1.jpeg
    E9510096-42D3-4285-8601-1C7D3A2A5DC1.jpeg
    146.1 KB · Views: 9
  • 7E99A9B6-F71D-44DB-8B36-A0916E1E0163.jpeg
    7E99A9B6-F71D-44DB-8B36-A0916E1E0163.jpeg
    93.9 KB · Views: 9
  • F968225E-47F9-4F40-BDAE-AEF0511B81FC.jpeg
    F968225E-47F9-4F40-BDAE-AEF0511B81FC.jpeg
    105.5 KB · Views: 9
Decided only way after t-cut, paint stripper etc was to redecal.

Watched some vids and was quite daunted by stripping everything out the cabinet. I know I’m going to get stick for my lack of professionalism ?. Redecaled with the machine upright and playfield in. Took various brackets and bolts off, all repainted in satin black.

Sanded, filled, primed each part of the cabinet, and sprayed satin black on the edges of each side.

Applied the decals with great car with lashings of soapy water, a squeegee and window cleaning sponges.

Came out virtually creaseless and with only a tiny number of small bubbles.
 

Attachments

  • 4BABF197-C056-4EC9-91BF-9196B3EFFC91.jpeg
    4BABF197-C056-4EC9-91BF-9196B3EFFC91.jpeg
    94.7 KB · Views: 13
  • 8D590895-32B7-456F-87B8-3CE17107F834.jpeg
    8D590895-32B7-456F-87B8-3CE17107F834.jpeg
    87.3 KB · Views: 13
  • B7D77D33-EB1C-477A-AFA5-945B4D0B0987.jpeg
    B7D77D33-EB1C-477A-AFA5-945B4D0B0987.jpeg
    94 KB · Views: 13
  • 43EDC8FD-AE54-4271-9F6B-C15381A7F99B.jpeg
    43EDC8FD-AE54-4271-9F6B-C15381A7F99B.jpeg
    143.2 KB · Views: 13
  • BCE3366B-14D9-4B1D-86D7-8B19B1AD8A40.jpeg
    BCE3366B-14D9-4B1D-86D7-8B19B1AD8A40.jpeg
    179 KB · Views: 13
  • 619F057D-7021-4C43-93EA-0E8244B7B666.jpeg
    619F057D-7021-4C43-93EA-0E8244B7B666.jpeg
    122.6 KB · Views: 12
Cleaned the legs with coke and kitchen foil then machine polished them. Fitted new leg levellers. They’re far from perfect but a big improvement.

Machine polished the lock bar and side trims.
 

Attachments

  • DF37DD9D-7A1D-4C7A-9176-EFC3D6A90E76.jpeg
    DF37DD9D-7A1D-4C7A-9176-EFC3D6A90E76.jpeg
    121.2 KB · Views: 9
Rerubbered about 75% of the playfield. Will remove the ramp at some point and replace the last ones and for new lane dividers.

Bought all new pop bumper caps.

The multiball drop targets were badly worn, bought new targets and decals, fitted, and mylar’d the decals for protection.

Bought a flipper refurb kit and rebuilt the 3rd flipper and adjusted it. Rollerlocks are now a lot easier.
 

Attachments

  • 6B9AB0B4-D941-4A06-8570-7F6A45E43DD7.jpeg
    6B9AB0B4-D941-4A06-8570-7F6A45E43DD7.jpeg
    135.6 KB · Views: 7
  • D12D875F-4A2C-490A-8959-B0497D05E429.jpeg
    D12D875F-4A2C-490A-8959-B0497D05E429.jpeg
    159 KB · Views: 7
  • F7BCD79C-B277-46E2-91C4-FD8B4E32BDD8.jpeg
    F7BCD79C-B277-46E2-91C4-FD8B4E32BDD8.jpeg
    95.8 KB · Views: 7
  • D3944EB6-DCEA-4BAD-B562-92A9C675AA7C.jpeg
    D3944EB6-DCEA-4BAD-B562-92A9C675AA7C.jpeg
    111 KB · Views: 7
  • E6789902-1952-41C2-832E-DF779B8BE108.jpeg
    E6789902-1952-41C2-832E-DF779B8BE108.jpeg
    132.4 KB · Views: 7
To finish off I fitted lithium batteries, got a new set of balls, pin guards and gold leg bolts.

Machine looks a huge amount better and plays nice.
 

Attachments

  • 34686AFA-AFB7-4D84-872F-165C47A56C24.jpeg
    34686AFA-AFB7-4D84-872F-165C47A56C24.jpeg
    155 KB · Views: 15
  • 258F0A85-D16B-44C8-BD60-F9D0C61553EB.jpeg
    258F0A85-D16B-44C8-BD60-F9D0C61553EB.jpeg
    134.2 KB · Views: 16
  • 054F135F-ED98-44EB-B2A9-18D2683A2B23.jpeg
    054F135F-ED98-44EB-B2A9-18D2683A2B23.jpeg
    101.5 KB · Views: 17
Probably not the most comprehensive job or most interesting log, but I tackled everything with no previous experience (my machine back in the noughties never needed anything).

I really enjoyed working on it and learned a lot. This forum has been absolutely brilliant and extremely helpful.

Pick up a SST tomorrow. Really looking forwards to it and have some mod plans.

Thanks for reading!
 
That looks really good.
I dont think I'm going to do the decals as I dont have a garage to do the work in.
I've also gone for standard bulbs.
Not sure if that good or bad? There seems to be mix views on led's.
 
Personally I think LED’s really suit this machine. Also helps reduce the loads by a big margin on the creaky old circuit boards.

Any pics of your new machine?
 
It's in pieces at the moment.
The case is pretty rough.
I think it's been in an out house for 20 years.
Playfield is OK . Has some marks but not to bad.
I'm just cleaning the playfield and working out what bits I need to order.
Some plastic is chipped and broken with some decal warping.
but its half the fun.
 
Sounds like a good restoration project look forward to hearing how you get on. If you don’t mind what did you pay for it?
 
I wouldnt go as far as restoration.
I'm just cleaning it up changing the rubbers and then playing it.
I ended up paying £1000.
Impulse buy whilst browsing ebay :)
 
Cliffy’s fitted to protect the pit and wall :)
 

Attachments

  • E94B0835-1E0F-4393-8224-8ADE51707503.jpeg
    E94B0835-1E0F-4393-8224-8ADE51707503.jpeg
    122.3 KB · Views: 13
  • 7B6B8F51-EB47-47DC-AEA3-25045FC64B4B.jpeg
    7B6B8F51-EB47-47DC-AEA3-25045FC64B4B.jpeg
    95.8 KB · Views: 13
Back
Top Bottom