What's new
Pinball info

Register a free account today to become a member! Once signed in, you'll be able to participate on this site by adding your own topics and posts, as well as connect with other members through your own private inbox!

In Progress Newbie NGG shop log

windoesnot

Site Supporter
Joined
Aug 10, 2014
Messages
3,332
Location
Lancashire
Alias
Ian Walmsley
So, I picked up a lovely NGG from @Mfresh on Saturday. It plays and looks great and am very happy with it. However, I think its worth a bit of work doing to it to make it even better.

List of jobs to sort on it:

New pop bumper skirts
Replacement upper playfield support posts - DONE
LED's in backbox - DONE
LED's in flashers - DONE

Fix 2 raised inserts (banana shaped ones)
New posts rubbers to add - DONE
New slingshot rubbers to add - DONE
Green superband flipper rubbers - DONE
New decal set (
https://pinside.com/pinball/forum/topic/ngg-slam-ramp-decal) - DONE
New slam ramp under decal (ordered but not yet required)
Adjust slingshot switches - DONE

Original NGG pictures from for sale thread here:

http://www.pinballinfo.com/community/threads/no-good-gofers.17993/

Lets see how this goes. Looks better already with the backbox LED's and flashers on!
 
Last edited:
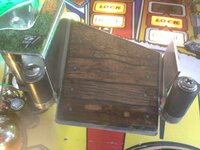
The mechanism that work the gofers get a beating and can wear pretty easily so I would do these at the same time. Biggest problem is the square plate with the little tab that holds the gofers up leading to the multiball , the small tab wears and can stop the gofers staying up when it should.
 
Got to love optimism......

Pop bumpers and rasied inserts, mentioned as if they are like changing a bulb :p

Just take your time, take plenty pictures and you'll be fine. (and wishing you never had started playing with the pop bumpers!)
 
Pop bumper skirts are the LAST thing on the list that I will be fixing. They work fine at the moment for me. Maybe in a few weeks / months / years time all be brave enough to take them on.

Daz, do you have a part number for the plate you mentioned? Not sure which you mean, having a guess its 01-14739 (lift ramp catch in the manual). When you come round you can point it out in person then laugh at me when I start to panic about replacing them :rofl:

Will post some pictures later of the LED upgrades, most of the rest has not arrived yet :)
 
when i was doing up mine a couple of months ago, i discovered a handful of little niggles that can each contribute to shenanigans. these are all still fresh in my mind, so ask if you get any difficulties. for example the bolt through the gofers can work loose, stopping them going down. the slam ramp needs to be able to smoothly go up and down, mine was hampered by a dented vertical post, a big daft washer preventing free travel along the groove, and the slam ramp solenoid coil getting caught up. all at various times.

oh, and i recommend putting felt under the slam ramp and both gopher metal flap ramps, to reduce the clanking noises. i replaced the decal on the wheel (recommended) and under the slam ramp (recommended) and at the back of the game (waste of time).

if you go down the route of replacing the actual gofers for NOS, let me know, as i might want your old ones if they're nicer than mine, to recoup some of your costs.

oh, and i also found that a screw under the flat clear Driving Range can improve its angle so that a hole in one is more acheivable
 
Last edited:
Thanks Dan.

There's already felt under the slam ramp and the wheel decal is new. The Gofers (Keown and Adams) are in decent shape so should be good for a good while longer. The noise from the gofer ramps seems ok too.
 
i hope you called them that because you like to bash them. i'm a Red Sea Pedestrian here, celebrating the ****'s loss last night and looking forward to our big Fiorentina 2nd leg tomorrow night, and Cup Final against Chelski on Sunday.
 
i hope you called them that because you like to bash them. i'm a Red Sea Pedestrian here, celebrating the ****'s loss last night and looking forward to our big Fiorentina 2nd leg tomorrow night, and Cup Final against Chelski on Sunday.
I'm actually starting to refer to them more now as Suarez and Keown :)

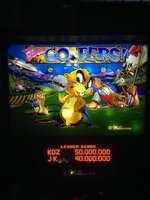
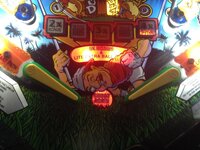
Backbox with LED's fitted (not to everyones taste I know but I prefer them):
img.photobucket.com_albums_v203_windoesnot_IMG_0330_zpsnagglglw.jpg

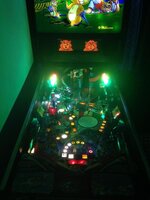
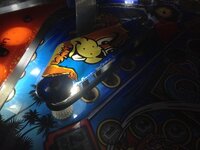
Multiball start with LED flashers (don't think the camera picks up how bright they are)
img.photobucket.com_albums_v203_windoesnot_IMG_0350_zpse7fmmuhd.jpg

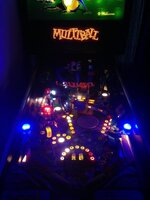
And again with the blues lit:
img.photobucket.com_albums_v203_windoesnot_IMG_0345_zps4i2wxyup.jpg

New upper support post fitted:
img.photobucket.com_albums_v203_windoesnot_IMG_0356_zpsl2rauevi.jpg

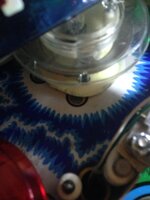
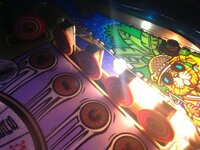
Upper pop bumper skirt currently, still plays ok but will be eventually be replaced. This is the worst of the 3 by far:
img.photobucket.com_albums_v203_windoesnot_IMG_0355_zpsbufihmfs.jpg
 
Having just tackled my first pop on a TZ the other day with great trepidation it turned out to be a piece of p*ss. The only hard bit was loosening the staples that fasten the ends of the bulb holder legs to the bottom of the playfield. Other than that it just comes apart very easily and there's suprisingly few parts.

Having said that I was happy to give Window Snot three new bumper skirts for his NGG and leave him to fit them...

That machine is looking better every day.
 
Good stuff. I'll be starting mine soon aswell. Havnt even gotten a chance to put it back up on legs yet

Going to go the LED route myself aswell. Such a bright and colourful machine they look good on it!
 
The only hard bit was loosening the staples that fasten the ends of the bulb holder legs to the bottom of the playfield. Other than that it just comes apart very easily and there's suprisingly few parts.
Flathead screwdriver and prise them out?
 
Having never tackled pops myself, what makes them so daunting? It it the number of parts or because they're fiddly?
Pops are no more difficult than flippers or slingshots. Each have their own little foibles. Probably the hardest part of setting up a pop properly is getting the skirt pin centred in the spoon. There's a neat trick using a torch. Trying to find the information...

Got it! Read it on Pinside.com ages ago. Another excellent tutorial from the infamous vid1900. Read the whole thing (<- that link filters out posts from all users except the OP) but the trick with the torch is in this post https://pinside.com/pinball/forum/topic/vids-guide-to-rebuilding-pop-bumpers#post-486010 and the next post https://pinside.com/pinball/forum/topic/vids-guide-to-rebuilding-pop-bumpers#post-486024.

Note the use of FISHPAPER in the switches in the photos of the following posts. If anyone wants some new fishpaper I've still got 4 sheets for sale on my GROUP BUY: FISHPAPER thread!
 
Firstly, dibs on it can only be made if you manage to spell my name on here correctly, its not that hard folks :rolleyes::rofl:

Paul did give me the new pop skirts to replace so again thanks for those.

My concern with the pops is re-attaching the lighting wires. Will cross that bridge when I come to it though, the other pop bumper work doesnt require me to remove them.

Will probably be into next week before work continues as I'm waiting on parts from various places to arrive.
 
Just seen that slam ramp under decal. Thats such a life saver

Have some wear there myself and was assuming id have to give it a touchup!
 
Updates for today:

New green superbands added to all 3 flippers:
img.photobucket.com_albums_v203_windoesnot_IMG_0359_zpsgwwymjj0.jpg

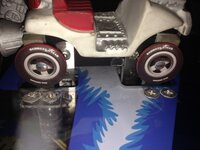
Black posts added to slam ramp and ramp posts at the back:
img.photobucket.com_albums_v203_windoesnot_IMG_0361_zpsrz3e1iuy.jpg

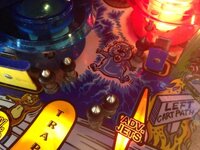
Small post rubbers all replaced from white to new black ones:
img.photobucket.com_albums_v203_windoesnot_IMG_0360_zpshc4tfrqm.jpg

Slingshot rubbers changed from white to blacks:
img.photobucket.com_albums_v203_windoesnot_IMG_0362_zps2hdbqxh0.jpg

Pinside decal set should arrive by the end of March. Also need to adjust the slingshot switches to make them more sensitive, have a tool from Andy to sort this.
 
Slingshot switches now adjusted and working great using the right tool for the job :)
 
Back
Top Bottom