Yea I know , I am always banging on about classic sterns and how awesome they are, how I played them in my youth etc... yawn yawn.
But it’s a fact they are awesome! And Seawitch is no exception. In fact it’s my favourite classic s.s. Period. And anyone who knows me knows I am a classics addict.
Plan is to do a mint restoration on this . We have one of Johns (John Greatwich from the u.s.). New playfields Which are awesome. He kindly agreed to send one to us directly. We have number 20 of 28 playfields , these have never suffered from clear coat problems. They look incredible.
Rosie stripped it out today and this is what we got. Plus a picture of the original Playfield which is actually not to bad for a Seawitch.
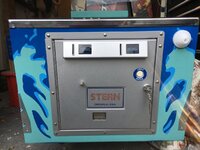
Hopefully you will all enjoy the journey....any comments always welcome. The backbox is pretty bad, with the usual dodgy mdf stern use. Cabinet filthy but solid. Here’s what it looks like.....


Here’s the new Playfield. The light board is pretty grim to....


But it’s a fact they are awesome! And Seawitch is no exception. In fact it’s my favourite classic s.s. Period. And anyone who knows me knows I am a classics addict.
Plan is to do a mint restoration on this . We have one of Johns (John Greatwich from the u.s.). New playfields Which are awesome. He kindly agreed to send one to us directly. We have number 20 of 28 playfields , these have never suffered from clear coat problems. They look incredible.
Rosie stripped it out today and this is what we got. Plus a picture of the original Playfield which is actually not to bad for a Seawitch.
Hopefully you will all enjoy the journey....any comments always welcome. The backbox is pretty bad, with the usual dodgy mdf stern use. Cabinet filthy but solid. Here’s what it looks like.....
Here’s the new Playfield. The light board is pretty grim to....


 would never of happened at Bally..............


 Oh well it’s u er boring anyways........

 just the right humidity for the paint today…. Not sure on using black next maybe use an aqua blue in its place (?)…..


 . Decided on blue in the end. Looks pretty cool


 Appreciate the feedback. Keef


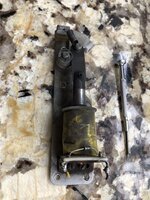

 first we soak it in stripper…..


 so we started on the side rails, all but one that needs a bit of rebuilding..
 ......
