Installing Eproms in a WPC Pinball Machine
To install your eproms, you will need:
Updated eprom chip(s)
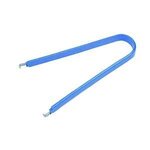
A small, flat blade screwdriver
Patience
A small, flat blade screwdriver
Patience
Please note: installing updated eprom chips in your game WILL wipe out any high scores or game customizations. Be prepared to change any settings (enabling Free Play mode etc) when you replace the chips.
Follow these instructions carefully! I am not responsible for any damage you may do to your game by improper handling or installation of chips. If you are confused by anything, or need further instructions or clarification at any time, ask on here!!
Follow these instructions carefully! I am not responsible for any damage you may do to your game by improper handling or installation of chips. If you are confused by anything, or need further instructions or clarification at any time, ask on here!!
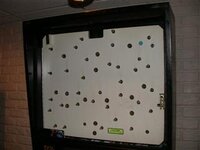
Unlock and remove the back-glass from your machine. Your machine should have keys for the back-glass lock, most always put on a hook inside the coin door.
Make sure you ground yourself on a grounded part of the machine, be it a side rail, ground strap etc.
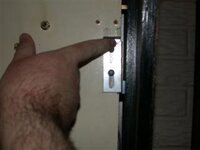
Unlatch and swing the light insert board open.
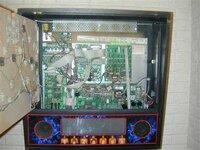
Behind the light board, you will see the circuit boards that control your pinball. The one to the lower left with the 3 AA batteries is the CPU.
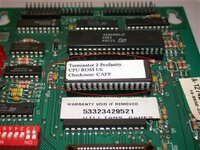
Toward the middle of the top of the CPU board is the CPU eprom in socket U6 (circled in red)
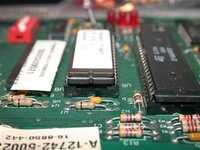
This photo shows the eprom in the socket from the side. When you remove the eproms, it is important that your small flat head screwdriver is placed between the socket and the eprom, not the socket and the board. Prying the socket off of the board can do serious damage to the board, requiring expensive repair work.This photo also shows in closer form what the notch on the chip looks like.
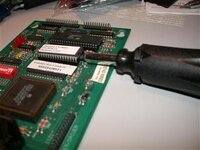
Using your small flat-blade screwdriver, insert the tip between the eprom and the socket, and pry slightly, just enough to start to remove the chip from the socket. Alternate between the sides of the chip until the chip is out of the socket. It is important to do this slowly in small increments so you do not bend the legs of the chip. Place the removed chip carefully aside, perhaps in the anti-static tube your replacement chip is shipped in.
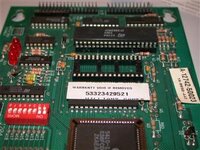
In this photo, the socket is empty and ready for the new eprom.
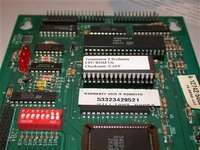
Carefully remove your updated chip from the anti-static foam it was shipped in, and verify it is the correct chip for the socket (same number of legs, same shape and size etc)Line up the chip, noting the notch is toward the right. The easiest way to line the legs up is to line up one side of the chip without inserting the pins into the socket, and gently roll the chip toward the board until the legs are lined up for both sides of the socket.
Once the chip is lined up, apply gentile pressure to the chip, slowly pushing it into the socket.
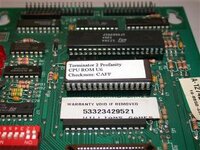
This photo shows the new chip installed, nice and snug in its socket. Take a closer look, and make sure no legs are rolled under the chip, or hanging outside the socket. If so, you could damage the chip and the board when you turn the game on. The legs of the chip are delicate, and are easily damaged with improper handling.
At this point, you are ready to power the game up and play a few games.
Make sure you ground yourself on a grounded part of the machine, be it a side rail, ground strap etc.

Unlatch and swing the light insert board open.

Behind the light board, you will see the circuit boards that control your pinball. The one to the lower left with the 3 AA batteries is the CPU.

Toward the middle of the top of the CPU board is the CPU eprom in socket U6 (circled in red)

This photo shows the eprom in the socket from the side. When you remove the eproms, it is important that your small flat head screwdriver is placed between the socket and the eprom, not the socket and the board. Prying the socket off of the board can do serious damage to the board, requiring expensive repair work.This photo also shows in closer form what the notch on the chip looks like.

Using your small flat-blade screwdriver, insert the tip between the eprom and the socket, and pry slightly, just enough to start to remove the chip from the socket. Alternate between the sides of the chip until the chip is out of the socket. It is important to do this slowly in small increments so you do not bend the legs of the chip. Place the removed chip carefully aside, perhaps in the anti-static tube your replacement chip is shipped in.

In this photo, the socket is empty and ready for the new eprom.

Carefully remove your updated chip from the anti-static foam it was shipped in, and verify it is the correct chip for the socket (same number of legs, same shape and size etc)Line up the chip, noting the notch is toward the right. The easiest way to line the legs up is to line up one side of the chip without inserting the pins into the socket, and gently roll the chip toward the board until the legs are lined up for both sides of the socket.
Once the chip is lined up, apply gentile pressure to the chip, slowly pushing it into the socket.

This photo shows the new chip installed, nice and snug in its socket. Take a closer look, and make sure no legs are rolled under the chip, or hanging outside the socket. If so, you could damage the chip and the board when you turn the game on. The legs of the chip are delicate, and are easily damaged with improper handling.
At this point, you are ready to power the game up and play a few games.
Last edited:

