So I got a nice Earthshaker from @DRD quite a few years back, and gave it the full cleanup and new plastics treatment at the time. But a machine like this needs a bit more care and attention than that to look its best, so about a year ago I got a new playfield for it (thanks to @Pick Holder)
So what follows is a quick transformation:
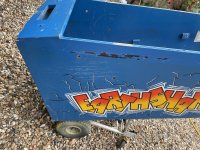
First off - strip the cab and backbox


Then I had my first experience with using resin as a filler, to get nice straight corners:


Resin is smelly but a lot better than wood filler for corners and edges, it seems to me:


Then a quick reassembly - well this took about three months as I'm a slow worker

And some powdercoated legs, side rails etc. I thought long and hard about what colour for these. I usually prefer contasting colours but yellow or red just wouldn't have worked, so ended up with dark blue

Decided to put one of @David retro 's lock bar receiver stickers on the lock bar receiver. It looks good, if not original...

And there you have it


And topped off with a home made topper.

A máquina agora é tão doce que faz os meus dentes doerem
Next up, @stumblor's old Whirlwind...
So what follows is a quick transformation:
First off - strip the cab and backbox
Then I had my first experience with using resin as a filler, to get nice straight corners:
Resin is smelly but a lot better than wood filler for corners and edges, it seems to me:
Then a quick reassembly - well this took about three months as I'm a slow worker
And some powdercoated legs, side rails etc. I thought long and hard about what colour for these. I usually prefer contasting colours but yellow or red just wouldn't have worked, so ended up with dark blue
Decided to put one of @David retro 's lock bar receiver stickers on the lock bar receiver. It looks good, if not original...
And there you have it
And topped off with a home made topper.
A máquina agora é tão doce que faz os meus dentes doerem
Next up, @stumblor's old Whirlwind...
Attachments
Last edited:
