Lifted from this thread: http://www.pinballinfo.com/forum/sh...-An-Ex-Arcade-TAF/page9&highlight=life+arcade
WARNING: We take no responsibility for any damage or harm caused by the fitting of any DIY parts. If these parts do not work as intended or your machine stops working, catches fire, burns out or sleeps with your daughter then it is, alone, your fault.
There don't appear to be any kits directly sold in the UK yet this is one of those things that most people think is a good idea. Making you own is fairly easy and a good way to start and practice molex connectors.
These protector kits use the original connectors and so effectively you can disconnect the magnets and fit these in-line without any machine soldering or wiring changes. I am not sure how much the fuse would save the playfield from damage because I don't know if the amps rise significantly when the magnets lock on but I have used the same fuses referenced in other kits (3A Slowblow).
Parts:
3 in-line fuse holders, 1 1/4" RC70M (Maplins £1.99)
3 male housing molex 03-06-1032 (RS 10 pack, £1.50)
3 female housing molex 03-06-2032 (RS 10 pack, £1.40)
6 male pins molex 02-06-2101 (RS 100 pack, £3.00)
6 female pins molex 02-06-1101 (RS 100 pack, £4.00)
Wire
3A Slowblow fuses (will be testing)
Tools:
Molex Crimping tool
Wire cutter/stripper
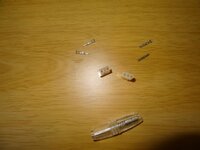
The parts lined up.

The Maplin in line fuse holders have a screw to clamp the wires, this makes it easier/quicker as you don't need to solder. I cut one long wire and two shorter wires to be connected to the inline fuse, I kept them all as short as I thought sensible as I didn't want them to be two long.
I crimped the pins on to the ends of the wires but didn't click them into the housing, this was the point to check which way round the machines connectors needed to be. The is because you can have female pins in male connectors, male pins in female connectors, male pins in male connectors and female pins in female connectors. Hell, you could have one of each in either or a combination over the 3 connectors for the magnets so it is worth checking your machine. Mine were all the same so I could make three identical connectors.

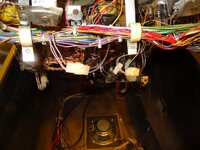
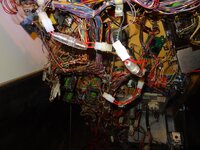
The three magnet connectors under the playfield:

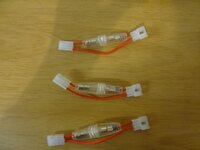
Connected up:

Then tidy up the wires so they are not hanging about.
Simple and the total cost was £7.26 for the three but I had to buy larger packs of some items so spent £15.96 and have spares for other connectors. I used this as a way to practice crimping pins for molex connectors and will use the remaining parts to fix some dirty or tired looking wiring under the playfield.
WARNING: We take no responsibility for any damage or harm caused by the fitting of any DIY parts. If these parts do not work as intended or your machine stops working, catches fire, burns out or sleeps with your daughter then it is, alone, your fault.
There don't appear to be any kits directly sold in the UK yet this is one of those things that most people think is a good idea. Making you own is fairly easy and a good way to start and practice molex connectors.
These protector kits use the original connectors and so effectively you can disconnect the magnets and fit these in-line without any machine soldering or wiring changes. I am not sure how much the fuse would save the playfield from damage because I don't know if the amps rise significantly when the magnets lock on but I have used the same fuses referenced in other kits (3A Slowblow).
Parts:
3 in-line fuse holders, 1 1/4" RC70M (Maplins £1.99)
3 male housing molex 03-06-1032 (RS 10 pack, £1.50)
3 female housing molex 03-06-2032 (RS 10 pack, £1.40)
6 male pins molex 02-06-2101 (RS 100 pack, £3.00)
6 female pins molex 02-06-1101 (RS 100 pack, £4.00)
Wire
3A Slowblow fuses (will be testing)
Tools:
Molex Crimping tool
Wire cutter/stripper
The parts lined up.

The Maplin in line fuse holders have a screw to clamp the wires, this makes it easier/quicker as you don't need to solder. I cut one long wire and two shorter wires to be connected to the inline fuse, I kept them all as short as I thought sensible as I didn't want them to be two long.
I crimped the pins on to the ends of the wires but didn't click them into the housing, this was the point to check which way round the machines connectors needed to be. The is because you can have female pins in male connectors, male pins in female connectors, male pins in male connectors and female pins in female connectors. Hell, you could have one of each in either or a combination over the 3 connectors for the magnets so it is worth checking your machine. Mine were all the same so I could make three identical connectors.

The three magnet connectors under the playfield:

Connected up:

Then tidy up the wires so they are not hanging about.
Simple and the total cost was £7.26 for the three but I had to buy larger packs of some items so spent £15.96 and have spares for other connectors. I used this as a way to practice crimping pins for molex connectors and will use the remaining parts to fix some dirty or tired looking wiring under the playfield.
