What's new
Pinball info

Register a free account today to become a member! Once signed in, you'll be able to participate on this site by adding your own topics and posts, as well as connect with other members through your own private inbox!

Creature Chase lamp lights not working properly.

David_Vi

Site Supporter
5Years
Joined
Sep 3, 2019
Messages
4,003
Location
Sudbury
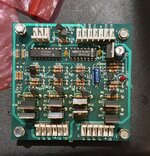
Claire's Creech has a few issues we wouldn't have noticed at first. I hooked up the chase lamp boards and noticed some odd behaviour.

On all the 3 boards the there's four separate strings, two don't appear to be working correctly. All lamps turn on and off but half don't cycle, flicker, twinkle, chase (whatever you want to call it).

You can see in the video that every two lamps are working, then the next two aren't.


So on a board the lamps are labeled L1 - L8.
Not working correctly on all boards are labelled L2, L3 and L6, L7.
L2 and L6 are the same string, as are L3 and L7.
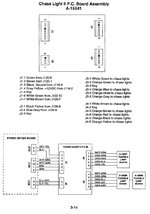
20230119_214946.jpg
Screenshot_20230119_175834_OneDrive.jpg
Screenshot_20230119_192319_OneDrive~3.jpg

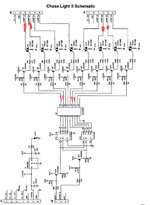
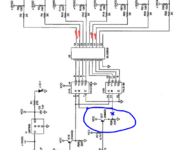
I've checked the schematic just to see which pins are for those lamps (labeled with red) thinking maybe it was one of the triacs, but they're all on different ones so it's unlikely four have gone? I can only assume U2 is dodgy?

Beyond this I'm out of ideas, any advice on what to check next? I own a DMM and logic probe.


Confirmation that it's definitely the chase lamp board would be good as we're getting one of @stumblor 's chase echos at some point so that should solve it. Saying that, it would be good to fix the board for now if possible.
 
i think you're right that the common component is the 2803 at U2. This is a sensitive device, and is the same chip that goes wrong on a wpc switch matrix if you momentarily overload it.
 
1674205510281.png

If blue x is always high then you would get what you see. Could be driver q17 or drive to board. Easy to test, remove J2 from board and then try pulling Drive 2 to ground.


David

sorry, CBA to rotate image
 
Last edited:
I swapped a new IC into U2, no change whatsoever.

Tried swapping two of the triacs (by now I'm just experimenting as I expect to get a replacement one way or another). Still no change, except ruining the board🙈

View attachment 191755

If blue x is always high then you would get what you see. Could be driver q17 or drive to board. Easy to test, remove J2 from board and then try pulling Drive 2 to ground.


David

sorry, CBA to rotate image

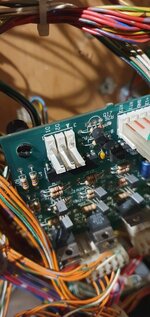
You mean these pins? What do you mean by pulling to ground? And should this be when the lights are set to "cycling" or "off" in test. I'm not sure I understand what I'm trying to do.
20230120_175156.jpg
 
Those two inputs are pulled high by resistors. Pulling (shorting them) to earth will allow you to simulate the control and therefore which string is on and you can check the input to U2. The two inputs give you 4 states - two sets for 8 lights.

You can check with DMM.

David
 
Check the voltage at the blue x and it should be low, then short J2.2 to ground and the blue x should go high. If it doesn't then change q17.

Repeat for J2.1 and q18. If they look good then it is U1 faulty.

Never just change something as a guess.


David
 
Looks to be U1 then. Those transistors are good, as are U2.
The board doesn't like me working on it, I'm not great at board work but this is the first one where nearly every time I've tried to remove something I've lifted pads. I don't know why this one is so fragile.
I suppose it's best to wait for the replacement from Davey.
If you know it it U1 then clip every leg as near to the chip as possible then remove the plastic bit leaving the 14 legs. Then remove each leg one by one and clean up the holes on the board. Fit a socket and Bob's your Uncle.

Get boards to practice soldering technique on so you don't screw up boards. Never start changing things if you don't know what you are doing.

David
 
If you know it it U1 then clip every leg as near to the chip as possible then remove the plastic bit leaving the 14 legs. Then remove each leg one by one and clean up the holes on the board. Fit a socket and Bob's your Uncle.

David

Exactly this ^

I use micro side cutters for snipping IC legs, and to be honest for anything that isn’t heavier gauge cutting, they’re also fantastic for cable tie trimming as they’re NOT diamond cut, so they cut flush and don’t leave nasty sharp edges on cable ties that make you look like you’ve been fighting with a cat!

These….


Chris.
 
Back
Top Bottom