As we all know (and have been discussing), replacement holograms for creech are pretty hard to come by these days. There's Henrik's, which is amazing, but expensive. And even if you had the dough, it's sold out. There was another one that was released by pinball centre, but no matter what @strongs_uk says, it sucks hard (like most *cough cough* stuff they do).
@replicas contacted me the other day about another possible solution - a clear etched plexiglass, purchasable through etsy. While not being a true hologram, it's cheap as chips (circa 30 quid) and looks pretty decent.
https://pinside.com/pinball/forum/topic/creature-from-the-black-lagoon-hologram-replacement-
If only there was something we could do to pimp it up a bit....
* To the pimp mobile! *


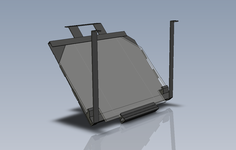
"The Rippler" is an Arduino controlled board that replaces the original 'ripple' motor & triac board in creech. You know, the one that bends your hologram to make it look like it's underwater and that everyone ends up removing because why the f would you risk bending your 300 quid irreplaceable hologram.
Instead, The Rippler turns on when your hologram does, and creates a ripple effect using two Adafruit Neopixel 30 RGB strips and some Arduino C++ black magic - which, as everyone knows, is the best kind of magic.
The first strip circles the hologram window, and shows a water like ripple effect. (warning - nerd info ahead) I created the effect using 3 sine waves interacting with each other. Two control the brightness, the intention being that two sine waves moving in opposite directions to each other create an effect similar to water bouncing off the edge of a pond. The third controls the colour mix, of which there are 8 possible interacting colours that are user selectable. That means if you want it blue, you can have it blue. Green, sure, go green. Red and yellow, sure, if McDonalds looking travesties are your thing, go for it sunshine.
The second strip is simpler and designed simply to light up the hologram, which, if you using the original hologram doesn't make a lot of sense, but if you're using something like the plexi solution which requires edge lighting, will come in super handy.
Here's it in action with a blue/purple mix:
And again with a green/blue mix:
Still some work to do around the overall brightness and speed of the effect, but I think it's coming along nicely.
@replicas contacted me the other day about another possible solution - a clear etched plexiglass, purchasable through etsy. While not being a true hologram, it's cheap as chips (circa 30 quid) and looks pretty decent.
https://pinside.com/pinball/forum/topic/creature-from-the-black-lagoon-hologram-replacement-
If only there was something we could do to pimp it up a bit....
* To the pimp mobile! *
"The Rippler" is an Arduino controlled board that replaces the original 'ripple' motor & triac board in creech. You know, the one that bends your hologram to make it look like it's underwater and that everyone ends up removing because why the f would you risk bending your 300 quid irreplaceable hologram.
Instead, The Rippler turns on when your hologram does, and creates a ripple effect using two Adafruit Neopixel 30 RGB strips and some Arduino C++ black magic - which, as everyone knows, is the best kind of magic.
The first strip circles the hologram window, and shows a water like ripple effect. (warning - nerd info ahead) I created the effect using 3 sine waves interacting with each other. Two control the brightness, the intention being that two sine waves moving in opposite directions to each other create an effect similar to water bouncing off the edge of a pond. The third controls the colour mix, of which there are 8 possible interacting colours that are user selectable. That means if you want it blue, you can have it blue. Green, sure, go green. Red and yellow, sure, if McDonalds looking travesties are your thing, go for it sunshine.
The second strip is simpler and designed simply to light up the hologram, which, if you using the original hologram doesn't make a lot of sense, but if you're using something like the plexi solution which requires edge lighting, will come in super handy.
Here's it in action with a blue/purple mix:
And again with a green/blue mix:
Still some work to do around the overall brightness and speed of the effect, but I think it's coming along nicely.
 Are you using pcbway to produce your PCBs?


")
")