What's new
Pinball info

Register a free account today to become a member! Once signed in, you'll be able to participate on this site by adding your own topics and posts, as well as connect with other members through your own private inbox!

Butchering a Flatbed Scanner

Slamtilt

Registered
Joined
Jul 7, 2019
Messages
189
Location
South East
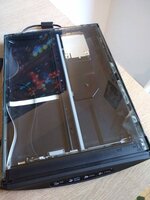
I needed a way to scan my cabinet and playfield, so I got a cheap scanner and hacked the top off...
IMG_20190807_181445792.jpg

It is going to get the sides cleaned up and maybe I will trim the front so the whole thing will sit flush.

I scanned at 600 dpi and the results are good enough to use, I resized them for here:
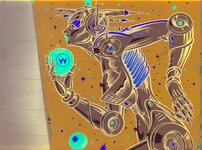
Untitled-6.jpg

Webp.net-resizeimage.jpg

Playfield (this one had been painted)
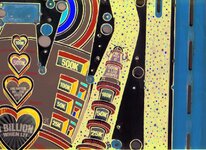
Untitled-4.jpg

So it works! The only thing is that you need 2 people to operate, one to hold the scanner and the other to press 'scan'!

Dom.
 
Last edited:
I am going to print out a part of the playfield and see what it looks like.

So a quick look at the scan:
g.jpg
ok the green is a joke, but it is not going to take a lot of work to redo.
 
This is funny I was doing the exact same thing over the weekend, except with my creech apron :

Screen Shot 2019-08-08 at 07.52.09.png

The universal monsters sticker is almost always bleached out (and unobtainium due to copywrite) - I got this one from the box of dracula toy they released in the 90s.
 
Good effort although you could of got a handheld scanner for next to nothing.....
This scanner cost £10, yes you can use a handheld on the playfied, but I don't fancy doing the cabinet with one!! I have never used a handheld scanner, are they accurate?

This is funny I was doing the exact same thing over the weekend, except with my creech apron :
The universal monsters sticker is almost always bleached out (and unobtainium due to copywrite) - I got this one from the box of dracula toy they released in the 90s.

Nice! How are you printing them?
 
This is funny I was doing the exact same thing over the weekend, except with my creech apron :

View attachment 90457

The universal monsters sticker is almost always bleached out (and unobtainium due to copywrite) - I got this one from the box of dracula toy they released in the 90s.
I'd be interested in a set for my Creech if you are up for doing one for me.
Please keep me updated. D.
 
Nice! How are you printing them?

I was originally looking at printed.com, but they seem better positioned to do thick (300gsm) vinyl printing. Maybe good for your BOP though? I'm now going to give https://www.discountstickerprinting.co.uk a try, to produce all the cab, apron and backboard decals on clear laminated stickers. Both sites seem to get good reviews, and have a slick UI (which I'm a sucker for being in web development).

I'd be interested in a set for my Creech if you are up for doing one for me.
Please keep me updated. D.

Sure thing. Once I get the quality of the print sorted i'll let you know. 👍
 
I was going to print out a part of the playfield, but
IMG.jpg
looks like decals have been applied and the cracking you can see is the clear coat, so no dice.

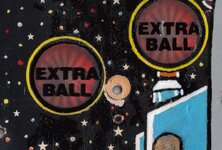
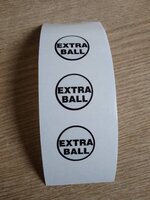
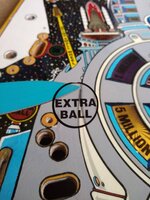
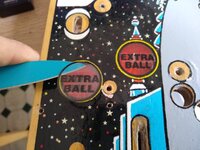
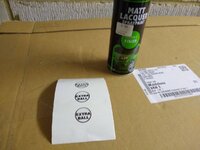
Anyway, I used the scan to print out a Extra ball in clear
IMG_20190808_143947561.jpg

well at least the scan was good enough to copy the design
IMG_20190808_144109519.jpg
The size matched up, kitchen knife is optional.
IMG_20190808_144058383.jpg

So I sprayed some with lacquer ( I only had matt to hand), to see if the print takes it. I read that it would, but never tried it before. Lets see how that goes.
 

Attachments

  • IMG_20190808_142646037.jpg
    IMG_20190808_142646037.jpg
    82.9 KB · Views: 10
600 DPI is Waaaay over the top for artwork. 1) The original artwork was silk screened and the DPI equivalent would have been less than 300DPI 2) You would use huge amounts of memory Photoshopping files of that size and will almost certainly get processing errors. 3) Most printers simply cannot print in that resolution and will simply downsacle the print to a lower level. 4) 300 DPI is the accepted resolution for most printed artwork, any more is pointless.
 
Your missing the point The ORIGINAL artwork will have been printed at less than 300DPI. Most silk screen printing has a DPI equivalent of around 150~200 DPI and there is no science available to increase resolution of a print. You can only use "doubling technique" which just replicates each dot a second time.
 
This may help.....he basic rule of thumbs with halftones would say that 150 DPI is enough, but with modern computers, 300 dpi would not be too much. For 11x17 times 150 dots per inch, the graphic would be (1,650 x 2,550) for 150 dpi or (3,300 x 5,100) for 300 dpi. It is the simple multiplication of the number of inches times the DPI. At 300 DPI, the image would be 15-20 megs and at 150 dpi under 5 megs.
 
So with my butchered scanner, I thought I would try a backglass. The scan was out of focus,
IMGb.jpg

so I decided to use another flatbed scanner:

img001 (3).jpg
I should have cleaned it first, doh! At least it works, and it gives me easy work to convert the file for printing.

A quick conversion later gives me the following picture, which will be simple to touch up and print.
Untitled-1.jpg

So the butchered Canon Lide is really only good for the cabinet sides and playfield.
 

Attachments

  • Untitled-1.jpg
    Untitled-1.jpg
    170.7 KB · Views: 8
Last edited:
There are many scanners on the market that have separate focus to overcome the "lip" on the scanner bed. I use a Optislim A3 Scanner to re-create my Backglasses. The bed is totally flat and there is separate focus. For reasons already given there is no point in scanning greater than 300DPI but it can scan to 1200. It means you can scan a normal sized backglass (front & back) in 8 overlapping scans and easily electronically "stitch" them together. Scanning Cabinet Decals and artwork is better done with a Handheld scanner and any scan errors can be corrected on Photoshop / Paintshop Pro Printing to glass or Lexan film. If glass the Colour go on first then the mask but if on Lexan film it is done in reverse with the light mask printed in "mirrored reverse" first, then the actual colour. The only glasses I have has a problem with are some fruit machine ones where the original artwork is in a "newsprint" style and very difficult to replicate.
 
I did the same as yo Paul, also a black mark on the frame that the scan head looks for as a limit switch - caused me a few probs at first. Plastics are an issue as they are a few mm away from the head and slightly out of focus. Good to see that there are now scanners with the ability to adjust focus. Means plastics and back glasses are doable - great to know. :)
 
Back
Top Bottom