Hi all,
With the voltage query...similar to
@DRD we have 244 -5v here to! To answer your question
@saladman never had a problem with coil power or lamp voltage/brightness..after the flippers are rebuilt and new coils on pop bumpers and flippers, mostly also benefitting from new mechanisms never had a problem with power ever, hope that helps......
Anyway back to the job in hand....The Backglass. This skateball backglass is a 9/10 in our opinion, it has two very small artwork chips and a short light scratch on the boarders helmet!(titter titter...). Here are some pictures of it as is.....points to note..
1). Some vandal had drawn on black nipples to the board girl on bottom left, and written “flo” on the head of the main boarder.
(Interesting fact , there was a teenage boarding hero in Germany born in France!!...?) called Flo Marfaing could that be the same flo?.......
2). Back in the eighties Bally backglass came in two thicknesses with a three part black plastic trim. The two sizes were 1/8” and 3/16”...most we come across are the thicker size. (3/16”). But this one strangely enough is the thinner glass. 1/8”. Take a look at the parts catalogue.....

3). The bottom trim/ glass retainer has dulled, dented, marked and rusted over the decades so we will replace that with a new one........here’s how it looks....

4). Some original skateball backglass had the games designer name painted on the Hudson truck. Ours is not one of those.

Here is the “Flo”.......

Front of the backglass currently....

And here is the back. Not to bad really..a small build up of burnt dust and nicotine but not horrendous by any means. We will clean that all off later.....

The tools you will need to replace the backglass chrome trim and get rid of all the nicotine and burnt dust is as follows....
1). Windolene cleaner spray. Do not be tempted to try anything else. This stuff works really well and does no damage. Do not be tempted to use foam cleaner, detergent or glass polisher....
2). A nice soft blanket to work on...
3). A long thin piece of wood..(does not have to be oak

).
4). Rubber mallet. A hammer is ok but we have dropped one of those before..

..so we stick with a rubber mallet.
5) couple o polishing clothes......
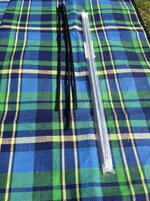
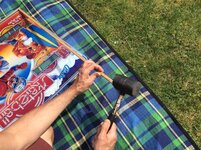
So remove the trim first so you can clean the area behind it for a nice smooth refit of the new one...Remove it like in the following picture. Just use gentle taps of the mallet. Start at one end and move along slowly tapping as you go...do not expect the trim to come away immediately at the end you start, it does not normally free up until you get about half way...so don’t panic.....continue to the far end and by then it would of just fallen off with no damage....

Like this...
Here are the tools.....

Here we are in action.........


She’s off...hooray........then what we do next is clean it....cover the rear of the glass in a good spray of windolene. Leave it to soak for about 2 minutes then wipe off...Job done........
After.......Rear...

Front...

Then we run a length of insulation tape along the bottom edge to protect the glass from the new trim like this....
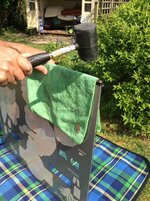
Then tap the new trim in place using your polish cloth as protection to keep it nice and new looking.....

If your “credit” decal has lifted a bit at the edge like ours has here, just trim it off with a Stanley blade up to the graphics.

Job done...looks wonderful.....


 One of my favourite Bally games, looking forward to seeing the resto
 ")


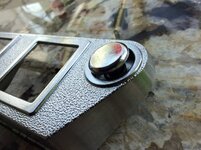
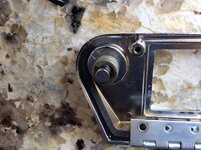


 someone has stuffed something behind one of them?...what is it?.....


 here they are in both types #555 and #44’s.


")