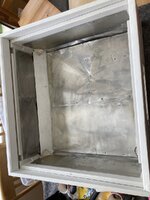
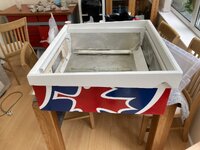
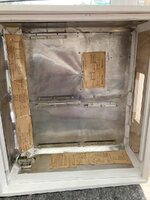
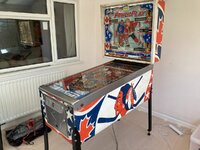
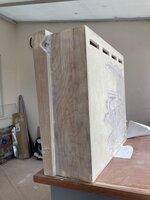
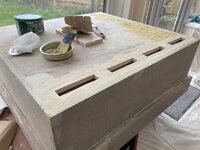
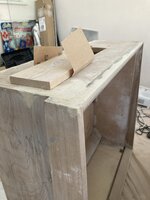
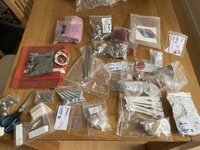
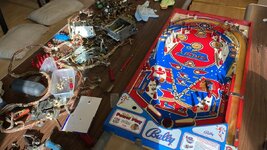
What's new
Pinball info

Register a free account today to become a member! Once signed in, you'll be able to participate on this site by adding your own topics and posts, as well as connect with other members through your own private inbox!

In Progress Bally PowerPlay

GezTheHealer

Registered
Joined
Apr 20, 2018
Messages
514
Location
Trowbridge
Bally Powerplay.

Plan is to repaint the cab & backbox first and foremost (on finding some woodworm), so have taken everything out, sanded the backbox & used acetone on the cab to start removing paint (stencils are in the post).
Will be sanding the body as well, treating all the wood again, then repairing some bits of the backbox where rot was cut out, and then get painting.

First full on refurb(!)
 

Attachments

  • IMG_8769.JPG
    IMG_8769.JPG
    179.5 KB · Views: 83
  • IMG_8804.JPG
    IMG_8804.JPG
    165.8 KB · Views: 79
  • IMG_8809.JPG
    IMG_8809.JPG
    159.2 KB · Views: 71
  • IMG_8873.JPG
    IMG_8873.JPG
    130.4 KB · Views: 68
  • IMG_8972.JPG
    IMG_8972.JPG
    136.5 KB · Views: 65
  • IMG_9080.JPG
    IMG_9080.JPG
    393.8 KB · Views: 65
  • IMG_9085.JPG
    IMG_9085.JPG
    117.2 KB · Views: 80
Since last update the cabinet and head have had a final course of woodworm treatment (3 coats of woodworm killer and a week covered in powder prior), so pretty thorough. We’ve had a pretty new playfield arrive (but that’s a job for another day) we’ve taken time over Easter to rebuild and glue in new vents and then fill in all the holes/nicks ready for paint - which will be the next few months, hopefully getting the base coat on over the next few days (weather permitting) I understand we need it to be at least 15 degrees, then a week to cure, then sand down and re-do, and then looking at doing the stencils.
 

Attachments

  • 43F3640F-6115-4937-9288-A501AC891572.jpeg
    43F3640F-6115-4937-9288-A501AC891572.jpeg
    85.5 KB · Views: 44
  • 32B4D64E-476F-4309-B4A3-9A87E0DF3226.jpeg
    32B4D64E-476F-4309-B4A3-9A87E0DF3226.jpeg
    88 KB · Views: 41
  • 8B8C03FB-D132-474B-84E0-8A7262D178E0.jpeg
    8B8C03FB-D132-474B-84E0-8A7262D178E0.jpeg
    143.4 KB · Views: 47
  • A8B6DF57-38BF-4321-8D99-FCF5F65F9A06.jpeg
    A8B6DF57-38BF-4321-8D99-FCF5F65F9A06.jpeg
    147.7 KB · Views: 47
  • B0D09C16-801A-40C2-A53F-09414C0C1B3B.jpeg
    B0D09C16-801A-40C2-A53F-09414C0C1B3B.jpeg
    87.8 KB · Views: 47
  • EC6EAB23-085A-46FE-BCCF-04BFECDA153F.jpeg
    EC6EAB23-085A-46FE-BCCF-04BFECDA153F.jpeg
    103.8 KB · Views: 40
  • 10EC6857-12EE-47CA-86D2-4A62ADEFA420.jpeg
    10EC6857-12EE-47CA-86D2-4A62ADEFA420.jpeg
    166.4 KB · Views: 37
  • F7A82A40-E554-4C19-828D-D1ECD5B88FFB.jpeg
    F7A82A40-E554-4C19-828D-D1ECD5B88FFB.jpeg
    129 KB · Views: 40
  • ED4A5B94-857D-47EB-84A5-48C591219CEC.jpeg
    ED4A5B94-857D-47EB-84A5-48C591219CEC.jpeg
    134.7 KB · Views: 44
So… lots of paint ordered.. weathers getting better, all my 8 cans of primer later, looks like some progress.. need to sand down now and then… primer again or get straight onto gloss white? Not so sure expect I’ll need to get some more primer. So I can touch up bits after a gentle sanding and make sure it’s fully opaque.. I only have the 6 cans of gloss white..
 

Attachments

  • IMG_9492.jpeg
    IMG_9492.jpeg
    239.5 KB · Views: 31
  • IMG_9491.jpeg
    IMG_9491.jpeg
    184.3 KB · Views: 32
  • IMG_9490.jpeg
    IMG_9490.jpeg
    224.4 KB · Views: 31
  • IMG_9489.jpeg
    IMG_9489.jpeg
    269.4 KB · Views: 32
  • IMG_9488.jpeg
    IMG_9488.jpeg
    197.3 KB · Views: 32
Then for a 'quick win' I took the crusty old bottom off the backglass using the @new forest pinball Keith Burden 'Mallet Tap with wood' following the 'Chisel with a screwdriver until you loose your nerve'.

A few hours and cut up hands later - the backglass shows some damage at the bottom, but this will be mostly covered by the new trim.

Also the Graphics look awesome in the sunlight. Crisp detail.

Experimented a bit with some 'mirror effect' spray paint I could use to tidy up the bottom, but have since decided against it.
 

Attachments

  • IMG_9524.JPG
    IMG_9524.JPG
    156.6 KB · Views: 34
  • Flaking backglass.jpg
    Flaking backglass.jpg
    294 KB · Views: 32
  • Backglass will be okay.JPG
    Backglass will be okay.JPG
    293.1 KB · Views: 34
  • Nice Backglass.JPG
    Nice Backglass.JPG
    229.2 KB · Views: 32
  • IMG_9522.JPG
    IMG_9522.JPG
    187.6 KB · Views: 35
Next was masking, and two colours with one stencil, an old shoe box helped mask off area's we didn't want to go over by accident.
 

Attachments

  • BA9EC05C-388E-49BE-8F21-8E0DB466DDD6.JPG
    BA9EC05C-388E-49BE-8F21-8E0DB466DDD6.JPG
    185.6 KB · Views: 28
  • IMG_9751.JPG
    IMG_9751.JPG
    136.2 KB · Views: 26
  • IMG_9750.JPG
    IMG_9750.JPG
    169.9 KB · Views: 28
  • IMG_9748.JPG
    IMG_9748.JPG
    164.8 KB · Views: 30
  • 19D1C24C-C9D2-49EC-9114-8DDE9052D061.JPG
    19D1C24C-C9D2-49EC-9114-8DDE9052D061.JPG
    74.8 KB · Views: 27
  • 7D49781B-7509-4A87-BC00-D5B1CB8C47A5.JPG
    7D49781B-7509-4A87-BC00-D5B1CB8C47A5.JPG
    124.4 KB · Views: 27
So following Red on one side, we waited a week and did red on the other side & front. We've painted red on the inside's as original- giving each coat a week to cure as advised.

Now after waiting another week we've put the blue on one side, which is a final coat. Do plan to wax the cabinet to give the paint some protection.

For an idea of time taken - We started work on these two stencils at 3pm - masking off the cab and head, then cutting down/applying stencils. Then when you peel the back of the stencil off, have to go over and avoid bubbles/lifting in the heat. Then go out and spray it 3 times with time between to dry. Then carefully peel off the stencil, with gritted teeth as some edges of the paint lift with the stencil (taking off a bit early I reckon). Anyway we finished at about 7pm.

Last time I do this on a Friday night, I think I was rushing to get to Special When Lit.

Still the front, and other sides to do in Blue - ONE DAY MORE (!!!)

Started ordering parts for a playfield swap and Googling clear furniture wax. Probably go with Rust-o-leam wax as thats the paint I've gone for, so will hopefully play nice.
 

Attachments

  • IMG_9884.jpg
    IMG_9884.jpg
    105.9 KB · Views: 35
  • IMG_9883.JPG
    IMG_9883.JPG
    179.1 KB · Views: 35
  • IMG_9881.jpg
    IMG_9881.jpg
    131.4 KB · Views: 34
  • IMG_9880.JPG
    IMG_9880.JPG
    197.4 KB · Views: 33
  • IMG_9879.JPG
    IMG_9879.JPG
    144.5 KB · Views: 36
Excellent work luke. (And Cat, think she’s definitely earned a new handbag) Stencilling is not a task for the faint hearted!
Really like your use of the custom 4th colour looks great 👍🏼 full marks for taking on a Bally ss full refurb it’s a steep learning curve, but one full of rewards ….
Cannot wait to play this game……
Best wishes Keef……👊🏼
 
Last edited:
Thanks Keef, huge props to you for all the effort that goes into your refurbs - getting first hand appreciation for all the effort that goes into it!

I've booked a session at the Spa for Cat & it is understood - I still owe her.

I can't wait to play it either! :p

Cheers
 
So a bit of a few updates coming up, and I'm going to go basically do a post for a day:

So since July it's starting being the summer holidays and I set aside sometime to work on PowerPlay (2-3weeks).

A trip to ProperJob - bought about 6 microfibre clothes and two tubes of AutoSol, some metal scourers (not really used them much) and a cloth spiny thing for the drill. I don't have a tumbler or an ultrasonic cleaning bath, but I've plenty of experience polishing rockets (pictured below).

So it took a day, wax on wax off, polishing down the side rails.
When I took apart the cabinet and the head, I took alot of photo's for reference, and have put all the head parts in one big plastic box, and all the body parts in another. So this was just a case of going through the box of bits and cleaning them up.

What I've learnt:
If you want a mirror finish, you can't just keep polishing it, you'd need to sand it down first, then polish it. I'm happy with the brushed steel look on the lockdown bar and reckon it's come up quite nice. Thanks @new forest pinball for the info for the mirror finish.

You could also take these parts to a professional metal polisher - but I was not able to find one locally. I found some powder coaters, but I want my machine shiny and chrome!

HOW TO: To polish say the lockdown bar: gently rub on autosol, keep rubbing til dirt appears/black marks/swirls. then wipe off & buff with another cloth. Then last quick buff from a spiny cloth pad on the end of a drill. Repeat until happy/sick of it/it doesn't seem to be getting much better. Most took a couple of rounds of liberally applied autosol and the tub was breaking up by the end of this, spilling autosol from the side.

Listen to lots of music during, don't need to put alot of thought into it.

@VeeMonroe I read in your Alien Poker thread about how much of a pain it is to take off the side rails. Kudos to you for taking on the project. See the swirl marks around where my side rails have got scratched up? That's from taking them off with the same blue removal tool you've got. So hard to initially get them to pop up, and then twist them out with pliers. Have ordered new pins as the heads got all mashed from pulling them out. I think we used a bit of WD-40 to try and loosen them too. We took a good few hours taking these off - it was pain, but they did eventually come off.
 

Attachments

  • 5 Polishing rockets.JPG
    5 Polishing rockets.JPG
    67.8 KB · Views: 19
  • 2 Clean rails.JPG
    2 Clean rails.JPG
    108.8 KB · Views: 19
  • 1 Autosol helps.JPG
    1 Autosol helps.JPG
    157.9 KB · Views: 20
  • 3 Sparkly.JPG
    3 Sparkly.JPG
    154.7 KB · Views: 17
  • 4 Filthy.JPG
    4 Filthy.JPG
    162.6 KB · Views: 18
NEXT DAY:

So next I decided to tidy up the gacky coin door. Insipred by @David_Vi work on Centaur's coin door. Similarly took it all apart, gave rusty bits an evapo-rust bath, cleaned them up a bit, and put them back together. I plan to use some parts of the old plastics as inserts in the coin-door ala @new forest pinball ... and will need to look at wiring up some lights for them, but will see what left overs I have from the playfield swap to do this.

I also painted the grill and original metal blobby cabinet feet in the same blue as the cabinet. Hand polished lots of little shiny metal bits. Pleased that the button came up quite nice. See some before/after/during pictures below.

It took a good few hours, but I don't feel like I'm going to catch something when I touch the coin door now.

What I've learn't: Using a £5 picnic blanket turned upside makes a good table protector, and can fold up and in on itself so all that muck rubbed off in it is wrapped inwards (less faff than putting down newspaper).
link: https://www.properjob.biz/shop/picnic-blanket-stripes-check-M5978

and putting it back together wasn't as bad as I first expected when it was all exploded out on the table.
 

Attachments

  • 4 Exploded.JPG
    4 Exploded.JPG
    140.5 KB · Views: 21
  • 5 Polished.JPG
    5 Polished.JPG
    184.7 KB · Views: 18
  • 6 better.JPG
    6 better.JPG
    233.1 KB · Views: 19
  • 2 Yuck.JPG
    2 Yuck.JPG
    151.4 KB · Views: 21
  • 3 Bluegh.JPG
    3 Bluegh.JPG
    159.7 KB · Views: 20
  • 1 bit of paint.JPG
    1 bit of paint.JPG
    142.9 KB · Views: 22
PAINT DAY:

We had good weather, (15 Degree's +) So this meant it was our last day to paint!!!!

Cat has become a dab hand at cutting out the stencils so they're easier to apply, trimming off edges. so we did the side, the front, and the side of the backbox in Blue.

So three stencils to apply.

For an idea on time:
1-2 hours to mask off where you don't want paint using, around the edge of the stencils.
30mins-1hours painting 3 coats.
30mins or so taking off stencils carefully while the paint is still a bit tacky, being careful not to drop the stencil back onto the cab accidentally marking up paint where you don't want it.
Then let it cure for another week before thinking about other stencils. I blocked it out on the calendar, if we painted every Sunday and allowing for a few poor weather days - it would take about 2 months or so. Primer, White (wait a week), Stencil red on the left (1 week) Stencil Red on the right (1 week), Stencil blue on the left (1 week), Stencil blue on the right (1 week).

What I've learnt:
When applying the stencils - press down all around the edges to make sure it's as close to the cabinet as it can be. Using the squeegee/fingers for fine bits. We had less bleed on this side, there is a little bloom on his nose, but overall, we've done better on this side than the other.

WEAR A PROPER MASK THROUGHOUT - https://tools-paint.com/3m-4251-maintenance-free-half-mask-ffa1p2-r-d-filters-72296-p.asp
This was the cheapest 3M one I could find for a one-off use, we got 2 one for each of us. Otherwise you can get ones with replaceable filters. I did start just using a painters/decorators mask thinking it was enough, and though we painted outside, followed instructions on the can & got through about 24 spray cans. I had a bout of Covid a few months ago - and nights of feeling like I was losing breath - everything I read online about breathing in paint really didn't help. So yeah - for health & piece of mind - wear a proper mask - as I was advised, Feeling better now though.

Anyway:

When pulling off the stencils they can bring up some of the old paint with them so there is a little area for touch up. But nothing major. After spending £££ on paint, stencils, tape, sanity, big thanks to @new forest pinball for help and guidance before/as we started painting. The stencils are single use - one shot. We painted the whole cab base white, then waited, then did all the red (and added in nutmeg for his face at the same time). Then finally the deep blue has finished it off.
 

Attachments

  • 2 Front and side done today.jpg
    2 Front and side done today.jpg
    129.3 KB · Views: 23
  • 1 Nice weather for painting.JPG
    1 Nice weather for painting.JPG
    136.3 KB · Views: 22
  • 3 Facing up.JPG
    3 Facing up.JPG
    125 KB · Views: 23
BUYING STUFF DAY:

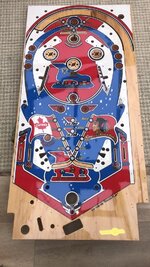
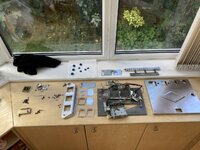
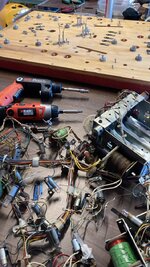
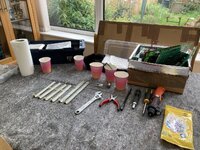
That's about £600 worth of parts out of the table there. I thought after a new playfield & plastics I'd be pretty much done, but really, if we're gonna swap the playfield, might as well tart it up a bit as we go..
This is a ridiculous hobby.

Lets discuss:

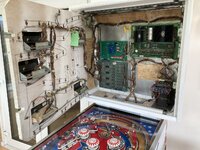
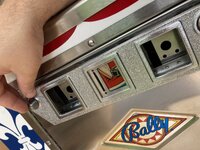
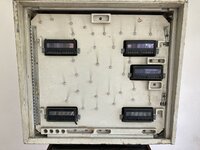
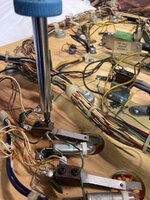
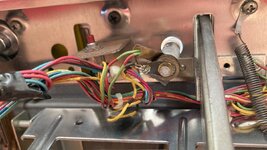
New boards for lights - so LED's don't flicker.
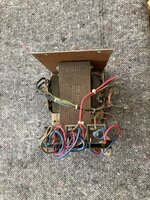
New powerboard kit - for consistent/reliable power to flippers (the powerboard was original and not held in when i got the machine, and rattled all about when I drove it home, I don't trust it).

New balls (for another game)...though did get a lone new ball for this one.
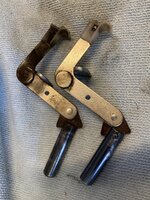
New flipper bats.
New drop targets without wear.
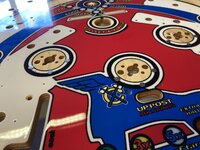
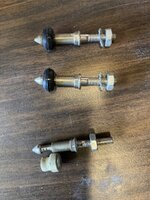
new up post.
25x new posts.
2x new short posts.
4 flipper rebuild kits.
new pop bumper bodies, skirts, thumpy bits.
new LED's for GI
New shooter rod.
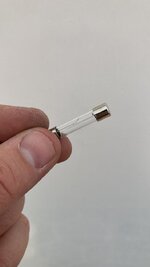
Fuse kit (it blew one when I got it home, so I need a set and even then I think I might need some different ones).
New rubbers.
New buttons.
New bolts.
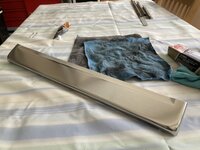
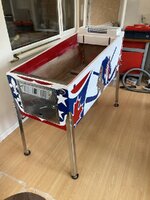
New legs (not pictured)
New coin door bolts (shiny & chrome).
New apron stickers.
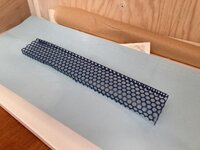
New Mylar for pops/slings.
New backbox lockbar - not pictured (as it was missing one).
New pop bumper caps.

I've also bought new yoppsickle's for inserts (led's) and GI Braid.
New rubber caps for the plastics.

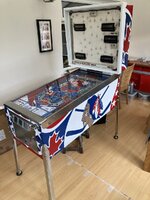
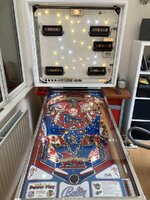
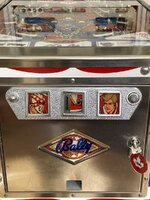
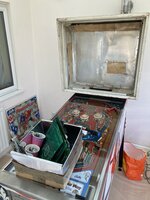
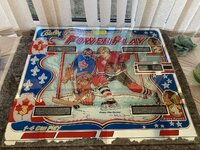
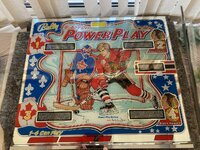
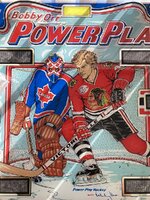
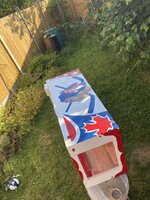
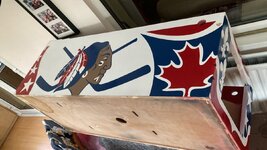
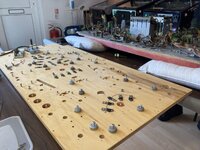
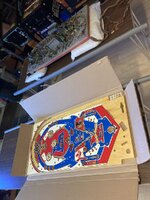
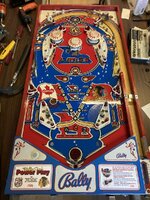
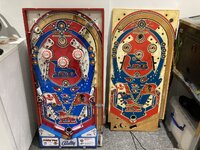
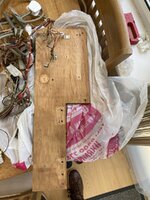
Looking at the other picture you can see the backglass of the Bobby Orr we had when I was a kid (about 25 years ago).

My dad got it framed for something like £150 - which was more than the price of the whole pinball machine back then(!). The machine got taken to the skip because it broke (stuck flipper or something) and he couldn't get anyone to fix it (dark days before the internet) I think my sister kept the pop bumper caps and pinball, I kept the backglass and it's been hanging on the wall ever since. In the last 5 years since I've got back into pinball I've not seen one/played one, so do have a soft spot for Bobby Orr and am looking forward to playing it again & most importantly... beating my dad's high score on it (I had the high score for ages on the old one, then he pipped it by a few hundred thousand, around 550,000) so I'm gonna roll this one & 9 it out(!!!).

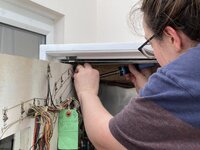
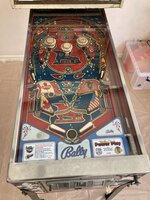
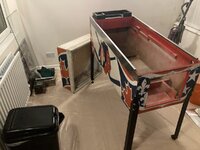
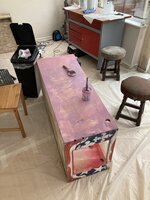
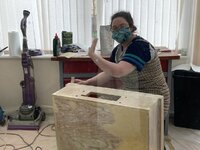
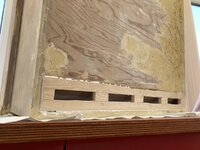
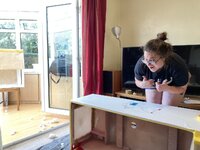
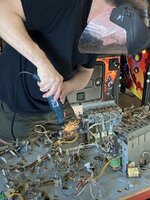
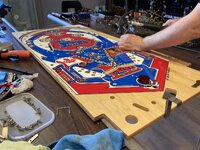
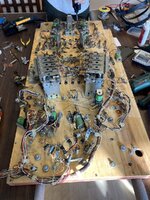
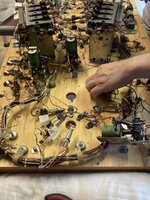
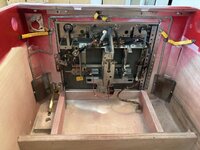
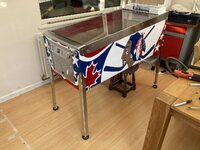
Anyway.. next task is the playfield swap. This looks to be a big job. I have never done it before, and don't want to trash the new playfield/bodge it - so have booked in time with @Moonraker to do the playfield swap and I'll assist/learn as we go. Thankfully, the parts arrived in time, despite a delay from Royal Mail: They were sent Sunday First class, but didn't arrive til the following Friday. Playfield swap booked in on the following Tuesday - glad they arrived in time - lots of parts specific to Marco Pinball Specialists, ordered though @new forest pinball.
 

Attachments

  • 1 New playfield & Plastics.JPG
    1 New playfield & Plastics.JPG
    128.9 KB · Views: 20
  • 2 lots of parts.JPG
    2 lots of parts.JPG
    218.4 KB · Views: 20
DAY ONE OF PLAYFIELD SWAP: 8hrs.

New playfield and old playfield side-by-side. What will this take? Like 30mins? More like 30 hours anyway, lets get started:

First we had to sand down all the insert roll overs. Don't want to file too much and snap any plastic, so strips of sandpaper worked well. Could have used files, and did use a circular file to spiral inside the centre of the rollovers. Anyway, one would be enough, but this game has ten. So it was a good few hours of sanding, checking the insert star posts don't still get stuck. teeth grinding job - as you can see.

Next we screwed on the yop's for the inserts - and laid a little braid here and there. Also had to drill some holes for the loom's mounting points (those blobby looking metal things).

I think we also unscrewed everything from the old playfield on this day. There's alot of screws. We did this from 10am ish til 6pm.
 

Attachments

  • 4 DAY ONE OVER fitted some bits.JPG
    4 DAY ONE OVER fitted some bits.JPG
    174.6 KB · Views: 28
  • 3 all that sand paper.JPG
    3 all that sand paper.JPG
    170.7 KB · Views: 32
  • 2 sanding has taken hours.JPG
    2 sanding has taken hours.JPG
    100.2 KB · Views: 33
  • 1 30min job.JPG
    1 30min job.JPG
    148.5 KB · Views: 33
DAY TWO OF PLAYFIELD SWAP: 8/9hours.

So I remember now, mid way though day one I said 'Pete my Allen key is just spinning in this flipper mech, I can't get it out' - 'give it here' he says - and promptly can't get it out either. We try with his fancier allen key on the end of an electric screwdriver: no joy. We drill it. No joy - snapped drill bit. We dremmel it with a circular saw thing - sparks fly, circular grinding disc's break and fly at all directions over Special when lit. - 'We'll need a bigger drill' - says Pete. We leave it there for the first day.

So day 2 I turned up with my Power Drill, eye protection & handy gloves - Pete already had a power drill ready, so we attack it again. No joy, spinning broken bits again. So dremmel and circular saw again. I vacate the room to avoid getting hit by debris (which there is) - joy it's released, and by the end of day two, the loom, the mechs, the bulbs, the bulb holders, the braids for both GI & controlled inserts.

I also spend some time cleaning the odd loose mech, I'm mainly fussed with stuff you can see/the ball touches. Wet wipes/paper towel to clean muck off under neath, polish for metal work seen on the playfield.

See in pic we found the illustrious 'Kmeic post' one which the designer put on all his games. a slightly oddly shaped and out of favour post he favoured. It's the opaque red one.

Look at that hideous rat's nest of wires we need to fit to the other side! We've taken it off, now we just to need to fit it onto the other side, we must be half way though! ... We're not..
 

Attachments

  • 5 clean as you go.JPG
    5 clean as you go.JPG
    182.2 KB · Views: 20
  • 6 cut out stuck stuff.JPG
    6 cut out stuck stuff.JPG
    140.5 KB · Views: 20
  • 6b Find the Kmeic Post!.jpg
    6b Find the Kmeic Post!.jpg
    106.8 KB · Views: 22
  • 7 DAY TWO OVER - LOOM REMOVED.JPG
    7 DAY TWO OVER - LOOM REMOVED.JPG
    199.9 KB · Views: 20
DAY THREE OF PLAYFIELD SWAP: about 8 hours.

So the pictures come up in a slightly different order from my numbering.

Image 8 & 9: & 10: We had to nail in pop bumper post nails. With a hammer. Onto of the new playfield. We fitted some rubbery tape (beer seal) to the end of the hammer to protect if we slipped. Pete kindly offered 'would you like to hammer' - 'no bloody way' I thought. I declined, and Pete hammered in the nails without fuss or marking the playfield. Easy job: I polished some grubby posts/metal work on the top of the playfield side as we prised them off. We'd taken everything off the bottom side, and were now taking off and putting everything across onto the topside, before fitting the loom/mechs underneath. Managed to get through almost my second tube of autosol. That ball trough is shiny, not that you can see it under the apron.

Images 10b-11:
So, we fitted all the posts, then tried the plastics and realised they didn't quite line up with some of the posts in wood screws ... so take the guides from CPR with a pinch of salt and check as you go. We moved several posts a few mm's each and then the plastics sat happily in place. Pete had turned his nose up at my new lamp holders for the pop bumpers, I got a pack of three as I knew they were out when I saw it, but Pete said they're rubbish, and though of an ingenious way of backing two spare yop's together. Similar to @new forest pinball 's . Nice. These were then wired though and placed with the pop bumper assembly (pic 11). I have never rebuilt a pop bumper and after looking at diagrams I was still unsure. I watched carefully as Pete reassembled them, placing the parts delicately in a specific order. I'll admit I'm still non the wiser. Pete said there is a bit of an art to it.

Images 12-14:
With the top side looking smart and posts reapplied (An electric screw-driver helped alot with this - Pete recommended a black and decker one - see them there by the playfield).
We had to move on to placing the loom/braid/bulbs back roughly into place to be able to start re-attaching. Putting the loom back into place, where the wire had twisted over on it's self, bulbs out of alignment, twisted braid, was daunting enough to me. It took what felt like an hour to just line it all up, and then be confident we could start re-attaching, but of-course lots of other things were kind of in the way when re-attaching, and you wouldn't want to fit something in the middle and then find it's too tight elsewhere and you would have to undo what you just did. Key thing is here, there is a braid, two of them, stapled into the underside of the playfield joining up light. This is below the loom and wires, and needs to be fitted first. Pete worked from bottoms to top, connecting the braid, stapling, soldering yops, drilling pilot holes and attaching with screws. We got into a bit of a routine with this - drill, hoover, screw, solder repeat. There is alot of lights to reattach. and at one point when we'd reattached items about half way up the table, the whole thing slipped and fell onto our knees. Gouging posts facing downwards of course.

This isn't the first time Powerplay had drawn blood from me, but it cut open Pete's knee. All the careful placement we'd made up the playfield had now fallen out or alignment. Pete had plasters and was alright; we had a break and played some Sinbad & picked up where we left off getting to fitting the underside of the pops by the end of the day.

What I've learnt: A playfield swap is not a 30 minute job. Everything inside a pinball machine either wants to trap your fingers, make them dirty or cut you open. Approach it carefully and slowly. Like dealing with an angry hedgehog.
 

Attachments

  • 8 Nail stuff in.JPG
    8 Nail stuff in.JPG
    159.2 KB · Views: 30
  • 9 With a hammer.JPG
    9 With a hammer.JPG
    218.8 KB · Views: 28
  • 10 Grubby posts.JPG
    10 Grubby posts.JPG
    181.1 KB · Views: 28
  • 11 Top of playfield populated.JPG
    11 Top of playfield populated.JPG
    198 KB · Views: 29
  • 12 Bottom still a way to go...jpg
    12 Bottom still a way to go...jpg
    146.6 KB · Views: 26
  • 10b Looming loom.jpg
    10b Looming loom.jpg
    206.2 KB · Views: 24
  • 13 Place that loom.JPG
    13 Place that loom.JPG
    241.1 KB · Views: 24
  • 14 Screw in stuff.JPG
    14 Screw in stuff.JPG
    186.9 KB · Views: 25
  • 10c Sticking Yops.JPG
    10c Sticking Yops.JPG
    150 KB · Views: 25
  • 10d Lights for pops.jpg
    10d Lights for pops.jpg
    113.7 KB · Views: 30
Last edited:
DAY FOUR OF PLAYFIELD SWAP: Approx 6/7 hours.

So, the last day of playfield swapping. We spent most of the morning stapling braid, soldering on lights, screwing in mechs like the up kicker and roll overs on the side. The roll overs do not play nice like the ones on the old playfield which move up and down with ease. I adjust each of the switches until there was a satisfying push back from the rollover stars and they reliably enough went up and down as you'd expect. This took some time and I'm not 100% happy with them all yet - but I can adjust later. It's nice to see it close to the end. I switched out old bulbs to LED's as I went. We fitted and aligned the flippers.

What I've learnt: I do not like roll overs.

Pictures:

15: Fitting the last of the mechs/loom at the top of the playfield. We tested braid, as some was frayed, so we soldered over it, and checked consistency to see that lights would get current. We also checked pictures as we went to make sure the right control wire linked with the right Yop.

16: The last screw of an adjusted rollover leave switch! These switches like to fall apart and drop lots of little blocks every where, so sticking some tape across the ends of the two screws helps keep them together before re-fitting.

17: Old vs new. How does it look? worth the 32 hours, blood, sweat and (no tears I know of) that have gone into it?

Big thanks to @Moonraker for taking me through my first playfield swap. As he's said we managed to work together for 4 days without losing our rag at each other - which is good!

Light is starting to appear at the end of the tunnel for this restoration - my bank account is severely depleted, but the two main tasks (PAINT & PLAYFIELD) ARE PRETTY MUCH DONE! I have a few weeks now before back to work to put it all back together again.
 

Attachments

  • 15 Wire loom:braid as we go.JPG
    15 Wire loom:braid as we go.JPG
    172.3 KB · Views: 30
  • 16 The last screw!.JPG
    16 The last screw!.JPG
    150.3 KB · Views: 30
  • 17 day 4 over OLD VS NEW.JPG
    17 day 4 over OLD VS NEW.JPG
    280 KB · Views: 30
Great thread Luke. Well done on attempting this. You and Cat are doing a great job.

Love the fourth colour used on the cabinet. That’s a great idea.

Also @Moonraker love your double sided ledbar trick for the pop’s, why didn’t I think of that!😆 might of done if I didn’t have stock of those comets......

I also love the coin door old plastics recycled idea. Trouble is it wasn’t mine! It was my tech Rosie’s idea. I’d put freeplay decals in Dolly Parton which she thought were horrible. Her words... “that’s a bit naff, why don’t you use some of the old plastics they would look awesome lit up” we were doing a Flash Gordon at the same time so we tried it out and it looked cool. (At the time cpr we’re not doing Dolly Parton plastics so we had none spare...... thanks for the positive feedback all the same. Keep up the Bally ss love and resto’s folks. There among the best....
Really looking forward to playing this not played a power play since 1982 👊🏼.... best wishes Keef.....
 
Fanks Keef! Much appreciated - done a little more today

Have gone over a small patch where the stencils took off some white paint - masked off and touched up a little so it’s covered, then have added my new legs, feet so I can start rebuilding the inside - Everything was taken off the inside to treat the wood. So I needed to reapply the braid - looked back over the old pictures and started where it finished - around the on/off switch.

First I screwed / bolted in the coin door surrounds, and then cleaned with wet wipes all the yellow earth braid connectors. Then screwed it all in and fitted the coin door.

Cat put back together the lockdown bar bolt, following images from before where we checked all the spacers etc were in place.

I did fit new coin door bolts, but it turns out that on on the corner gets caught up on the handle for the lockdown bar. So the old one (which was shorter) is now soaking in evaporust over night. Will fit it tomorrow along with the lock and might look at tarting up the coin door/wiring in some lights with left over lapsocket holders from the playfield inserts.
 

Attachments

  • IMG_0352.jpeg
    IMG_0352.jpeg
    155.7 KB · Views: 28
  • IMG_0362.jpeg
    IMG_0362.jpeg
    172.7 KB · Views: 25
  • IMG_0361.jpeg
    IMG_0361.jpeg
    123.2 KB · Views: 26
And another day -

Fitting loom to the cabinet & side rails back to the cabinet. Been careful to check all the braid connections go the right place. Just really a case of looking back at old photos and putting everything back - however the wooden board with tilt Bob bits on it is a bit manky so I’ve taken it out, sanded it, treated the wood with woodworm stuff just in case (doesn’t look to be any on it, but can’t be too careful). Then de-rusted the buttons/some bolts in evaporust, carried on polishing any little bits I’d missed. Finally fitted the plunger and side rails.

Spent the morning looking for ‘22 gauge wire’ in B&Q as that’s what recommended for GI (plan to add wire to light up the new clear flipper buttons) however we don’t measure by gauge but by thickness in mm… so anything a mm will do I expect.

Will leave this and the coin door light up for another day. Keith let me know there there is already wire for the coin door, it’s just taped up - so that helps. Expecting it’s the same colours as the current wired bulb.

Tomorrow I’ll wire up the tilt Bob stuff plank. It has counter sunk screws for my missing chime box. Hoping to replace the chimes at some point, but instead have re-soldered in the old speaker in the mean time.

Tested it with the glass - lockdown bar locking in and side rails holding ☑️ thanks to new twisty screws.
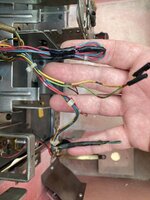
 

Attachments

  • IMG_0367.jpeg
    IMG_0367.jpeg
    114.4 KB · Views: 22
  • 78A5EC9A-4909-424D-9840-67A380391EDD.jpeg
    78A5EC9A-4909-424D-9840-67A380391EDD.jpeg
    132.4 KB · Views: 20
  • IMG_0370.jpeg
    IMG_0370.jpeg
    153.2 KB · Views: 22
  • IMG_0372.jpeg
    IMG_0372.jpeg
    168.5 KB · Views: 22
Last day putting back together the main cabinet.

Spend an hour or so putting back in the tilt mechs, wiring the speaker and sound board (currently need to research further on putting back in chimes - though found a few sources for them ☑️ )

Staples in the old paper bits and stencil kit certificate.

So the cabinet is back together. Got some new scratch free glass ordered and new metal sheets for the backbox.

Next week I’ll put together the backbox and see what happens when I plug it all back in.
 
Today I’ve spent a few hours this afternoon -

Touching up paint on the cabinet/head. Masking off and painting over a touch of overspray/red specks on white paint & left to dry. Slotted in some new glass from pinball mania.

Have opened up the box of bits I took out of the head and cleaned the board mounts & selected bits to give an evaporust bath over night - the mount for the transformer and some knocker assembly. Lots of little pots of screws to put in and pictures from months ago to look over before I put back together. I figure the loom is the last thing to connect.

Getting there!
 

Attachments

  • IMG_0439.jpeg
    IMG_0439.jpeg
    312.6 KB · Views: 17
  • IMG_0438.jpeg
    IMG_0438.jpeg
    192.5 KB · Views: 16
  • IMG_0437.jpeg
    IMG_0437.jpeg
    114.4 KB · Views: 13
  • IMG_0432.jpeg
    IMG_0432.jpeg
    260.6 KB · Views: 17
I have just caught up with this thread Luke, great to meet and chat to you over the weekend, it looks amazing, it will easily be the best looking Power Play in the UK once finished.

Also a very rare beast as I’ve never seen one in the flesh before. It’s a shame your Dad had to make them even rarer by chucking one in the skip 😱.
Such a shame he couldn´t stick it in the loft for future Luke to refurbish it 😀.
 
Cheers Chris, I am getting a bit giddy as I see it come together!

Different times when the old one went to the skip - wouldn’t happen now that’s for sure. Hoping this one will go another 40 odd years 🤞😁
 
Today I’ve spent most the afternoon and early evening working on the head.

First fitted some tin foil card, though on finding it’s not conductive and attached to the earth braid, decided to refit the old metal liner - after a wipe down and a bit of polish.

Then I took out metal bits from the evaporust bath, washed off, wiped down and polished a bit.

Then started screwing stuff back or stapling it in. Then went to B&Q for a heavy duty stapler.

Stapled in the paper bits.

Got out the display panel. Gave it a wipe down.

Put in the yellow braid connectors. Put the knocker in two or three times til it’s the same orientation as before, and panel metal bits.

Stapled down the braid & added some of the old braid to make it up to enough.

Gingerly placed it back on and bolted on..

Screwed in the light panel.

Done for the day!
 

Attachments

  • 6FCD9E7E-1FBE-4750-897B-D9C1FBD908D4.jpeg
    6FCD9E7E-1FBE-4750-897B-D9C1FBD908D4.jpeg
    122.8 KB · Views: 17
  • 2361B907-EFF8-4AA8-A340-EAC01D95EB5E.jpeg
    2361B907-EFF8-4AA8-A340-EAC01D95EB5E.jpeg
    78.9 KB · Views: 13
  • IMG_0457.jpeg
    IMG_0457.jpeg
    104.9 KB · Views: 13
  • IMG_0458.jpeg
    IMG_0458.jpeg
    95.1 KB · Views: 13
  • IMG_0459.jpeg
    IMG_0459.jpeg
    102.1 KB · Views: 13
  • IMG_0463.jpeg
    IMG_0463.jpeg
    139.9 KB · Views: 13
  • IMG_0464.jpeg
    IMG_0464.jpeg
    120.7 KB · Views: 15
  • IMG_0465.jpeg
    IMG_0465.jpeg
    128 KB · Views: 17
Putting it all back together day (about 3-4 hours)

So, Last bit of wiring the loom in the head to do today.. got sidetracked and tried cutting out an old plastic for the coin door. Figured it looked pretty good! So did two others and fitted them. They're not wired to light up... looking at the mount holders for the bulbs they have more rubber grommets than the playfield lamp-holders.. I don't want to electrify the coin door so just left it for now. Got side tracked again and took all the protective film off the playfield plastics - then I put all the wires back in. Thought I had loads of left over screws, but they were mainly to fit the boards back in and I've put several screws in the transformer to stop it coming loose. Got my local solderer to solder in the knocker and its ready to be plugged in...

.. last time I switched it on was March and it blew the 1amp slow-blow fuse under the playfield after about 10mins

Got a link and guide of tests to do from @Moonraker to check voltages around the board. Have no idea on the electronics to be honest, something I'll need to learn a bit more. Should have, but didn't do any tests - switched it on out of curiosity and:

1. It lit up!
2. It didn't explode!
3. It didn't electrify me!
4. It worked for a bit, but no sound as it was before and the slow blow 1 amp blew after about 10mins. Before it blew again I put it into test mode and (almost all) lights are working and the solenoids all fired.

Both Pete & Keef recommend a higher Amp Slow Blow for the playfield, which I really should have bought at Pinfest but forgot.

I'm waiting on some new surround for the backglass before I put that in, but consider this a success - We've taken the whole machine back to bare wood and put it back together again, and it's behaving as it did before we did. It will need some diagnosis, tweaking and play testing, but another step of progress.
 

Attachments

  • 3 Board & wired up.JPG
    3 Board & wired up.JPG
    237.4 KB · Views: 23
  • 4 Soldering.JPG
    4 Soldering.JPG
    159.5 KB · Views: 22
  • It powers up!.JPG
    It powers up!.JPG
    155.3 KB · Views: 21
  • It blows the slow blow.JPG
    It blows the slow blow.JPG
    32.3 KB · Views: 20
  • 1 Window.JPG
    1 Window.JPG
    226.2 KB · Views: 18
  • 2 Windows.JPG
    2 Windows.JPG
    152.7 KB · Views: 21
Luke,

I wouldn't go very much higher than 1A for the playfield fuse. Even for a multi-ball game that pulsed a solenoid for longer than usual (Stern's Flight 2000) as I recall it was only 1.5 A. In any case, it's subservient to the solenoid fuse on the power supply/rectifier board, for which the guideline is 5A for 2 flippers, with another Amp for each extra flipper, hence a 4-flipper game such as this or my Seawitch having 7A.

Btw, have you noticed a detail in the flyer for Power Play? The game shown has metal 2" flippers, both of which are for the same side. Hence one of them can't avoid being 'upside down'.
 
Last edited:
Back
Top Bottom