Pinball info
You are using an out of date browser. It may not display this or other websites correctly.
You should upgrade or use an alternative browser.
You should upgrade or use an alternative browser.
Complete BALLY FUTURE SPA - Now sold.
- Thread starter new forest pinball
- Start date
Fubar
Site Supporter
I also like solid slightly better. White definitely the worse of the lot IMHO.
the translucent with a fluted lensed bulb inside really looks good. imho
I normally favour stock materials.
But I know that Keef is a Lipsmackin' thirstquenchin' acetastin' motivatin' goodbuzzin' cooltalkin' highwalkin' fastlivin' evergivin' coolfizzin' freestylist
Solid red looks best IMHO, when both cold and hot.
Besides, a brave man to disagree with @ronsplooter
But I know that Keef is a Lipsmackin' thirstquenchin' acetastin' motivatin' goodbuzzin' cooltalkin' highwalkin' fastlivin' evergivin' coolfizzin' freestylist
Solid red looks best IMHO, when both cold and hot.
Besides, a brave man to disagree with @ronsplooter
I like the solid red too 
Another solid red vote from me 
First of all thanks very much for your opinions on the lane guides. For a moment I quite liked the alternate idea from @Judderman but on trying it, just didn’t look right. Interestingly no one went for the original games guide colour of solid white. The most votes went for transparent red. (Which also happened to be my favourite choice.) when the solid reds are lit they just look to orange. Transparent red with twin smd comets looked the best.
So onto pimping the playfield. As this game is so psychedelic thought I could get away with some over the top modding. Nothing to tasteless or o.t.t. Of course!
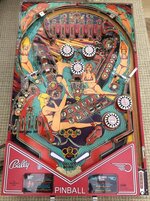
The first thing we did was to install clear targets to replace the standard solid yellows. Clear blue for the “spa” target, and clear red for the “futurity” target at the top of the multiplier bank. Two additional g.i. lamps were mounted underneath the playfield to illuminate the two targets the effect is good but difficult to capture on my iPad with the current light conditions.
The next thing was to fit new clear posts and some post led’s. The posts were kept red at the lane guides as the clear posts/red guides just don’t mix in our opinions. But all the others were swapped out for clears. Lamp post LED’s were used in the slingshots.
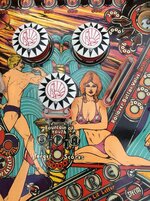
Next we rebuilt the five pop bumpers with all new parts. Fitted pink clear skirts on the top set, and purple clear skirts on the lower 2 bumpers. Dual facing LED’s were used in the pop’s to illuminate the bodies and throw some light on the centre of the playfield. This looks really sweet.
New spinners were then fitted. For all you geeks out there. (I know, pretty rare thing in the pinballverse ). All the leds in the g.i. circuit
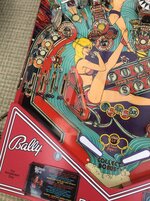
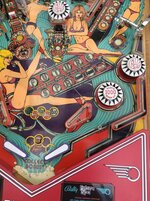
Pull 2.1 amps. Here’s some pictures of the playfield so far.....
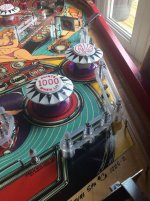
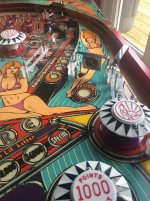
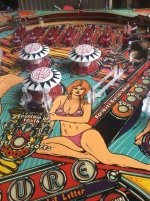
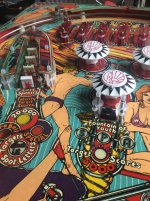
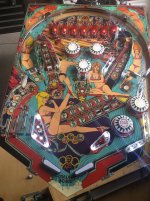
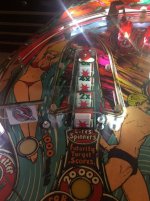
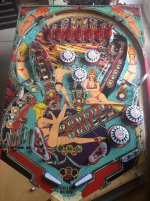
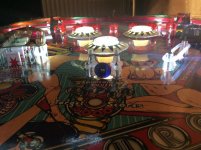
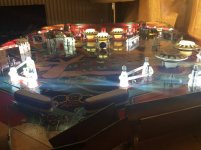
Clear Titan rubbers have also been fitted. With clear rubber nuts for the plastics. As you can see in the pictures half the plastics are missing!
This is because no one ever has reproduced future spa plastics so I have sent them off to @Colywobbles to make us up a set of protectors.
Next up is to rebuild the flippers with new mechs and eos switches. But not for a while as I am off to sunny Cornwall for a couple of weeks
Ciao fer now Keef. Oh and feel free to comment on the pimps so far or any ideas / things that you think would be cool...........
So onto pimping the playfield. As this game is so psychedelic thought I could get away with some over the top modding. Nothing to tasteless or o.t.t. Of course!
The first thing we did was to install clear targets to replace the standard solid yellows. Clear blue for the “spa” target, and clear red for the “futurity” target at the top of the multiplier bank. Two additional g.i. lamps were mounted underneath the playfield to illuminate the two targets the effect is good but difficult to capture on my iPad with the current light conditions.
The next thing was to fit new clear posts and some post led’s. The posts were kept red at the lane guides as the clear posts/red guides just don’t mix in our opinions. But all the others were swapped out for clears. Lamp post LED’s were used in the slingshots.
Next we rebuilt the five pop bumpers with all new parts. Fitted pink clear skirts on the top set, and purple clear skirts on the lower 2 bumpers. Dual facing LED’s were used in the pop’s to illuminate the bodies and throw some light on the centre of the playfield. This looks really sweet.
New spinners were then fitted. For all you geeks out there. (I know, pretty rare thing in the pinballverse
Pull 2.1 amps. Here’s some pictures of the playfield so far.....


Clear Titan rubbers have also been fitted. With clear rubber nuts for the plastics. As you can see in the pictures half the plastics are missing!
This is because no one ever has reproduced future spa plastics so I have sent them off to @Colywobbles to make us up a set of protectors.
Next up is to rebuild the flippers with new mechs and eos switches. But not for a while as I am off to sunny Cornwall for a couple of weeks
Ciao fer now Keef. Oh and feel free to comment on the pimps so far or any ideas / things that you think would be cool...........
The next thing was to fit new clear posts and some post led’s. The posts were kept red at the lane guides as the clear posts/red guides just don’t mix in our opinions. But all the others were swapped out for clears. Lamp post LED’s were used in the slingshots.
Wonderful looking work! Those illuminated posts like boss! Transparent red covers up on the rollovers do look nice!

The red or dare I say it, turquoise blue!
Do like the clear posts and transparent rubbers ! The middle pop bumpers skirts are that clear or trans red do like them

Another quality New Forest Pinball restoration , a true transformation , it's testament to your Passion for these Classic Bally's Keith . Agree with Carl , the clear LED posts and transparent rubbers combo look stunning , looking forward as to how this project unfolds mate , well done ! 

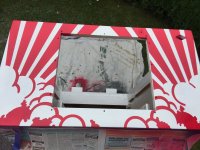
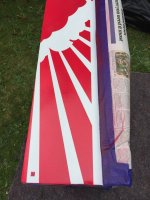
The time has come to prepare the cabinet and backbox for re-stencil. It’s in an awful state. Having some gross spillage on it, deep growing and scratching, the base of the cabinet is pretty much detached and a lot of the ply is split. Here’s how it looks before stripping.....
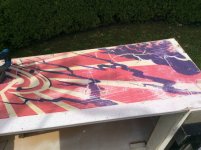
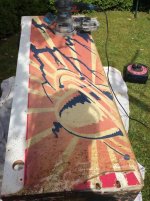
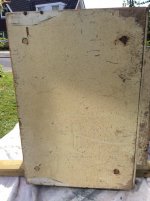
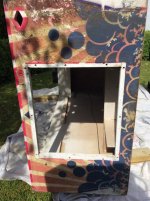
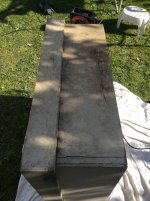
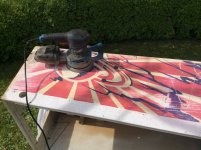
This future spa will be painted in its original colour, of hot pink, white, and deep purple. Not sure if we will add the gold speckled effect as per the original depends on time really that’s available this summer between the weather, customers commission’s and my holiday............
After pictures to follow.......
looks familiar. i bet i know how it smells too. 


I like the "old game" cabinet smell. I also like the smell of caps leaking in old videogames too.. but that's just me!looks familiar. i bet i know how it smells too.
Have fun stripping! (Missus)
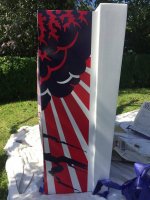
At last, an opportunity to primer the cabinet and backbox. Will leave to dry for 48hrs then a light sand in preparation for the white coat. For future spa we will be using this. It’s a bit tougher and more glossy than the standard white.
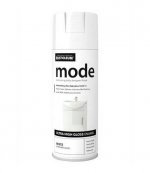
Here is the cabinet and backbox in primer......(ooppsss! Forgot to cover the grass!
 )
)
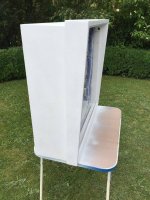
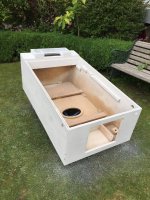

Here is the cabinet and backbox in primer......(ooppsss! Forgot to cover the grass!


OMG
when i seen this i thought just part it out
these days i prefer to see these restores
absolute credit to you ..
I also purchased the same dust covers in your Dolly Parton resto
was inspired with the attention to detail with the dust covers
have made several sets of my own with the correct bally font
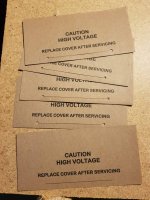

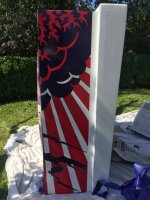
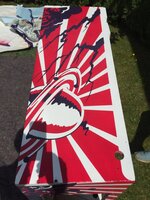
Yum!A start on the stencils today. Pleased with the results.
View attachment 142657View attachment 142658
Keef. you’re work is amazing! inspiring. 


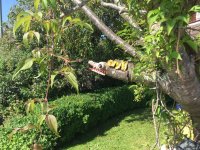
Excellent work. I love tree croc [emoji246]
Sent from my iPhone using Tapatalk
Sent from my iPhone using Tapatalk
Started early on the stencils this morning, but it was still much too hot!
In fact the stencils were starting to bubble on the cabinet, I have never had that problem before!?
Never mind the future being a spa?! (A scenario that I am not completely opposed to.) my lawn currently is like a spa!
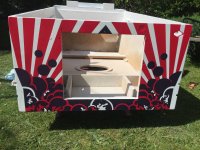
So not much done. Managed to get one side stencilled only. Enjoy the pictures of her starting to look pretty in pink....
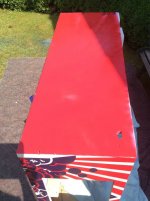
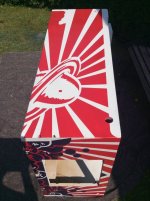


The cabinet and backbox is now completely re- stencilled, leaving it to cure for a while before we start reassembling.
Just to minimise damage to the new paint.
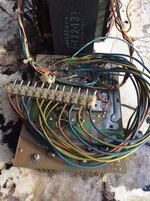
So on to the power supply. Think this is one of the craziest hacks I have ever seen? Why would you do such a thing. The other side of this long connector is even worse! Think it has half the insert lights shorted together. Very strange. Only thing I can think of is that it’s been wired for a display or something so that when it’s turned on all the lamps are lit up?
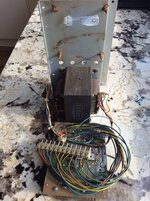
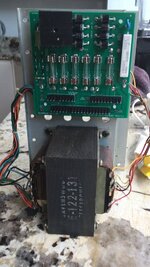
Mystery. Anyway here is a picture of the transformer and the power pcb as it was when I received the machine.
Plan is to remove the hack and fit a new powerboard from Andrew at weebly. Here it is before....the transformer is currently set to 220v 50/60hz ac.
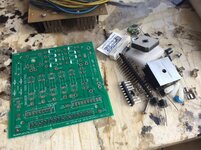
We buy are boards in knock down kit form. I know I have said it before, but always mount your fuses in the holders first ,
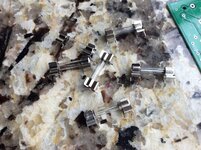
To make sure you do not have to redo any solder joints once you find a fuse will not fit! like this........
Here’s the finished artical with new pcb mountings.
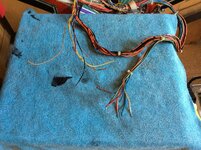
Also have two connectors just cut off from the Playfield loom!
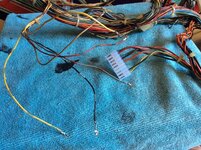
One we have identified as j1 on the power pcb the other cables form part of j2 on the lamp driver board so we will put new pins on only for now and check what’s required when we re-install the main loom. Here’s the bare cables....
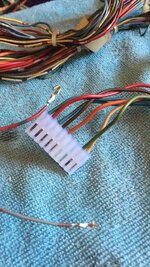
After...with news pins and connector.
Just to minimise damage to the new paint.
So on to the power supply. Think this is one of the craziest hacks I have ever seen? Why would you do such a thing. The other side of this long connector is even worse! Think it has half the insert lights shorted together. Very strange. Only thing I can think of is that it’s been wired for a display or something so that when it’s turned on all the lamps are lit up?
Mystery. Anyway here is a picture of the transformer and the power pcb as it was when I received the machine.
Plan is to remove the hack and fit a new powerboard from Andrew at weebly. Here it is before....the transformer is currently set to 220v 50/60hz ac.


We buy are boards in knock down kit form. I know I have said it before, but always mount your fuses in the holders first ,
To make sure you do not have to redo any solder joints once you find a fuse will not fit! like this........

Here’s the finished artical with new pcb mountings.

Also have two connectors just cut off from the Playfield loom!
One we have identified as j1 on the power pcb the other cables form part of j2 on the lamp driver board so we will put new pins on only for now and check what’s required when we re-install the main loom. Here’s the bare cables....

After...with news pins and connector.


A gift from the “ wobble gods “....... @Colywobbles
Really excited about these. Looking forward to fitting the plastics now to the playfield to see what it looks like.
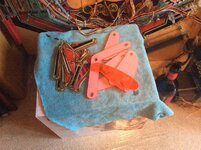
Had some made the same size and others oversized. All holes oversized to fit over the starposts nut. Bit of an experiment, will see how it works out. But with no future spa plastics available protection is a must.........
Really excited about these. Looking forward to fitting the plastics now to the playfield to see what it looks like.

Had some made the same size and others oversized. All holes oversized to fit over the starposts nut. Bit of an experiment, will see how it works out. But with no future spa plastics available protection is a must.........
@stevebm1 these are the nvramweebly boards Steve, designed by Andrew. (Barakandyl). They are excellent quality, and very reasonably priced, the power pcb kit rectifier board used here AS-2518-18 is $35.00. Fabulous!......only 1 rectifier on the new replacement boards now then,and beefy diodes for the other 2,is that a newer revision of the replacement boards,or game specific for future spa,space invaders and kiss?
The future spa Playfield is now complete. The protectors are a complete success! @Colywobbles was very patient with my pedantic requests! Here’s how it looks with the protectors in place and the apron back on! Starting to come together at last.......
